eLearning
All modules
Organizing courses into categories
eLearning · 9 of 14 · 3 min read
Categories group courses by topic or by audience. For example, you can separate courses for staff (Workplace safety, Kitchen and food hygiene) from those for guests (Courses for guests). The Categories page is where you create and manage them.
How categories are used
The category is a field of the course. In the New Course window, the Category field lists all categories, including inactive ones. To choose the category of a new course, see Create a new course.
In the Course Catalog, the All Categories filter shows only the courses of the category you choose. For the catalog, see Browsing the catalog and enrolling in a course.
Each course has only one category. To give a course more information together, use Classifying courses with tags.
The Categories page
Before you start: the Categories page is reserved for people who manage courses.
Open eLearning › Categories. The page shows one row per category.
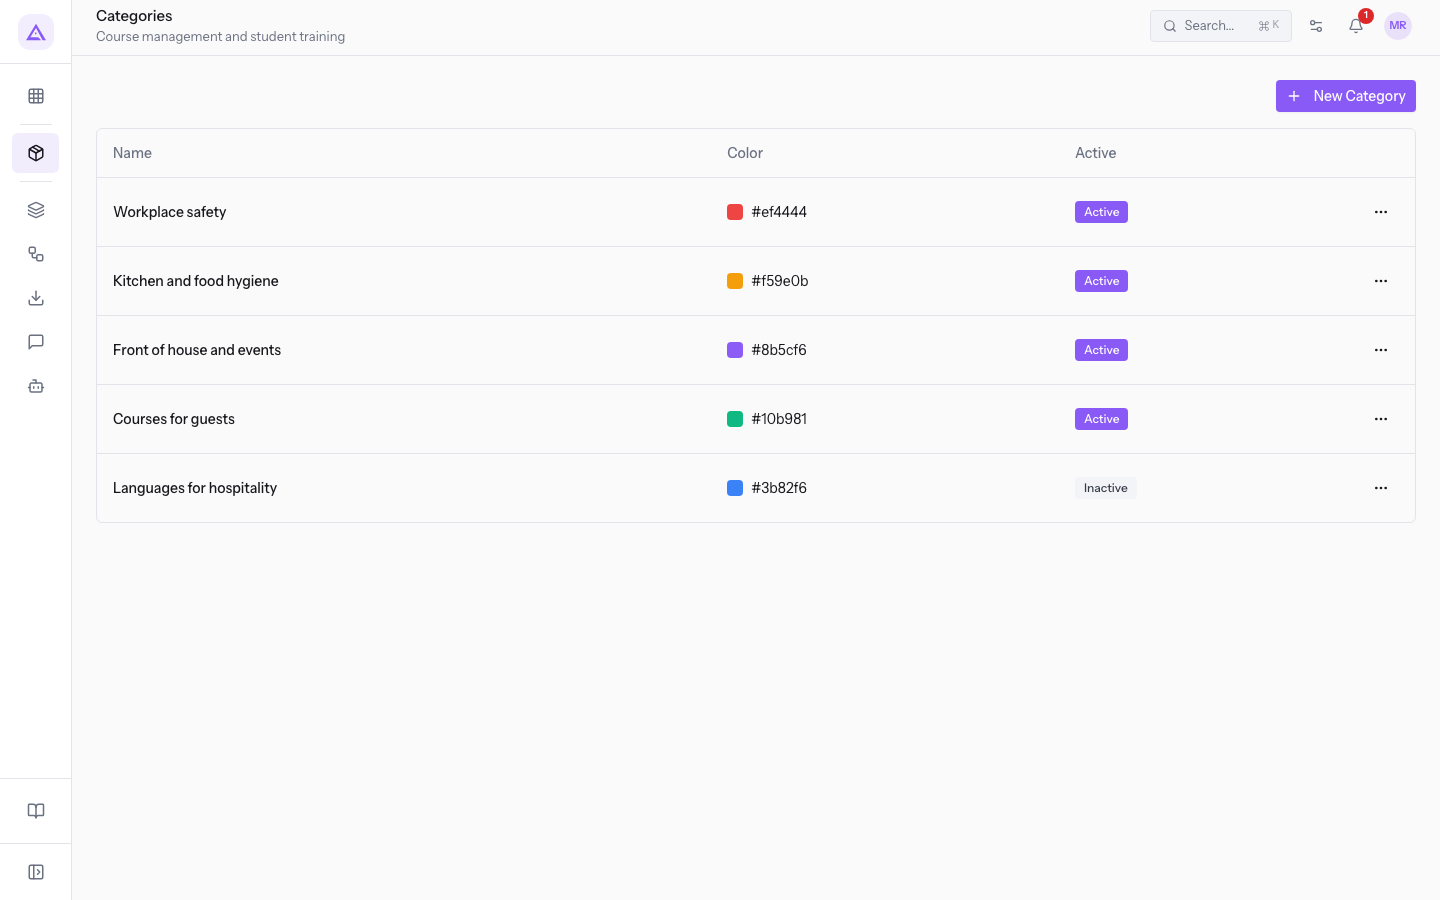
The columns are:
- Name: the name of the category.
- Color: a small square in the category's color and its code, for example
#8b5cf6. - Active: the Active or Inactive badge.
At the end of each row is the actions menu (the three dots), with Edit and Delete. If there are no categories yet, the page shows No categories yet.
Creating a category
Create a category for each group of courses you want to tell apart in the catalog.
- In eLearning › Categories, press New Category. The New Category window opens.
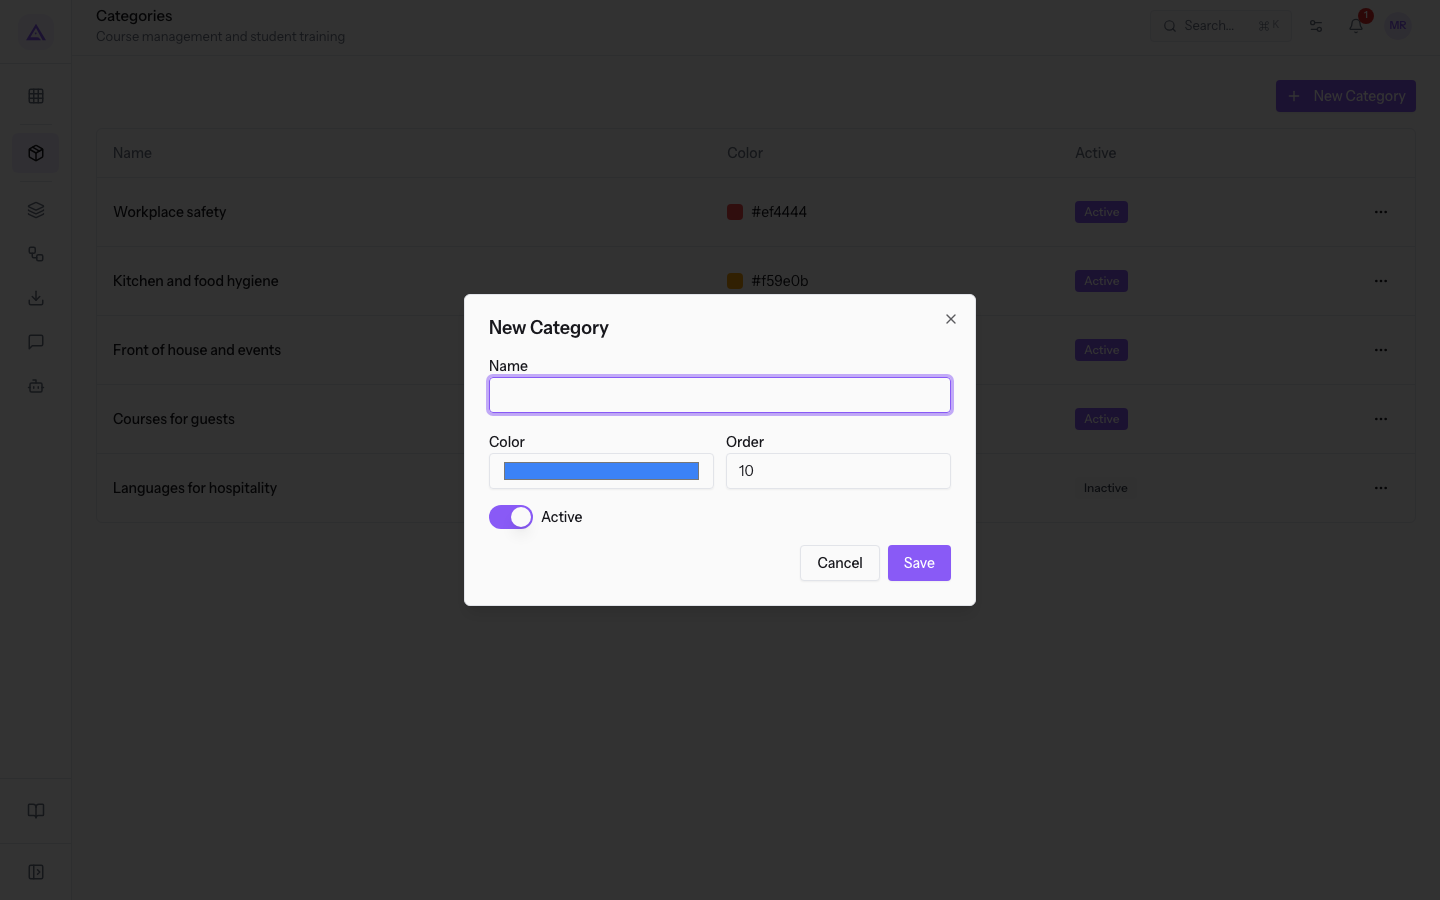
- Fill in the fields.
- Press Save. The message Saved appears and the new category is added to the list.
The fields in the window are:
- Name: the name of the category. The field is required.
- Color: the color of the category, chosen in the color picker. The suggested color is
#3b82f6. - Order: a number that sets the position in the list. Lower numbers come first. The suggested value is 10.
- Active: the switch that makes the category active. When you create the category, it is on.
Editing or deactivating a category
Edit a category to change its name, color, or order, or to deactivate it.
- In the category's row, open the actions menu (the three dots) and choose Edit. The Edit Category window opens, with the fields already filled in.
- Change the fields. To deactivate the category, turn off the Active switch.
- Press Save. The message Saved appears.
In the list, a deactivated category has the Inactive badge. An inactive category still appears among the choices in the Category field in the New Course window and in the Course Catalog filter.
Deleting a category
Delete a category only if you no longer need it. If you want to keep it, deactivate it instead.
- In the category's row, open the actions menu (the three dots) and choose Delete.
- At the Are you sure? question, confirm. The message Deleted appears and the category leaves the list.
Important: deletion cannot be undone from the Categories page.
See it on your company, not on a slide deck.
In 30 minutes we map the software you use today.We show you how much work and how much margin Archimedes gives back.
Show me on my business →What industry are you in?
One tap — it lets us prepare the demo around your world.
What tools do you use today?
Pick the ones you recognise — or just type them. It helps us show you how they migrate.
Last step: your details.
We reply within one working day — and right after, if you like, you pick the demo slot yourself.
We couldn't send your request. Try again, or write to us at [email protected].
By sending, you agree to your data being processed so we can get back to you about the demo. Privacy notice.
Preview form — nothing is sent from this page.
Want to schedule the demo now?
Your call: book the slot you prefer yourself, or we'll call you to arrange it.
Live availability, 30 minutes, instant confirmation. The calendar opens in a new tab.
Lock in your slot ↗We'll get back to you within one working day — and we'll join the call already knowing your world.
The calendar is open in another tab: pick a slot and the demo is booked. Can't see it? Reopen it ↗
Preview page: nothing was sent.
Our calendar is live: take the slot that suits you and the demo is booked. 30 minutes, instant confirmation, no waiting.
Lock in your slot ↗