Documents
All modules
Upload documents and create a page
Documents · 3 of 15 · 4 min read
In Documents you add a document in two ways: you upload a file from your computer or write a page directly in the module. You can upload a contract, an insurance policy or the floor plan of a room, for example, and write a page such as a checklist or an internal procedure.
Choosing between a file and a page
Use Upload when the document already exists as a file, for example Framework contract Forniture Neri 2026 or 2026 liability insurance policy. Use New page when you want to write the text in Documents, such as Wedding-day checklist.
- If you already have the PDF or the image, choose Upload.
- If the text needs to be written and updated by several people in Documents, choose New page. Changes to the text stay in the history.
- If the document must be in a specific folder, open it first from the Documents › Folders screen: the folder is suggested automatically.
Before you start: to upload documents and create pages you need the basic permission of the Documents module.
Uploading one or more files
The Upload Document window adds one or more files to the archive at once.
- Go to Documents › All Documents.
- Press Upload. The Upload Document window opens.
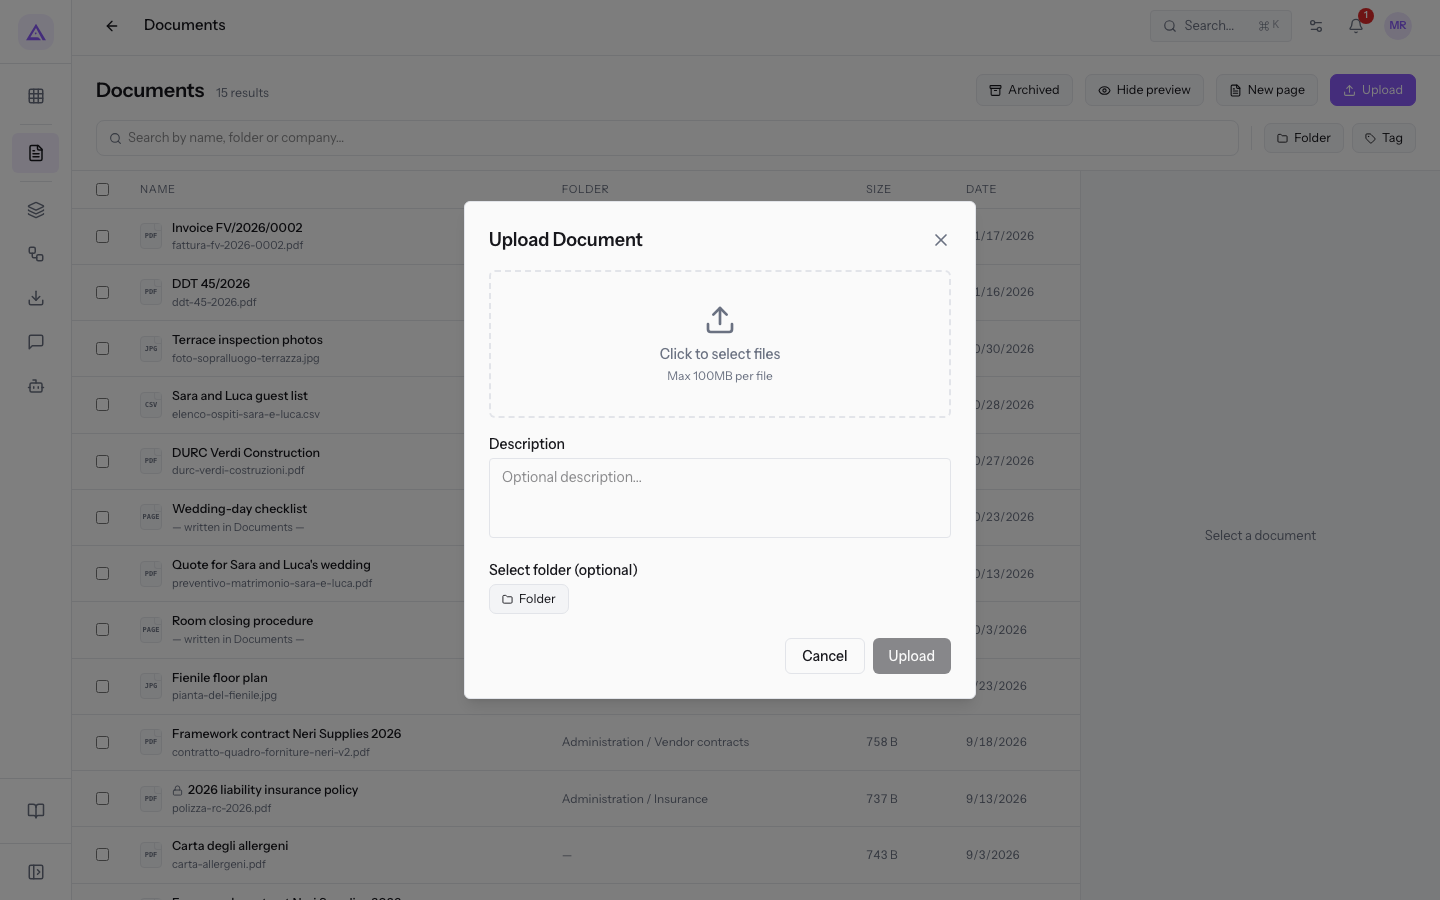
- Press Click to select files and choose one or more files from your computer.
- To add more files, press + Add more files.
- Fill in the fields described below.
- Press Upload.
The fields of the window:
- Click to select files: the area from which you choose the files. The limit is shown below it: Max 100MB per file. After choosing, the window lists each file with its name and size, and next to each one there is a button to remove it from the list.
- Name: the name of the document, for example
2026 liability insurance policy. The field appears only when you have selected a single file and is filled in automatically with the file name without extension. You can edit it. - Description: an optional text about the content of the document. If you upload several files, the same description applies to all of them.
- Select folder (optional): the folder in which to save the files, such as
Administration. If you are filtering the list by a folder, the window already suggests it.- No folder: the document is saved without a folder.
The Upload button stays disabled until you have chosen at least one file. With Cancel you close the window without uploading anything.
Important: if a file exceeds 100 MB, the upload does not start and a message appears. Remove the file from the list and try again with the others.
Note: a document without a folder appears among the Unfiled, such as
Terrace inspection photos, and never appears on the customer portal. Documents take the visibility of their folder: to make them visible to customers, read Sharing folders with customers in the portal.
Uploading a file inside a folder
From the Folders screen you upload a file directly into the open folder.
- Go to Documents › Folders.
- Search for the folder with Find a folder…, for example
Administration, and open it. - Press Upload in the folder header. The Upload Document window opens.
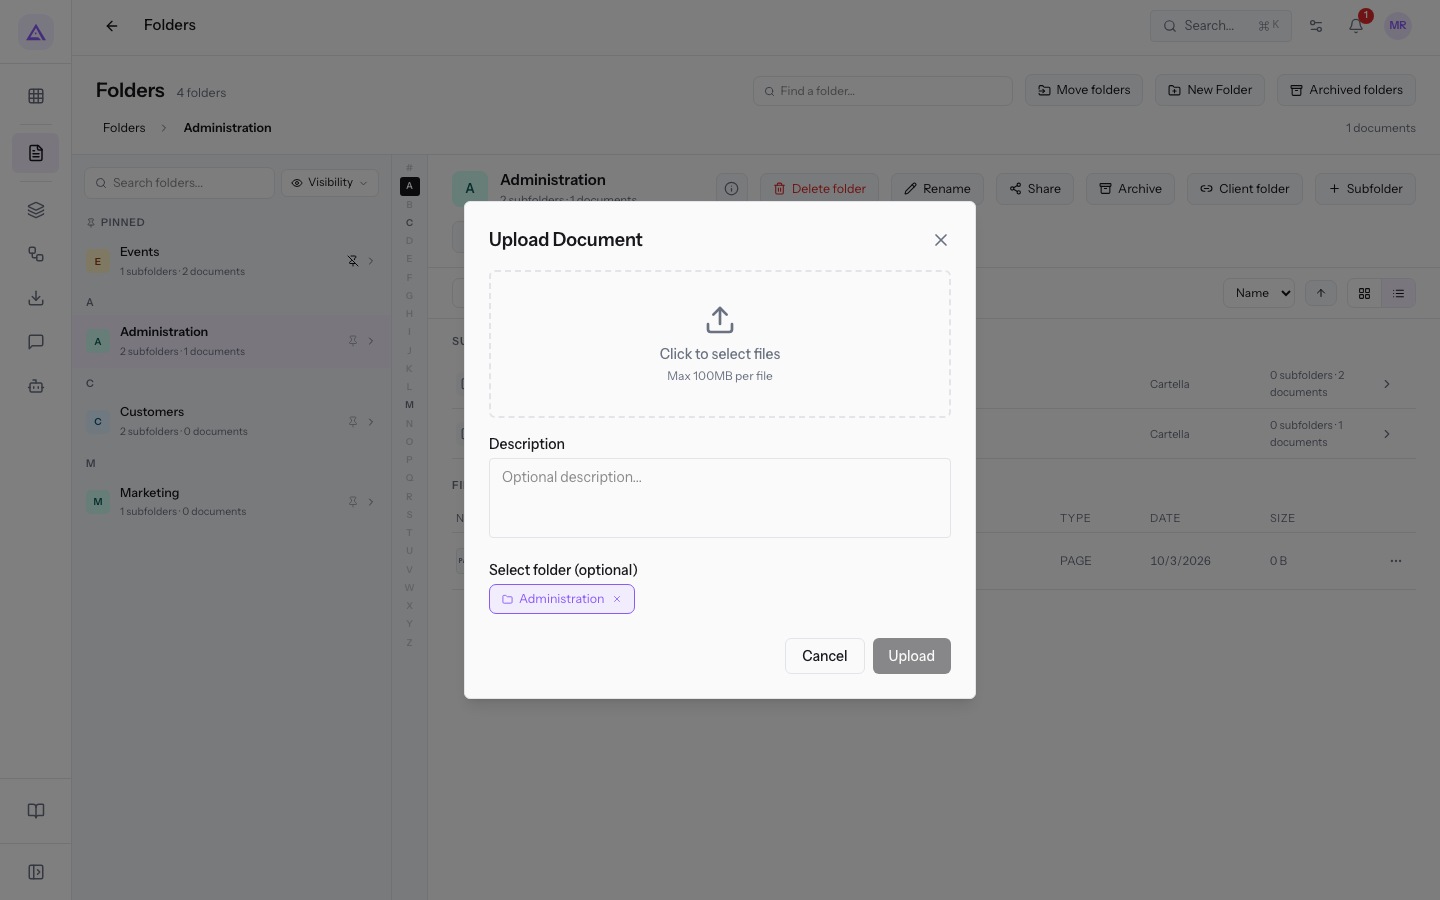
- Choose the files and fill in the fields as described in Uploading one or more files. The Select folder (optional) field already shows the open folder.
- Press Upload. The file appears in the list of documents in the folder.
Creating a page
New page creates a document written directly in Documents, without a file.
- Go to Documents › All Documents, or open a folder from Documents › Folders.
- Press New page. The new page opens, with the title Untitled page and the message This page is empty. Choose Edit to start writing.
- Press Edit to write the text, then Save.
The folder of the page is decided automatically:
- If you create the page from a folder open in Folders, the page is saved in that folder.
- If you create it from All Documents with the filter on a single folder, the page is saved in that folder.
- In other cases the page is saved without a folder.
In the All Documents list a page is recognized by the extension PAGE and by the text — written in Documents — in place of the file name.
Tip: give the page a title right away, for example
Room closing procedure, so you can find it with the list search.
See it on your company, not on a slide deck.
In 30 minutes we map the software you use today.We show you how much work and how much margin Archimedes gives back.
Show me on my business →What industry are you in?
One tap — it lets us prepare the demo around your world.
What tools do you use today?
Pick the ones you recognise — or just type them. It helps us show you how they migrate.
Last step: your details.
We reply within one working day — and right after, if you like, you pick the demo slot yourself.
We couldn't send your request. Try again, or write to us at [email protected].
By sending, you agree to your data being processed so we can get back to you about the demo. Privacy notice.
Preview form — nothing is sent from this page.
Want to schedule the demo now?
Your call: book the slot you prefer yourself, or we'll call you to arrange it.
Live availability, 30 minutes, instant confirmation. The calendar opens in a new tab.
Lock in your slot ↗We'll get back to you within one working day — and we'll join the call already knowing your world.
The calendar is open in another tab: pick a slot and the demo is booked. Can't see it? Reopen it ↗
Preview page: nothing was sent.
Our calendar is live: take the slot that suits you and the demo is booked. 30 minutes, instant confirmation, no waiting.
Lock in your slot ↗