Open Banking
All modules
Connect a bank account
Open Banking · 6 of 15 · 5 min read
Connecting a bank account lets Archimedes download the transactions of a bank account by itself. The transactions then go to reconciliation, for example the transfer from Rossi Arredamenti S.r.l. for FV/2026/0002.
The connection starts from the page of an account that is not yet connected, such as the account Bank (BNK1) of the demo organization.
Recognize an account that is not connected
On the Banking screen, an account that is not connected has the Manual only badge and the Needs setup badge with the reason No bank connection linked.
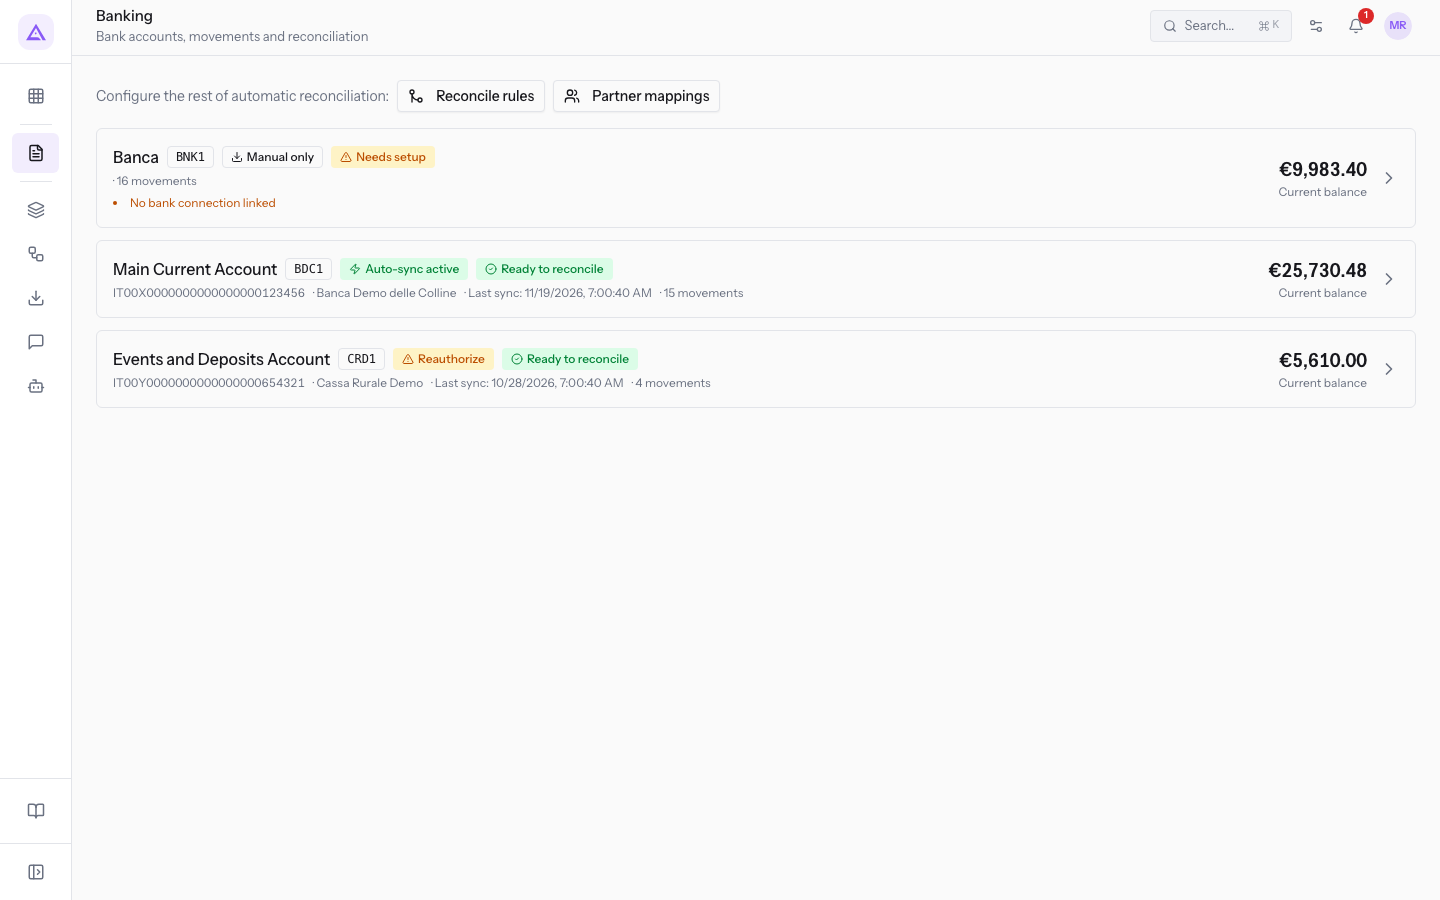
Its transactions come only from statements imported by hand: in the demo, the account Bank has 16 movements. To import a file, read Import a bank statement from a CSV or CAMT.053 file.
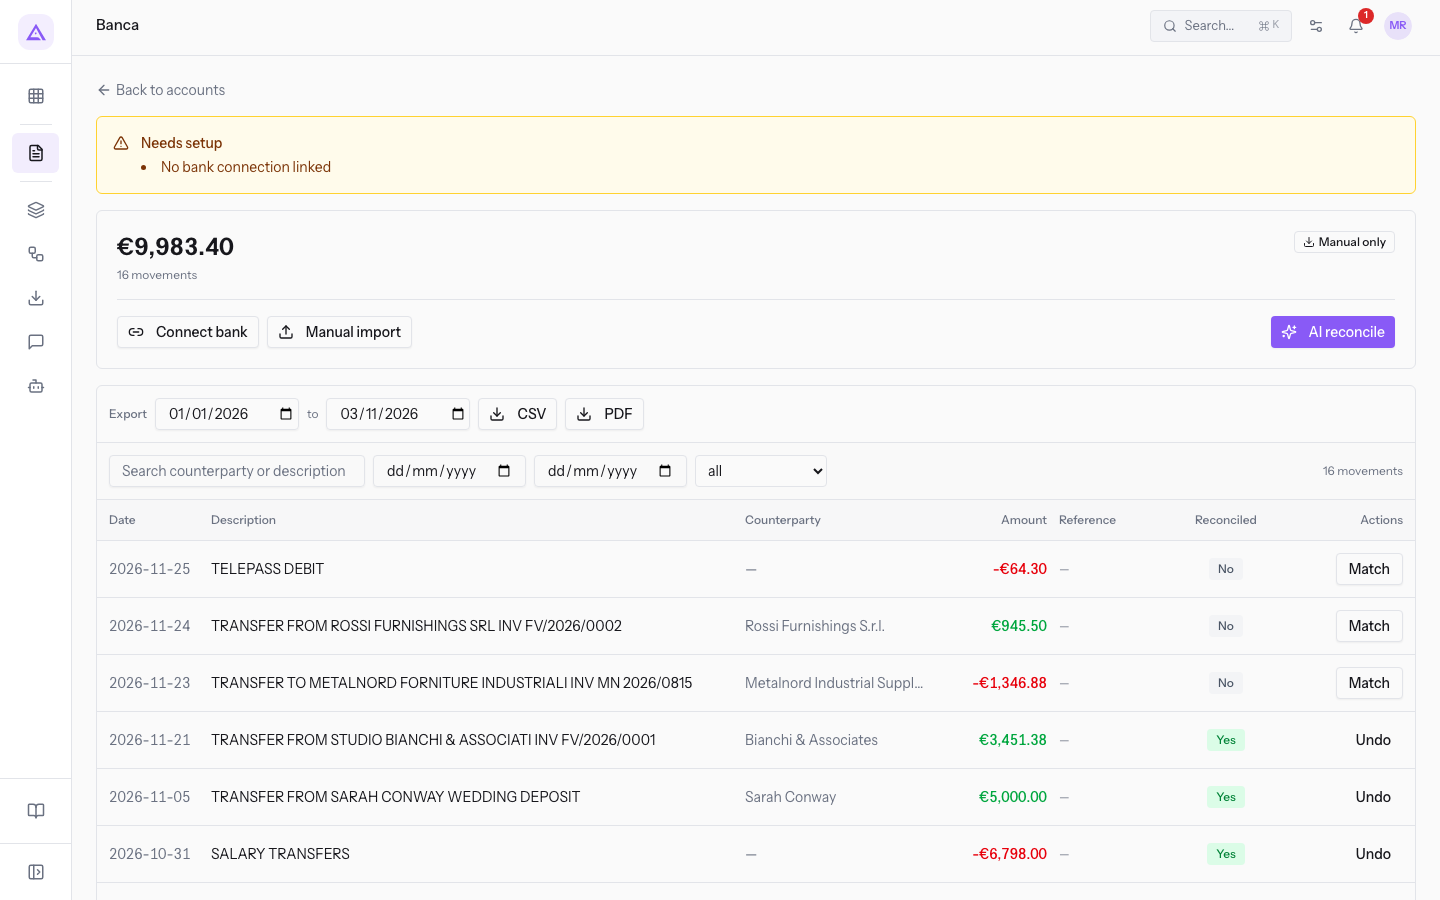
When you open the account, the page shows the Needs setup box with No bank connection linked, the Manual only badge and, in the action bar, the buttons Connect bank, Manual import and AI reconcile. The other parts of the page are described in Read a bank account page.
Choose whose account it is
Usually you connect an account of your organization. The account of a third party is a special case, for example factoring, and you choose it only from a secondary option in the window.
- If the account is in the name of your organization, keep the proposed choice and press Continue.
- If you connect the account of a customer or a supplier, open the third-party option and choose the contact.
Open the Connect a bank account window
Before you start: to connect, sync and disconnect an account you must have the Open Banking Manager group. With the Open Banking User group you can only view the connections.
- Open the Banking screen and press the card of the account, for example
Bank(BNK1). - Press Connect bank. The window Connect a bank account opens.
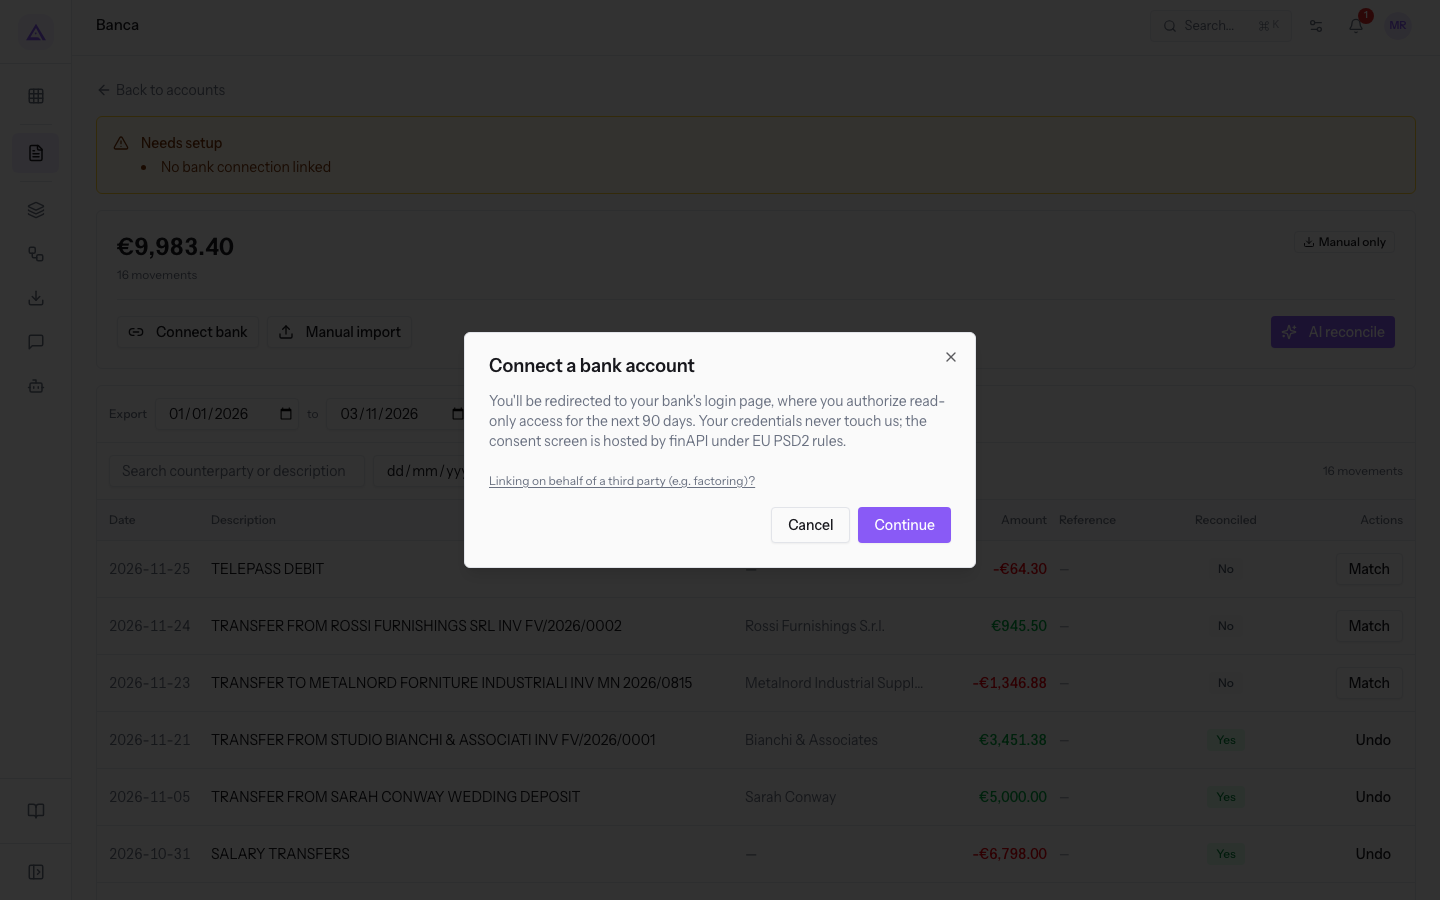
The window explains that you will be redirected to the login page of your bank, where you will authorize read-only access for the next 90 days, and that your credentials do not pass through Archimedes.
The consent follows the European PSD2 rules and the bank page is managed by the provider finAPI. With read-only access Archimedes cannot make payments.
The window contains:
- Linking on behalf of a third party (e.g. factoring)?: the link that shows the choice of the account holder.
- Cancel: closes the window without connecting anything.
- Continue: opens the bank page.
Connect the account of a third party
Use this option only if the account is not of your organization.
- In the Connect a bank account window, press Linking on behalf of a third party (e.g. factoring)?. The Account holder menu appears, set to Company account (your organization).
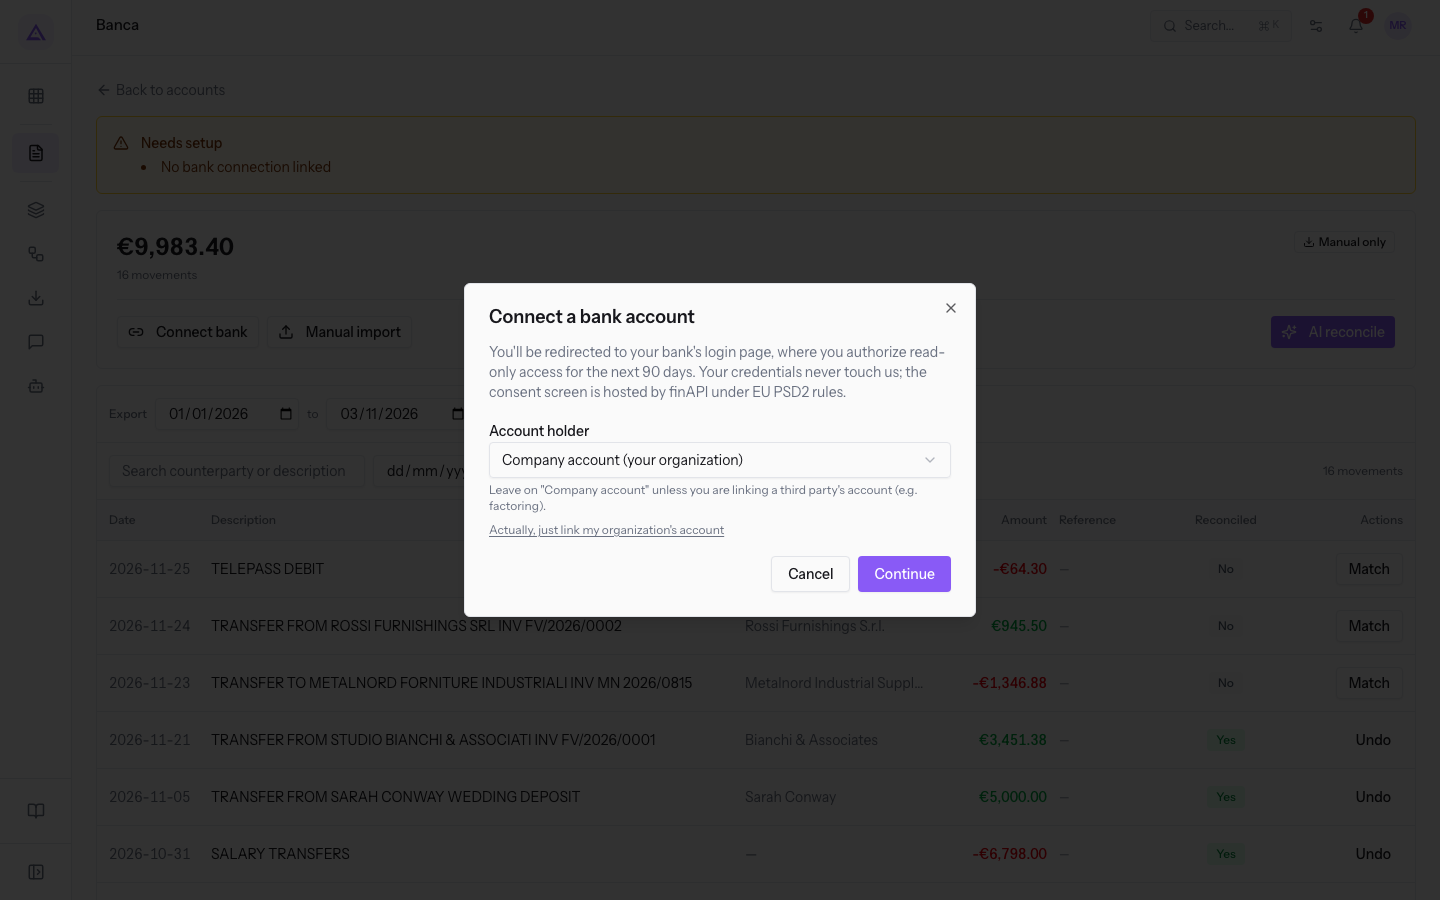
- Open the menu and choose the holder.
- Company account (your organization): the account is of your organization. It is the proposed choice.
- a company contact, for example
Rossi Arredamenti S.r.l.,Forniture Neri S.r.l.orMetalnord Forniture Industriali S.p.A.: the account belongs to that contact.
- To go back to the account of your organization, press Actually, just link my organization's account.
Note: the menu lists only company-type contacts, up to 500. Private customers do not appear.
Give consent to the bank
After Continue, the connection is completed on the bank page.
- Press Continue. The bank page opens in a separate browser window.
- Log in to the bank and give consent.
- Return to Archimedes: the Pick accounts to track window lists the accounts that the bank returned, with bank, IBAN and currency. They are all selected.
- Deselect the accounts you do not want to follow.
- Press Activate N, where N is the number of accounts you have selected. The button stays disabled if no account is selected.
Important: if the browser blocks pop-up windows, the bank page does not open and an error message appears. Allow pop-ups for Archimedes and press Continue again.
Note: the accounts you do not select are deleted, not deactivated. One single consent can cover several accounts: each chosen account becomes a separate connection.
Important: in the demo organization do not press Continue: it would open the real bank service.
What happens after the connection
The chosen accounts appear on the Banking screen as connected accounts, such as Main Current Account (BDC1), which has the Auto-sync active badge.
- The first download of transactions starts by itself after activation.
- Afterwards the transactions arrive with the scheduled sync or with a sync started by hand, not in real time. Read Sync an account with the bank and read the history.
- The downloaded transactions go into the statement lines and are reconciled as described in Reconcile the bank statement.
- The consent lasts 90 days. When it expires, renew it on the same connection instead of creating a new one: read Reconnect a bank account when the bank consent expires.
See it on your company, not on a slide deck.
In 30 minutes we map the software you use today.We show you how much work and how much margin Archimedes gives back.
Show me on my business →What industry are you in?
One tap — it lets us prepare the demo around your world.
What tools do you use today?
Pick the ones you recognise — or just type them. It helps us show you how they migrate.
Last step: your details.
We reply within one working day — and right after, if you like, you pick the demo slot yourself.
We couldn't send your request. Try again, or write to us at [email protected].
By sending, you agree to your data being processed so we can get back to you about the demo. Privacy notice.
Preview form — nothing is sent from this page.
Want to schedule the demo now?
Your call: book the slot you prefer yourself, or we'll call you to arrange it.
Live availability, 30 minutes, instant confirmation. The calendar opens in a new tab.
Lock in your slot ↗We'll get back to you within one working day — and we'll join the call already knowing your world.
The calendar is open in another tab: pick a slot and the demo is booked. Can't see it? Reopen it ↗
Preview page: nothing was sent.
Our calendar is live: take the slot that suits you and the demo is booked. 30 minutes, instant confirmation, no waiting.
Lock in your slot ↗