Contacts
All modules
Managing an entity's Members and Locations
Contacts · 5 of 13 · 5 min read
Members are the people who belong to an entity in the contact directory, for example the purchasing contact at Rossi Arredamenti S.r.l. or a person linked to Studio Bianchi & Associati. Locations are the entities linked to a parent company, for example a branch or a satellite office registered as a separate contact. Both are managed from the entity's contact page.
To link a person who is already in the directory, use the Link Existing mode; if the person doesn't exist yet, use Create New, which creates the contact and links it in a single step.
Locations appear only on entities marked as a parent company: it is this flag that adds the Locations tab to the contact page.
The Members tab
The Members tab lists the people linked to the entity and shows the number of members in its title.
- Open Contacts and select the entity, for example
Rossi Arredamenti S.r.l.. - Open the Members tab.
- Review the list: each row shows the linked person, with the member removal button and the Add Member button at the top of the tab.
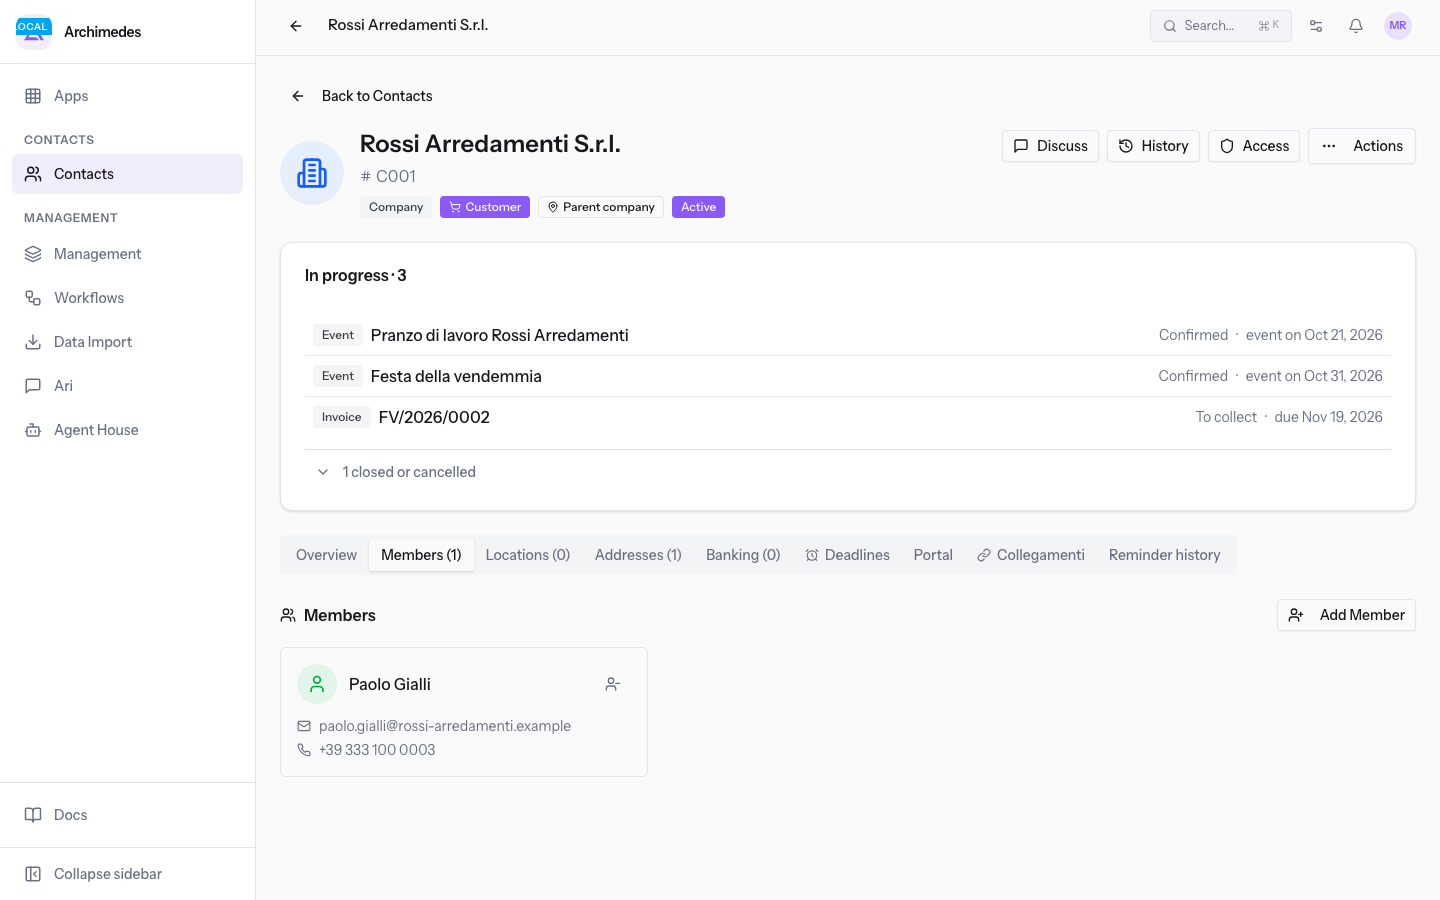
Note: when the entity has no members, the tab shows No members yet.
Linking a person already in the directory
Use this mode when the person's contact already exists, for example Luca Bianchi or Francesca Russo.
- In the Members tab, click Add Member. The add-member window opens, showing the entity's name in its title.
- Stay on the Link Existing tab.
- Type in the Search people by name, email, or phone... search field and select the person.
- Fill in the role fields.
- Click Link Member. To close without linking anyone, use Cancel.
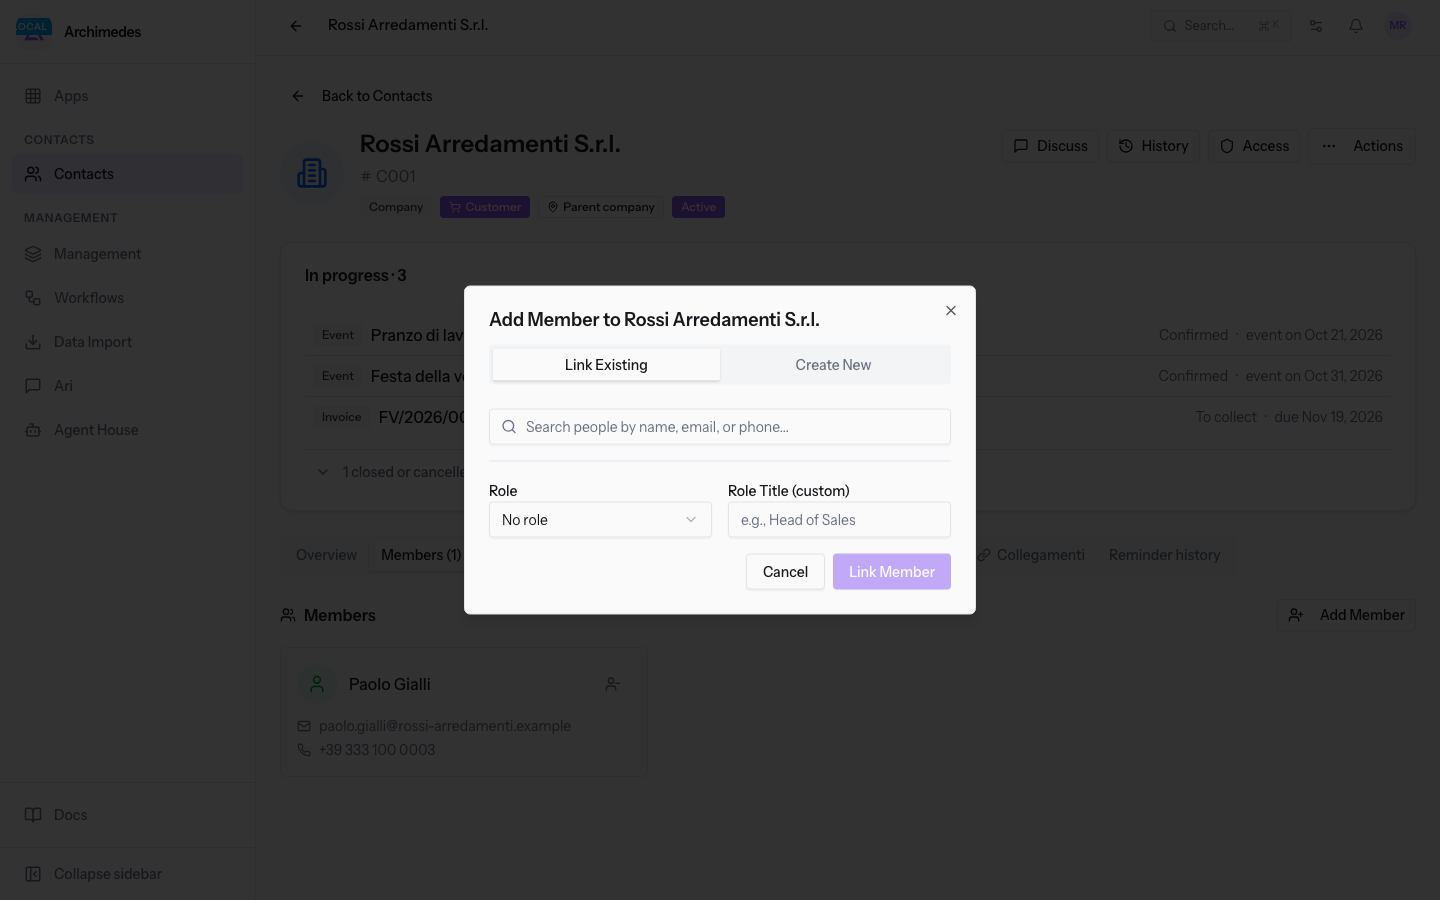
The fields on the Link Existing tab:
- Search people by name, email, or phone...: the box you use to find the person to link.
- Role: the member's role in the entity, chosen from a list of predefined roles. The initial value is No role.
- Role Title (custom): a free-form title to use when the list of roles doesn't contain the one you need. The field shows the example
es. Responsabile vendite.
Creating the person and linking them
Use this mode when the person is not yet in the directory: the contact is created and linked to the entity in the same step.
- In the Members tab, click Add Member.
- Open the Create New tab.
- Turn on Copy data from company if the person shares the entity's contact details.
- Fill in Full Name and the other fields.
- Click Create & Add.
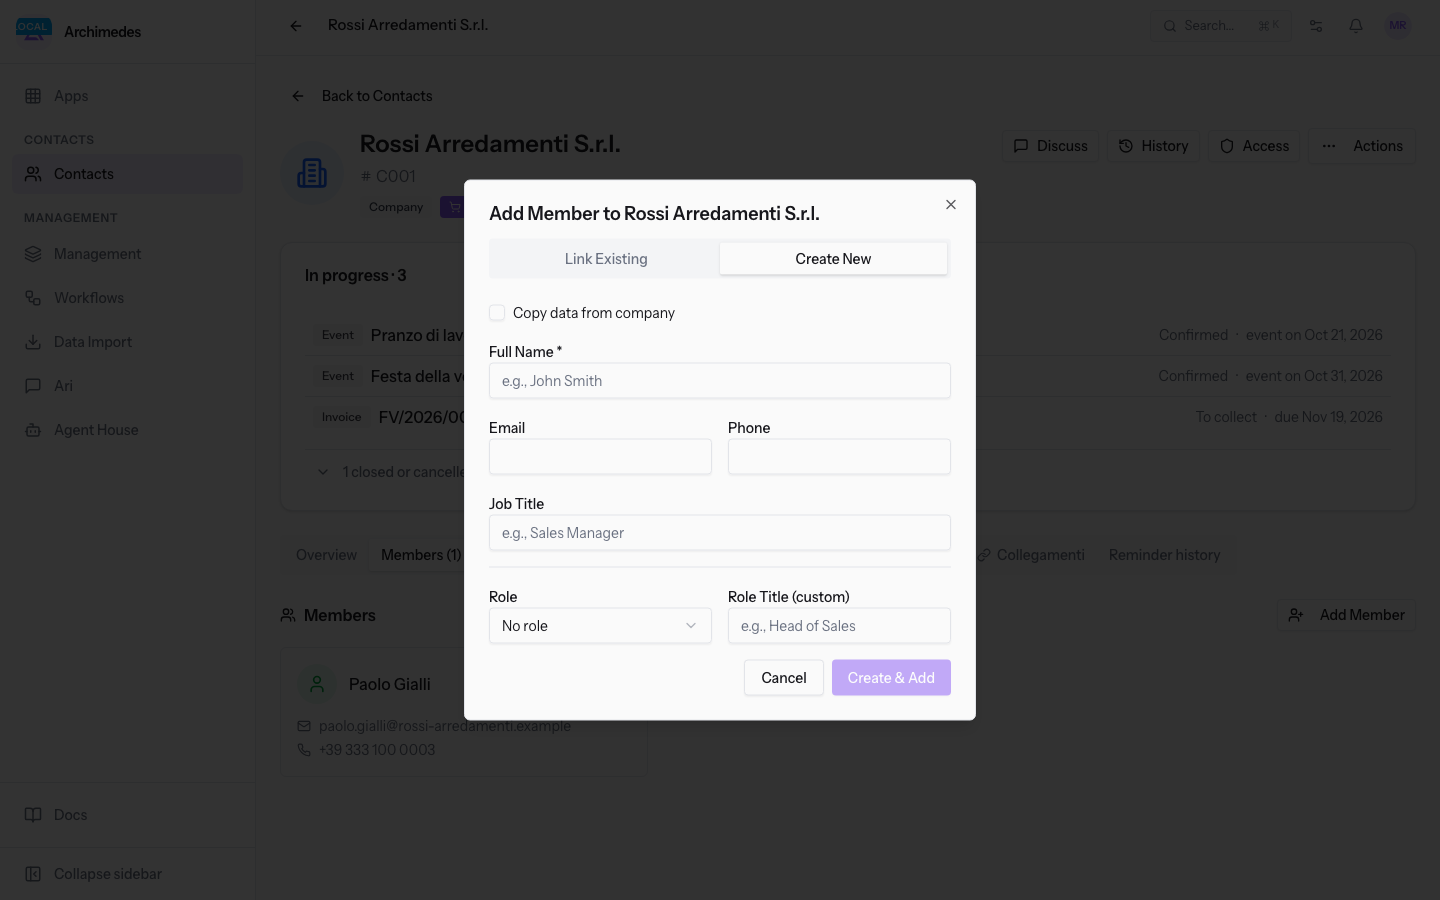
The fields on the Create New tab:
- Copy data from company: a checkbox; it is off when the window opens.
- Full Name: the person's name, with the example
es. Mario Rossi. The field is required. - Email: the person's email address.
- Phone: the person's phone number.
- Job Title: the person's job title, with the example
es. Responsabile vendite. - Role: the member's role in the entity; the initial value is No role.
- Role Title (custom): the free-form role title.
Note: the person's details can still be edited later from the Edit Contact window, described in Creating and editing a contact.
Removing a member
Removal dissolves the link between the person and the entity.
- Open the entity's Members tab.
- On the person's row, click the member removal button.
- Confirm the Remove member prompt. When the operation completes, Member removed appears.
Important: removal keeps the person's record and only deletes the link to that company; the contact therefore remains in the directory.
The entity's primary contact
The primary contact is the member designated as the entity's point of reference. It is set from the person's page, not from the entity's.
- Open Contacts and select the person, for example
Paolo Gialli. - In the header, note the link to the entity they belong to, for example
Rossi Arredamenti S.r.l.. - Click Set as primary contact. When the operation completes, Primary contact updated. appears.
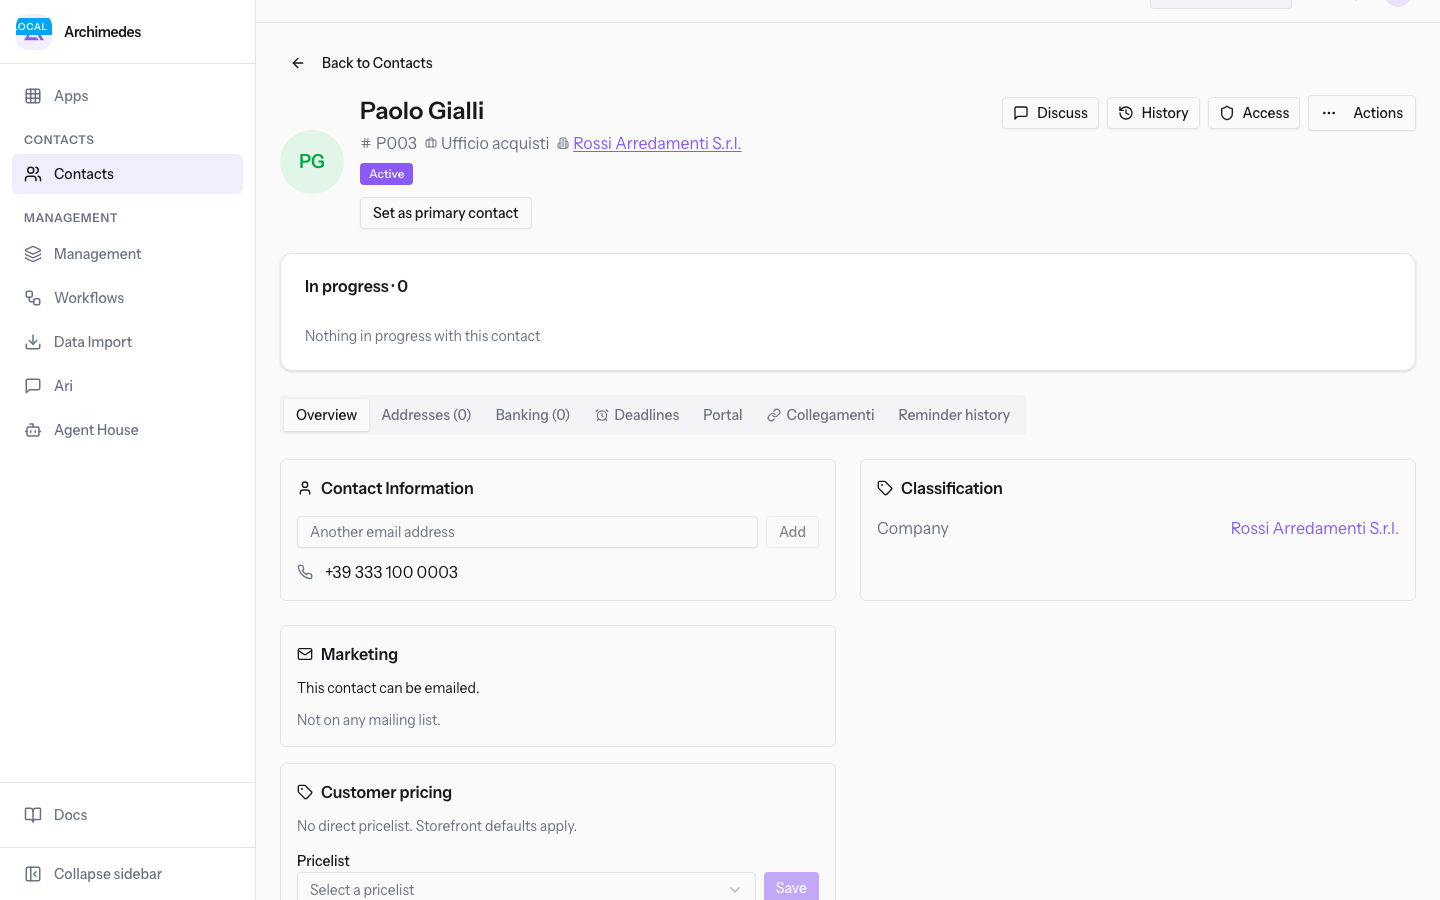
Note: the button appears on the page of a person linked to an entity. The other header elements are described in Reading a contact's page.
Marking the entity as a parent company
The flag declares that the entity is a head office or a holding company that can have satellite locations as separate contacts, and it makes the Locations tab appear.
- Open the entity's page and, in the Actions menu, choose Edit Contact.
- Open the Classification tab.
- Turn on Parent company.
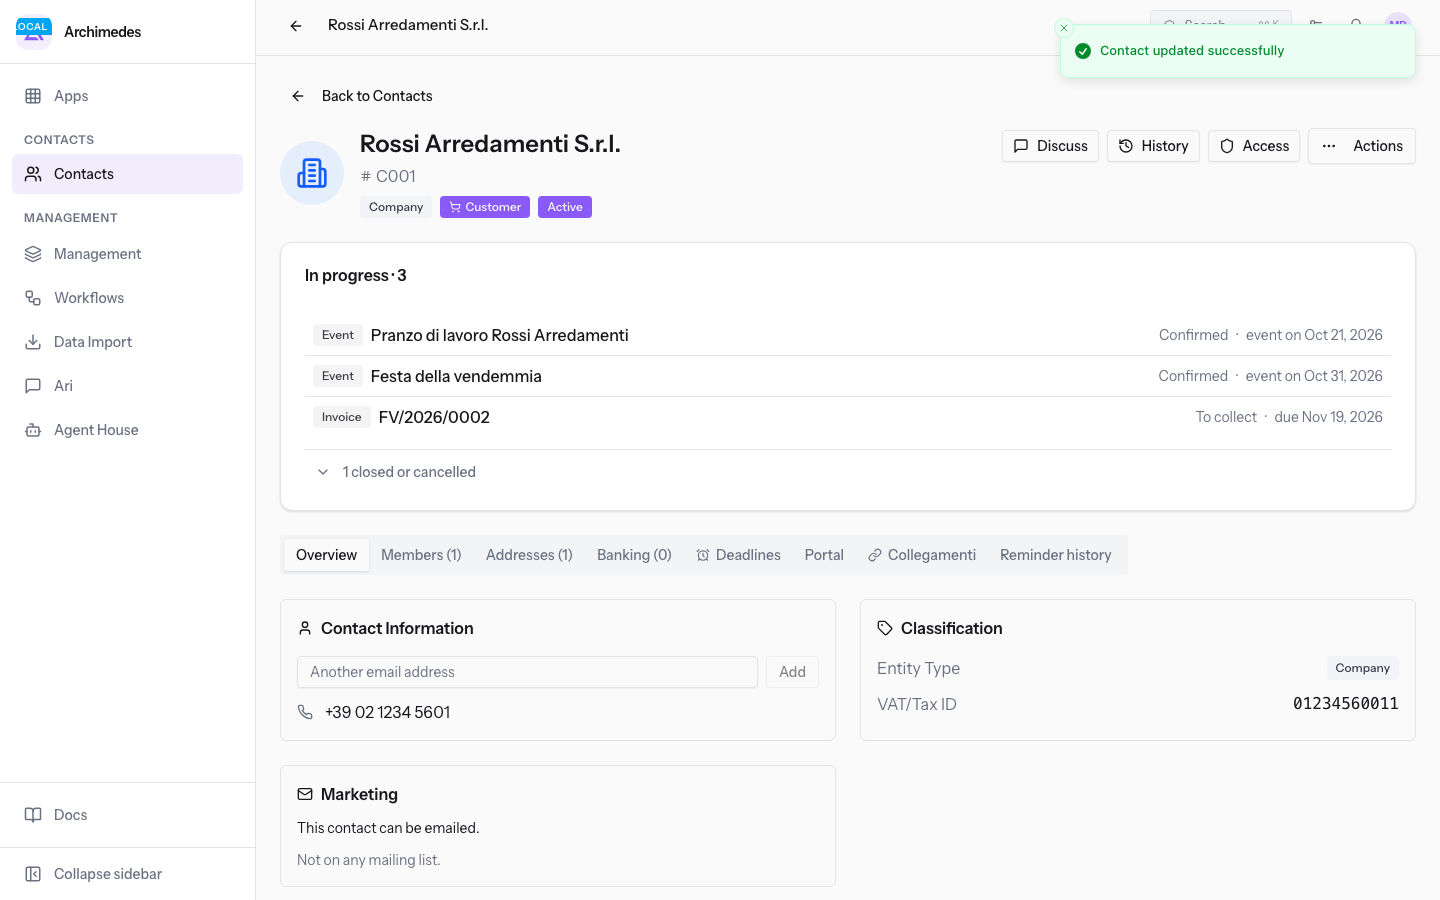
- Click Save Changes. Contact updated successfully appears.
- The Parent company badge appears in the page header and Locations appears among the tabs.
Creating a location
The location is a new entity, linked to the parent company from which you create it.
- Open the parent company's Locations tab.
- Click Create Location. The Create Location window shows the parent company's name beneath its title.
- Fill in the fields.
- Click Create Location. When the operation completes, Location created and linked appears. To close without creating anything, use Cancel.
The fields in the Create Location window:
- Entity Name: the location's name.
- Email: the location's email address.
- Phone: the location's phone number.
- VAT/Tax ID: the location's tax identifier.
Note: the location's remaining details, including addresses and bank accounts, are entered later on its own page, as described in Adding Addresses and Bank Accounts to a contact.
Viewing the linked locations
The Locations tab lists the entities linked to the parent company and shows their number in its title.
- Open the parent company's page.
- Open the Locations tab.
- Use Open location on the location's row to go to its contact page.
Note: when the parent company has no locations yet, the tab shows No locations linked yet.
See it on your company, not on a slide deck.
In 30 minutes we map the software you use today.We show you how much work and how much margin Archimedes gives back.
Show me on my business →What industry are you in?
One tap — it lets us prepare the demo around your world.
What tools do you use today?
Pick the ones you recognise — or just type them. It helps us show you how they migrate.
Last step: your details.
We reply within one working day — and right after, if you like, you pick the demo slot yourself.
We couldn't send your request. Try again, or write to us at [email protected].
By sending, you agree to your data being processed so we can get back to you about the demo. Privacy notice.
Preview form — nothing is sent from this page.
Want to schedule the demo now?
Your call: book the slot you prefer yourself, or we'll call you to arrange it.
Live availability, 30 minutes, instant confirmation. The calendar opens in a new tab.
Lock in your slot ↗We'll get back to you within one working day — and we'll join the call already knowing your world.
The calendar is open in another tab: pick a slot and the demo is booked. Can't see it? Reopen it ↗
Preview page: nothing was sent.
Our calendar is live: take the slot that suits you and the demo is booked. 30 minutes, instant confirmation, no waiting.
Lock in your slot ↗