Contacts
All modules
Finding and Merging Duplicate Contacts
Contacts · 10 of 13 · 4 min read
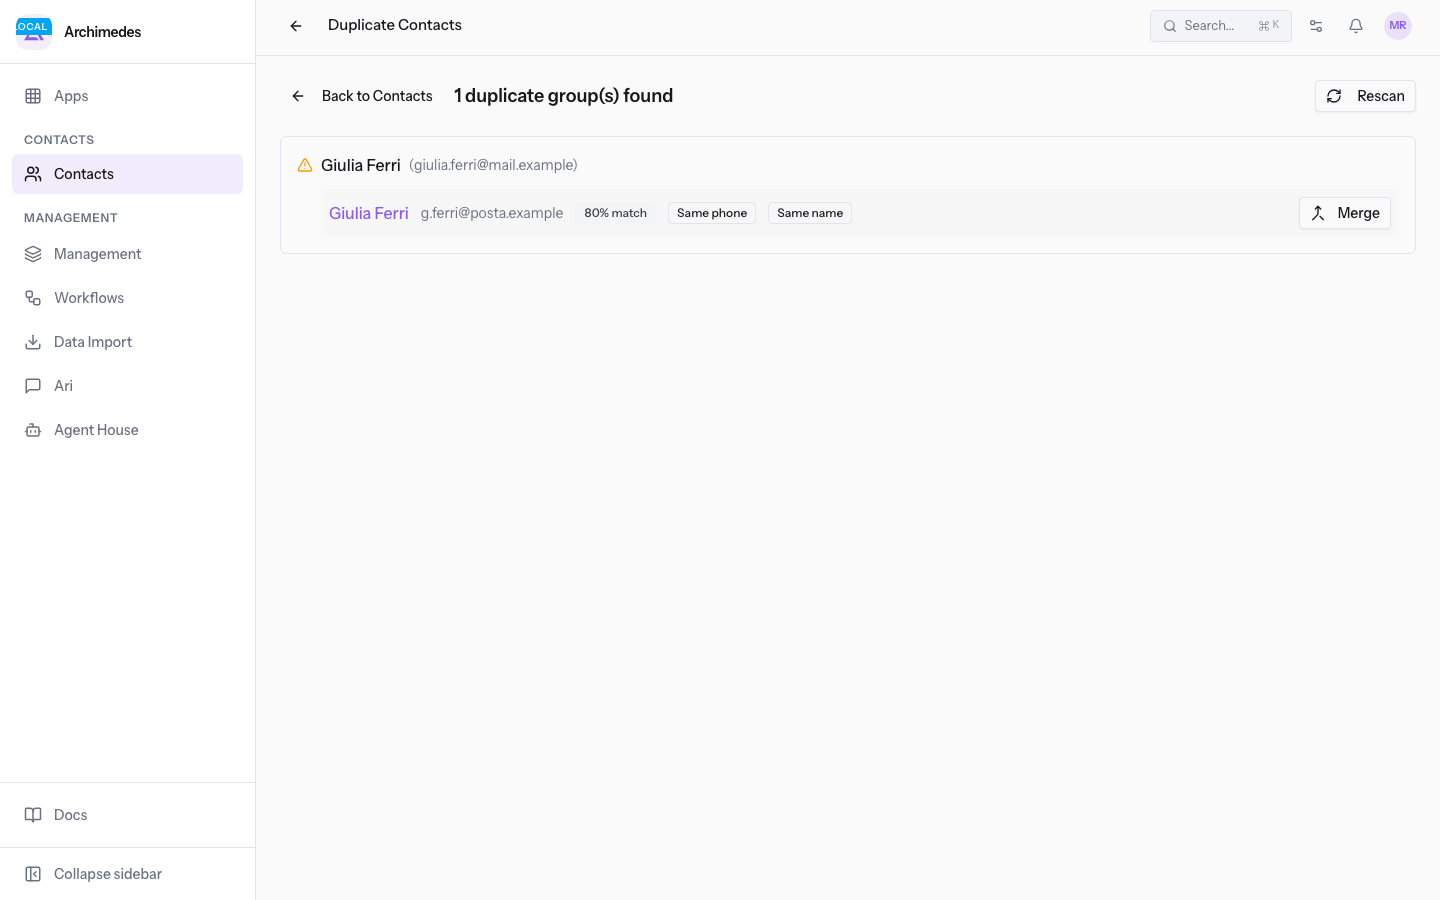
The Duplicate Contacts page gathers the contacts that the system recognizes as possible duplicates of the same person or the same entity, for example two Giulia Ferri records with the same phone number and two different email addresses. From here you review the groups found and merge the records that refer to the same subject into a single contact.
Only merge when you are certain that the two records are the same subject: the merge keeps a single contact, the one you choose as the master, and discards the other values. If the data is not enough to decide, leave the group as it is and run the check again later with Rescan.
Reviewing duplicate groups
The page lists the groups found, one for each set of records that the system considers overlapping.
- Open the Duplicate Contacts page.
- Read the result heading: it tells you how many groups were found, for example
1 duplicate group(s) found. - Examine each group: it shows the contacts it is made of with their name and email, for example
Giulia Ferriwith[email protected]andGiulia Ferriwith[email protected]. - Check the percentage next to the group, for example
80% match: it tells you how closely the two records resemble each other in the compared data.
The page commands:
- Rescan: runs the duplicate search on the contact database again and refreshes the list of groups. Use it after creating, importing, or correcting contacts.
- Back to Contacts: returns to the contact list, described in Browsing the Contact list.
When the contact database has no duplicates, the page says so with No duplicates found and the text Your contact database looks clean.
Tip: before merging, open the contact records in the group and compare their data, as explained in Reading a contact's record.
Merging two contacts
The merge starts from the group and is completed in the Merge Contacts window, where you decide which contact remains and which values to keep.
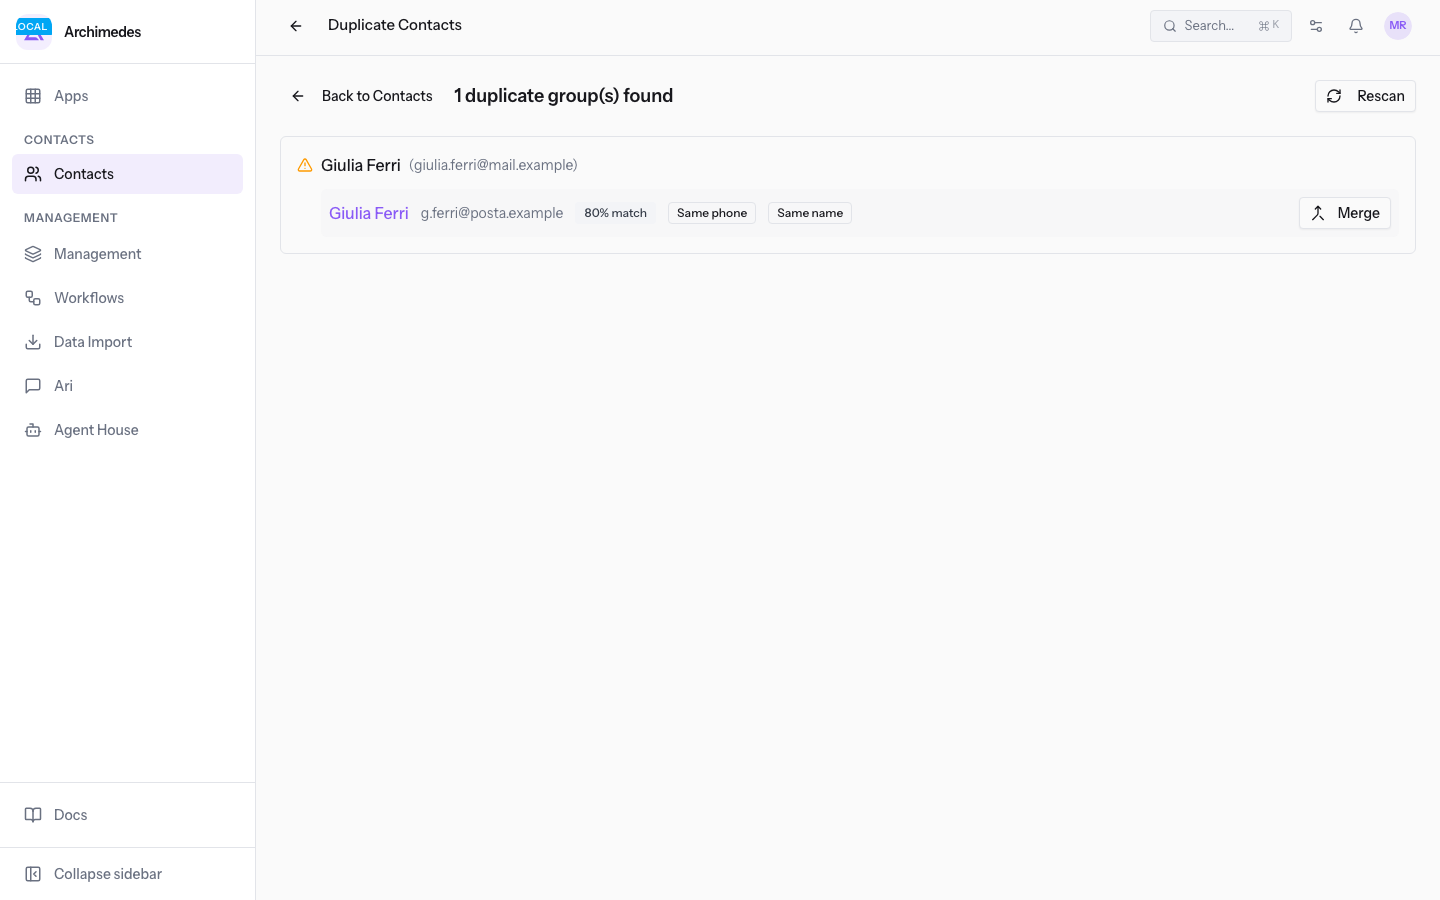
- On the Duplicate Contacts page, click the group's merge command, for example the command that merges
Giulia Ferriwith[email protected]intoGiulia Ferriwith[email protected]. - In the Merge Contacts window, under Select the master contact (the one that survives):, click the record to keep. The master contact is the one that survives the merge.
- Under For each field, pick the value to keep:, click the value to keep for each field. The proposed values are those present on the two records, for example the name
Giulia Ferri, the emails[email protected]and[email protected], the phone+39 347 210 0001. - Click Merge to perform the merge, or Cancel to close the window without merging.
When the merge succeeds, the message Contacts merged successfully appears.
Note: the choice of the master contact changes the order in which the field values are proposed, because the master contact's values are listed first.
Choosing what to keep for conflicting items
Some items can only exist on one of the two records after the merge. When both contacts have one, the merge stops and the window asks which one to keep with the message Both contacts have this — choose which one to keep, then merge again.
The items that can require this choice are:
- Portal login: the contact's access to the portal, described in Giving a contact Portal access.
- Client document folder: the document folder linked to the contact.
- Store wallet: the contact's wallet in the store.
- Loyalty card: the loyalty card registered to the contact.
- Default Address: the contact's default address, described in Adding Addresses and Bank Accounts to a contact.
Once you have made the choice, run the merge again with Merge.
Important: the merge must be performed again after resolving the conflict; as long as the item is present on both contacts, the merge does not complete.
See it on your company, not on a slide deck.
In 30 minutes we map the software you use today.We show you how much work and how much margin Archimedes gives back.
Show me on my business →What industry are you in?
One tap — it lets us prepare the demo around your world.
What tools do you use today?
Pick the ones you recognise — or just type them. It helps us show you how they migrate.
Last step: your details.
We reply within one working day — and right after, if you like, you pick the demo slot yourself.
We couldn't send your request. Try again, or write to us at [email protected].
By sending, you agree to your data being processed so we can get back to you about the demo. Privacy notice.
Preview form — nothing is sent from this page.
Want to schedule the demo now?
Your call: book the slot you prefer yourself, or we'll call you to arrange it.
Live availability, 30 minutes, instant confirmation. The calendar opens in a new tab.
Lock in your slot ↗We'll get back to you within one working day — and we'll join the call already knowing your world.
The calendar is open in another tab: pick a slot and the demo is booked. Can't see it? Reopen it ↗
Preview page: nothing was sent.
Our calendar is live: take the slot that suits you and the demo is booked. 30 minutes, instant confirmation, no waiting.
Lock in your slot ↗