eCommerce
All modules
Organizing shop categories
eCommerce · 6 of 13 · 6 min read
Shop categories are the sections visitors browse in the online shop, for example Pantry, Wine cellar or Gifts and boxes. From this page you create the category tree, decide its order, and assign to each the products it should list.
Shop categories and internal categories
Shop categories are separate from internal product categories, the ones you use to organise products in the management system. A product can belong to an internal category and to one or more shop categories.
- If you already have internal categories and want the same arrangement in the shop, import them with Import from internal and then adjust the tree.
- If you want to show visitors sections that differ from the internal ones, for example
Gifts and boxes, create the categories with New category.
If you delete a shop category, its products remain in the shop: they simply leave that category.
Opening the page and editing categories requires the eCommerce Manager group.
Opening the Product Categories page
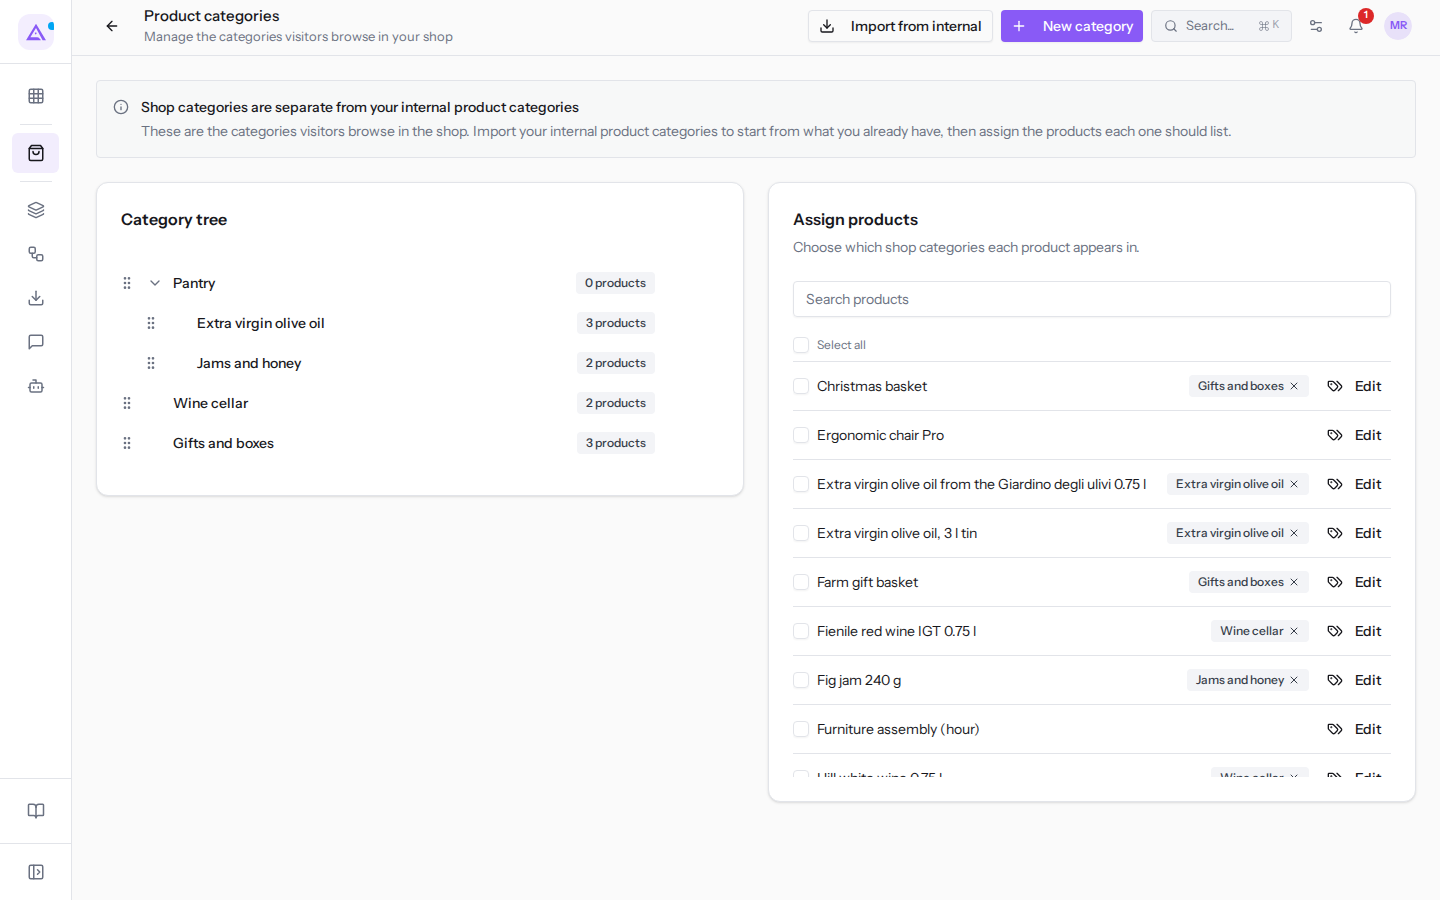
The Product Categories page has no dedicated menu entry: it opens from the Dashboard, or from Publish Products with Open shop categories.
- Go to eCommerce › Dashboard.
- Click Manage Categories.
The same management is also found in eCommerce › Settings, under the Categories tab.
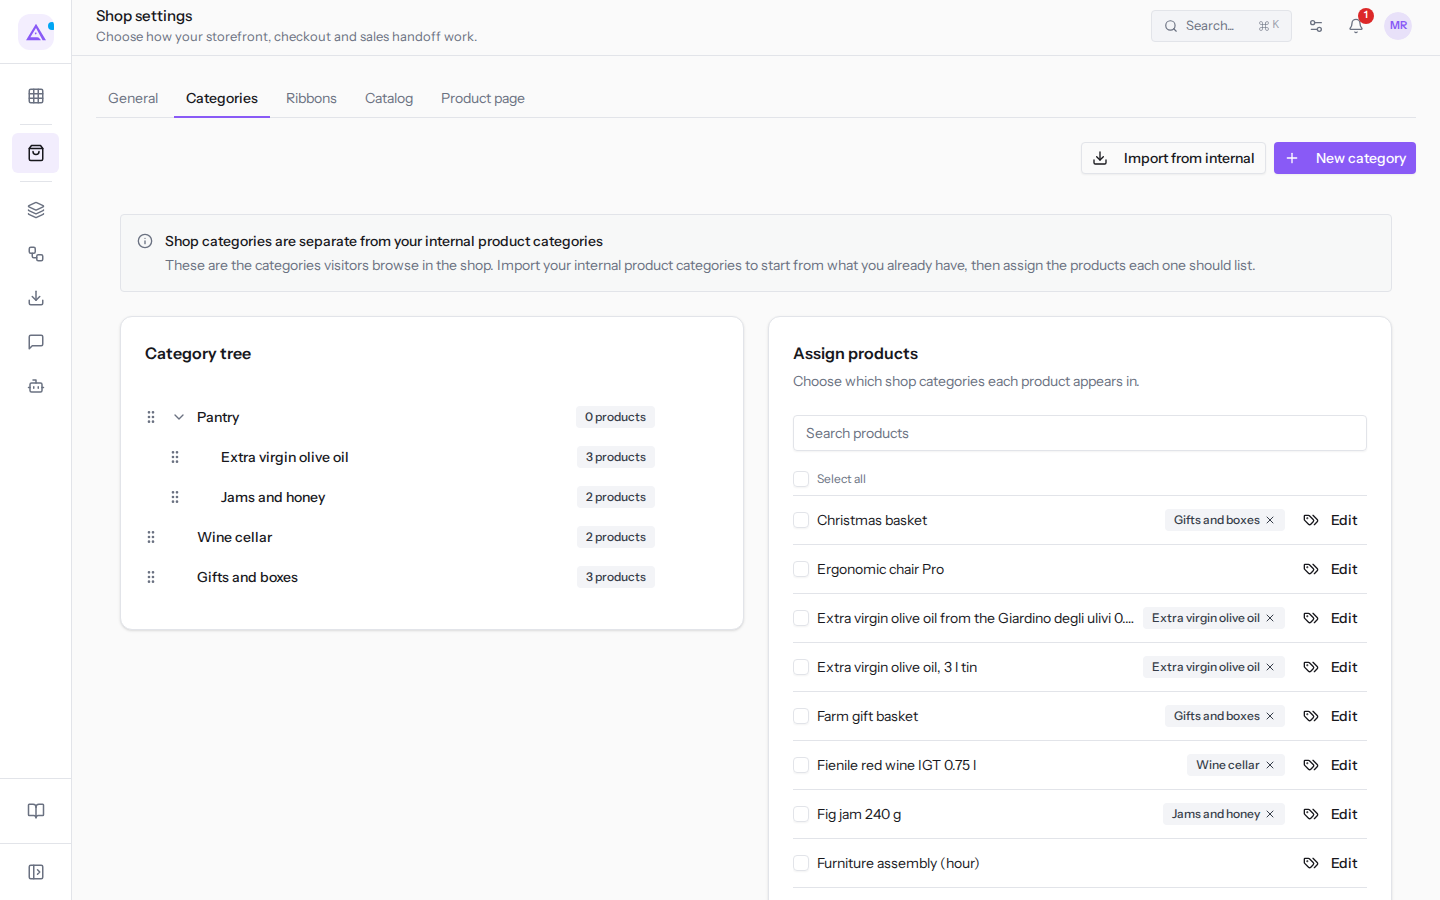
The page has two parts:
- Category tree: the shop categories with subcategories indented below the parent category. Next to each category the number of its products is shown. For example the tree contains
Pantry, with subcategoriesExtra virgin olive oilandJams and honey, thenWine cellarandGifts and boxes. - The product list, with the Search products field, the Select all checkbox, and for each product, the shop categories it belongs to and the Edit button.
Creating a category
Create a category when you need a new section in the shop or a subcategory of an existing section.
- Click New category.
- Fill in the fields of the New category window.
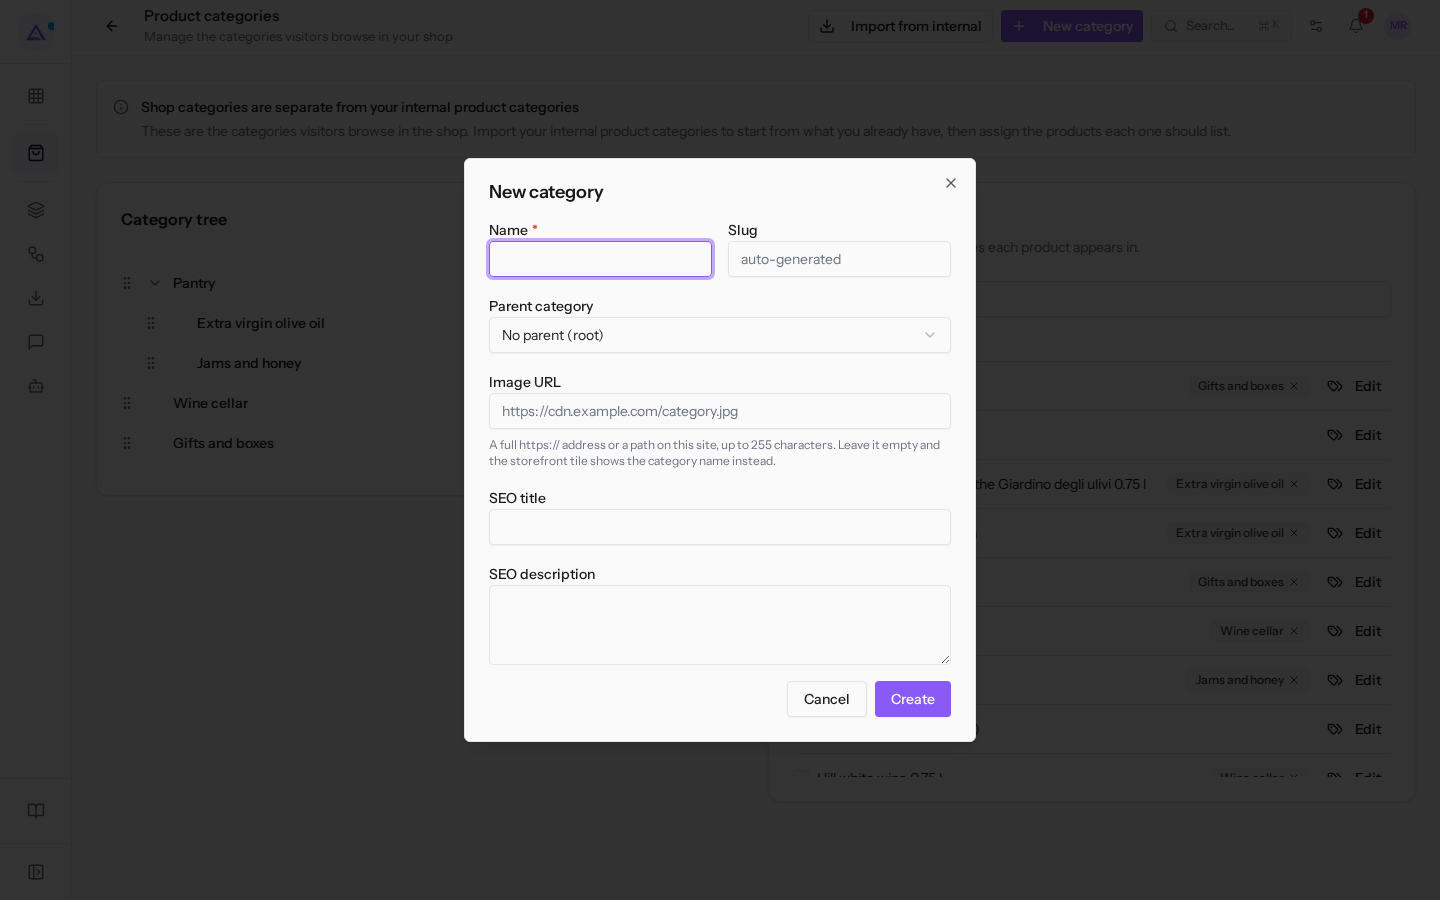
- Click Create. The message Category created appears.
The window's fields:
- Name: the name of the category that visitors see in the shop, for example
Jams and honey. This field is required. - Slug: the part of the category's address in the shop. This field is optional.
- Parent category: the category this one sits under.
- No parent (root): the category is at the first level of the tree. This is the default value.
- An existing category, for example Pantry: the new category becomes a subcategory of it.
- Image URL: the image for the category tile in the shop. Accepts a full https:// address or a path on this site, up to 255 characters. If you leave it empty, the shop tile shows the category name. When the address is valid, the window shows a preview of the image.
- SEO title: the title of the category page for search engines.
- SEO description: the description of the category page for search engines.
To show categories as tiles above the products or as a filter in the shop, see Setting up the catalogue and product page.
Editing or deleting a category
Each row of the tree has two icons that appear when you hover over the category: a pencil to edit it and a bin to delete it.
To edit a category:
- Hover over the category in the tree and click the pencil icon.
- In the Edit Category window, change the fields — the same ones as when creating. As Parent category you cannot choose the category itself.
- Save the changes. The message Category updated appears.
To delete a category:
- Hover over the category and click the bin icon.
- Confirm the prompt Delete this category? Its products stay in the shop and simply leave this category. The message Category deleted appears.
Reordering categories
The order of the tree is the order in which visitors see the categories in the shop.
- Grab the drag handle to the left of the category, for example Drag to reorder Wine cellar.
- Drag the category to the new position and release it.
A category can only be moved among categories at the same level, that is, with the same parent category. To move it under a different category, change the Parent category when editing. Each move is saved immediately.
Ordering the products in a category
Within each category you choose the order in which customers see the products.
- Click the category name in the tree, for example Extra virgin olive oil. The window Products in Extra virgin olive oil opens.
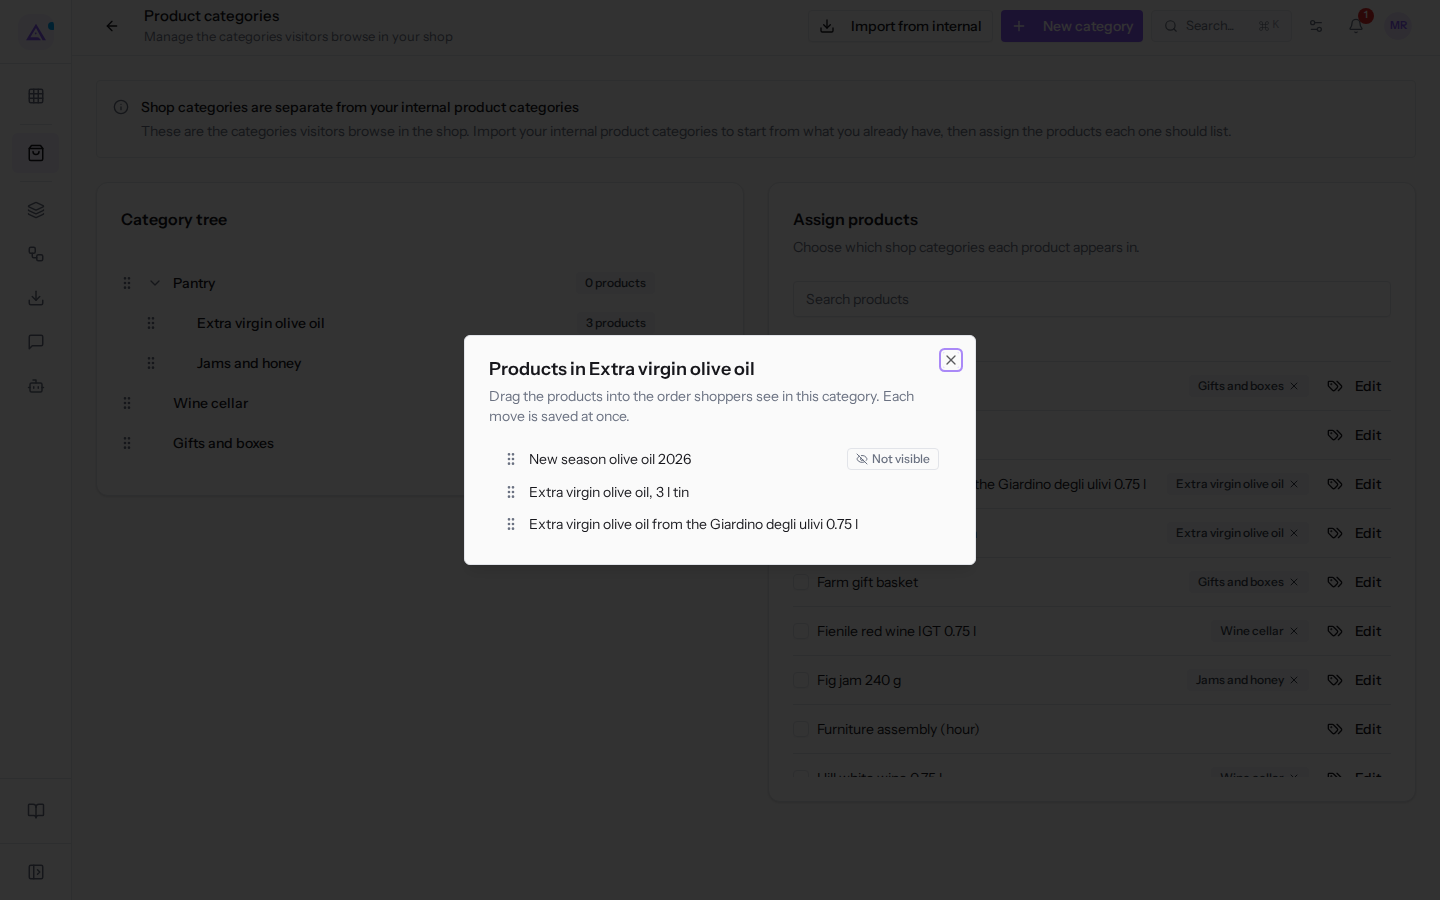
- Drag the products using the drag handle into the order in which customers should see them. Each move is saved immediately.
- Click Close.
A product that the shop does not display appears in the list with the label Not visible, for example New season olive oil 2026. If the category is empty, the window shows No products in this category yet.
Importing internal categories
Importing mirrors internal product categories in the shop. A category that has already been imported is reused, never duplicated.
- Click Import from internal. The Import internal categories window opens.
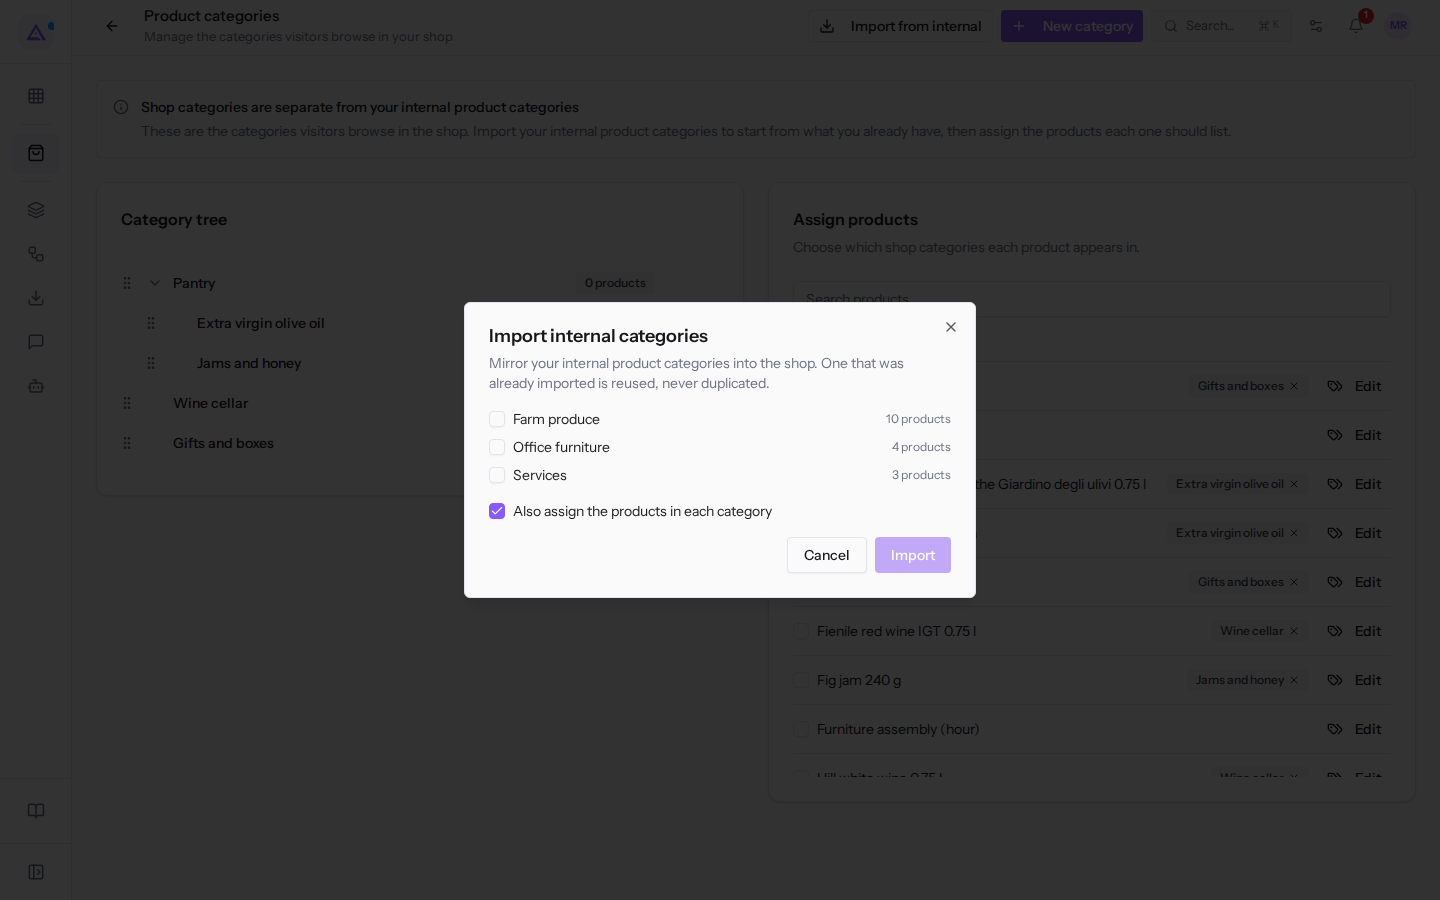
- Tick the internal categories to import. Next to each one the number of its products is shown, for example
Office furniturewith 4 products,Farm producewith 10 andServiceswith 3. - Leave Also assign the products in each category enabled if you want the products of the internal category to also enter the shop category. Disable it if you want to assign the products manually.
- Click Import. The button remains disabled until you tick at least one category.
If there are no internal categories, the window shows There are no internal product categories to import.
Assigning products to categories
A product appears in a shop category only if it is assigned to it. You can assign it to multiple categories.
One product at a time
- Find the product in the product list, including by typing in the Search products field, for example
oil. - Click Edit on the product row. The window with the product's categories opens, for example Categories for Metal cabinet, 2 doors.
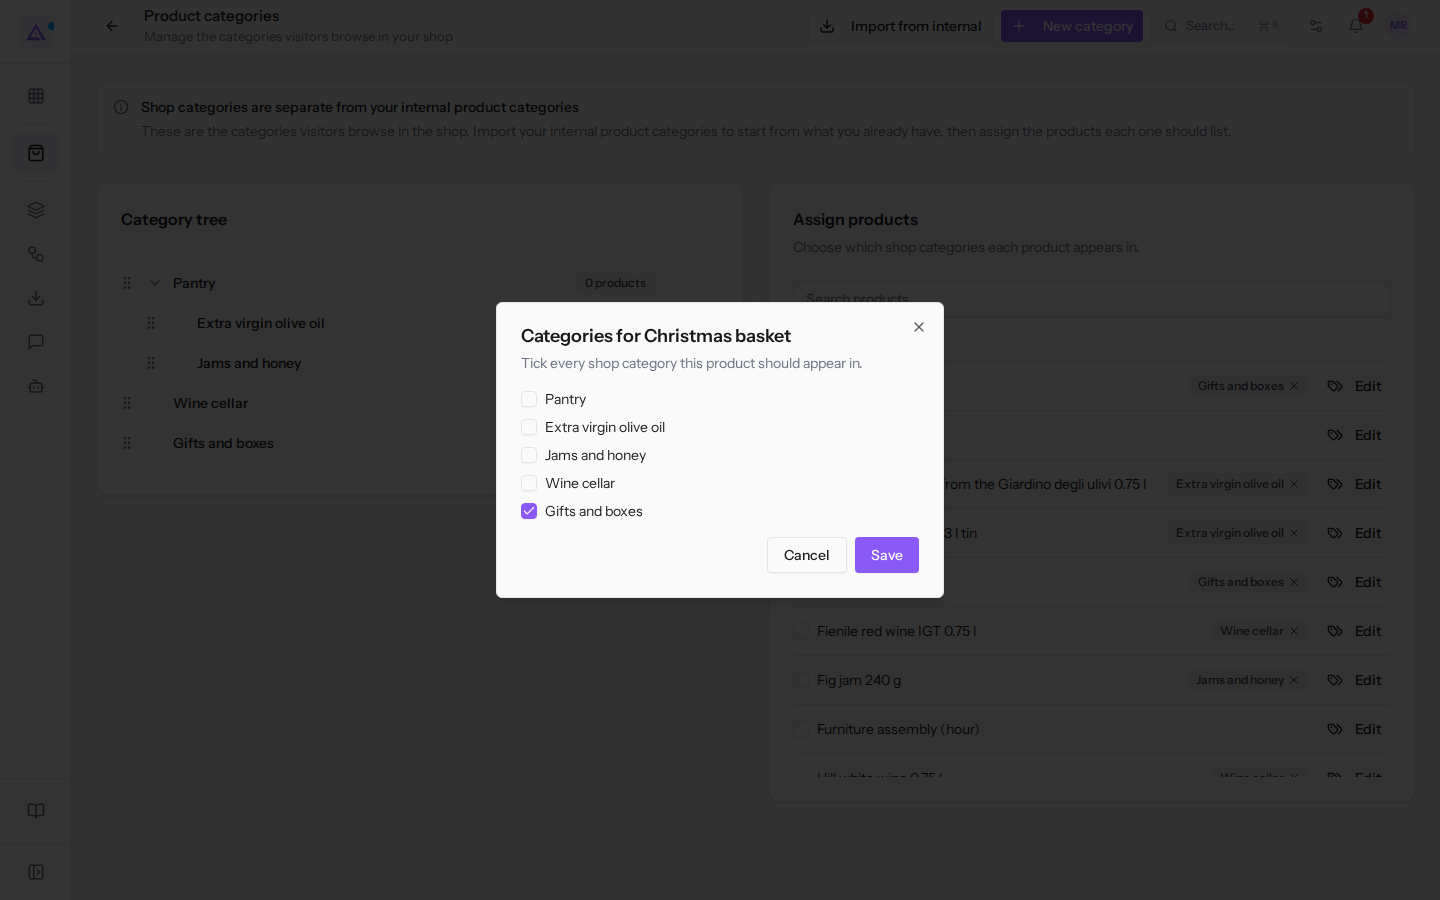
- Tick each shop category the product should appear in and untick those it should not appear in.
- Click Save.
To remove a product from a single category, click Remove this category, the small x on the category name in the product row. The product remains in the shop and in the other categories.
Multiple products at once
- Tick the products in the list, or Select all to tick all displayed products.
- In the bar that appears above the list, choose the category under Choose a category, for example Pantry.
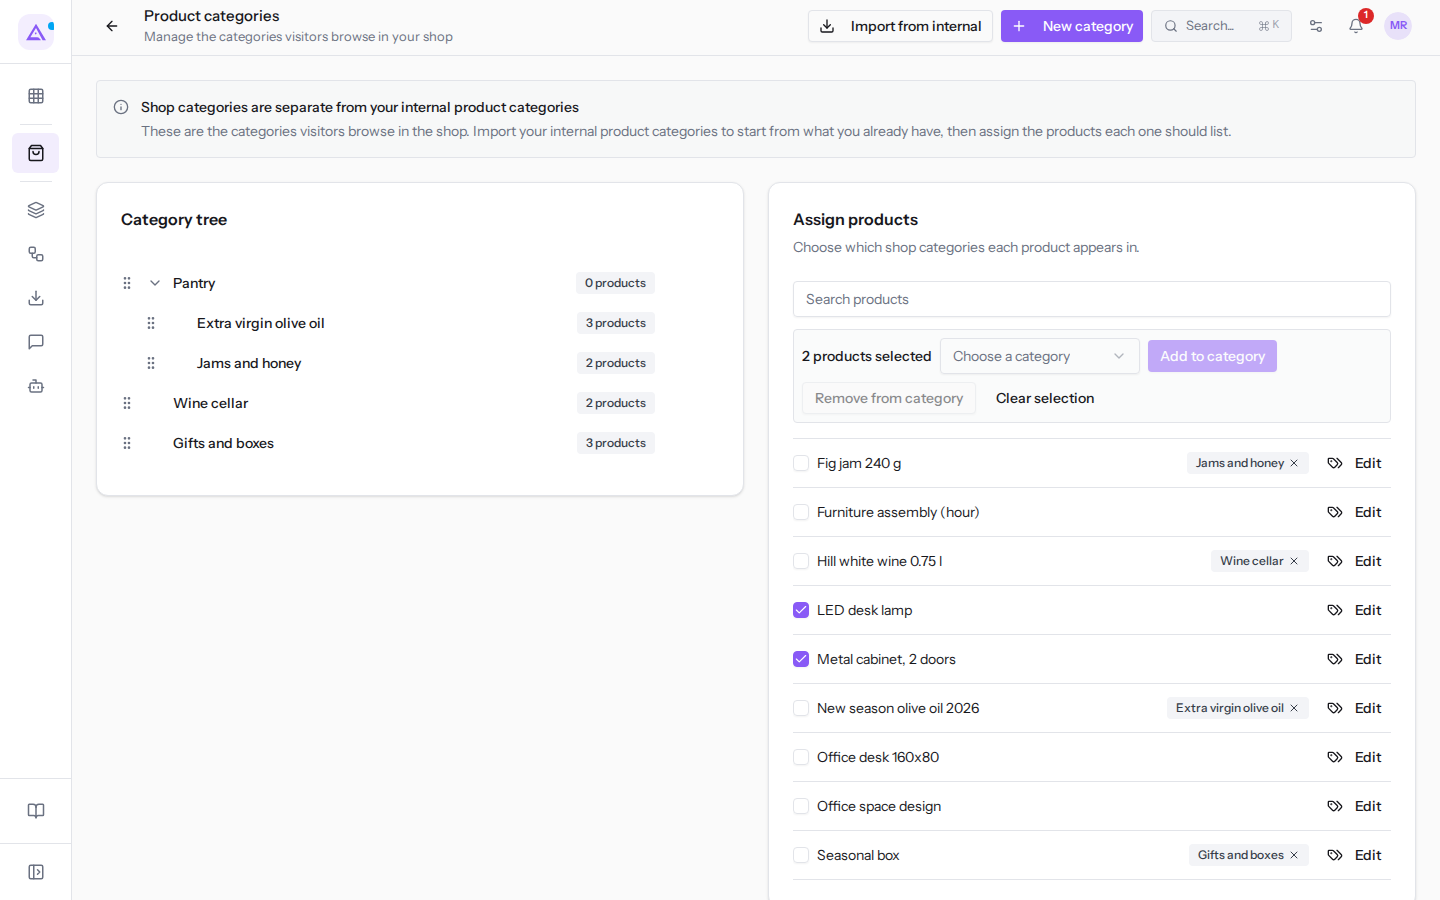
- Click one of the buttons:
- Add to category: the selected products enter the chosen category and remain in the others.
- Remove from category: the selected products leave the chosen category.
- Clear selection: unticks all products without changing anything.
When done, the number of changed products is shown, for example 1 product updated. The Add to category and Remove from category buttons remain disabled until you choose a category.
Assigning a product to a category does not publish it. An unpublished product remains outside the shop even if it is in a category.
See it on your company, not on a slide deck.
In 30 minutes we map the software you use today.We show you how much work and how much margin Archimedes gives back.
Show me on my business →What industry are you in?
One tap — it lets us prepare the demo around your world.
What tools do you use today?
Pick the ones you recognise — or just type them. It helps us show you how they migrate.
Last step: your details.
We reply within one working day — and right after, if you like, you pick the demo slot yourself.
We couldn't send your request. Try again, or write to us at [email protected].
By sending, you agree to your data being processed so we can get back to you about the demo. Privacy notice.
Preview form — nothing is sent from this page.
Want to schedule the demo now?
Your call: book the slot you prefer yourself, or we'll call you to arrange it.
Live availability, 30 minutes, instant confirmation. The calendar opens in a new tab.
Lock in your slot ↗We'll get back to you within one working day — and we'll join the call already knowing your world.
The calendar is open in another tab: pick a slot and the demo is booked. Can't see it? Reopen it ↗
Preview page: nothing was sent.
Our calendar is live: take the slot that suits you and the demo is booked. 30 minutes, instant confirmation, no waiting.
Lock in your slot ↗