eCommerce
All modules
Set up the catalogue and product page
eCommerce · 12 of 13 · 5 min read
The Catalog and Product page tabs in the store settings determine how customers browse the catalogue and how they see a product's photos. They are used, for example, to choose the store filters, the product list view, or the photo shape.
The store settings are reserved for members of the eCommerce Manager group.
Opening the catalogue settings
The Catalog tab contains the navigation controls, the default view, and reserved products.
- Go to eCommerce › Settings.
- Click the Catalog tab.
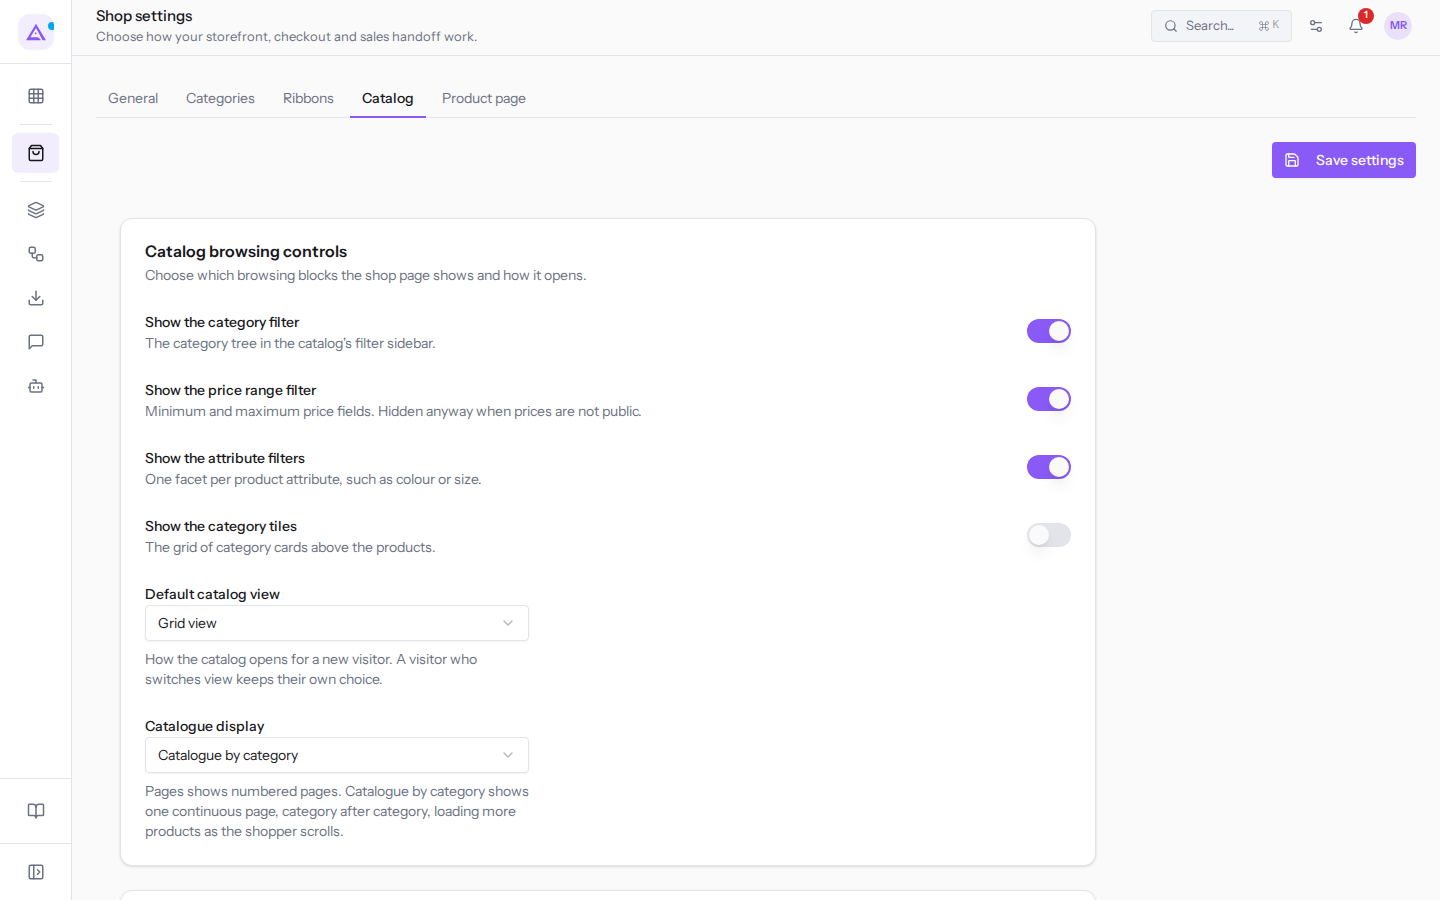
Choosing the catalogue navigation controls
The toggles decide which search tools the customer finds next to the product list. Leave active the filters that help narrow down the catalogue and turn off the ones you don't use.
- Show the category filter: shows the store category filter.
- Show the price range filter: shows the minimum and maximum price fields. It remains hidden when prices are not public.
- Show the attribute filters: shows a filter for each product attribute, for example colour or size.
- Show the category tiles: shows the grid of category tiles above the products.
Choosing the catalogue view
The default view is what a new store visitor sees. Anyone who changes the view keeps their own choice.
- Default catalog view: how products are arranged in the list.
- Grid view: products are arranged in a grid.
- List view: products are arranged one below the other.
- Catalogue display: how the catalogue is organised.
- Pages: numbered pages.
- Catalogue by category: a single continuous page, category after category, that loads more products as the customer scrolls.
After making changes, click Save settings.
Reserving products for specific customers
Products with one of these tags are shown only to customers who have the same tag. Use reserved tags when part of the catalogue is intended for only some customers, for example customers with the tag Key account. If you don't choose any tag, all products remain open to all customers who can see the store.
- In the Catalog tab, open the Choose existing tags field.
- Choose one or more tags, for example
Key account. The list contains tags that already exist in the organisation, including those from other modules, with the group in parentheses, for examplePrenotazione online (Assistenza). - Click Save reserved tags. The confirmation Change the reserved tags? opens.
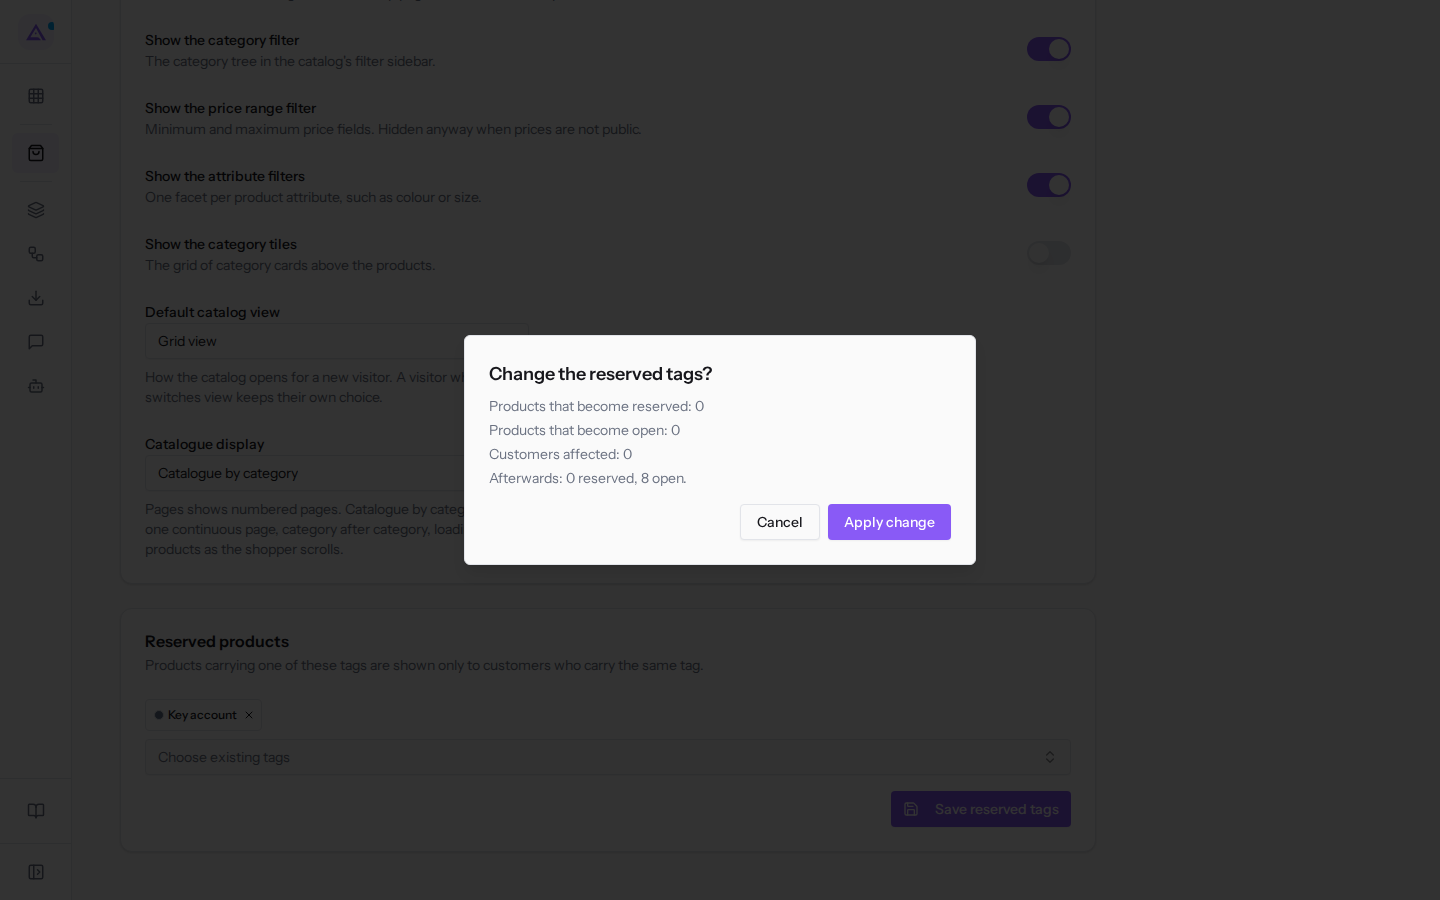
- Check the effect of the change and click Apply change, or Cancel to leave the tags as they are.
The confirmation shows the effect of the change before applying it:
- Products that become reserved: how many products will be visible only to customers with the tag.
- Products that become open: how many products become visible to everyone again.
- Customers affected: how many customers see the catalogue change.
- The total after the change, for example
Afterwards: 0 reserved, 8 open.
A customer sees a reserved product only if they have the same tag, assigned to them or their company. Assign the tag to the right customers before reserving products, otherwise those products disappear from their catalogue.
Setting up the product page photos
The Product page tab determines how photos are displayed on a product's page, on desktop and on mobile, and how they are framed.
- Go to eCommerce › Settings.
- Click the Product page tab.
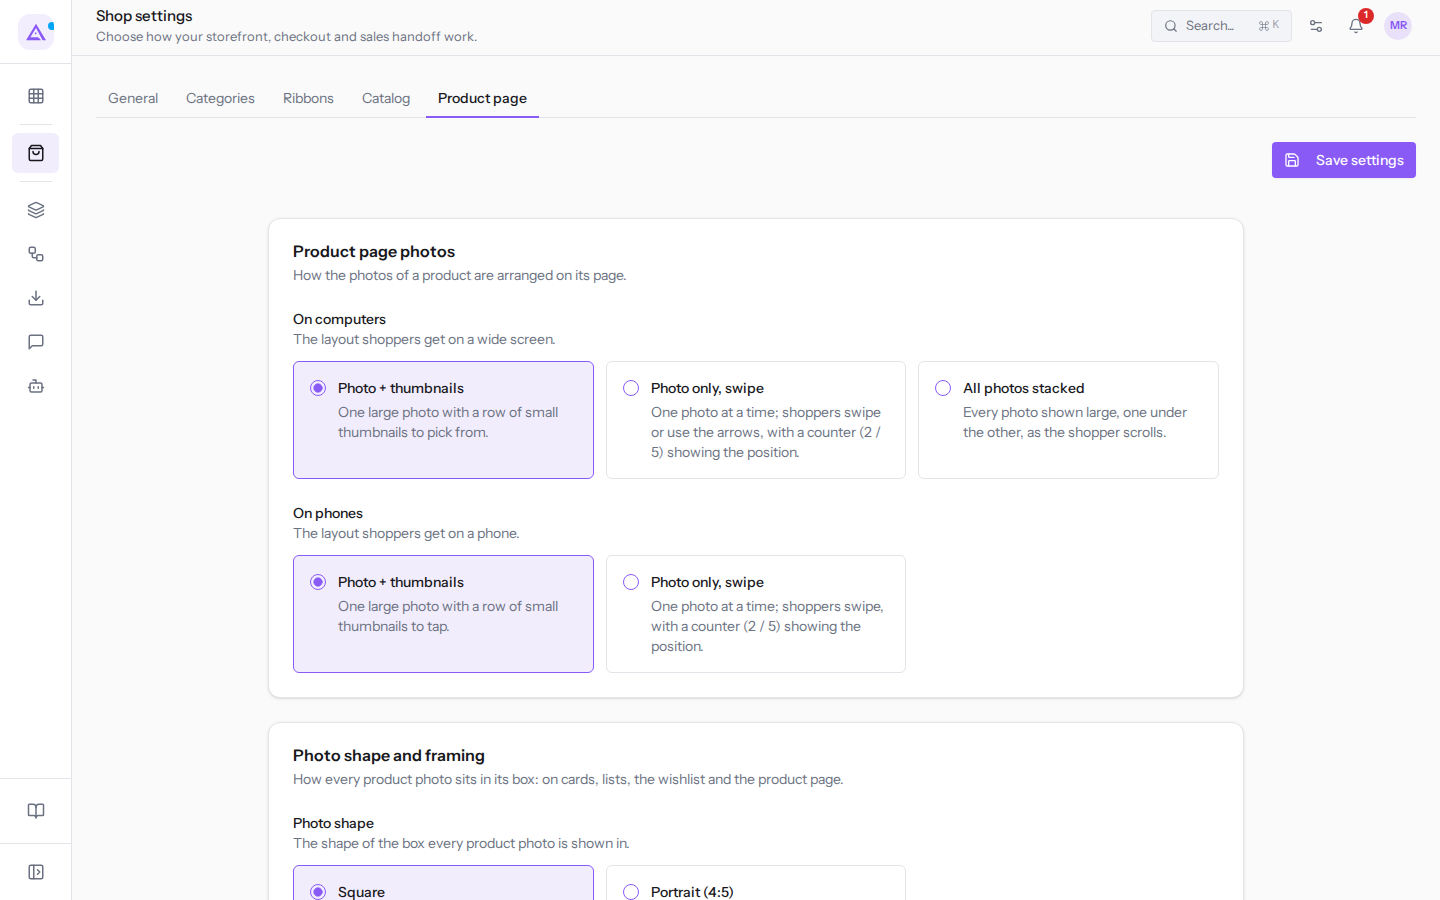
- Choose the options and click Save settings.
On desktop, choose one of the three layouts:
- Photo + thumbnails: a large photo with a row of thumbnails to choose from.
- Photo only, swipe: one photo at a time. The customer scrolls or uses the arrows, and a counter (for example
2 / 5) shows the position. - All photos stacked: each photo displayed large, one below the other, as the customer scrolls.
On mobile, there are two layouts:
- Photo + thumbnails: a large photo with a row of thumbnails to tap.
- Photo only, swipe: one photo at a time. The customer swipes with their finger, and a counter shows the position.
If a product has many photos, the thumbnail layout lets you jump straight to the one you're looking for. The swipe layout gives more space to the photo.
Choosing the shape and framing of photos
In the Photo shape and framing panel, Photo shape applies to every photo: tiles, lists, favourites, and the product page. Framing decides what happens when the photo does not have the same shape as the frame.
Photo shape:
- Square: each photo fits in a square frame.
- Portrait (4:5): each photo fits in a taller frame, suited to fashion and bottles.
Framing:
- Automatic: the photo is cropped to fill the frame on tiles and lists, and shown in full on the product page.
- Crop to fill: the photo always fills the frame. Excess edges are cropped.
- Show whole: the photo is always fully visible. The remaining space appears as a uniform band.
If photos have different shapes and it matters to see them in full, choose Show whole. If it matters to have all frames full and aligned, choose Crop to fill.
Click Save settings to apply the choices.
See it on your company, not on a slide deck.
In 30 minutes we map the software you use today.We show you how much work and how much margin Archimedes gives back.
Show me on my business →What industry are you in?
One tap — it lets us prepare the demo around your world.
What tools do you use today?
Pick the ones you recognise — or just type them. It helps us show you how they migrate.
Last step: your details.
We reply within one working day — and right after, if you like, you pick the demo slot yourself.
We couldn't send your request. Try again, or write to us at [email protected].
By sending, you agree to your data being processed so we can get back to you about the demo. Privacy notice.
Preview form — nothing is sent from this page.
Want to schedule the demo now?
Your call: book the slot you prefer yourself, or we'll call you to arrange it.
Live availability, 30 minutes, instant confirmation. The calendar opens in a new tab.
Lock in your slot ↗We'll get back to you within one working day — and we'll join the call already knowing your world.
The calendar is open in another tab: pick a slot and the demo is booked. Can't see it? Reopen it ↗
Preview page: nothing was sent.
Our calendar is live: take the slot that suits you and the demo is booked. 30 minutes, instant confirmation, no waiting.
Lock in your slot ↗