Shifts
All modules
Configure shift roles and templates
Shifts · 15 of 16 · 6 min read
Roles and templates are the foundation of shift planning. A role indicates the activity in which a shift takes place, for example Dining room, Kitchen or Reception. A template is a slot with a name, a role, and a set of hours, for example Lunch or Dining room evening, from which you create shifts on the grid without retyping the hours.
Roles and templates: how to choose them
A role is operational, not contractual: the same person can cover a different role on another day. A template has no date or assigned person: it carries the role and the hours, while who works and when is decided on the grid.
- If an activity repeats with different people, for example table service in the dining room, create a role.
- If a time slot repeats every week, for example lunch in the kitchen 10:00–14:30, create a template.
- If a slot can be covered by whoever is available, create a template with no role. For example, the Floater template has no role.
Roles and templates are never deleted. A role you no longer use is retired and shows Retired; a template is retired and also shows Retired. Shifts already recorded do not change.
Note: create roles before templates and before staffing requirements. A staffing requirement states how many people of a given role are needed in a slot.
Viewing roles
The Shift roles page lists the organisation's roles with their status.
- Open Shifts › Settings › Roles.
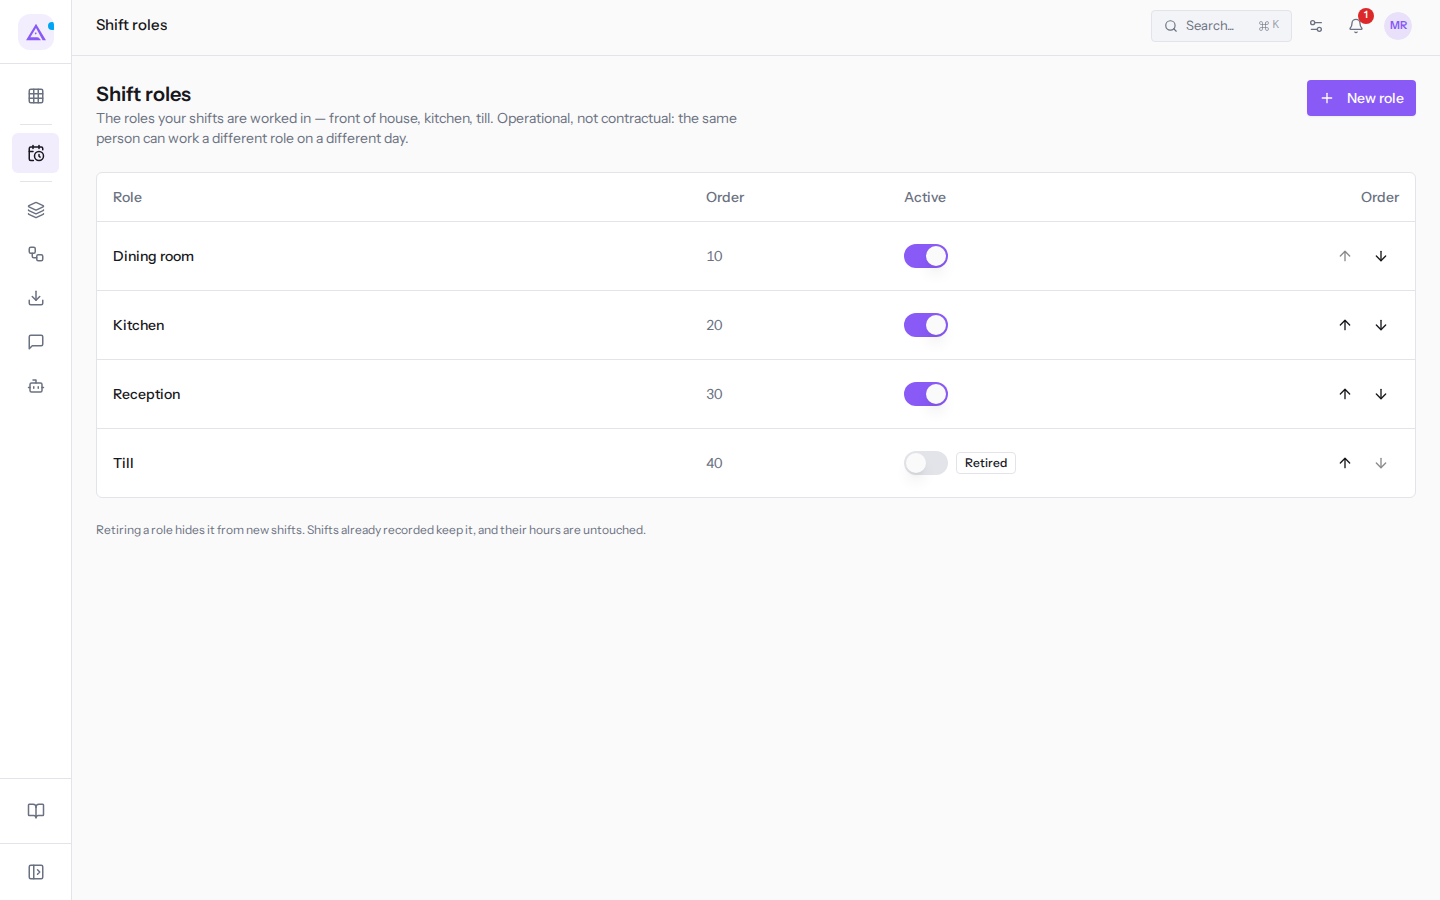
Each row in the list shows:
- the role name; clicking the row opens the Edit role dialog;
- the number in the Order column, which is the role's position;
- the Active toggle: on for roles in use, off for retired roles, which also show the Retired label;
- the up and down arrows in the last column, which move the role one position in the list.
For example, the Dining room, Kitchen and Reception roles are active and Till is retired.
Creating a role
Create a role for every activity in which you schedule shifts.
- Open Shifts › Settings › Roles.
- Click New role.
- Fill in the Role field.
- Click Create. To close without saving, click Cancel.
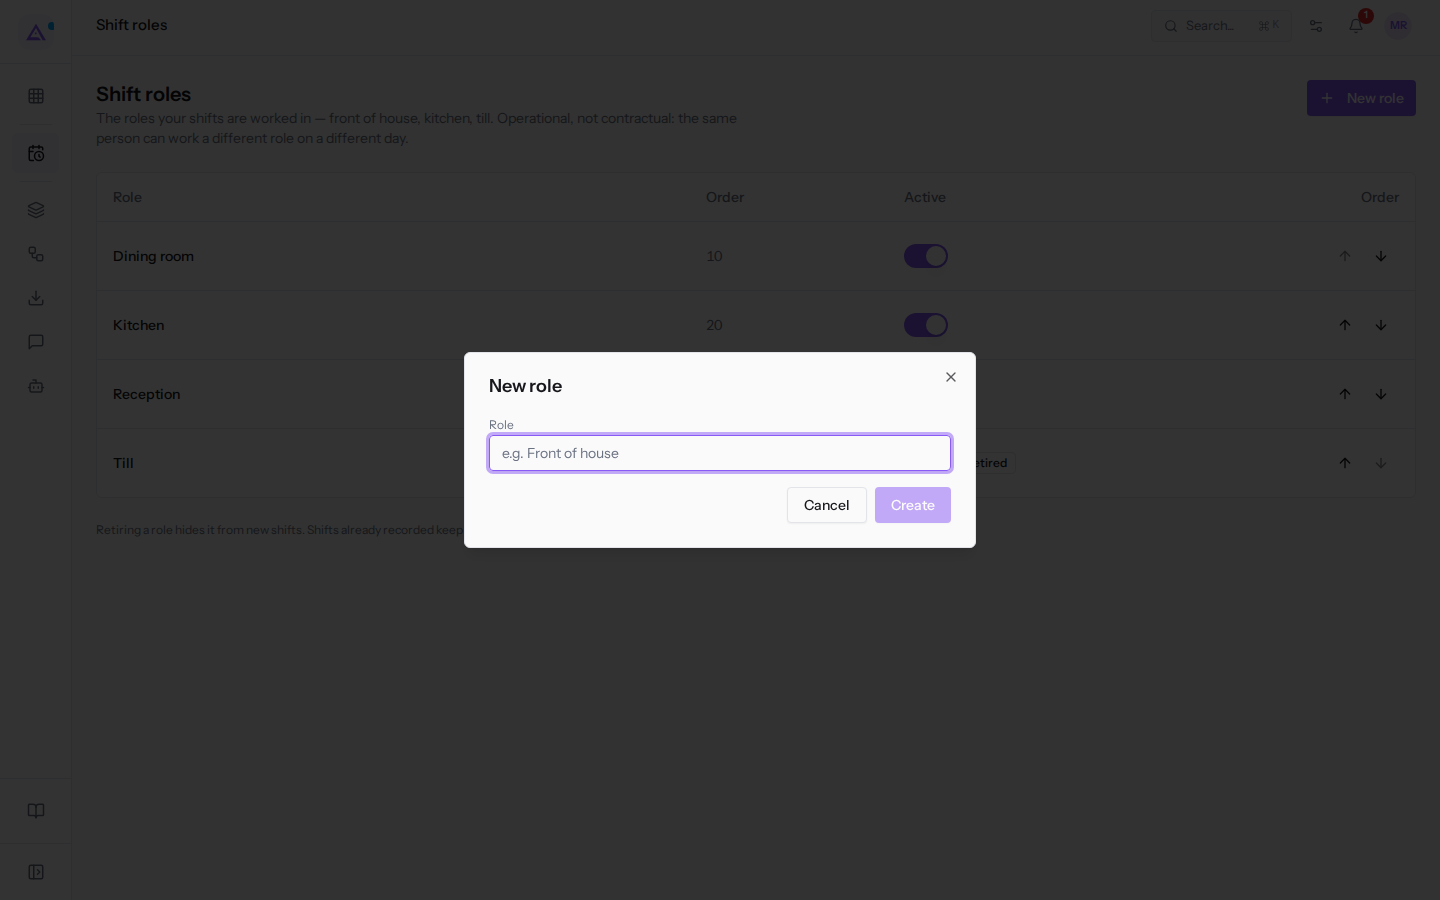
Fields in the New role dialog:
- Role: the name of the role, for example
Dining room. This is the name you see on shifts in the grid and when choosing a role.
Editing or retiring a role
Rename a role from the Edit role dialog; retire it from the list.
- Open Shifts › Settings › Roles.
- Click the role name, for example
Dining room. The Edit role dialog opens. - Change the Role field.
- Click Save.
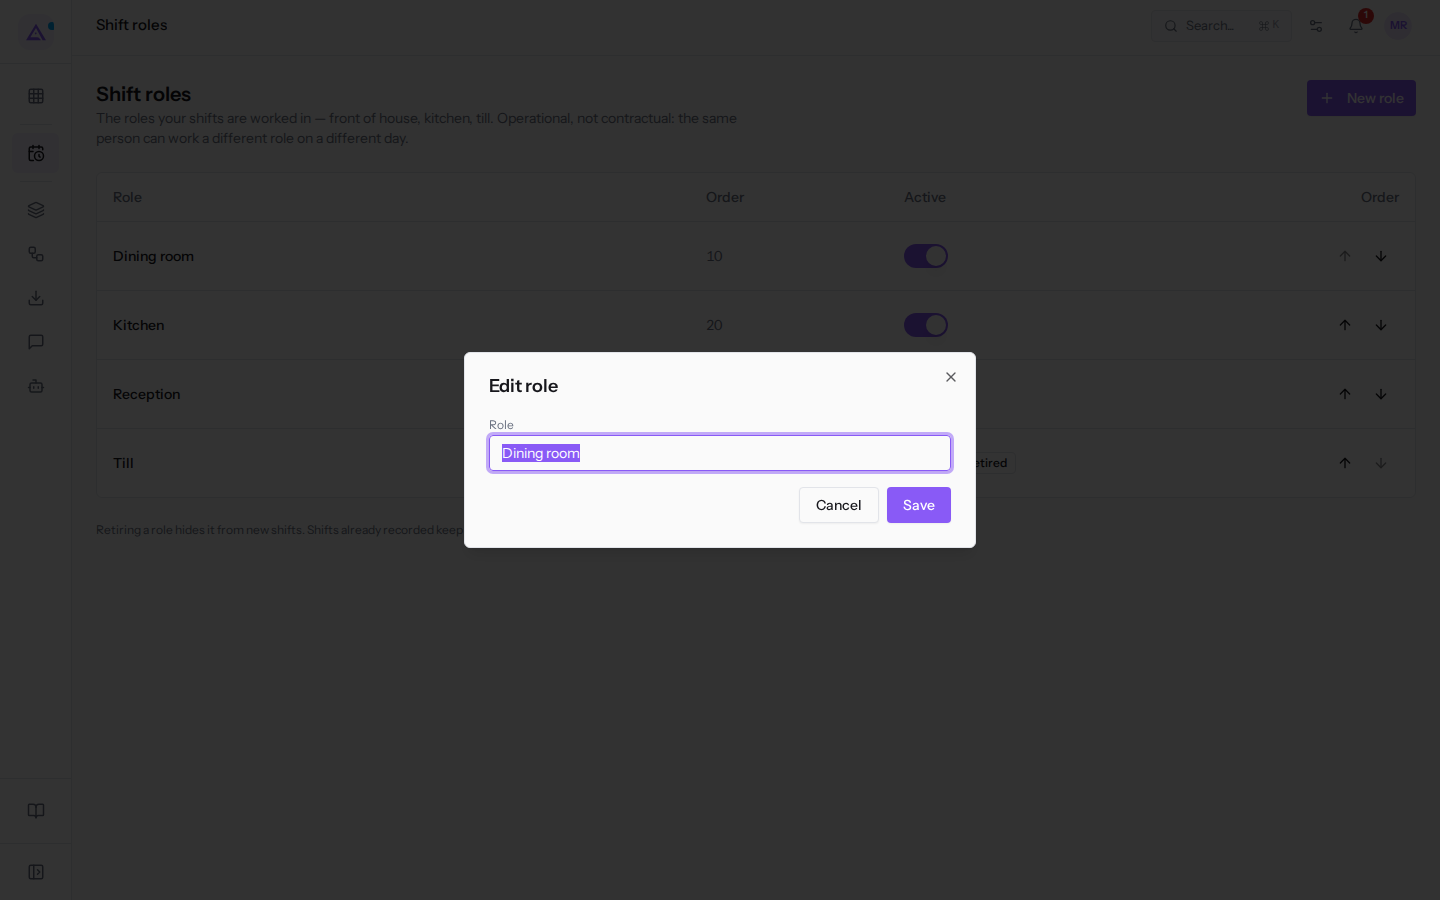
To retire a role, turn off the Active toggle on its row. To reactivate it, turn it back on.
Retiring a role hides it from new shifts. Shifts already recorded keep it and their hours remain unchanged. For example, the Till role is retired and does not appear among the roles you can choose when creating a new template or a new shift.
Note: the role name is saved at the time of publication. If you rename a role, shifts already communicated to staff keep the previous name.
Viewing templates
The Shift templates page lists the named slots from which the week is built. You choose one on the grid and the hours fill in automatically.
- Open Shifts › Settings › Templates.
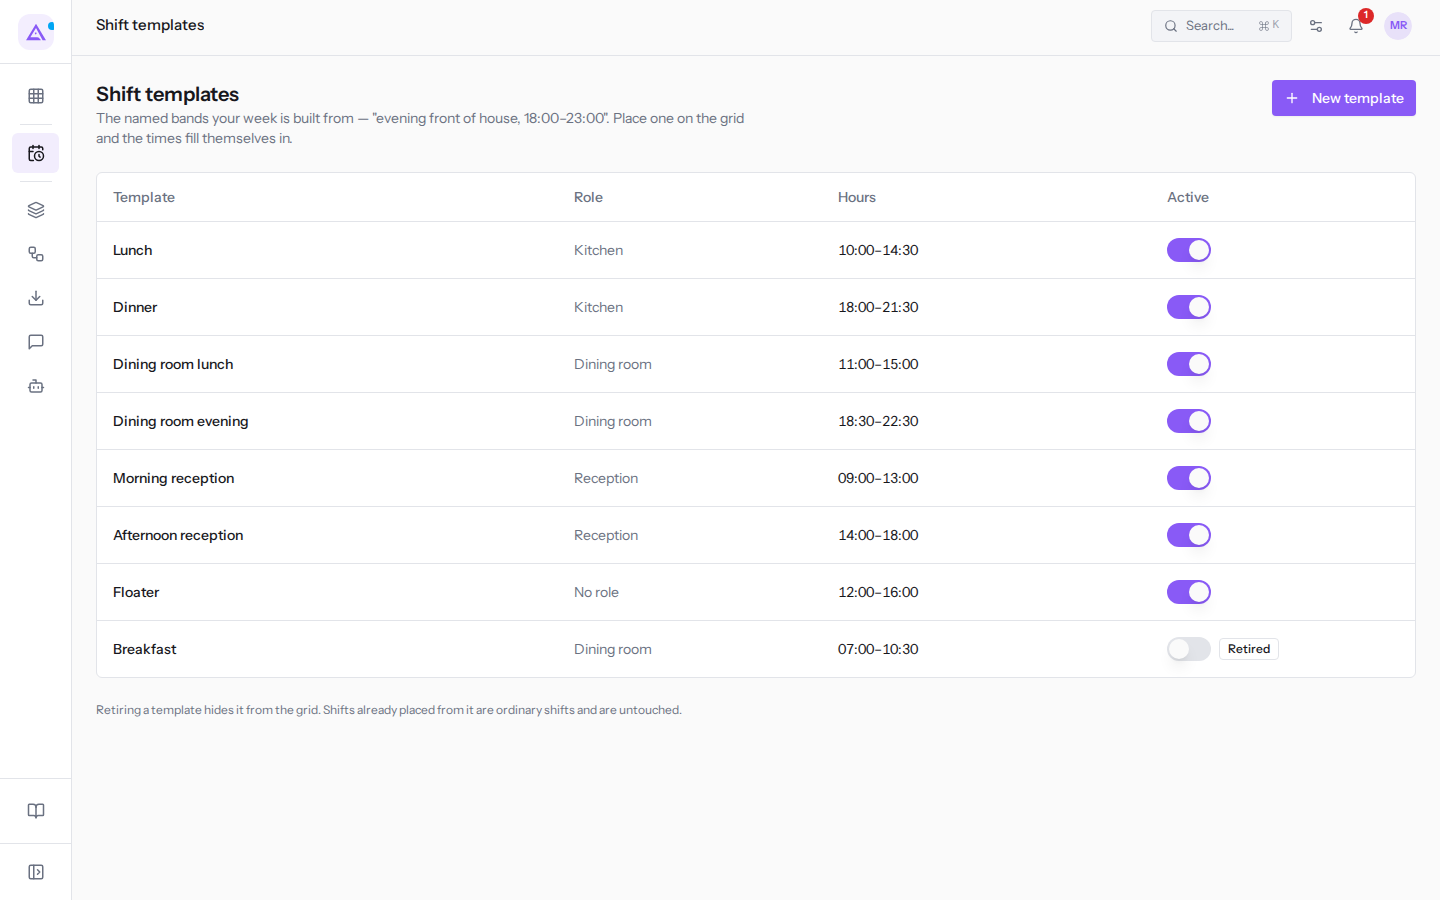
Each row shows Template, Role (or No role), Hours, and the Active toggle. Retired templates have the toggle off and the Retired label. Clicking a row opens the Edit template dialog.
For example, the active templates are Lunch, Dinner, Dining room lunch, Dining room evening, Morning reception, Afternoon reception and Floater; Breakfast is retired.
Creating a template
Create a template for every slot that repeats during the week.
- Open Shifts › Settings › Templates.
- Click New template.
- Fill in the fields.
- Click Create. To close without saving, click Cancel.
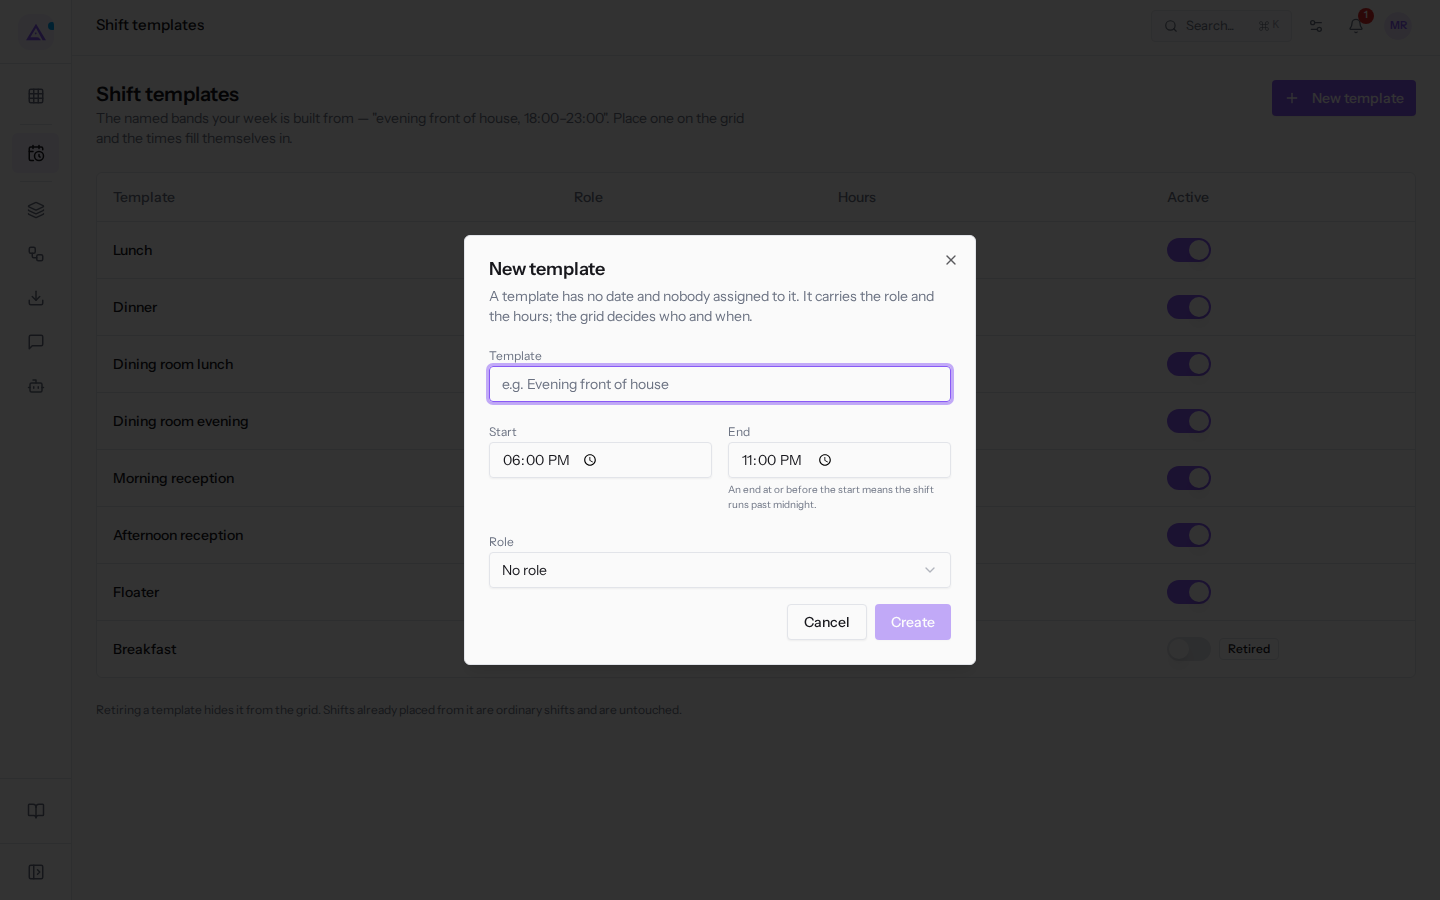
Fields in the New template dialog:
- Template: the name of the slot, for example
Lunch. This is the name shown when choosing a template on the grid. - Start: the start time of the slot. In the new template,
18:00is suggested. - End: the end time of the slot. In the new template,
23:00is suggested. An end time equal to or earlier than the start time indicates a shift that goes past midnight. - Role: the role of shifts created from the template. The options are:
- No role: the template carries only the hours;
- an active role, for example Dining room, Kitchen or Reception. Retired roles do not appear.
For example: template Lunch, Start 10:00, End 14:30, role Kitchen.
Editing or retiring a template
Change a template's name, hours, or role from the Edit template dialog; retire it from the list.
- Open Shifts › Settings › Templates.
- Click the template name, for example
Lunch. The Edit template dialog opens, with the same fields as the new template. - Change the Template, Start, End, or Role fields.
- Click Save.
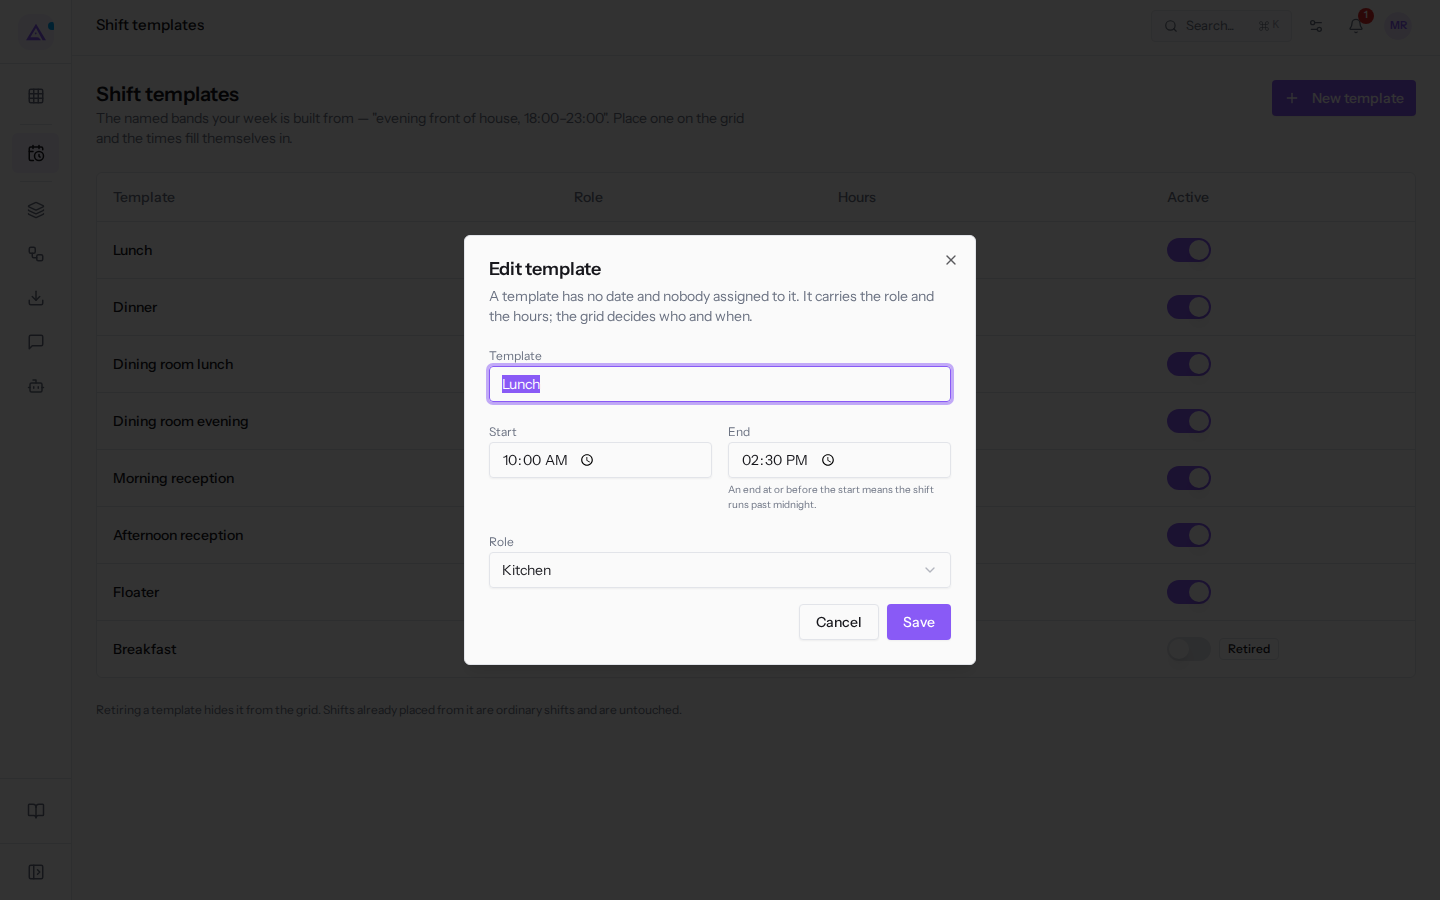
To retire a template, turn off the Active toggle on its row. To put it back in use, turn it back on.
Retiring a template hides it from the grid. Shifts already created from that template are normal shifts and are not affected. For example, Breakfast is retired and does not appear when choosing a template.
Using a template on the grid
On the weekly planning view, a template fills in the hours and role of the new shift.
- Open Shifts › Planning.
- Click an empty cell in a person's row (Add shift). The New shift dialog opens, showing the person's name and the date, for example Andrea Neri on 2026-10-29 (Thursday).
- In the From a template field, open Choose a template and choose a template. Each entry shows the name and hours, for example
Lunch · 10:00–14:30. - Check Start, End, and Role, filled in by the template, and change them if needed.
- Click Create.
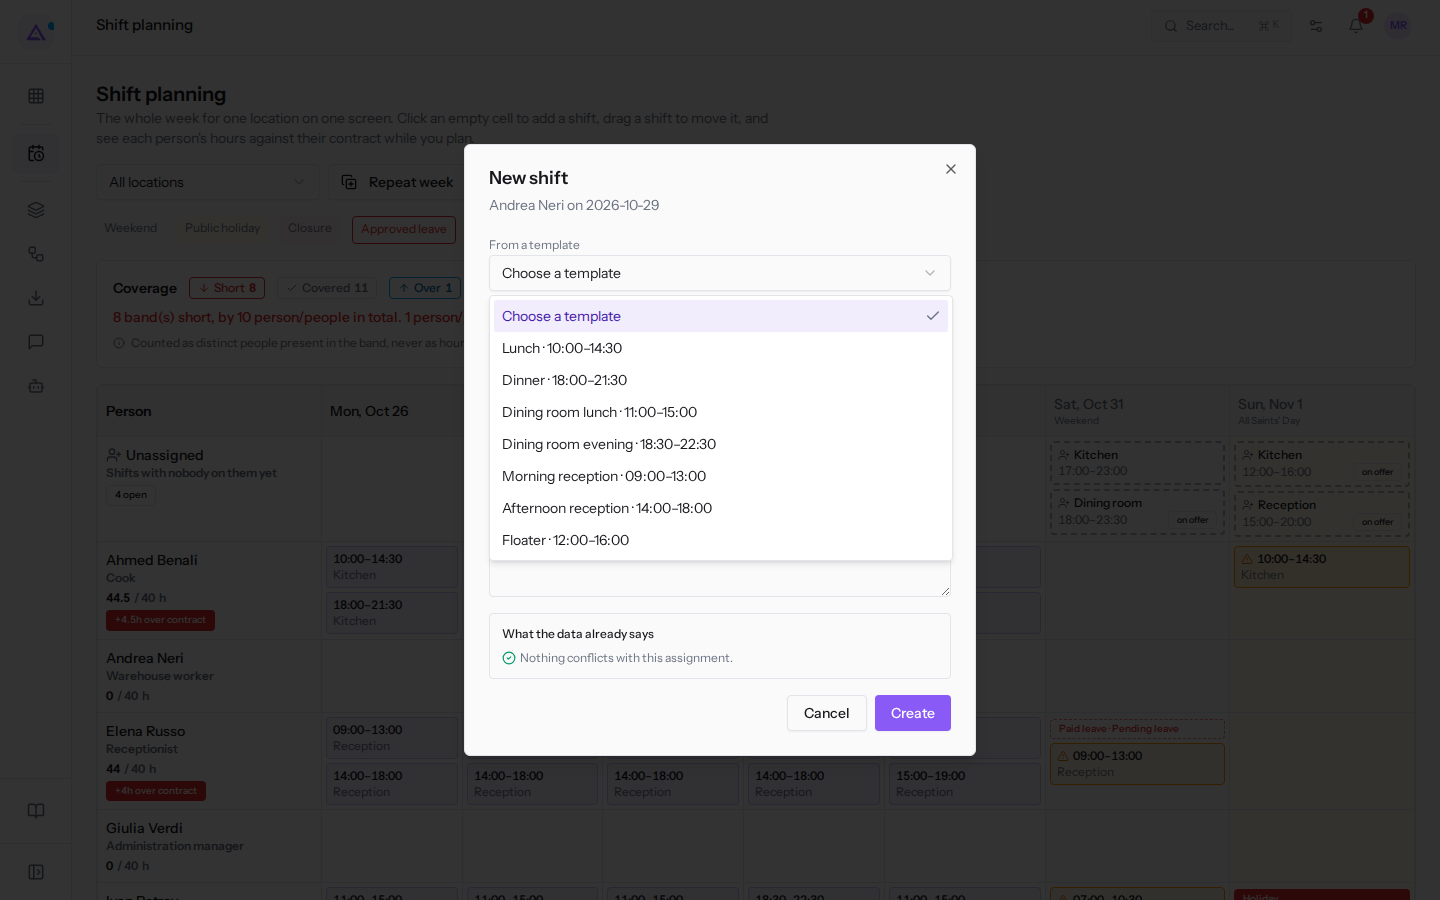
The Choose a template list shows only active templates, for example Lunch, Dinner, Dining room lunch, Dining room evening, Morning reception, Afternoon reception and Floater.
Note: a shift created from a template is a normal shift. If you later edit or retire the template, the shift does not change.
See it on your company, not on a slide deck.
In 30 minutes we map the software you use today.We show you how much work and how much margin Archimedes gives back.
Show me on my business →What industry are you in?
One tap — it lets us prepare the demo around your world.
What tools do you use today?
Pick the ones you recognise — or just type them. It helps us show you how they migrate.
Last step: your details.
We reply within one working day — and right after, if you like, you pick the demo slot yourself.
We couldn't send your request. Try again, or write to us at [email protected].
By sending, you agree to your data being processed so we can get back to you about the demo. Privacy notice.
Preview form — nothing is sent from this page.
Want to schedule the demo now?
Your call: book the slot you prefer yourself, or we'll call you to arrange it.
Live availability, 30 minutes, instant confirmation. The calendar opens in a new tab.
Lock in your slot ↗We'll get back to you within one working day — and we'll join the call already knowing your world.
The calendar is open in another tab: pick a slot and the demo is booked. Can't see it? Reopen it ↗
Preview page: nothing was sent.
Our calendar is live: take the slot that suits you and the demo is booked. 30 minutes, instant confirmation, no waiting.
Lock in your slot ↗