Chat
All modules
Writing and formatting a message
Chat · 4 of 16 · 8 min read
The box at the bottom of every conversation is where you write and send messages. You can write them in a channel, for example #events, or in a direct message, for example with Giulia Verdi. From the box you format text, attach files, insert emoji, mention colleagues and teams, and record voice messages.
Writing and sending a message
The message box is located below the messages of the open conversation. The placeholder text shows the conversation name, for example «Message events».
- Open Chat and choose a conversation in the sidebar, for example
#events.
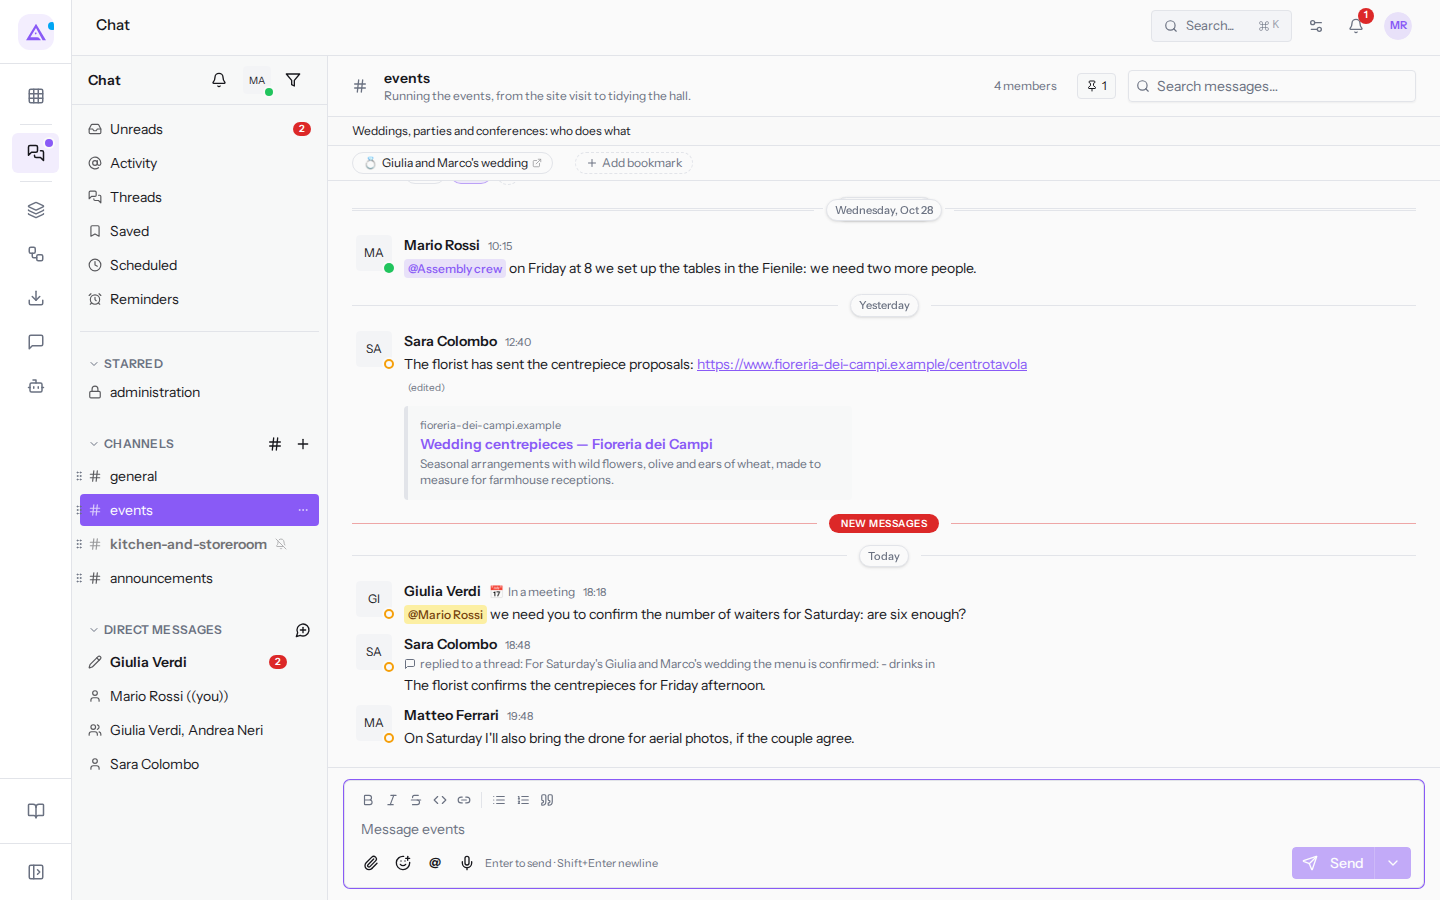
- Write the text in the box. To go to a new line without sending, press Shift+Enter.
- Press Enter or click Send. The box empties and the message appears in the conversation.
Below the box the reminder Enter to send · Shift+Enter newline appears.
- The Send button remains inactive until the box contains text or an attached file.
- The ▾ arrow next to Send schedules the sending for later: In 1 hour, Tomorrow morning, Next Monday or Custom date & time…, up to 30 days in advance. See Saving, setting reminders, and scheduling a message.
- If you press the up arrow key with the box empty, you edit your last message: handy for correcting a mistake you just sent.
The box is not always there. In a channel where only channel owners and administrators can write, such as #announcements, other members find in its place the text «Only channel admins can post here. You can still react and reply in threads.». In a public channel you haven't joined you find instead «You're previewing this channel. Join to post and get notified.» and the Join channel button.
Formatting text
Formatting makes a long message easier to read: bold highlights key information, a list separates items. The message about the menu for Giulia and Marco's wedding in #events is an example of this: the event name is in bold and the courses are a bulleted list.
- Select the text in the box, or position the cursor where you will start writing.
- Click an icon in the bar above the box. Hovering over an icon shows its name.
The bar icons, from left:
- B, Bold (Ctrl+B, ⌘B on Mac).
- I, Italic (Ctrl+I, ⌘I on Mac).
- The struck-through S, Strikethrough (Ctrl+Shift+X, ⌘⇧X on Mac): for example for outdated information you want to leave visible.
- «</>», Code (Ctrl+Shift+C, ⌘⇧C on Mac): fixed-width character, for a code or document number.
- The chain, Link: opens the box for inserting a link (see the next section).
- Bulleted list and Numbered list: transform lines into a list.
- The quotation marks, Quote: to report someone else's words.
A second click on the same icon removes the formatting.
Inserting a link
The chain icon (Link) inserts a link with a text of your choice instead of the full address, keeping the message readable.
- Click the chain icon in the formatting bar.
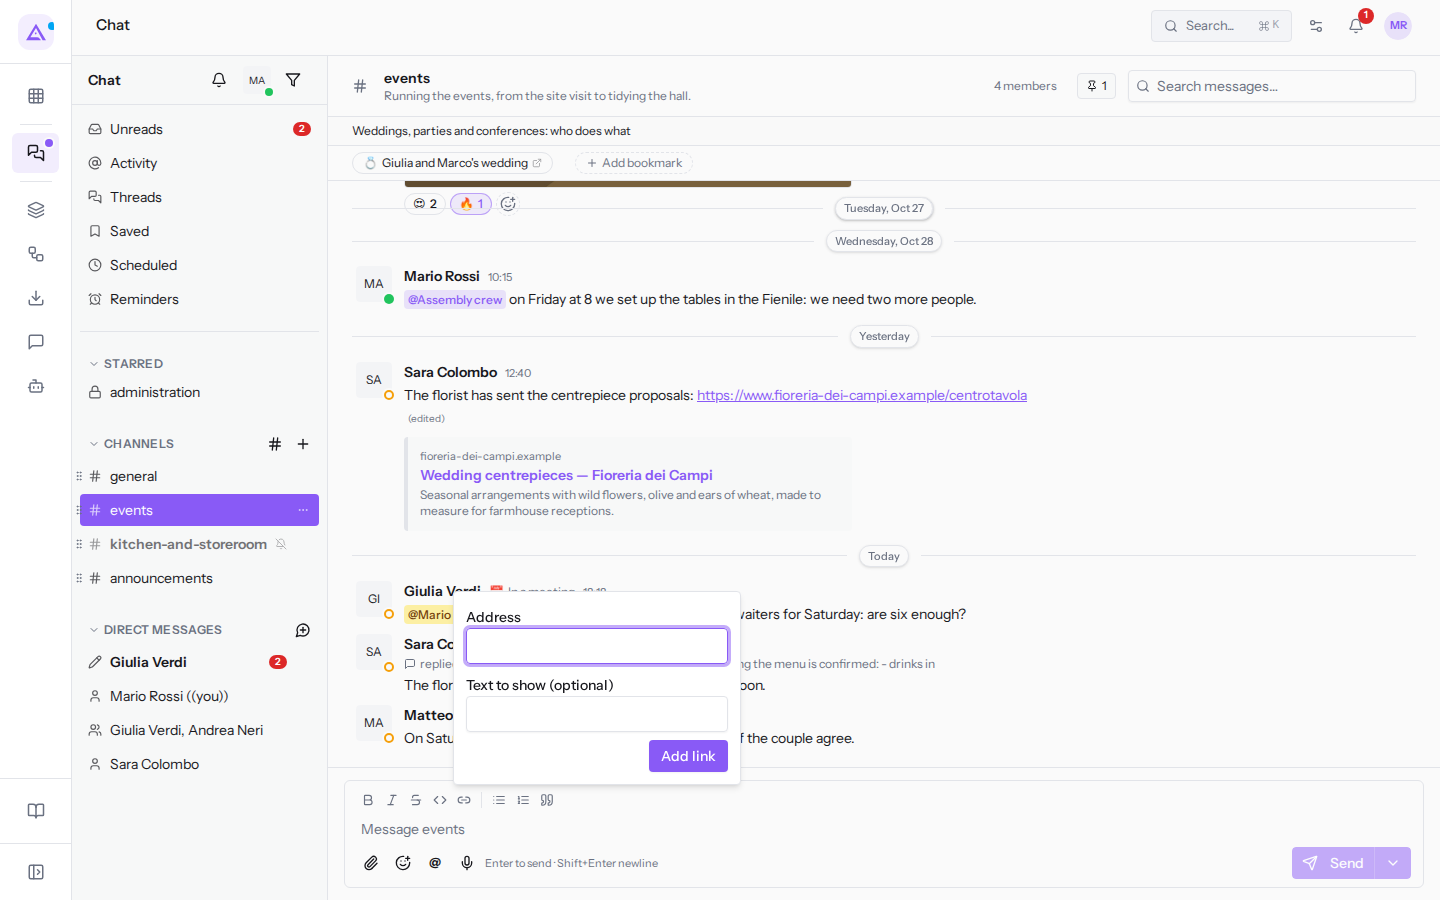
- Fill in the fields and click Add link.
The box fields are:
- Address: the page address, for example
https://www.fioreria-dei-campi.example/centrotavola. - Text to show (optional): the text that is clicked in the message. If you leave it empty, the message shows the address.
The link to an external site shows a preview below the message with the page title and description, like the florist link in #events; the link to an application record becomes a card. See Sharing invoices, tasks and links.
Attaching a file
You can attach one or more files to the message, with or without text.
- Click the paperclip icon below the box and choose the files. Alternatively drag the files onto the box or paste them with Ctrl+V (⌘V on Mac).
- Each file appears above the box with its name and size. Images have a preview. During upload a progress indicator appears.
- Press Enter or click Send.
To remove a file before sending, click the X next to the file. If you press Enter while a file is still uploading, the message does not send: wait for the upload to finish.
Inserting an emoji
Emoji are inserted from the picker or by typing a colon followed by the name. In addition to standard emoji, the organisation's custom ones are available, such as :vendemmia:, in the CUSTOM section at the top of the picker.
- Click the smiley icon below the box.
- Type in the Search emoji… field to filter the list, for example
vendemmia.
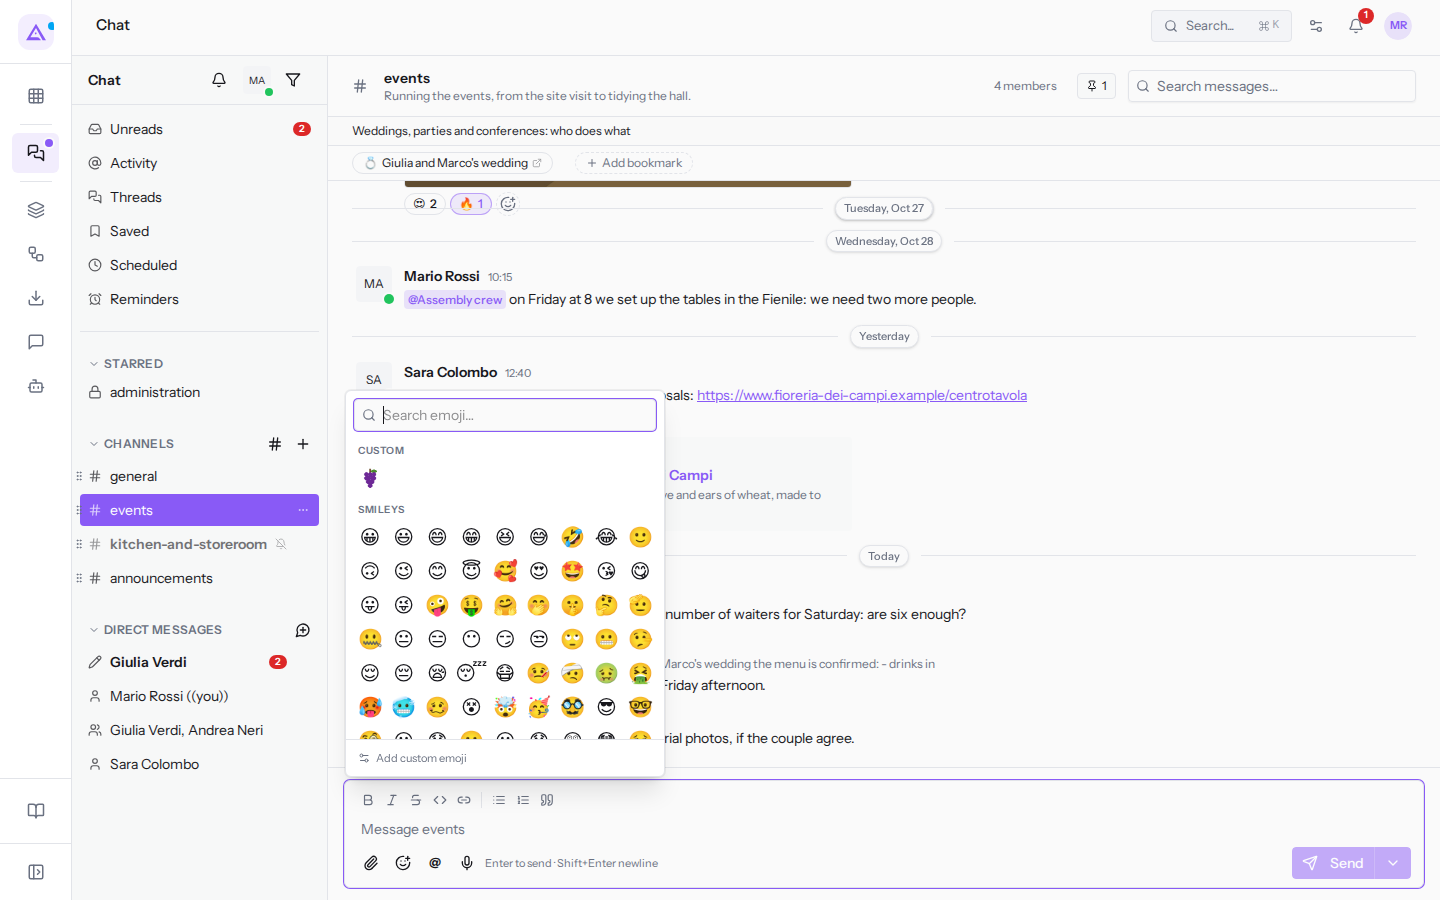
- Click the emoji. It is inserted at the cursor position.
You can also type a colon followed by at least two letters of the emoji name. A list of emoji appears above the box, with custom ones first. Choose the emoji with the arrow keys and press Enter, or click the emoji. Esc closes the list.
Mentioning a person, a team, or the whole channel
A mention sends a notification to the specified person or group and appears in their Activity entry, even if they usually do not receive notifications for every message in that channel. Use a person mention when you need a response from them. Use a team mention to notify all its members. Use @channel or @here only for a notification that concerns the whole channel: it notifies many people at once. Anyone who has muted the conversation does not receive the notification.
- Type @ in the box or click the «@» icon below the box.
- Continue typing the name to filter the list.
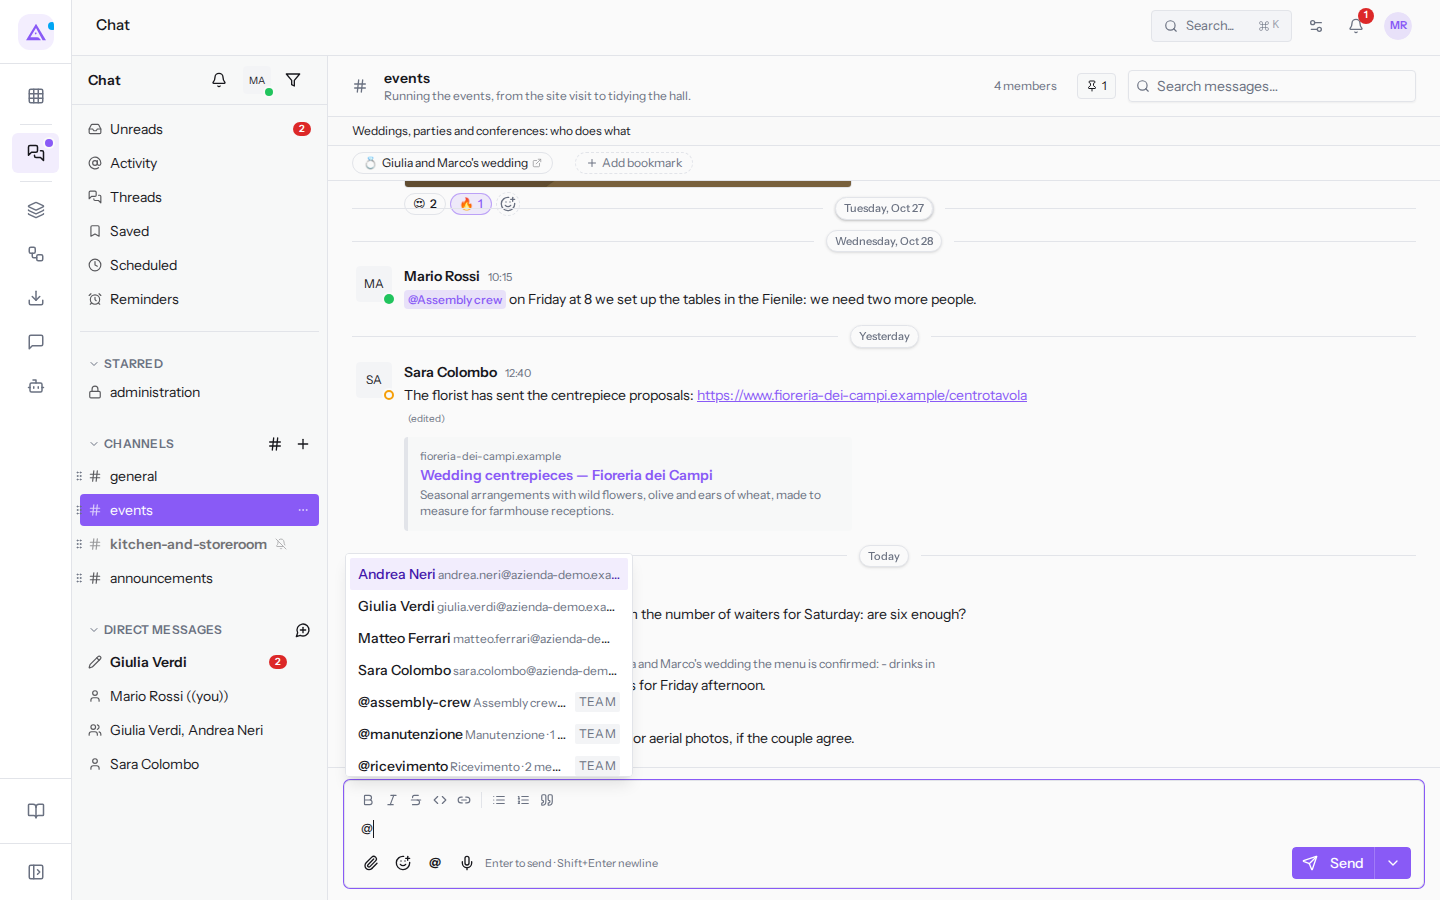
- Choose an entry. The mention is inserted in the text.
The list contains:
- People, with name and email, for example
Giulia Verdi. - Teams, with the TEAM label, the name and number of members. For example
@assembly-crewnotifies all team members: useful when you don't know which of them is on duty. - At the bottom, scrolling down,
@channel(«Notify everyone in this conversation») and@here(«Notify everyone online in this conversation»).
An organisation can restrict @channel, @here and @all to channel owners and administrators. In that case, if you type one of these mentions in a channel where you do not have one of these roles, the text «In this organization only channel owners and admins can notify everyone. @channel, @here and @all in your message will notify nobody.» appears above the box. The message is sent anyway, but without notifications. In direct messages and groups the restriction does not apply.
Inserting a link to a channel
Typing # followed by the name shows the list of channels: it includes channels you are part of and public channels you can join. Choose a channel to insert a link to that channel in the message: whoever reads it reaches it with a click. For example the message pinned in #general links to #events.
Voice messages
A voice message is useful when writing takes too long, for example while you are in the storeroom or in the dining room. The microphone icon is in the box of channels and direct messages, not in the thread reply box.
- Click the microphone icon. The first time, the browser asks permission to use the microphone.
- Speak. A red dot and the elapsed time appear in the box; a recording lasts at most 5 minutes.
- Click Send: the voice message is sent immediately, without a preview. To discard the recording, click the «×» button (Cancel) instead.
Received voice messages appear in the conversation with a player: a button to listen and one for playback speed, initially 1×. The direct message with Giulia Verdi contains one.
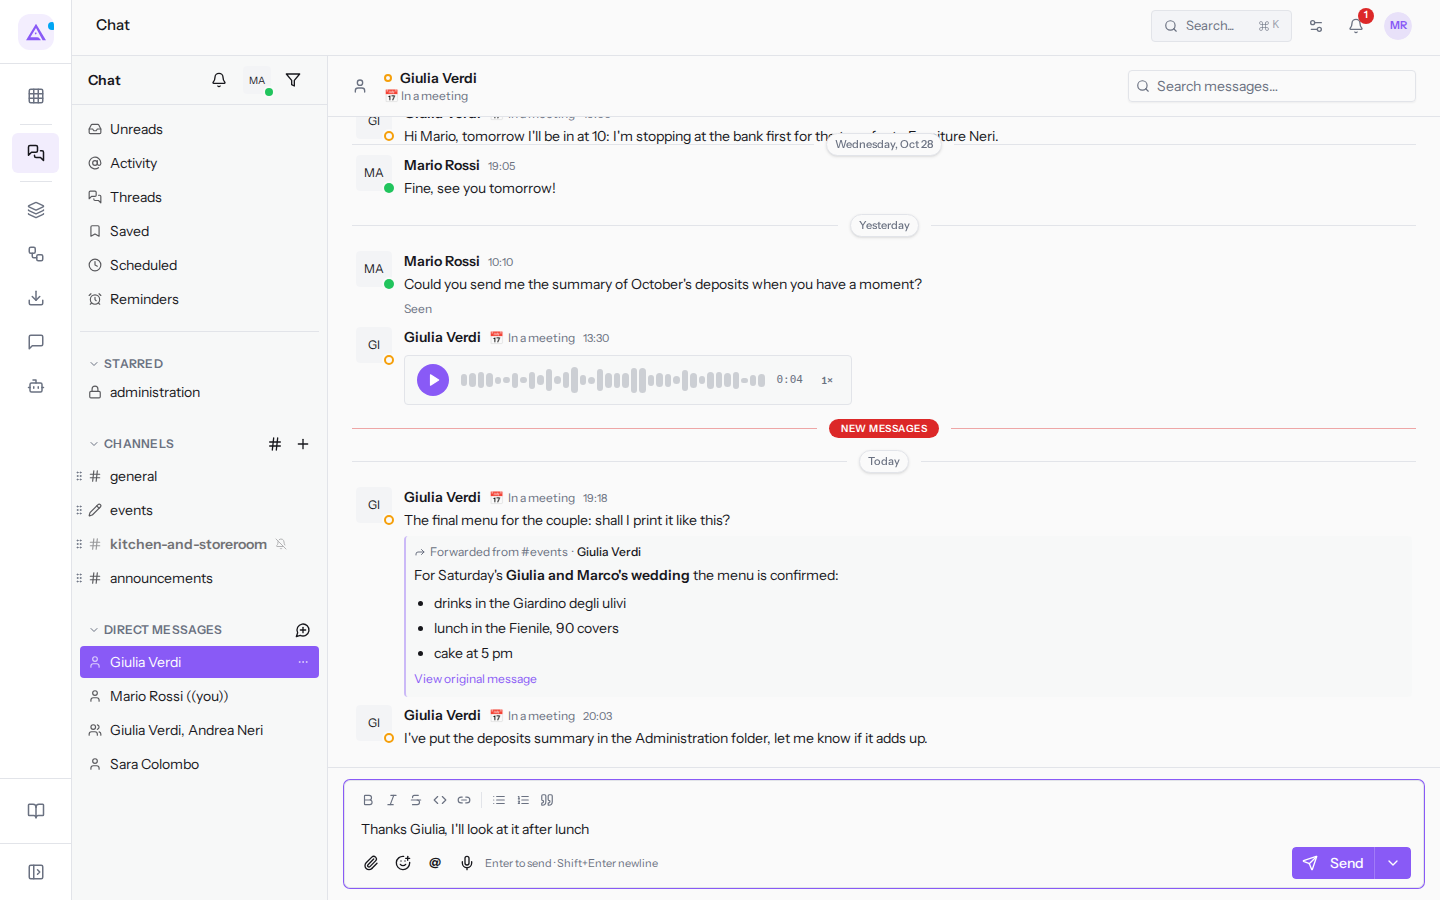
If the browser does not allow recording, the message «Voice recording not supported in this browser» appears; if you have denied the microphone, «Microphone permission denied».
Maximum message length
A message can contain at most 8,000 characters, including formatting characters. A simple emoji counts as one character. For longer text, such as a policy document, attach a file.
- From 7,500 characters onwards, a character counter appears next to Send.
- Above 8,000 characters Send is disabled and the message cannot be sent. Shorten the text or split it into multiple messages.
Drafts
Text you haven't sent remains in the input box as a draft, along with any already uploaded files. Each conversation has its own draft and each thread has its own.
- If you switch to another conversation, the draft is saved. When you return, you'll find it in the input box.
- The draft is also saved on the server, so you'll find it on another device.
- A conversation with a draft shows the pencil icon in the sidebar, for example the direct message with
Giulia Verdi, which contains «Thanks Giulia, I'll look at it after lunch». - When you send the message, the draft is deleted.
See it on your company, not on a slide deck.
In 30 minutes we map the software you use today.We show you how much work and how much margin Archimedes gives back.
Show me on my business →What industry are you in?
One tap — it lets us prepare the demo around your world.
What tools do you use today?
Pick the ones you recognise — or just type them. It helps us show you how they migrate.
Last step: your details.
We reply within one working day — and right after, if you like, you pick the demo slot yourself.
We couldn't send your request. Try again, or write to us at [email protected].
By sending, you agree to your data being processed so we can get back to you about the demo. Privacy notice.
Preview form — nothing is sent from this page.
Want to schedule the demo now?
Your call: book the slot you prefer yourself, or we'll call you to arrange it.
Live availability, 30 minutes, instant confirmation. The calendar opens in a new tab.
Lock in your slot ↗We'll get back to you within one working day — and we'll join the call already knowing your world.
The calendar is open in another tab: pick a slot and the demo is booked. Can't see it? Reopen it ↗
Preview page: nothing was sent.
Our calendar is live: take the slot that suits you and the demo is booked. 30 minutes, instant confirmation, no waiting.
Lock in your slot ↗