Helpdesk
All modules
Configure boards and their stages
Helpdesk · 13 of 15 · 7 min read
Boards split tickets by support flow. Stages are the columns of each board. In Helpdesk › Settings you create boards and choose the default one, order and configure stages, and move tickets in bulk from one stage to another. For example, the board Customer support collects bookings, invoices and complaints, and the board Room and hall maintenance collects faults.
Before you start: Settings is visible only to support managers (Helpdesk Manager group). Operators see stages and boards but cannot edit them.
Helpdesk settings
The Helpdesk Settings page has the subtitle "Configure stages, tags and teams for your tickets." You configure boards and stages in the Boards, Stages and Bulk Action tabs.
- Open Helpdesk › Settings.
- Press the tab you need: Boards, Stages or Bulk Action.
The other tabs on the page are Workflows, Tags, Teams, Custom Fields and Front desk setup.
Boards
A board is a kanban of its own, with its own stages, workflow and tickets. A ticket created without naming a board goes to the default board. The help text at the top of the tab reminds you of this.
How to choose:
- If two groups of requests follow different steps, create one board for each. For example
Room and hall maintenancehas the stagesReported,Being repaired,Waiting for the supplierandRepaired. - If requests follow the same steps, use one board and tell them apart with types, tags or teams.
- Make default the board that receives most tickets.
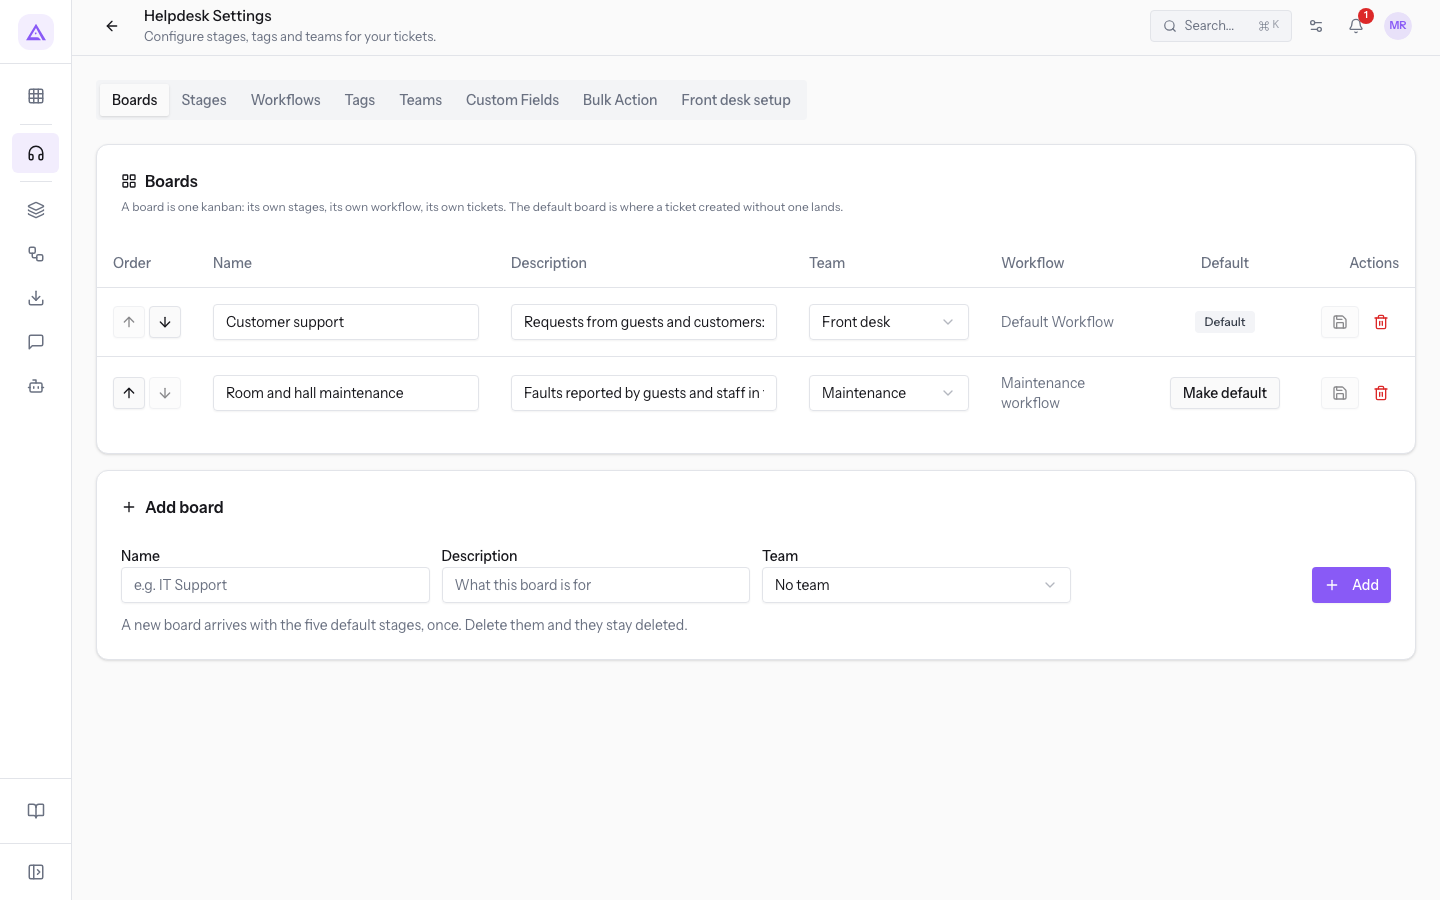
The list shows one row per board, with these columns:
- Order: the Move board up and Move board down buttons change the board's position. The product confirms with Board order saved.
- Name: the board name, such as
Customer support. - Description: the What this board is for field, editable in the row. On
Room and hall maintenanceit readsFaults reported by guests and staff in the halls, the rooms and the garden. - Team: the board's team, chosen from the team list (Front desk or Maintenance), or No team.
- Workflow: the workflow assigned to the board. You assign it in the Workflows tab.
- Default: marks the default board. The other rows have a Make default button. In the demo organization the default is
Customer support.
Adding a board
The last row of the list is used to create a new board.
- In the Boards tab, type the board name in the field with the example text
e.g. IT Support. - Fill in What this board is for.
- Choose the team, or leave No team.
- Press Add. The product confirms with Board created.
A new board starts with the five default stages, only once. If you delete these stages, they stay deleted.
Note: if a board has no stages, the Stages tab shows "This board has no stages. Add one below — the defaults are not coming back on their own."
Deleting a board
Press Delete board on the board's row. The product confirms with Board deleted.
The product refuses the deletion in two cases:
- The board is the default one: "This is the default board. Make another board the default first."
- The board still contains tickets: the message names the board and the number of tickets and asks "Move them to another board first."
Stages
Stages are the columns of the board, in the Pipeline. Each board has its own stages. Two options decide how a stage behaves.
- Choose Fold for stages you don't need to see every day, for example
Waiting for the customer. The column starts collapsed on the board. - Choose Closing for stages that mean the work is finished, such as
SolvedandClosedinCustomer support, orRepairedinRoom and hall maintenance. A ticket moved into a closing stage is marked as resolved. - If you move a ticket from a closing stage to an open stage, the ticket is reopened: the resolution and closing dates are cleared.
- In the Stages tab, choose the board in the Board field, such as
Room and hall maintenance.
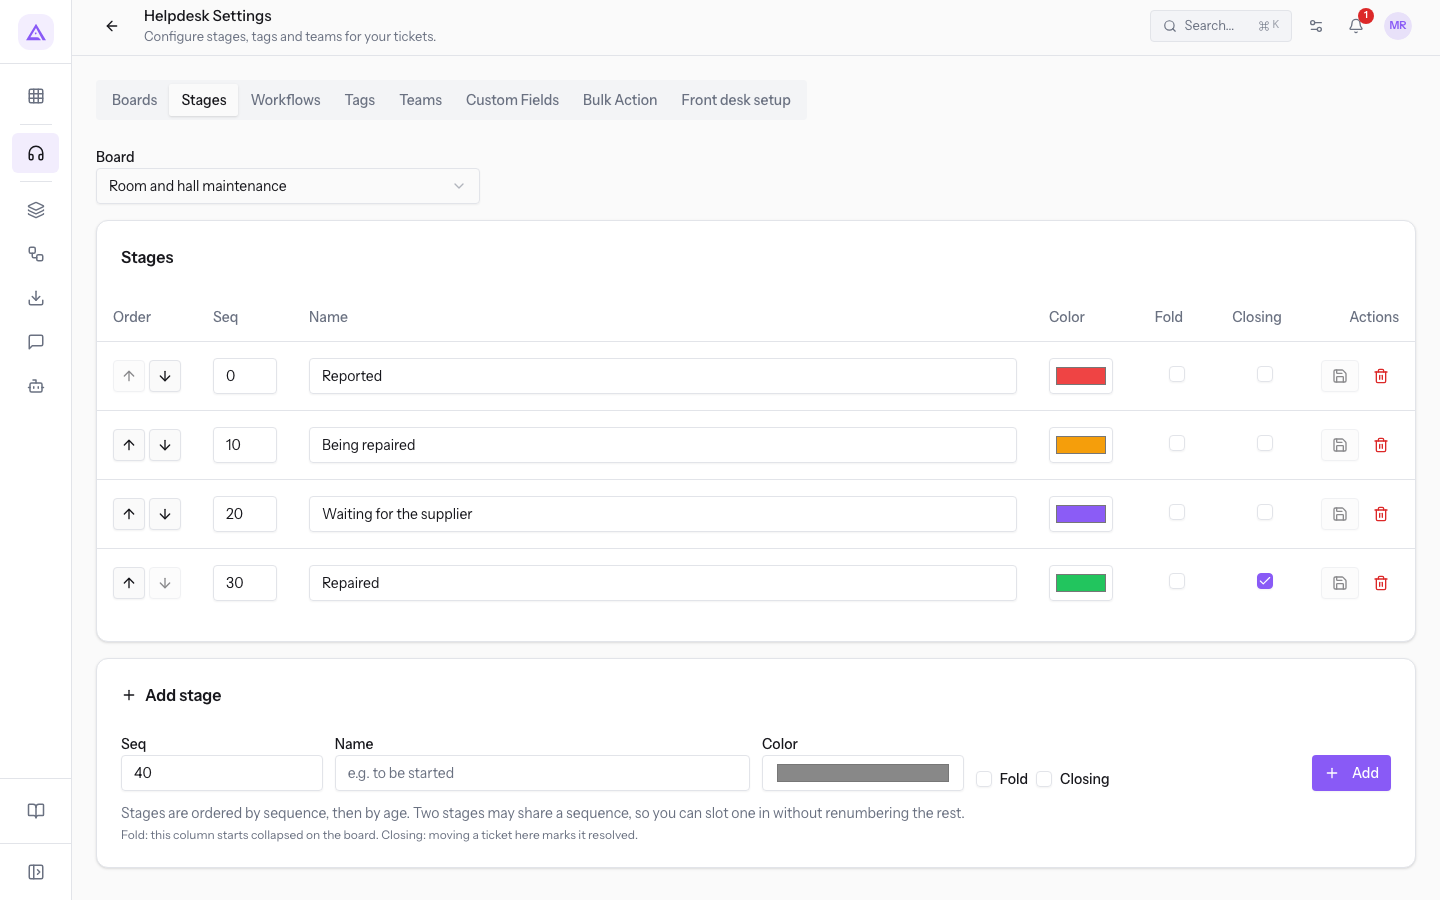
The list shows the board's stages, with these columns:
- Order: the Move stage up and Move stage down buttons change the stage's position. The product confirms with Stage order saved.
- Seq: the stage's sequence. Stages are sorted by sequence and, when equal, by age. Two stages can have the same sequence: this lets you insert a stage without renumbering the others.
- Name: the stage name. A board cannot have two stages with the same name: "This board already has a stage with that name."
- Color: the stage's color.
- Fold: the column starts collapsed on the board. The checkbox help says "This column is collapsed by default on the board."
- Closing: a ticket moved into this stage is considered resolved.
The text below the list summarizes the two options: "Fold: this column starts collapsed on the board. Closing: moving a ticket here marks it resolved."
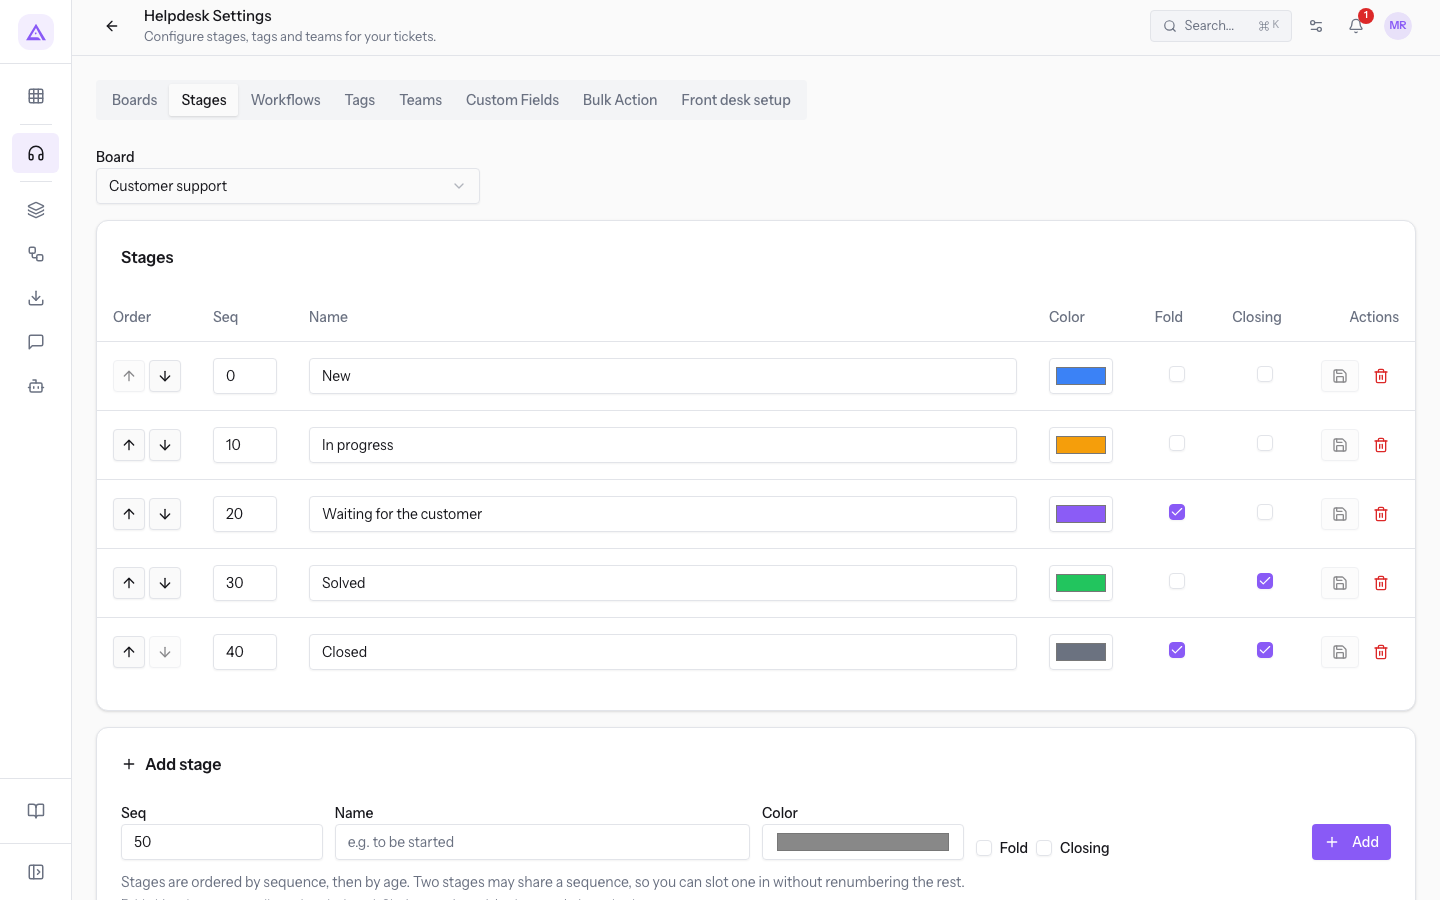
Important: if you change Closing on a stage that contains tickets, the change applies only to future moves. Tickets already in the stage keep their resolution date. The product shows this with the number of affected tickets.
Important: if no stage of the board is marked Closing, the tab warns that a ticket cannot be concluded there: Close would record the resolution date and leave the ticket in an open column. Tick Closing on the stage that marks completed work.
Adding a stage
The last row of the list is used to create a new stage in the chosen board.
- Type the stage name in the field with the example text
e.g. to be started. - Tick Fold or Closing if you need them.
- Press Add. The product confirms with Stage created.
Note: if the board has a workflow with restrictions, the new stage starts without restrictions. No restricted stage can move to the new stage until you tick its column in the Workflows tab.
Deleting a stage
Press Delete stage on the stage's row. The product confirms with Stage deleted.
A stage that still contains tickets cannot be deleted. The message names the stage and the number of tickets and asks you to move them first with Bulk Action.
Bulk action
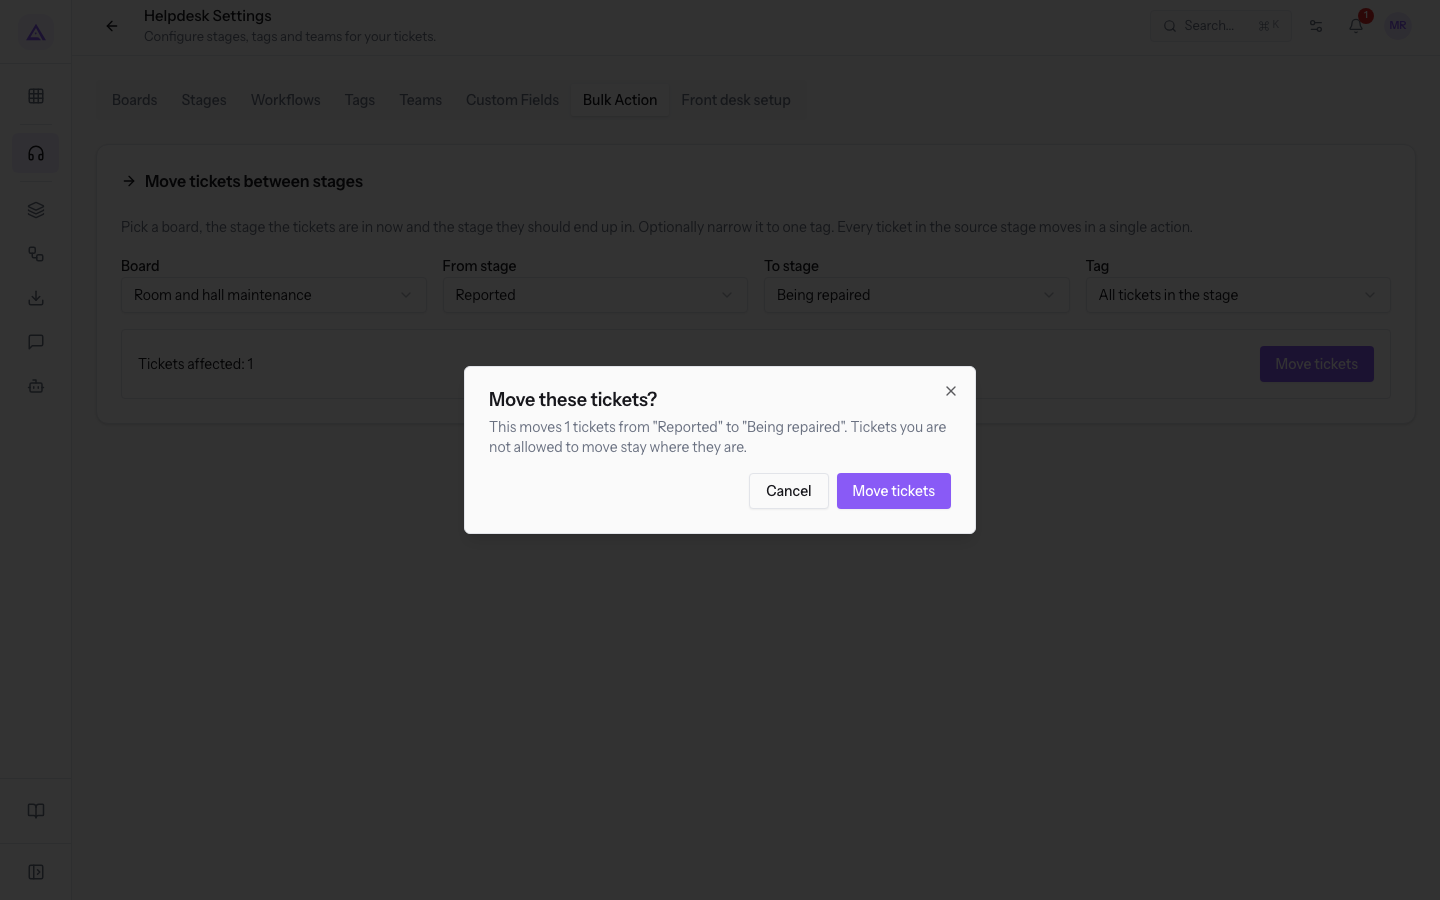
The Bulk Action tab moves all tickets of one stage to another stage of the same board in a single step. You can limit the move to tickets with a tag. Use it to empty a stage before deleting it, or to advance a group of tickets.
- In the Bulk Action tab, choose the board in the Board field, for example
Room and hall maintenance. - In From stage choose the stage where the tickets are now, such as
Reported. - In To stage choose the target stage, such as
Being repaired. - In Tag leave All tickets in the stage, or choose a tag.
- Check the number of affected tickets shown by the tab.
- Press Move tickets.
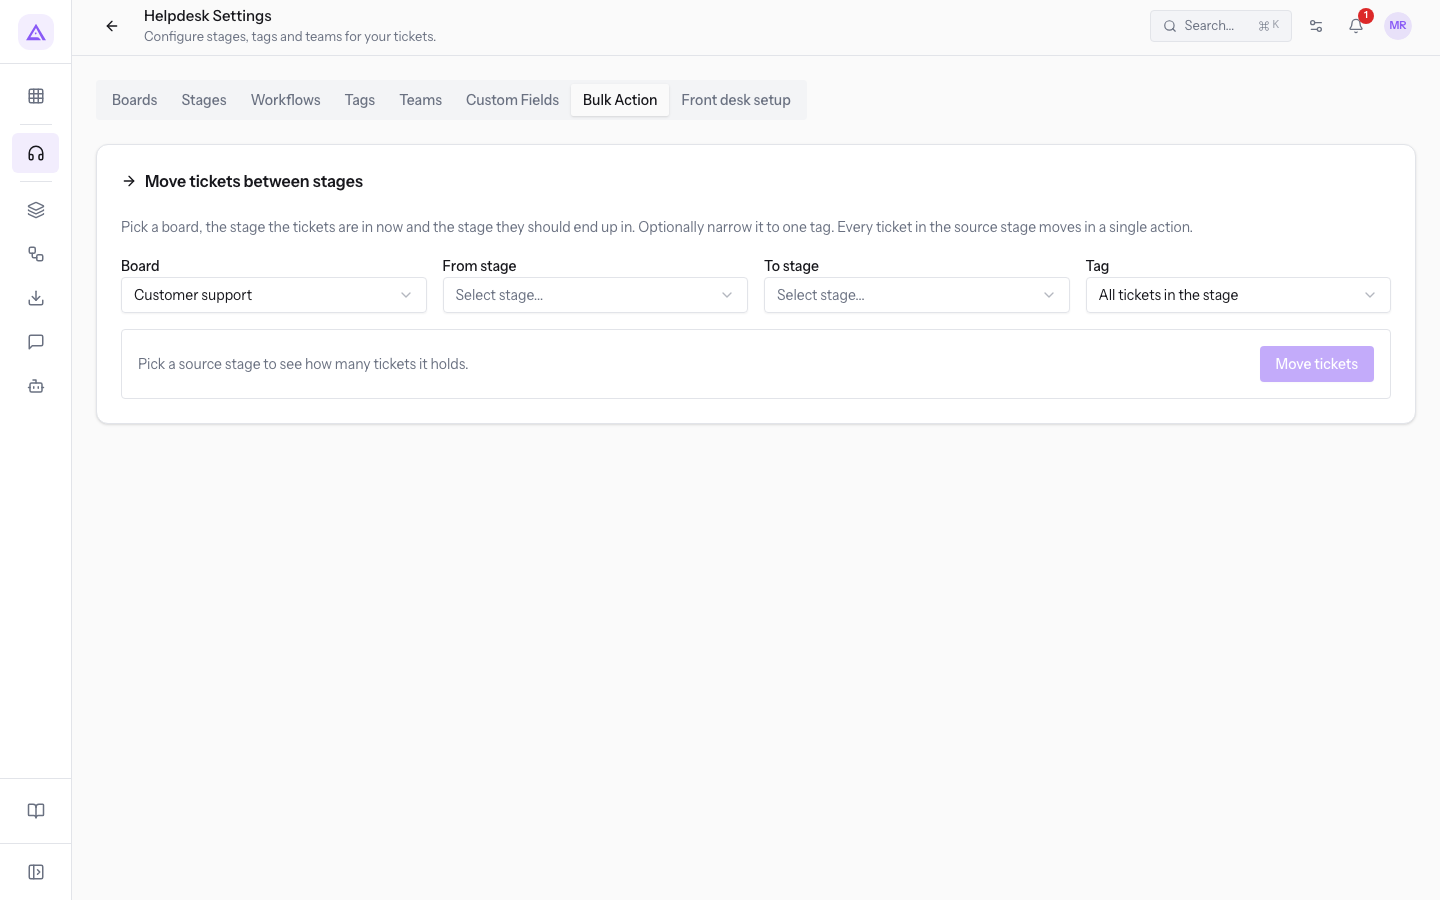
The tab's fields:
- Board: the board of the tickets to move.
- From stage: the starting stage. Until you choose it, the tab shows "Pick a source stage to see how many tickets it holds."
- To stage: the target stage. If it is a closing stage, the tab warns that the moved tickets are marked as resolved.
- Tag: limits the move to tickets with one tag. With All tickets in the stage, all tickets of the starting stage are moved.
The Move these tickets? dialog opens. It shows how many tickets will be moved and between which stages. Tickets you don't have permission to move stay where they are.
- Press Move tickets to confirm, or Cancel.
See it on your company, not on a slide deck.
In 30 minutes we map the software you use today.We show you how much work and how much margin Archimedes gives back.
Show me on my business →What industry are you in?
One tap — it lets us prepare the demo around your world.
What tools do you use today?
Pick the ones you recognise — or just type them. It helps us show you how they migrate.
Last step: your details.
We reply within one working day — and right after, if you like, you pick the demo slot yourself.
We couldn't send your request. Try again, or write to us at [email protected].
By sending, you agree to your data being processed so we can get back to you about the demo. Privacy notice.
Preview form — nothing is sent from this page.
Want to schedule the demo now?
Your call: book the slot you prefer yourself, or we'll call you to arrange it.
Live availability, 30 minutes, instant confirmation. The calendar opens in a new tab.
Lock in your slot ↗We'll get back to you within one working day — and we'll join the call already knowing your world.
The calendar is open in another tab: pick a slot and the demo is booked. Can't see it? Reopen it ↗
Preview page: nothing was sent.
Our calendar is live: take the slot that suits you and the demo is booked. 30 minutes, instant confirmation, no waiting.
Lock in your slot ↗