Helpdesk
All modules
Manage teams, tags and custom fields for tickets
Helpdesk · 15 of 15 · 5 min read
In the helpdesk settings you define the teams that tickets are assigned to, the tags used to classify them, and the custom fields that add information specific to your business, for example the room concerned or a booking reference.
Before you start: the Helpdesk › Settings entry is visible only to support managers (Helpdesk Manager group). Operators (Helpdesk User group) can see teams, tags and custom fields but cannot edit them.
Teams
A team lets you assign a ticket to a group of people instead of a single person. For each team, choose how tickets are distributed among its members.
Choose the assignment method based on how the group works:
- If tickets should be taken on in turns, choose Round robin: each member receives one ticket in turn.
- If you want to balance the workload, choose Least tickets: the ticket goes to the member with the fewest open tickets in the team; ties are decided by rotation.
- If the manager decides who follows each ticket, choose Manual: nobody is assigned automatically.
Note: a manual reassignment does not move the rotation turn.
- Open Helpdesk › Settings.
- Press the Teams tab.
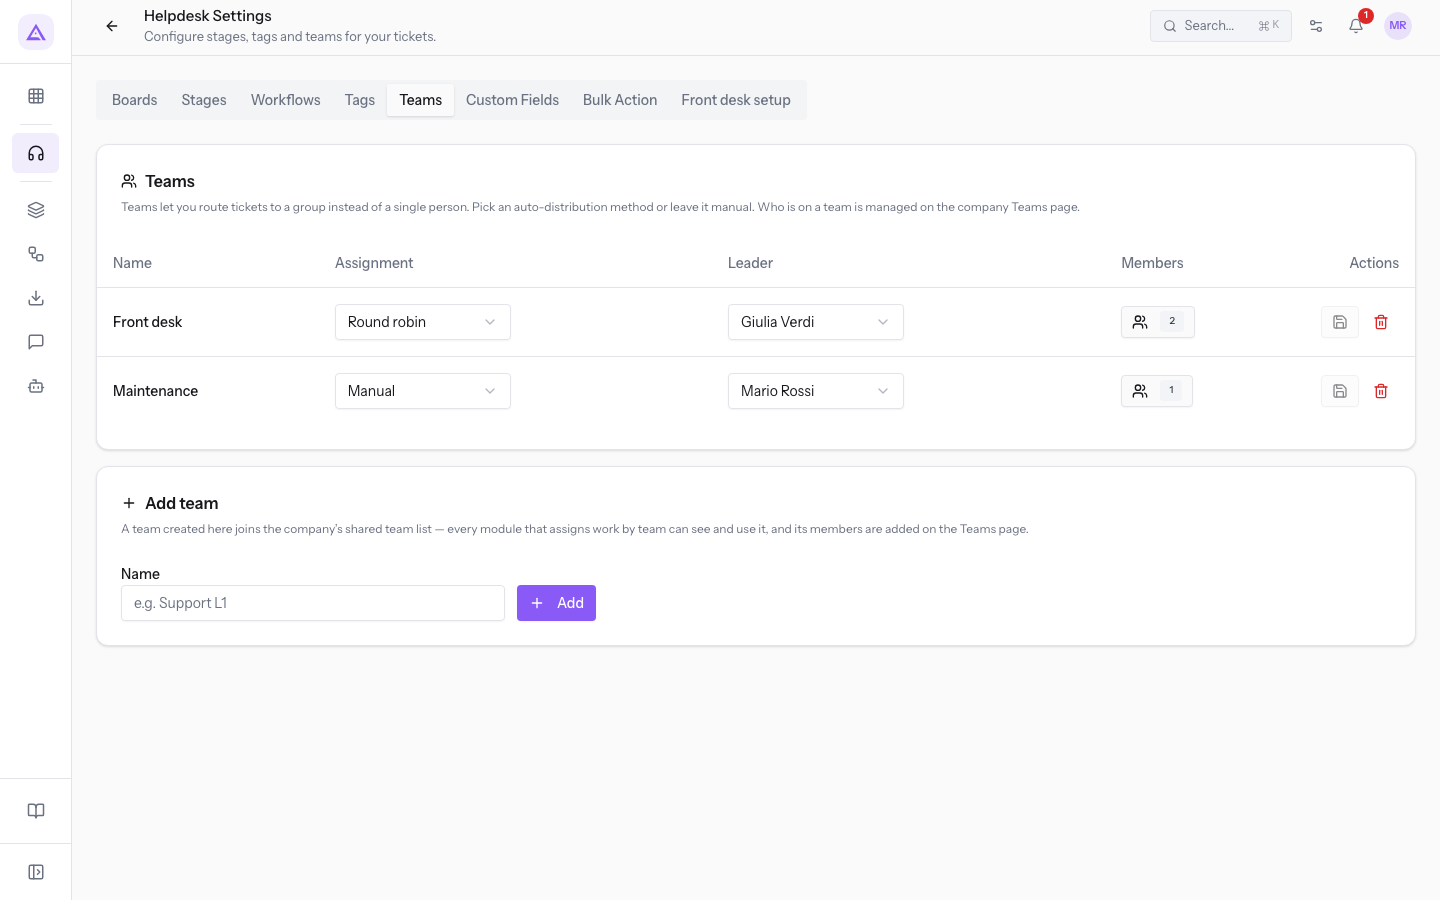
The team list has these columns:
- Name: the team name, for example Front desk or Maintenance.
- Assignment: the assignment method.
- Manual: no automatic assignment.
- Round robin: one ticket in turn to each member.
- Least tickets: the ticket goes to the member with the fewest open tickets.
- Leader: the user responsible for the team, such as Julia Green. If none is set, No leader appears.
- Members: the number of team members. Press the number to see who belongs to the team.
- Actions: the row commands.
In the demo organization, the Maintenance team uses Manual, with leader Martin Ross and one member; the Front desk team uses Round robin, with leader Julia Green and two members.
Adding a team
A team created here is added to the company-wide shared team list: every module that assigns work by team can see and use it.
- In the Teams tab, in the Add team panel, type the team name, for example
Support L1. - Press Add.
- In the new team's row, choose the method in Assignment and the Leader.
Viewing and managing members
Team membership is shared at company level: members are not added in the helpdesk settings but on the company Teams page.
- In the Members column, press the member count of the team, for example 2 for Front desk.
- The window opens with the team name, such as Front desk — Members, showing the name and email of each member.
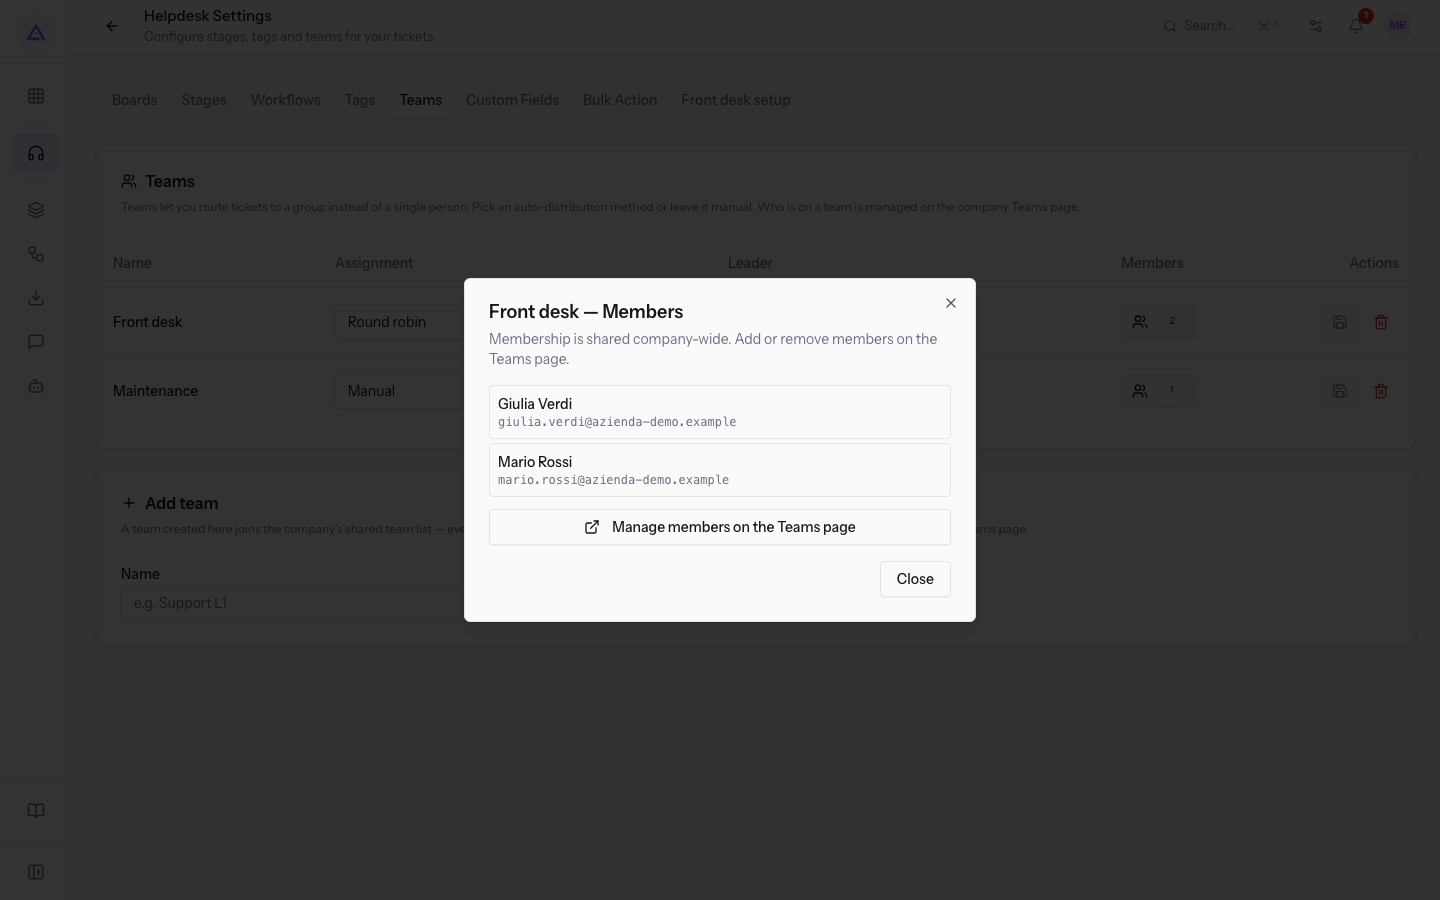
- To add or remove members, press Manage members on the Teams page. To return to the list, press Close.
Note: a team with no members shows No members yet. and the link No members yet — add some on the Teams page.
Tags
Tags classify tickets, for example Event hall or To call back, and appear on the ticket page next to the subject.
Important: tickets use the shared tag catalog, valid across the whole workspace. The tags in the Tags tab are the old helpdesk-only list, still editable. For shared tags, press Manage shared tags.
- Open Helpdesk › Settings.
- Press the Tags tab.
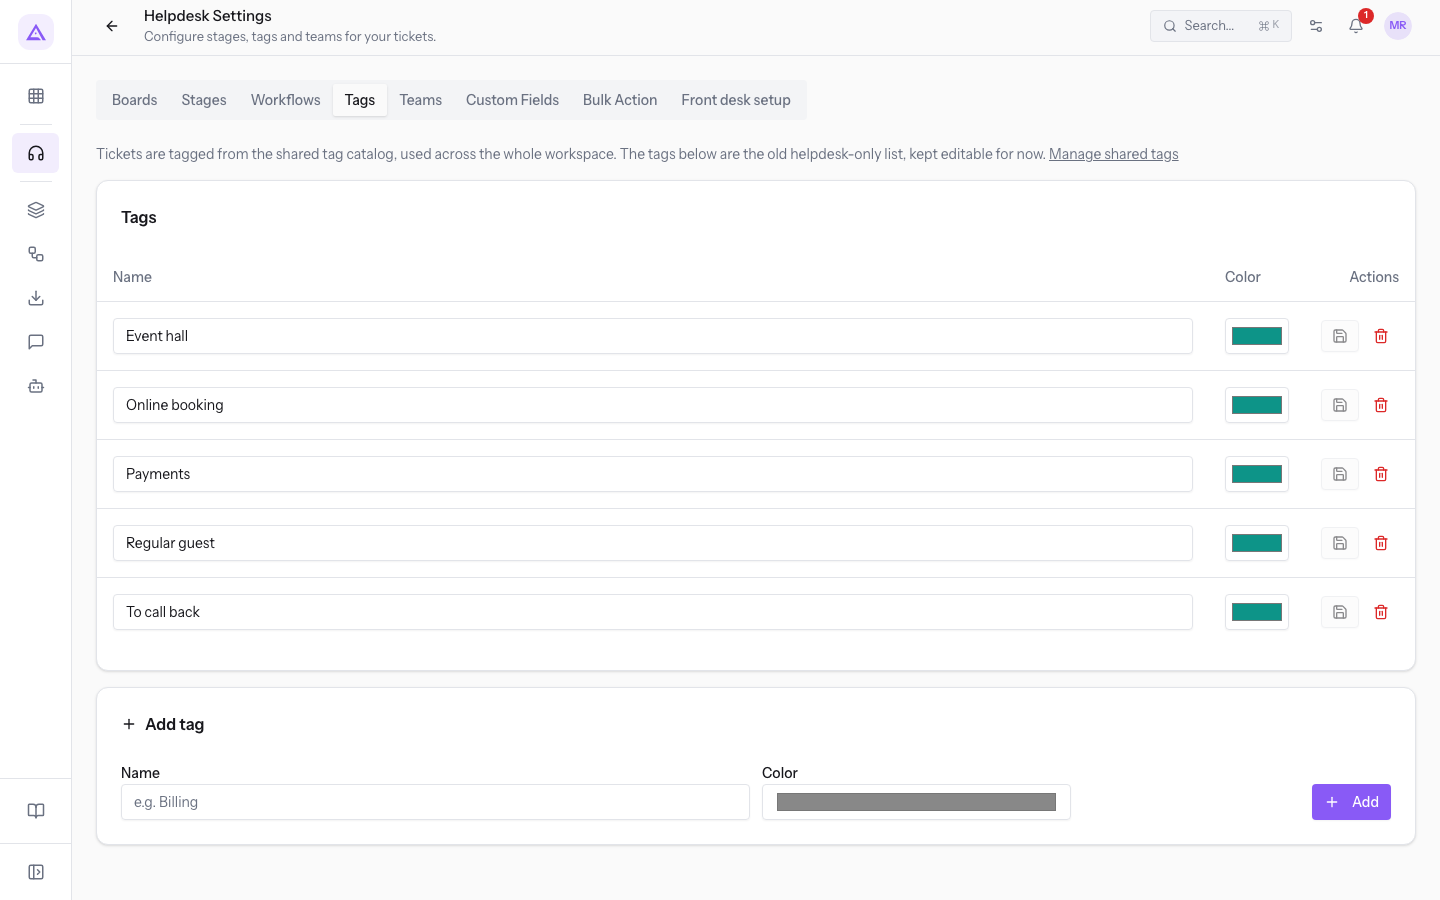
The tag list has these columns:
- Name: the tag name.
- Color: the color the tag shows on tickets.
To add a tag to the list:
- In the Add tag panel, type the name, such as
Billing. - Press Add.
Custom fields
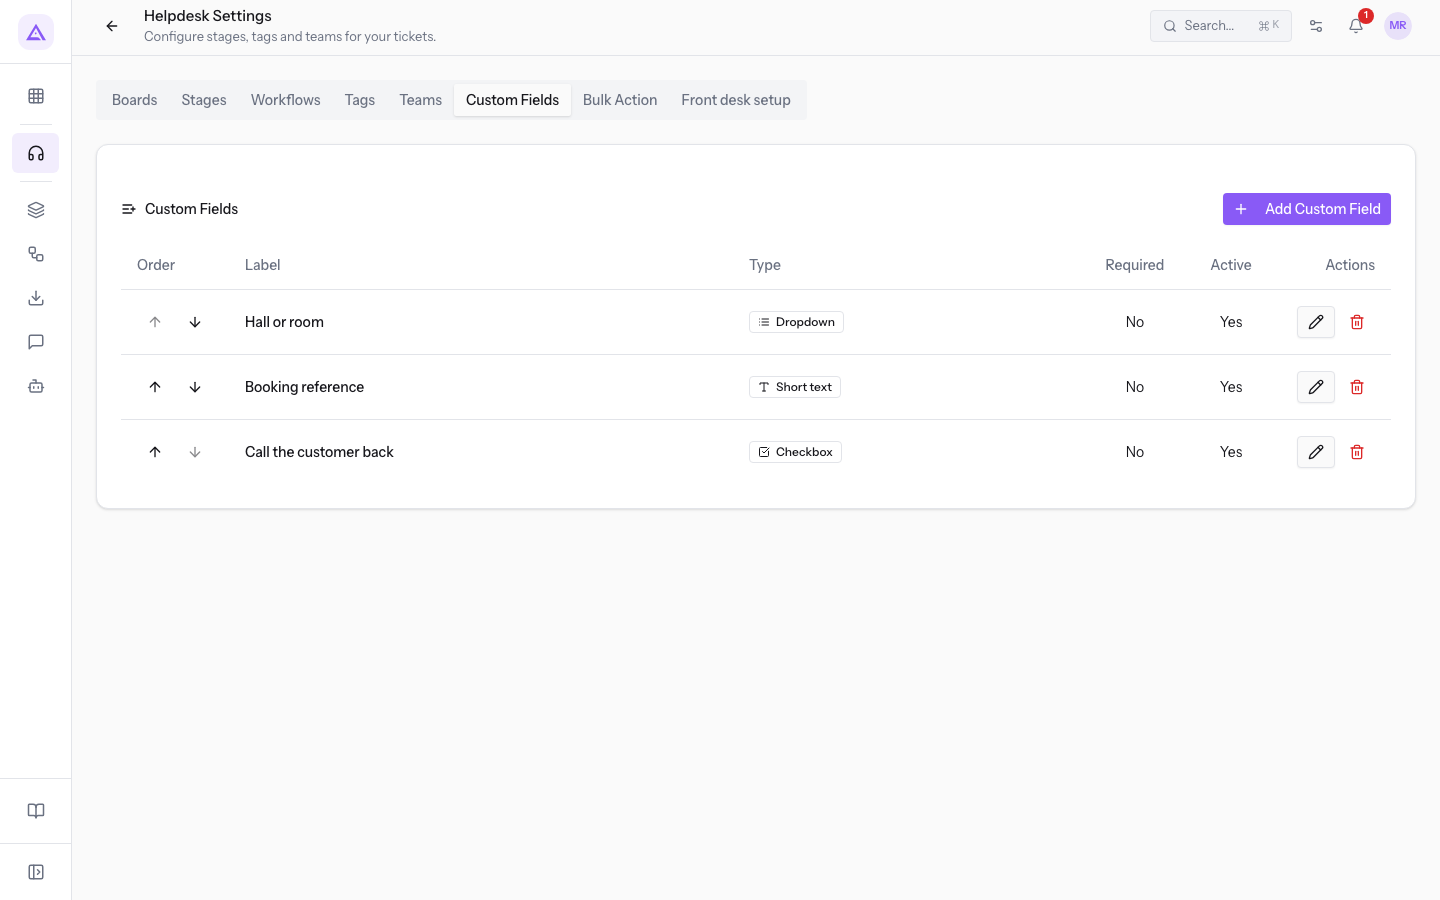
Custom fields add to the ticket information that the standard fields do not cover. In the demo organization, three fields are defined:
- Hall or room, of type Dropdown, with the options Barn, Giardino degli ulivi, Hall del Camino, Terrazza, Rooms.
- Booking reference, of type Short text.
- Call the customer back, of type Checkbox.
Choose the type based on the data to collect:
- If the value is one of a few fixed values, choose Dropdown and list the options.
- If the value is a code or a short note, choose Short text; for long text, choose Paragraph.
- If a yes or no is enough, choose Checkbox.
- Open Helpdesk › Settings.
- Press the Custom Fields tab. The list shows the defined fields.
Adding a custom field
- Press Add Custom Field. The Add Custom Field window opens.
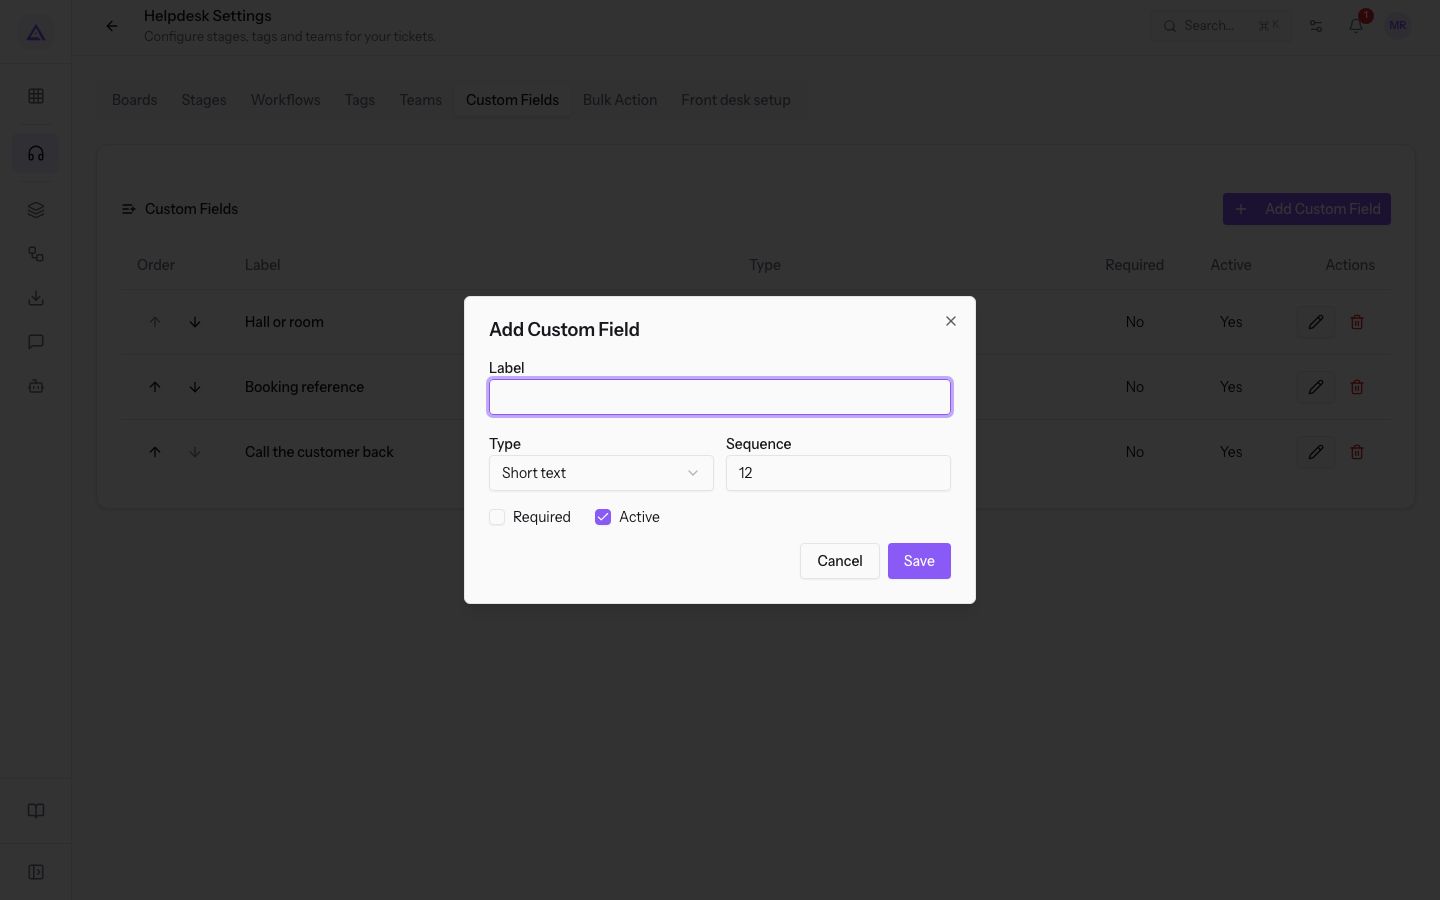
- Fill in the fields and press Save. The message Custom field created appears. To leave without saving, press Cancel.
The window contains these fields:
- Label: the field name as it appears on the ticket, for example Booking reference. The field is required.
- Type: the data type. The proposed value is Short text.
- Short text
- Paragraph
- Number
- Currency
- Date
- Date and time
- Checkbox
- Dropdown
- Labels
- URL
- Sequence: appears in the window for every type.
- Options: appears with the Dropdown type. Write one option per line.
- Required: checkbox, off when you create the field.
- Active: checkbox, on when you create the field.
Editing or deleting a custom field
- In the field's row, press the edit icon. The Edit Custom Field window opens, with the same fields as creation.
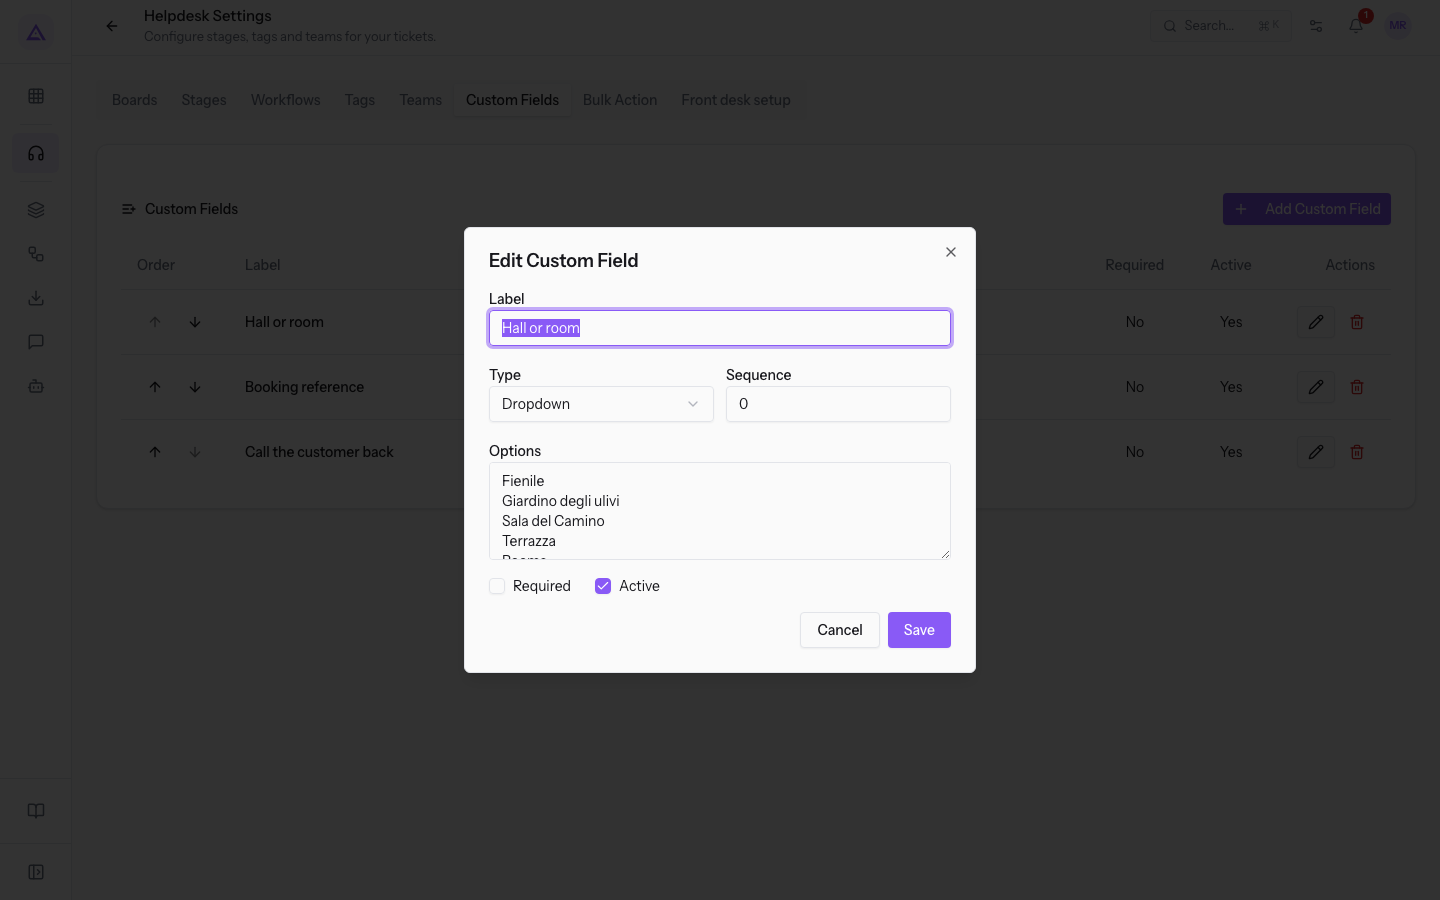
- Change the values and press Save. The message Custom field saved appears.
- To delete a field, press the delete icon in its row and confirm in the Delete custom field? window. The message Custom field deleted appears.
Use the arrows in the row to move a field up or down in the list.
Where custom fields appear
On a ticket page, custom fields appear in the Custom Fields panel, below the description.
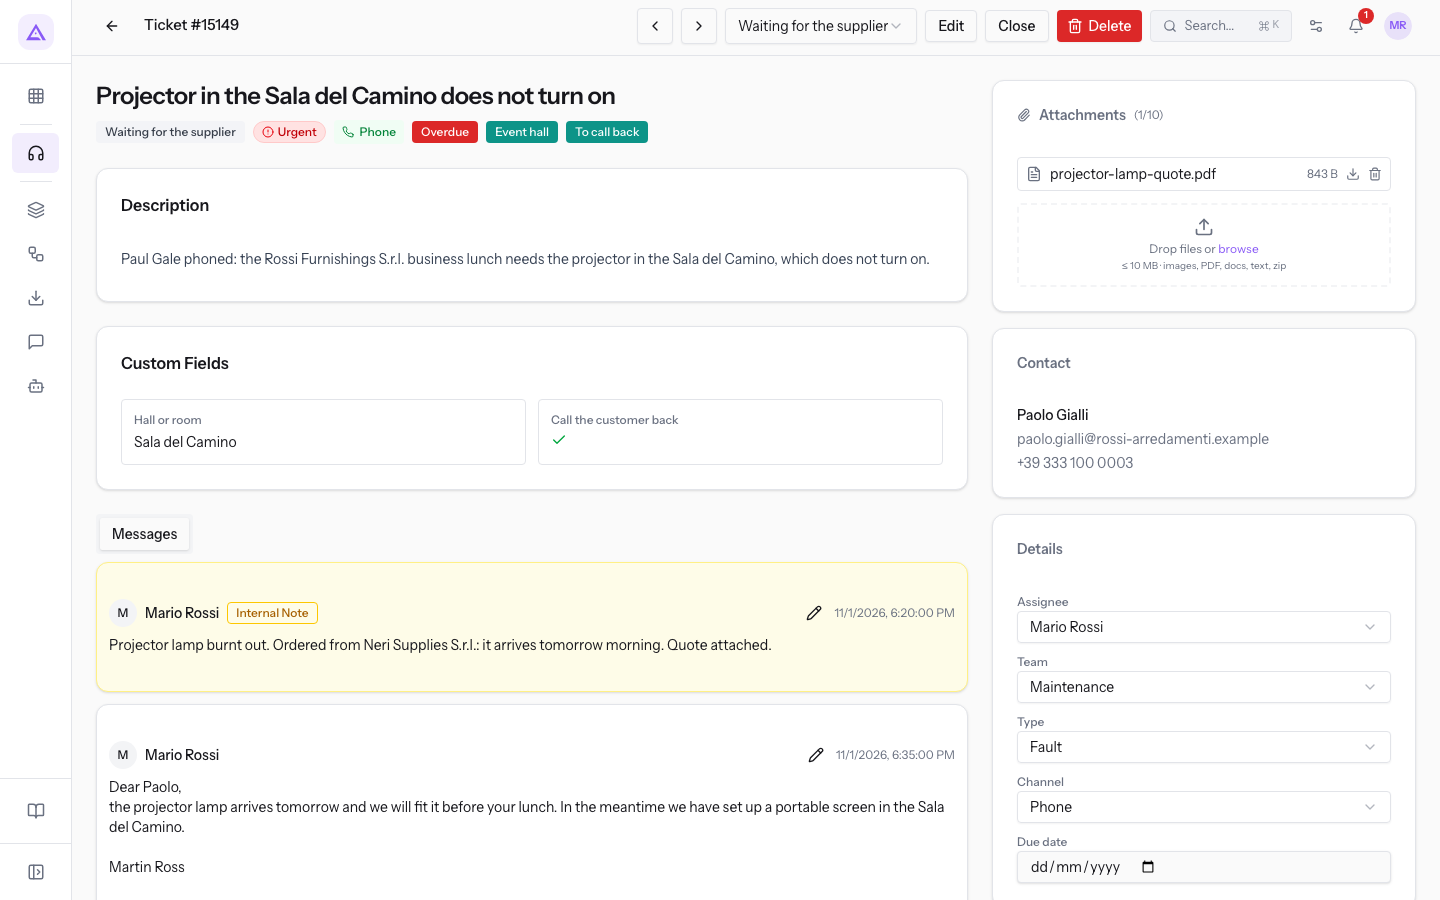
In the Helpdesk › Tickets list you can show custom fields as columns.
- Open Helpdesk › Tickets and press Add column.
- In the Custom attributes group, select the fields to show, for example Hall or room, Booking reference and Call the customer back. By default they are not shown.
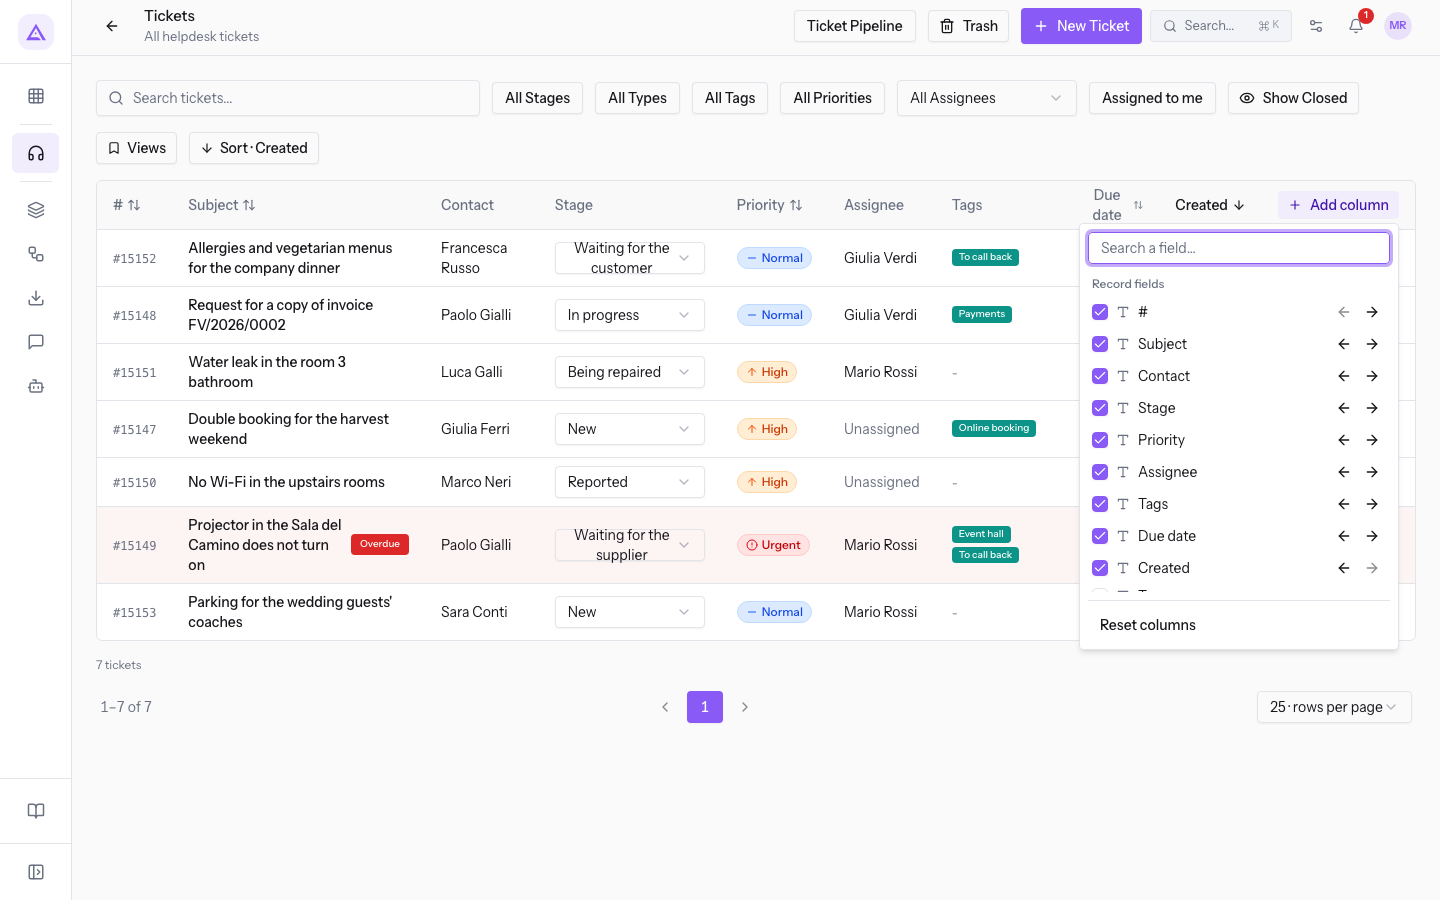
- To search for a field, type in the Search a field… box. To go back to the default columns, press Reset columns.
In the same selector, the Record fields group contains the standard columns, including Team.
See it on your company, not on a slide deck.
In 30 minutes we map the software you use today.We show you how much work and how much margin Archimedes gives back.
Show me on my business →What industry are you in?
One tap — it lets us prepare the demo around your world.
What tools do you use today?
Pick the ones you recognise — or just type them. It helps us show you how they migrate.
Last step: your details.
We reply within one working day — and right after, if you like, you pick the demo slot yourself.
We couldn't send your request. Try again, or write to us at [email protected].
By sending, you agree to your data being processed so we can get back to you about the demo. Privacy notice.
Preview form — nothing is sent from this page.
Want to schedule the demo now?
Your call: book the slot you prefer yourself, or we'll call you to arrange it.
Live availability, 30 minutes, instant confirmation. The calendar opens in a new tab.
Lock in your slot ↗We'll get back to you within one working day — and we'll join the call already knowing your world.
The calendar is open in another tab: pick a slot and the demo is booked. Can't see it? Reopen it ↗
Preview page: nothing was sent.
Our calendar is live: take the slot that suits you and the demo is booked. 30 minutes, instant confirmation, no waiting.
Lock in your slot ↗