Inventory
All modules
Create a warehouse transfer manually
Inventory · 3 of 14 · 3 min read
A manually created transfer moves goods from one location to another without starting from a purchase or sales order. For example, you can move a product from stock to the packing area, record an incoming receipt, or prepare an outgoing shipment.
How a manual transfer works
The transfer starts in Draft status. You then confirm and validate it from its record.
- The operation type determines the numbering: WH: Receipts uses WH/IN/, WH: Delivery Orders uses WH/OUT/, WH: Internal Transfers uses WH/INT/.
- When you choose the operation type, the page automatically fills in the expected source and destination locations for that type. You can change them.
- If you are moving goods between two warehouse locations, choose WH: Internal Transfers.
- If you are recording goods arriving from outside, choose WH: Receipts: the suggested source is Vendors.
- If you are preparing outgoing goods, choose WH: Delivery Orders.
- Stock changes only upon validation, and only in internal locations. Vendors and Customers are virtual locations.
Opening the New Transfer page
The page opens from the transfers list.
- Go to Inventory › Transfers.
- Click New Transfer. The New Transfer page opens, with the Transfer Details and Stock Moves sections.
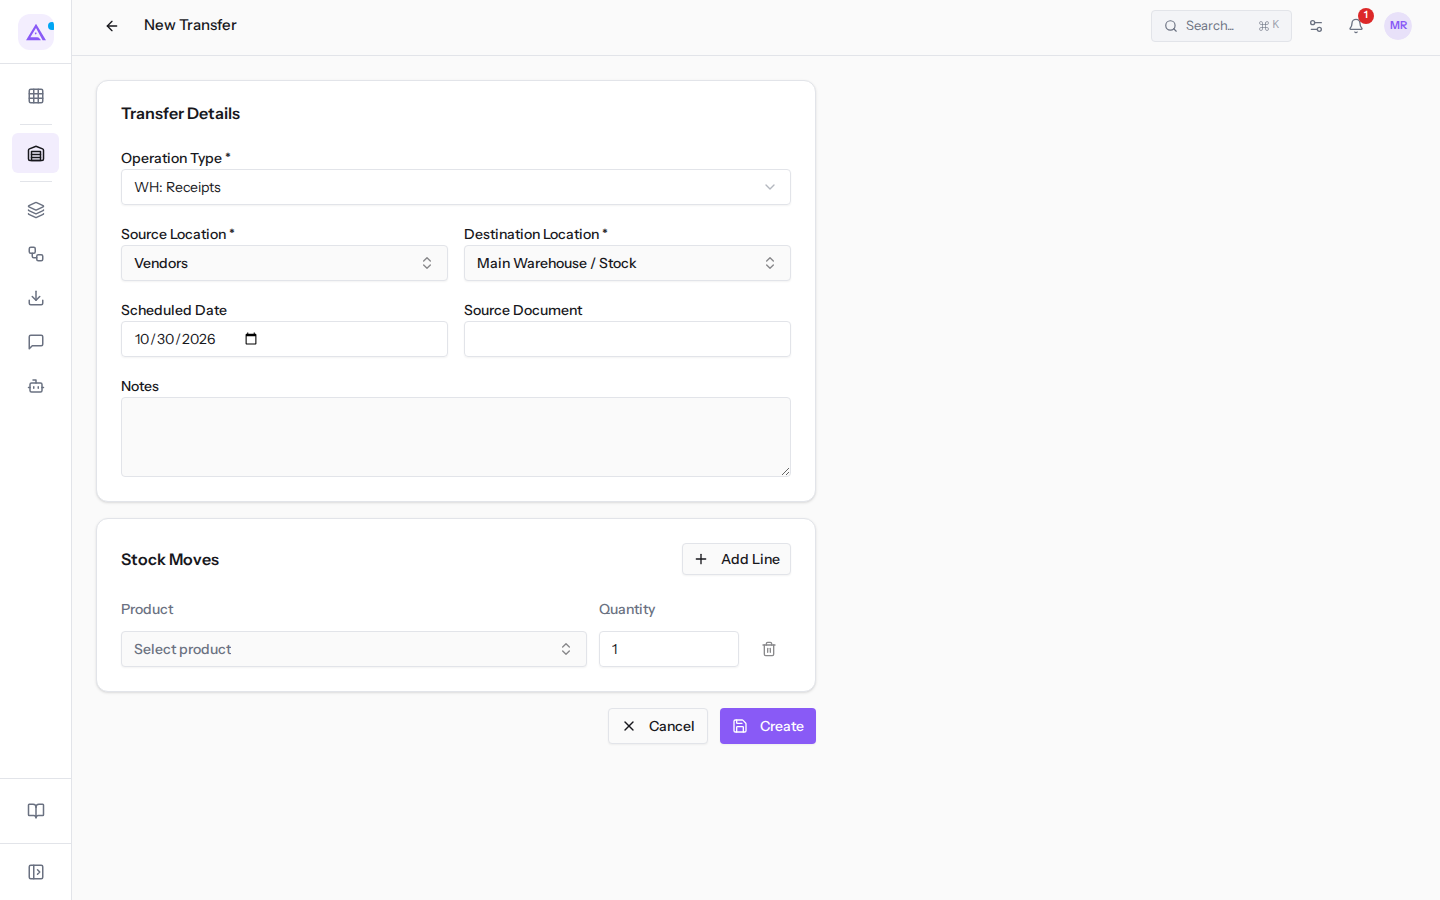
When it opens, the operation type is WH: Receipts, with source Vendors and destination Main Warehouse / Stock.
Filling in the transfer details
The Transfer Details section indicates what type of operation it is, where the goods come from, and where they are going.
- In the Operation Type field, which is required, choose the type, for example WH: Internal Transfers. The locations update: the source becomes Main Warehouse / Stock.
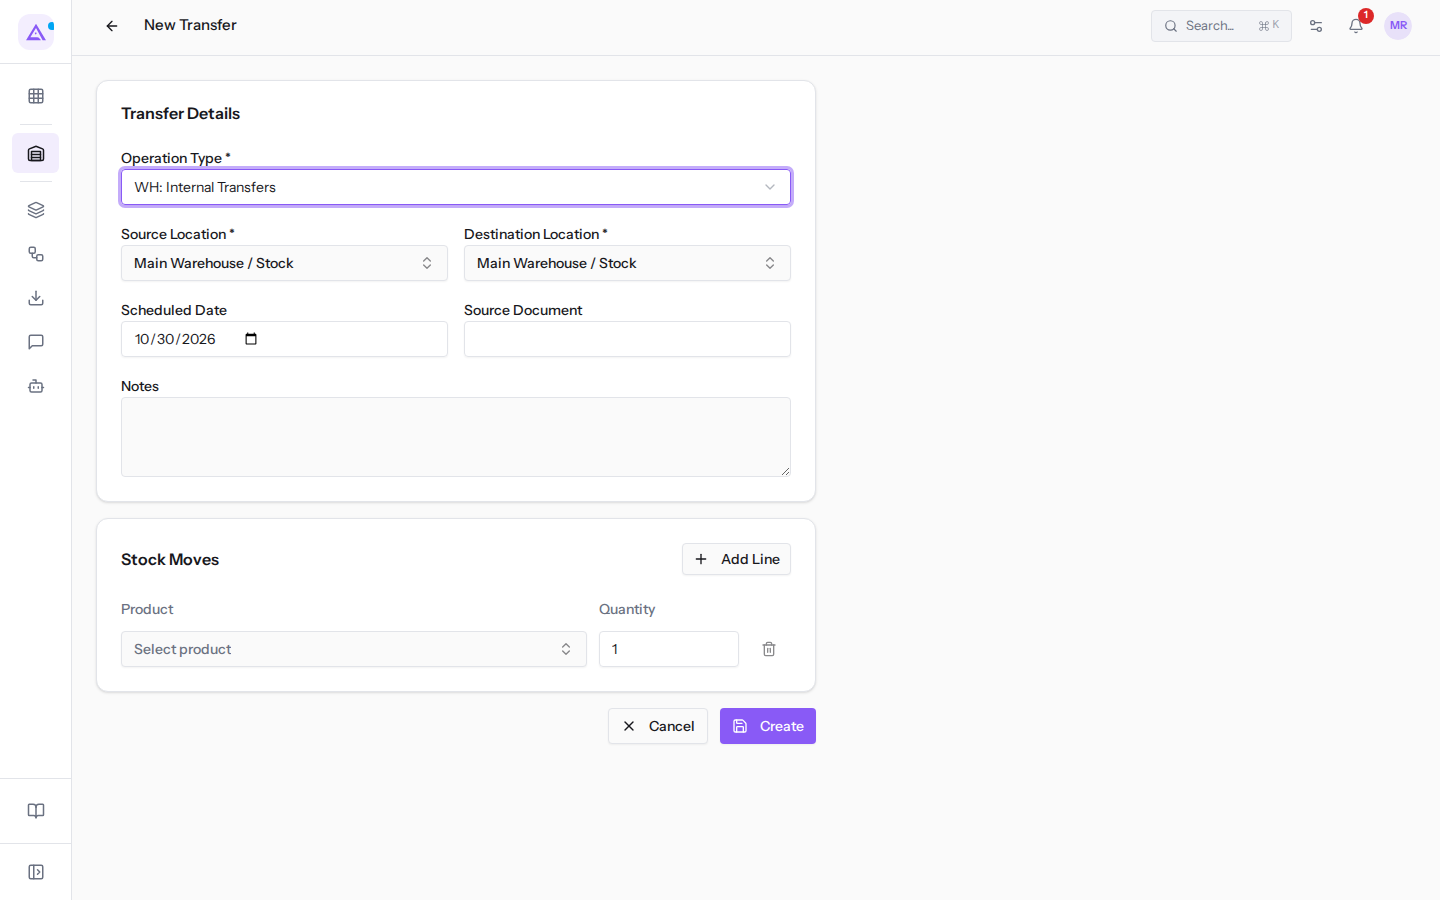
- Check Source Location and Destination Location: they are required and are suggested by the operation type. For this example, choose Main Warehouse / Packing Zone as the destination.
- If needed, fill in Scheduled Date (initially today's date), Source Document (a free reference to the document that originated the transfer), and Notes (text for whoever carries out the transfer).
Note: without an operation type and locations the transfer will not be created.
Adding products
The Stock Moves section lists the products to move, one row per product. The section only appears when you are creating the transfer.
- In the first row, in the Product field (empty shows Select product), choose the product, for example
[ARR-003] Metal cabinet, 2 doors. You can only choose products with tracked stock. - In the Quantity field, indicate how many units to move. The default is 1. For products measured in units, hours, or days, use whole numbers.
- For another product, click Add Line.
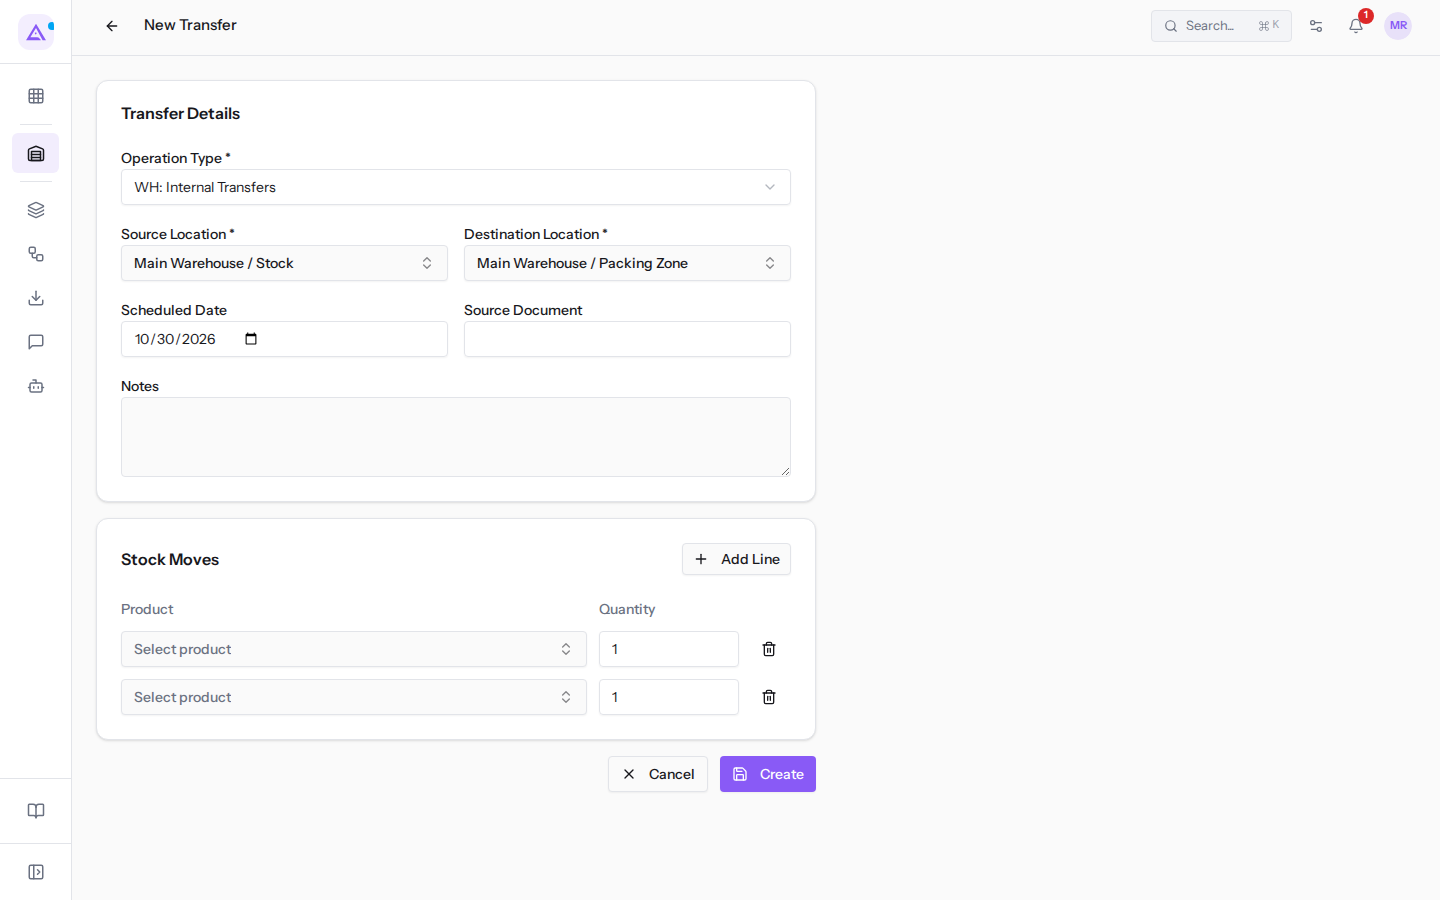
- To remove a row, click the trash icon (Remove line). The icon is not active when only one row remains.
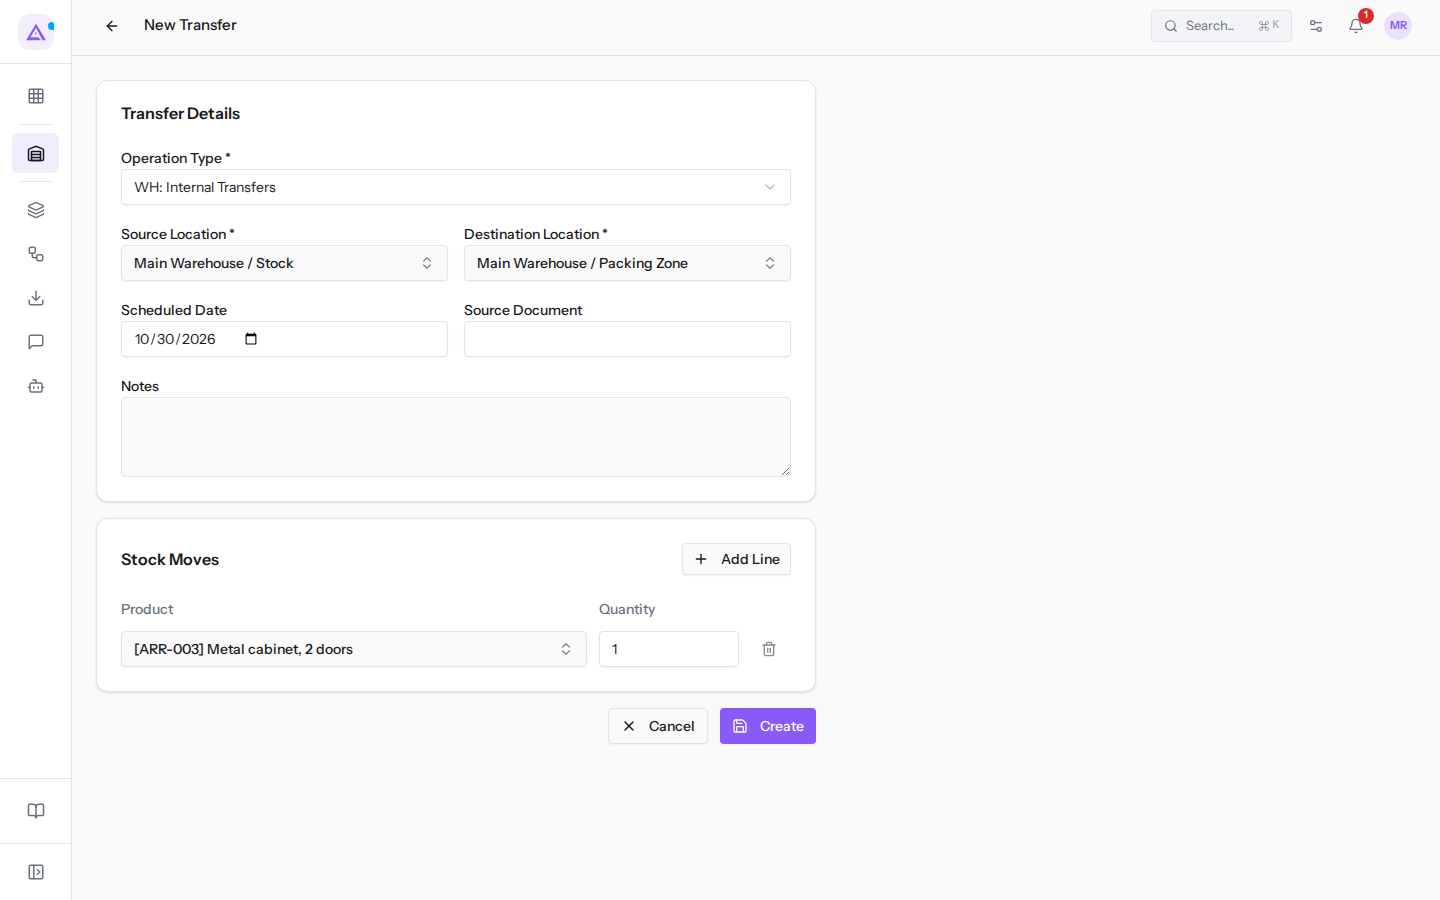
Important: a transfer can only be confirmed if it has at least one row. Add at least one product before clicking Create.
Creating or cancelling
At the bottom of the page there are two buttons.
- Create: saves the transfer. The message Transfer created appears and the transfer record opens, in Draft status, with the number assigned by the operation type.
- Cancel: closes the page without saving and returns to the Transfers list.
From the transfer record, click Confirm to start the movements. The status after confirmation depends on reserved stock: Ready if all is reserved, Partial stock if some is reserved, Waiting if none is reserved. This applies when the operation type reserves at confirmation; otherwise the transfer stays Waiting. You then validate the transfer and the stock changes.
See it on your company, not on a slide deck.
In 30 minutes we map the software you use today.We show you how much work and how much margin Archimedes gives back.
Show me on my business →What industry are you in?
One tap — it lets us prepare the demo around your world.
What tools do you use today?
Pick the ones you recognise — or just type them. It helps us show you how they migrate.
Last step: your details.
We reply within one working day — and right after, if you like, you pick the demo slot yourself.
We couldn't send your request. Try again, or write to us at [email protected].
By sending, you agree to your data being processed so we can get back to you about the demo. Privacy notice.
Preview form — nothing is sent from this page.
Want to schedule the demo now?
Your call: book the slot you prefer yourself, or we'll call you to arrange it.
Live availability, 30 minutes, instant confirmation. The calendar opens in a new tab.
Lock in your slot ↗We'll get back to you within one working day — and we'll join the call already knowing your world.
The calendar is open in another tab: pick a slot and the demo is booked. Can't see it? Reopen it ↗
Preview page: nothing was sent.
Our calendar is live: take the slot that suits you and the demo is booked. 30 minutes, instant confirmation, no waiting.
Lock in your slot ↗