Point of Sale
All modules
Organize products into categories for the POS
Point of Sale · 14 of 16 · 4 min read
POS categories group the products that the till shows in the product grid. You need them to sort products by type, for example oil, wines, cheeses, or the dishes of a menu, and to choose which products each till sells.
How categories work
A category is a group of products. After you create it, you assign it to one or more tills: each till shows the products of the categories assigned to it.
- If a product must be sold on a till, put it in a category assigned to that till.
- If you want two tills to sell different products, create separate categories and assign to each till only its own.
- If a product must appear in more groups, add it to several categories: the same product can be in more than one category. For example
Tuscan salami 300 gis both in Cheese and cured meats and in Monthly specials.
You assign categories to tills on the tills page, in Point of Sale › Terminals, as described in the article «Configuring tills».
Before you start: you manage categories in Point of Sale › Categories, a menu settings group entry reserved for the point-of-sale manager.
The POS Categories page
Open Point of Sale › Categories. The POS Categories page opens, with the subtitle Organize products into categories for the POS terminal, which lists all categories, one card per category.
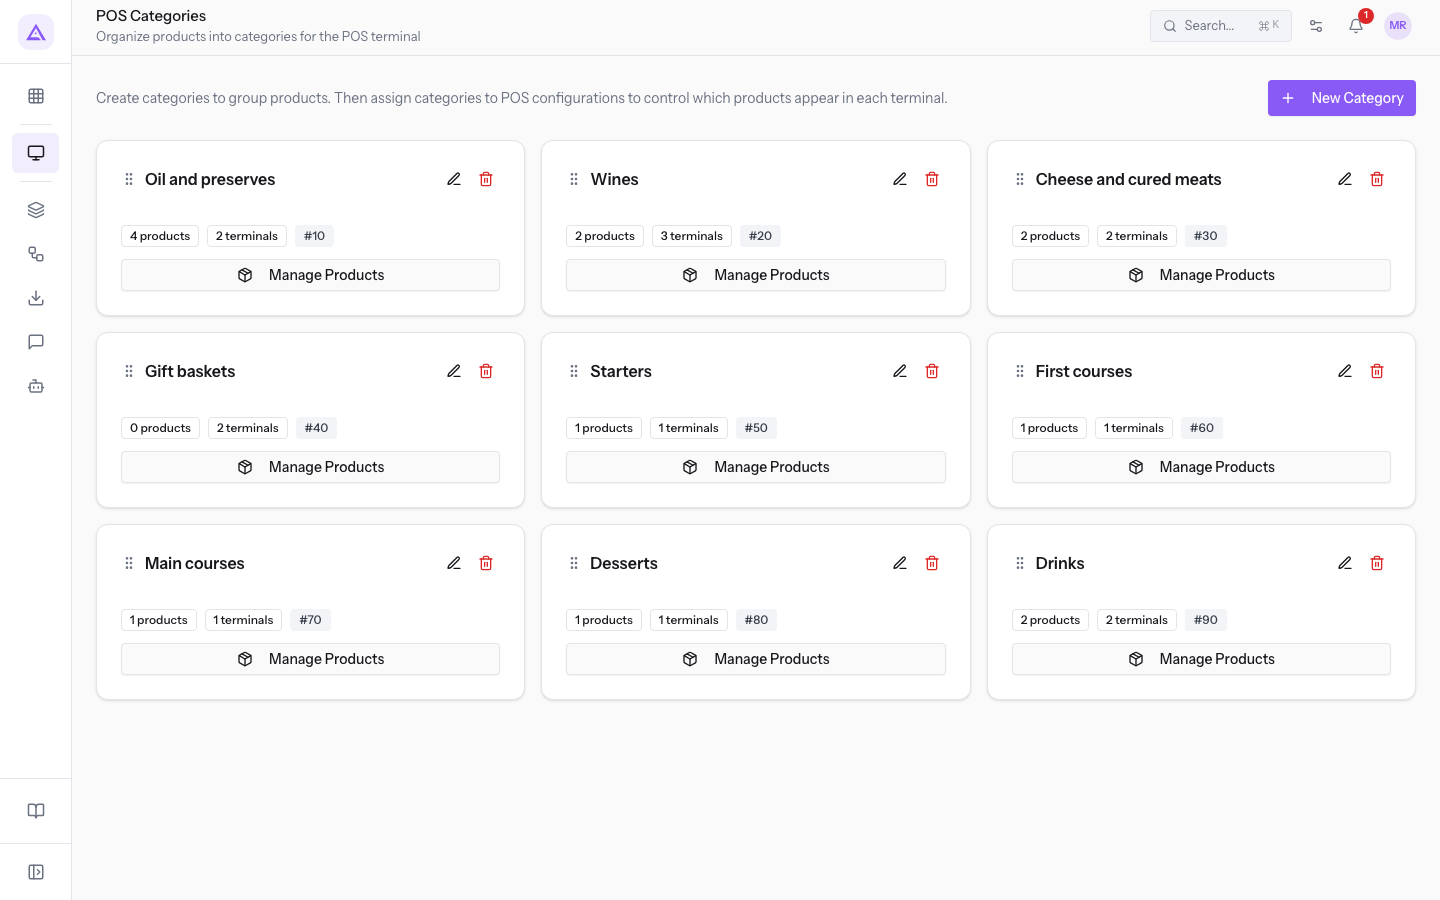
At the top the page explains: «Create categories to group products. Then assign categories to POS configurations to control which products appear in each terminal.»
Each card shows the category name, how many products it contains and on how many tills it is used, and the Manage Products button.
In the demo organization the categories are Oil and preserves, Wines, Cheese and cured meats, Gift baskets, Starters, First courses, Main courses, Desserts and Drinks. The first four serve the Farm shop, the others the Restaurant till.
Create a category
Create a category for each group of products you want to show at the till.
- In Point of Sale › Categories, press New Category. The New Category window opens.
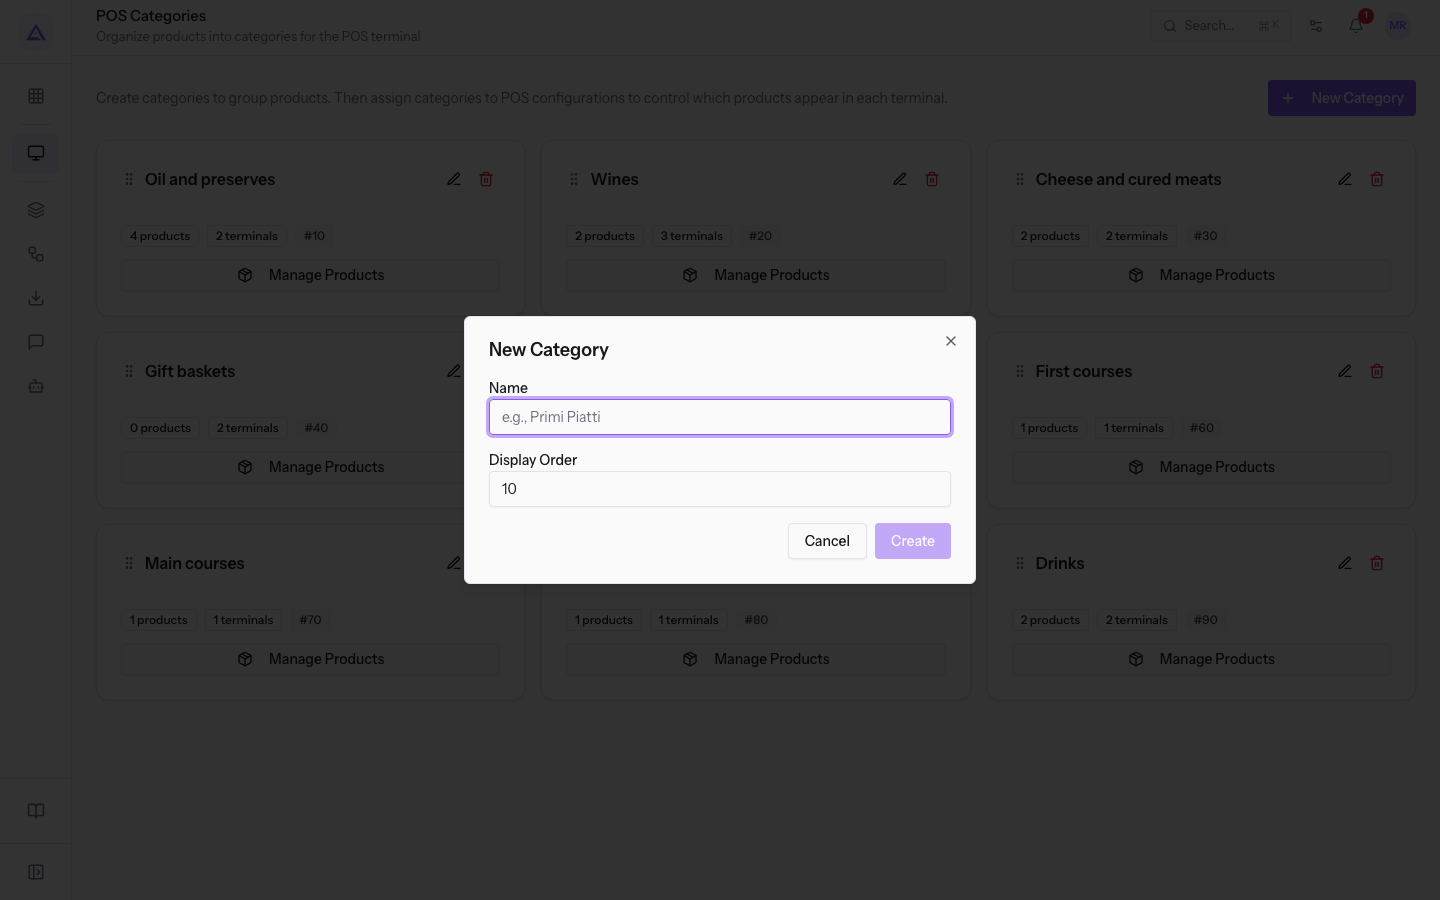
- Fill in the fields, for example Name
Monthly specials, and press Create. The message Category created appears and the new card is added to the list.
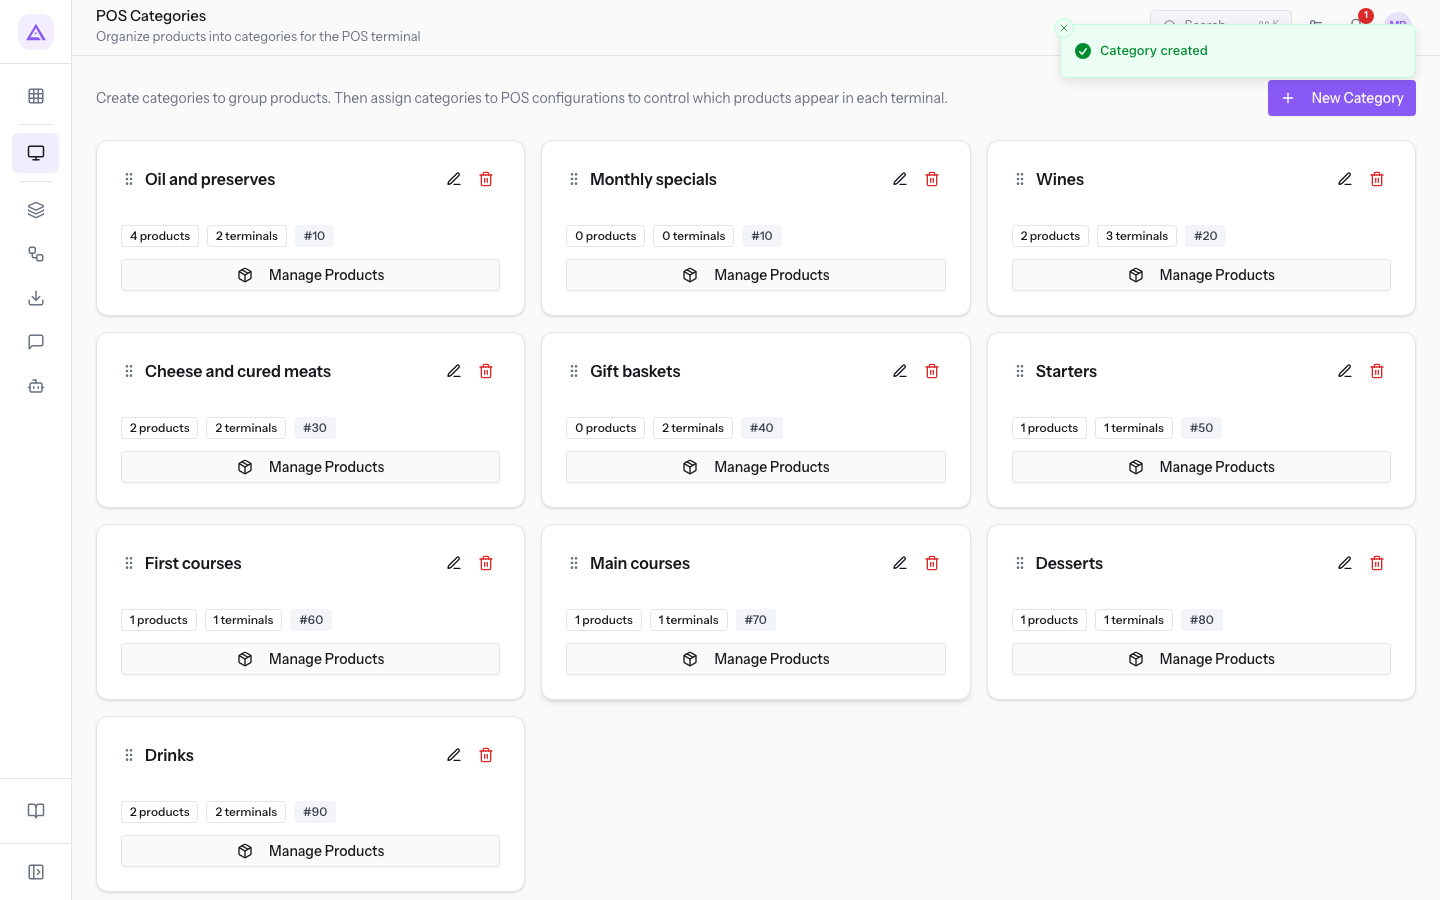
The fields of the window:
- Name: the name of the category, which the staff sees at the till. The placeholder suggests
e.g., Primi Piatti. - Display Order: the position of the category among the others.
Note: a newly created category contains no products and is not assigned to any till. Add products with Manage Products and assign it to a till in Point of Sale › Terminals.
Add products to a category
The products window shows which products are already in the category and which you can add.
- In Point of Sale › Categories, press Manage Products on the category card, such as Monthly specials. The window Products in "Monthly specials" opens.
- In the Add Products list, press the product to add, for example
Tuscan salami 300 gat €9.50. The product moves to Assigned Products.
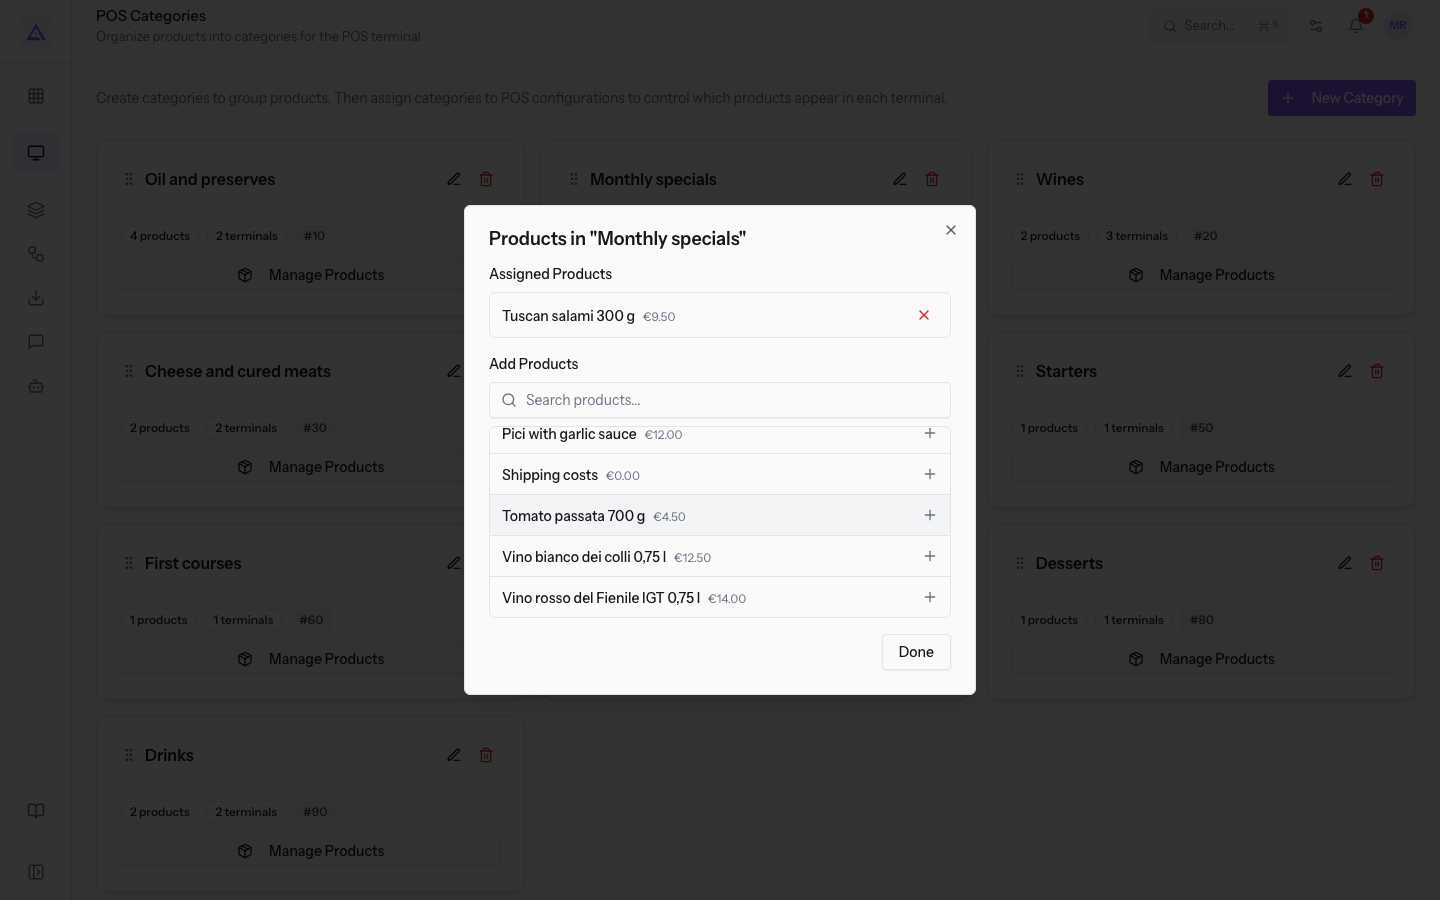
The parts of the window:
- Assigned Products: the products already in the category, with their price. If the category is empty, No products assigned yet appears, as in the Gift baskets category of the demo.
- Search products...: filters the list of products to add by name. If no product matches, No products available to add appears.
- Add Products: all products of the organization that are not yet in the category, with their price. Each product you press enters the category immediately.
Note: the Add Products list includes all products of the organization, even those not sold at the till, such as
Office desk 160x80orMontaggio arredi (ora). Add only the products the staff must find at the till.
Edit a category
You can change the name or the order of an existing category from its card. The Edit Category window has the same fields as New Category: Name and Display Order. On saving, the message Category updated appears.
Delete a category
Delete a category you no longer need from its card. Before deleting it, the program asks for confirmation with the message «Delete category ""?», which shows the category name. After confirmation the message Category deleted appears.
Important: if the category is assigned to a till, after deletion that till no longer shows the products of the category, unless they are also in another category assigned to the till.
See it on your company, not on a slide deck.
In 30 minutes we map the software you use today.We show you how much work and how much margin Archimedes gives back.
Show me on my business →What industry are you in?
One tap — it lets us prepare the demo around your world.
What tools do you use today?
Pick the ones you recognise — or just type them. It helps us show you how they migrate.
Last step: your details.
We reply within one working day — and right after, if you like, you pick the demo slot yourself.
We couldn't send your request. Try again, or write to us at [email protected].
By sending, you agree to your data being processed so we can get back to you about the demo. Privacy notice.
Preview form — nothing is sent from this page.
Want to schedule the demo now?
Your call: book the slot you prefer yourself, or we'll call you to arrange it.
Live availability, 30 minutes, instant confirmation. The calendar opens in a new tab.
Lock in your slot ↗We'll get back to you within one working day — and we'll join the call already knowing your world.
The calendar is open in another tab: pick a slot and the demo is booked. Can't see it? Reopen it ↗
Preview page: nothing was sent.
Our calendar is live: take the slot that suits you and the demo is booked. 30 minutes, instant confirmation, no waiting.
Lock in your slot ↗