Point of Sale
All modules
Configuring tills
Point of Sale · 13 of 16 · 6 min read
A till is the configuration of a point of sale: its name, its accounting journals, the look of the till screen, the receipt and the staff controls. It can be a shop, the restaurant or a stall at the market.
Each day or work shift on a till is a session: the till stays the same, and the sessions follow one another. To open and close them, see Getting Around the Point of Sale: Registers, Sessions and the Cash App.
The list of tills
The tills page shows one card for each till in the organization.
Before you start: the page is in the settings group of the menu, reserved for point-of-sale managers.
Open Point of Sale › Terminals. Each card shows the name of the till, its status and the number of payment methods, with the Edit button.
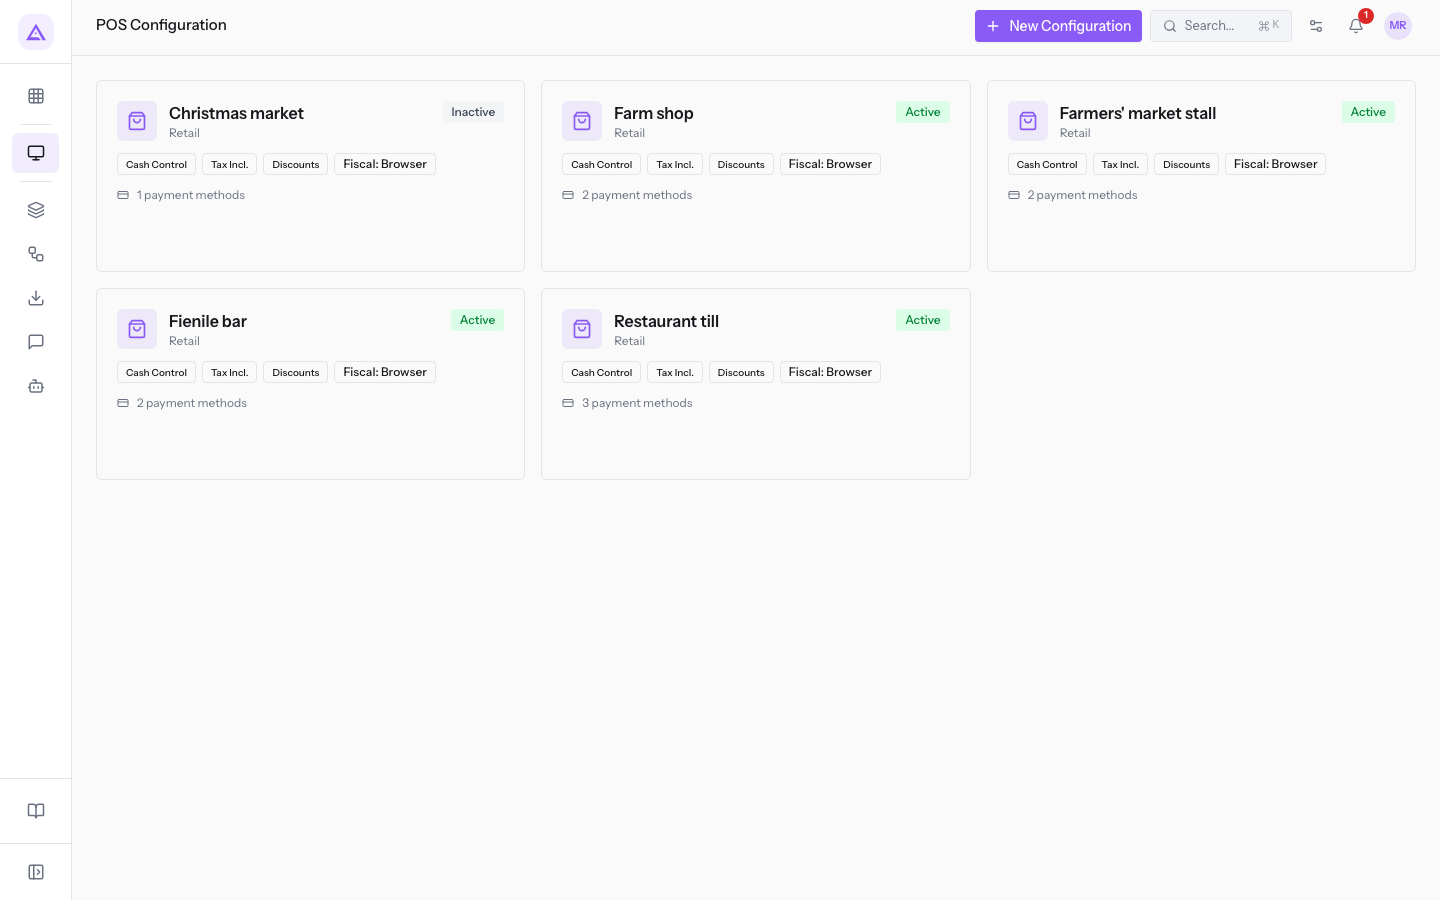
In the demo organization the tills are Farmers' market stall, Barn bar, Farm shop, Restaurant till and Christmas market. Christmas market is disabled; Barn bar has never been opened.
Creating a till
Create a till for each point where you take payment with its own drawer and its own staff.
- In Point of Sale › Terminals press New Configuration.
- Fill in the fields described in Editing a till and press Create.
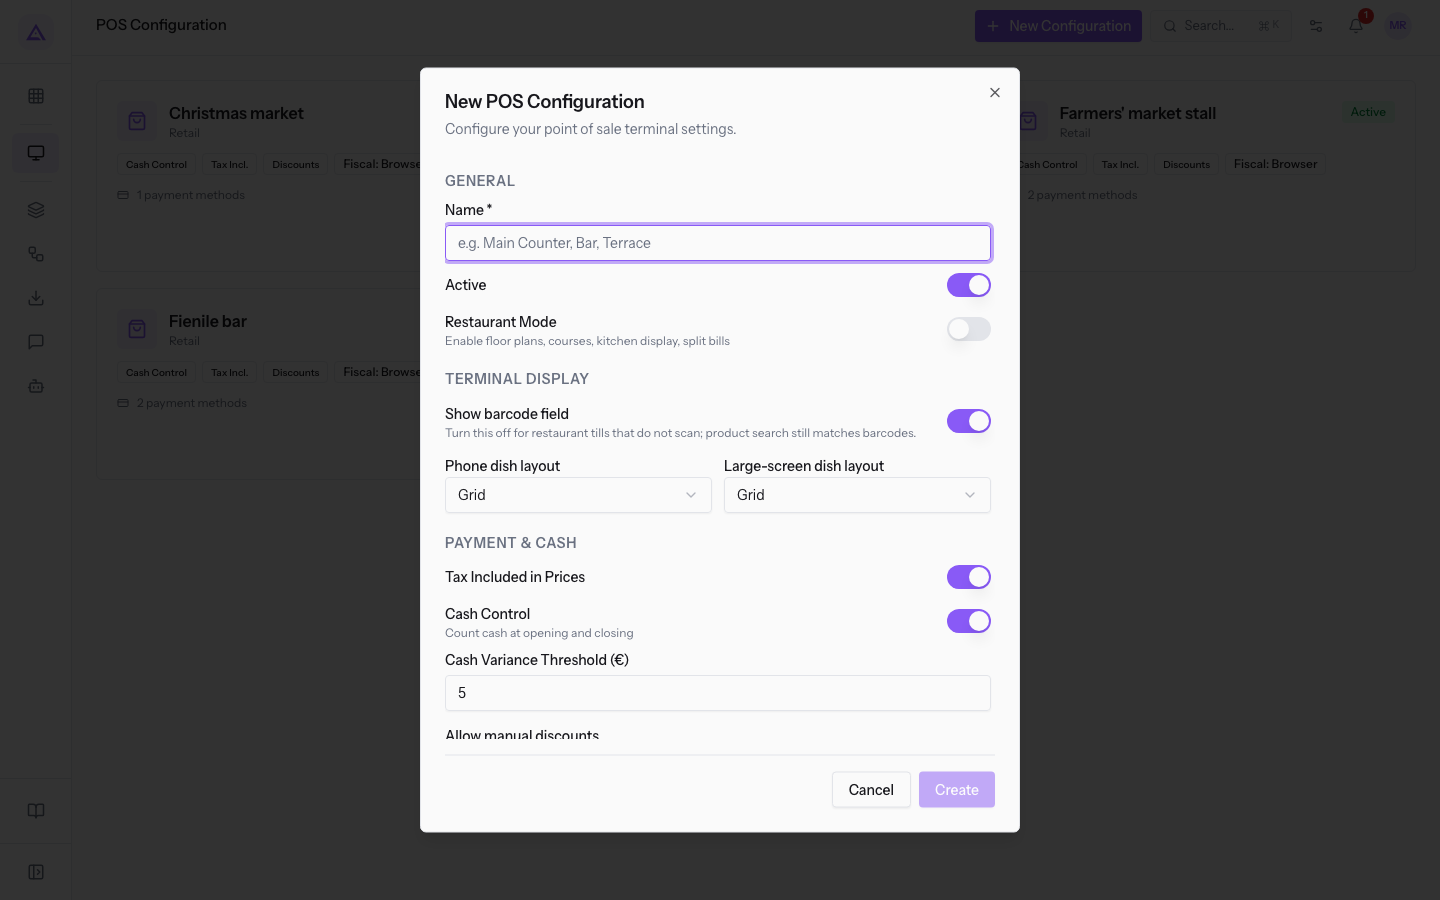
Note: on a new till Sales certified otherwise is off and Invoice from till is set to Send to office.
Editing a till
The edit window gathers all the settings of a till.
- In Point of Sale › Terminals press Edit on the till's card, for example
Farm shop. - Change the fields and press Save Changes.
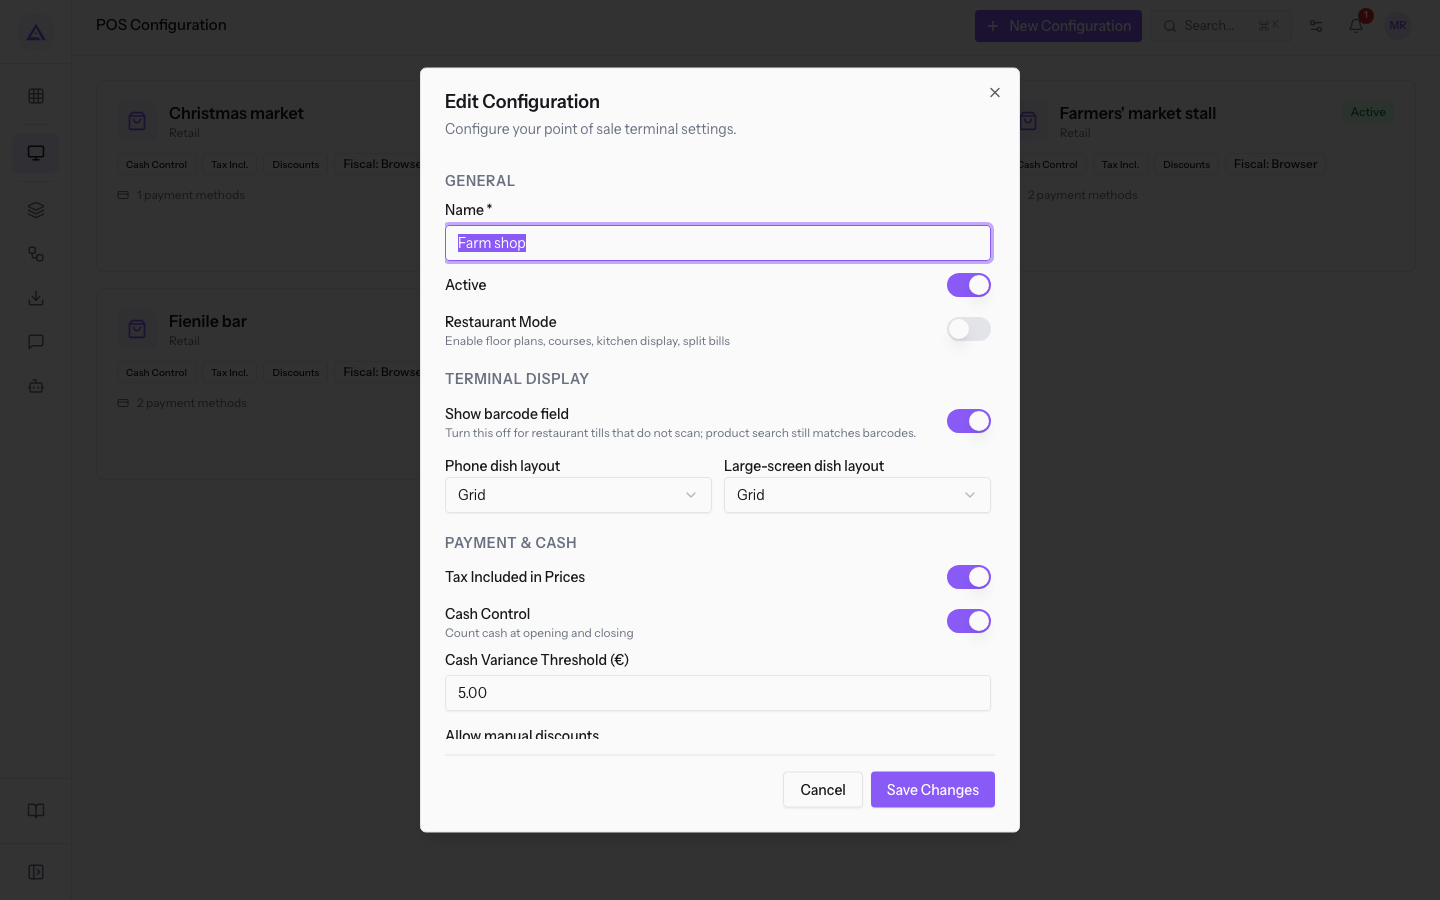
Important: changes apply to all future sessions of the till. If a session is open, such as POS/Farm shop/3, check with whoever is using it before saving.
General details
- Name: the name of the till. It appears on the cards and in session names, such as POS/Farm shop/3. The field is required.
- Active: keeps the till active. A disabled till, such as
Christmas market, stays in the list but is not in use.
Payment methods and categories
In the window you choose which payment methods the till accepts and which product categories it shows. The till only shows the products of the categories you assign to it. Payment methods are created in Point of Sale › POS options; categories in Organize products into categories for the POS.
Note: in the list of tills, the card for
Farmers' market stallshows 2 payment methods.
Pricelist and Warehouse
- Pricelist: the price list the till takes its prices from.
- Warehouse: the warehouse from which the till draws its stock. With Organization's default warehouse the till uses the main warehouse. Orders recorded on this till are deducted from this warehouse.
Note: stock deduction requires the Inventory module. Without it, orders do not touch stock levels.
Accounting
- Default sale journal: the journal on which closing the session books the takings. With the default value the till uses the journal set by the organization; alternatively choose a journal from the list, such as
CSH1 — CassaorBNK1 — Banca. - Default invoice journal: the journal for invoices issued by the till.
- Invoice from till: how an invoice requested at the till is handled.
- Send to office: is the value for the demo tills.
- Issue immediately
- Post sessions to accounting: from the moment you turn this option on, closing a session books the day's takings. Earlier sessions are not touched: for those use the recovery command.
Note: the journal for each payment method is chosen in Point of Sale › POS options. With the default value, cash goes to the cash journal and cards to the bank journal.
Till display
These options decide how products appear on the till screen. Choose one layout for phones and one for tablets and computers.
- Phone dish layout: the layout of products on phones.
- Large-screen dish layout: the layout of products on larger screens.
- For both fields the options are Grid, Compact grid and List. The value for the demo tills is Grid.
- Show barcode field: shows on the till the box where you can type a product's barcode.
Sales certified otherwise
- Sales certified otherwise: declares that the till does not issue fiscal receipts and that its sales are certified by an invoice or by another system. The till shows a simple note in place of the missing-receipt warning.
Turn the option on if the till does not have a telematic cash register. In the demo it is on for all existing tills.
Discounts
- Allow manual discounts: lets staff apply a discount to a line or to the order. Turn it off and this till offers none and rejects those sent.
- Whole-order discount: adds the discount on the whole order alongside those per line. Turn it off to offer only per-line discounts.
To apply discounts at the till, see Apply discounts, notes and custom prices.
Ask for the PIN when…
With the PIN, whoever opens and whoever closes the till stays recorded. Without a PIN, opening, closing and cash movements do not record who did them.
- the till opens and closes: off, at opening and closing the PIN is not asked and it is not recorded who did them.
- money comes in or goes out (takings, cash in, cash out): on, every takings, cash-in and cash-out asks for the PIN and records who did it.
- a delicate operation is made
A discount above the percentage shown asks for a manager's PIN; leave the value empty to never ask for it on discounts. In the demo the three switches are off and the till staff have no PIN.
Receipt
The receipt has a header and a footer of free text.
- Header: the name and details of the business, such as
Demo Company – Farm shop Products of our land. - Footer: a greeting or the tax details, such as
Thank you and goodbye!.
Tip: use a different header for each till: the
Restaurant tillhasDemo Company – Farm restaurantandThank you for being our guests..
See it on your company, not on a slide deck.
In 30 minutes we map the software you use today.We show you how much work and how much margin Archimedes gives back.
Show me on my business →What industry are you in?
One tap — it lets us prepare the demo around your world.
What tools do you use today?
Pick the ones you recognise — or just type them. It helps us show you how they migrate.
Last step: your details.
We reply within one working day — and right after, if you like, you pick the demo slot yourself.
We couldn't send your request. Try again, or write to us at [email protected].
By sending, you agree to your data being processed so we can get back to you about the demo. Privacy notice.
Preview form — nothing is sent from this page.
Want to schedule the demo now?
Your call: book the slot you prefer yourself, or we'll call you to arrange it.
Live availability, 30 minutes, instant confirmation. The calendar opens in a new tab.
Lock in your slot ↗We'll get back to you within one working day — and we'll join the call already knowing your world.
The calendar is open in another tab: pick a slot and the demo is booked. Can't see it? Reopen it ↗
Preview page: nothing was sent.
Our calendar is live: take the slot that suits you and the demo is booked. 30 minutes, instant confirmation, no waiting.
Lock in your slot ↗