Point of Sale
All modules
Ring up a sale and collect payment
Point of Sale · 4 of 16 · 5 min read
On the till screen, you add products to the order, assign a customer, and collect with one or more payment methods.
In this article the example is the POS/Farm shop/3 session, opened by Julia Green: 2 Farm extra-virgin olive oil 0.5 l and 1 Hills Chianti 0.75 l sold to Julia Ferris, paid with €20.00 by Card and the rest in Cash.
Open the till screen
Before you start: the till must have an open session. A session whose cash float is not yet confirmed does not take orders.
The till screen opens from the till's card: on the Point of Sale page, POS Configurations section, press Resume Session on the Farm shop card.
At the top the screen shows the session name (POS/Farm shop/3) with status Open and the buttons ← Back, Cash In/Out, Customer Display, Tablet Mode and Close.
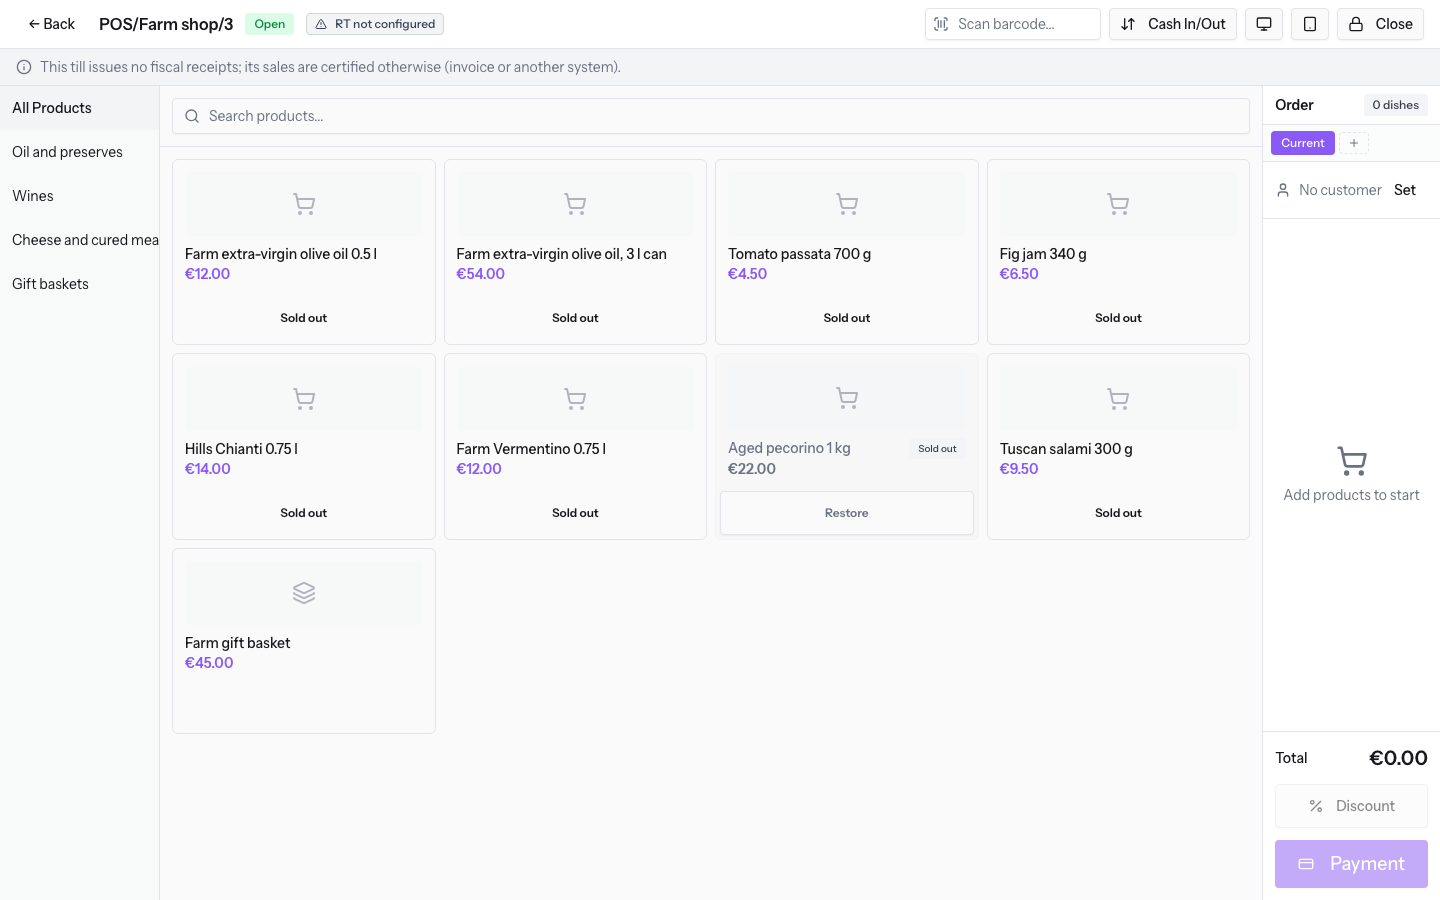
Note: the demo tills do not issue fiscal receipts. The screen says so with the note «This till issues no fiscal receipts; its sales are certified otherwise (invoice or another system).»
Find products
The grid shows the products of the categories assigned to the till, each with its name and price.
- All Products: shows all the products of the till. At the Farm shop the other tabs are Oil and preserves, Wines, Cheese and cured meats and Gift baskets.
- Gift baskets: contains the Farm gift basket at €45.00.
- Search products...: filters the grid as you type: typing Chianti leaves only Hills Chianti 0.75 l.
- Scan barcode...: the field where you type a product's barcode.
A product marked out of stock carries the Sold out badge and the Mark available button: in the demo this is the case of Aged pecorino 1 kg. The product cannot be sold for the rest of the session. The other products have the Mark sold out button.
Add products to the order
The order panel collects the order lines in progress. While it is empty it shows Add products to start.
- Press Farm extra-virgin olive oil 0.5 l in the grid. The line appears in the panel with quantity 1.
- Press the plus button of the line to bring the quantity to 2. The minus button reduces the quantity.
- Press Hills Chianti 0.75 l. A second line appears in the panel with quantity 1.
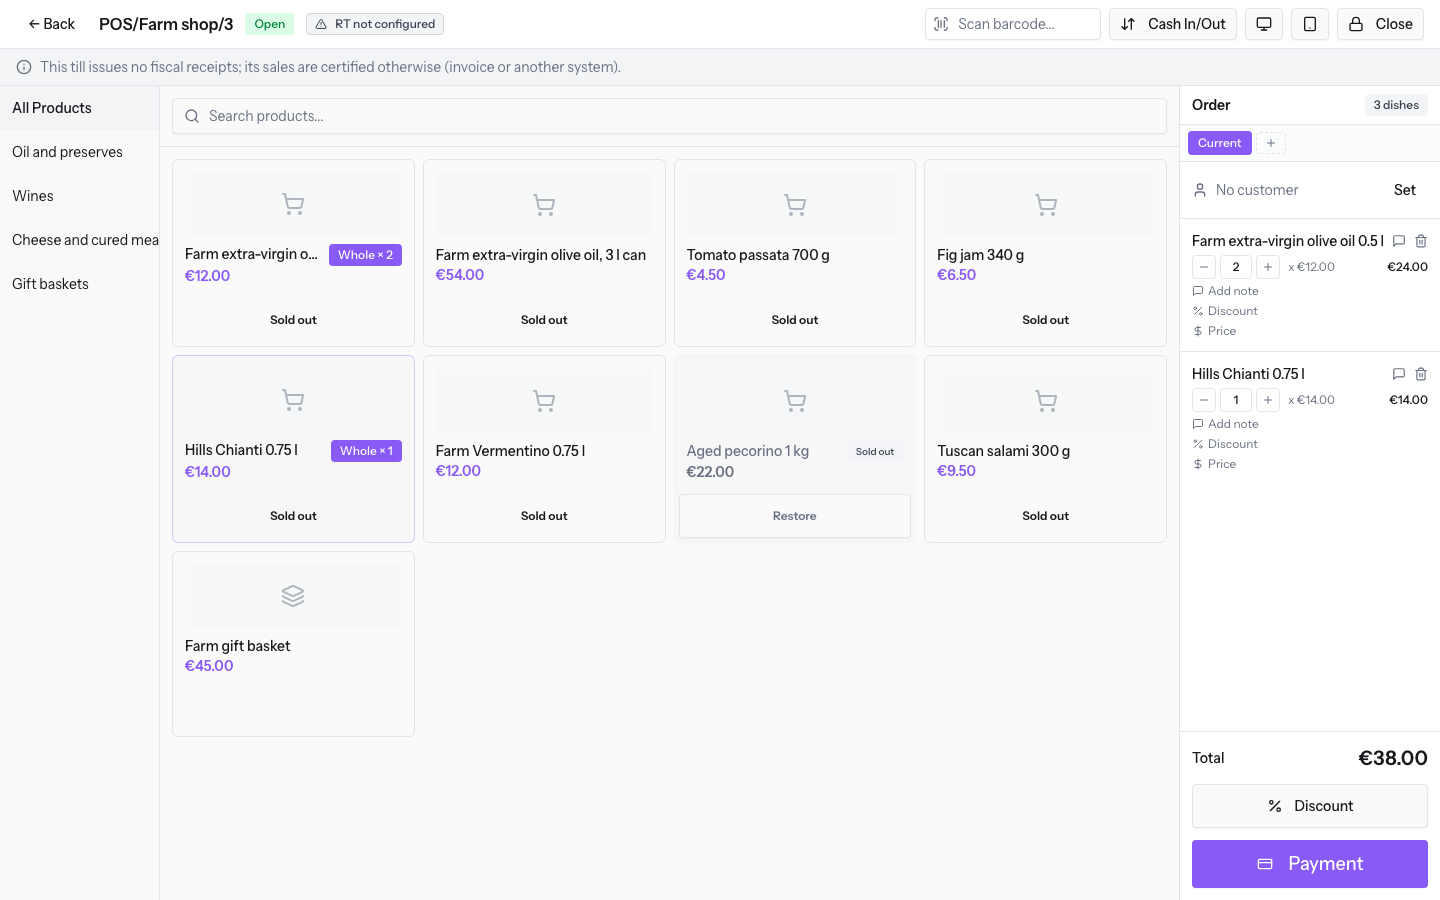
Each line also has the buttons Line note, Add note, Discount and Price. Above the lines the Current tab shows the order in progress, and the New Order button starts another one.
Assign a customer
An order can stay without a customer: the panel then shows No customer. Assign a customer when you need them on the order, for loyalty rewards or for the invoice.
- In the order panel, press Set. The Set Customer window opens.
- Press Type to search customers.... The list of contacts appears, with name, email and phone.
- Type the name in the Search contacts... field, for example Julia Ferris.
- Press the right contact. In the demo there are two cards for Julia Ferris with the same phone: choose the one with the email [email protected].
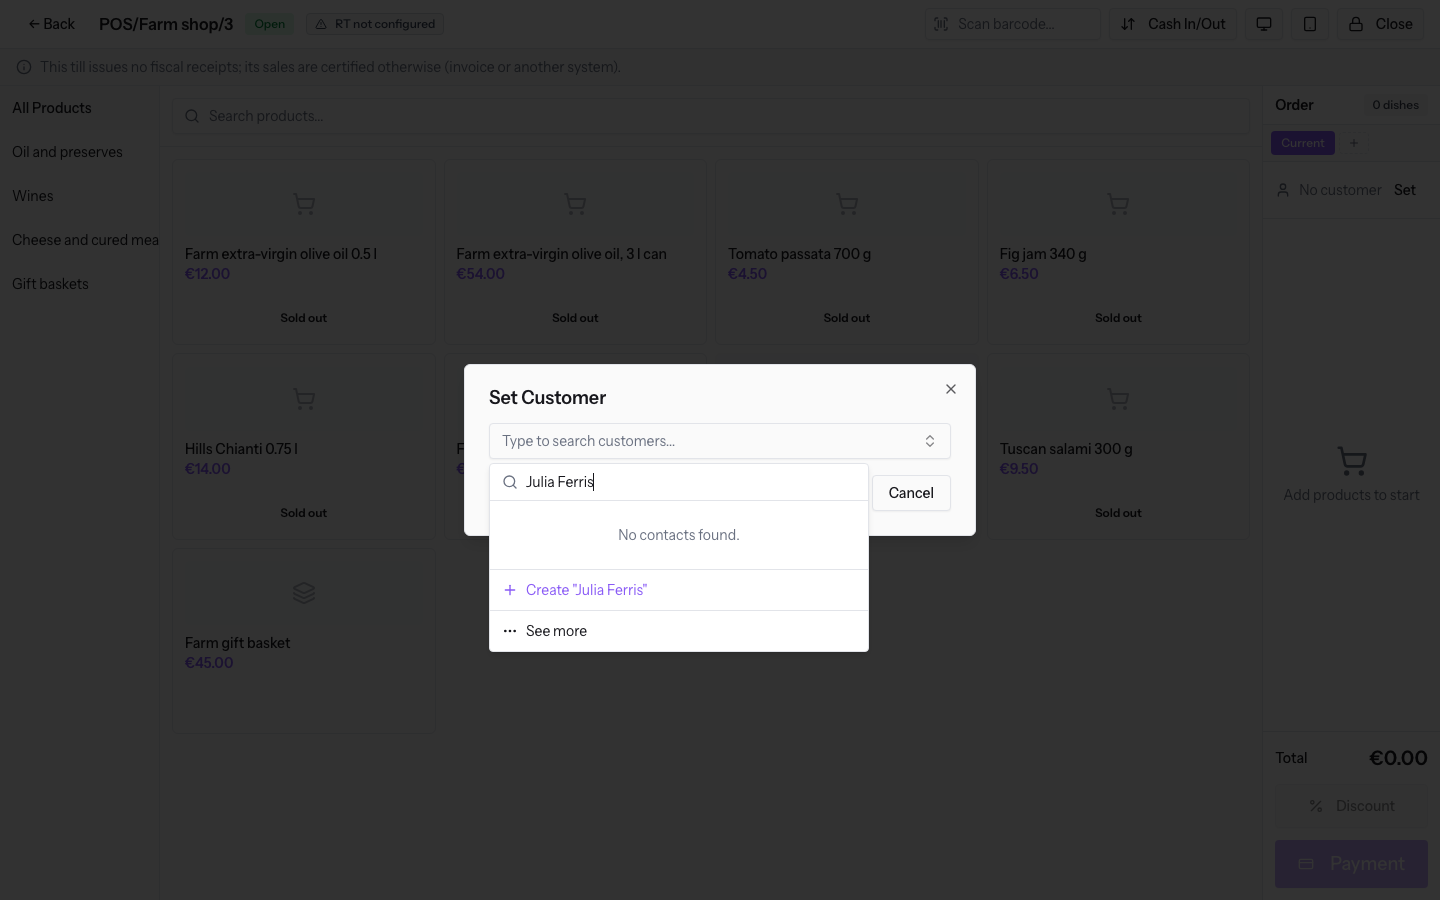
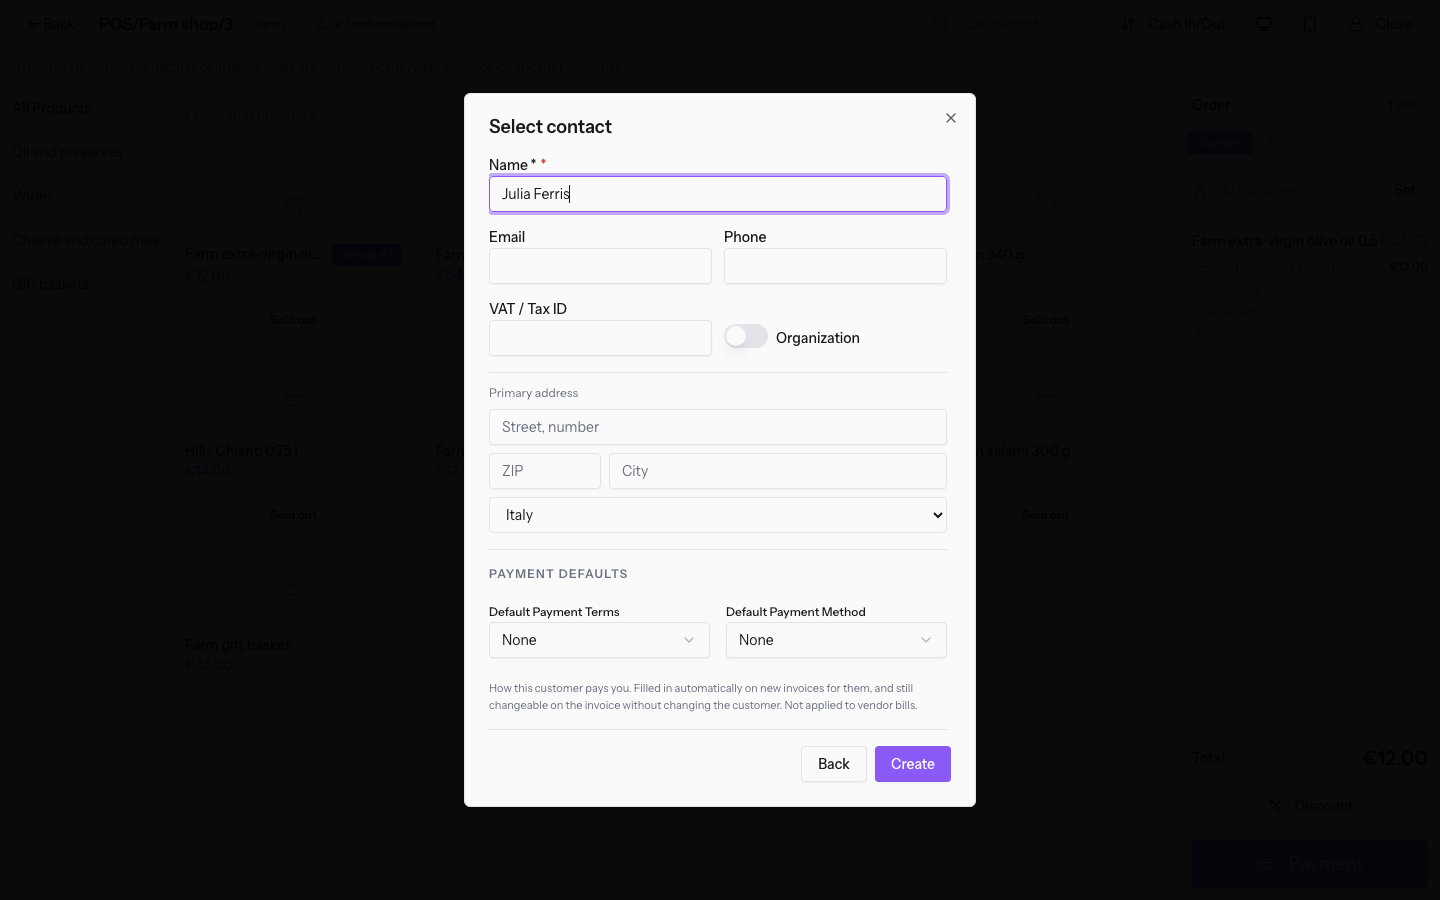
The list also has Create new contact and See more. After the choice the Set button becomes Change, to replace the customer, and the Rewards button appears.
Collect the order
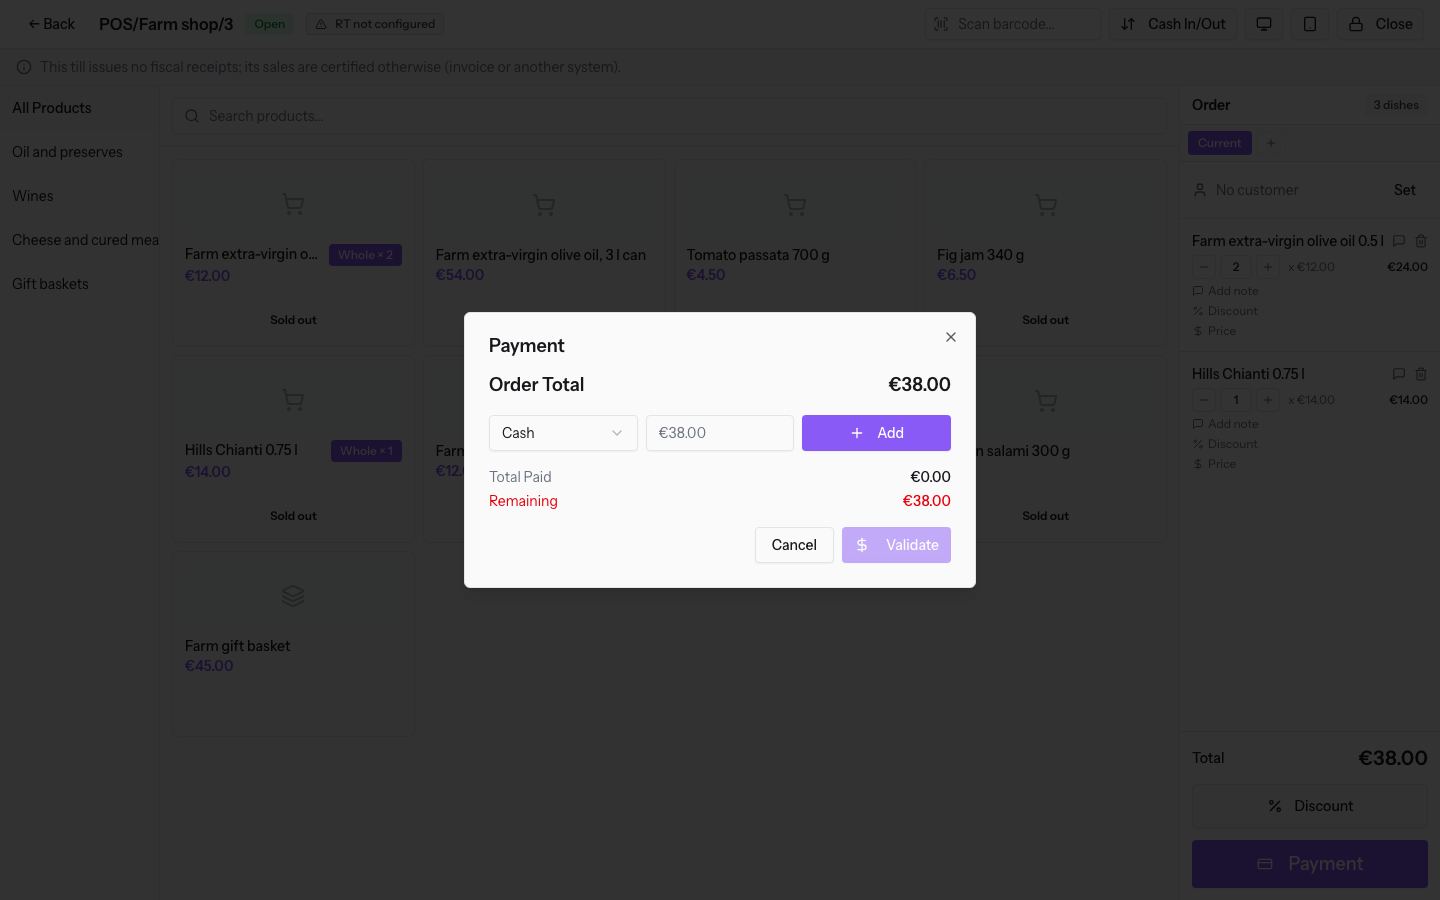
The Payment window records how much the customer pays and with which method. At the Farm shop the methods are Cash and Card.
- If the customer pays in cash, choose Cash.
- If the customer pays by card, choose Card · External POS and enter the amount on the external card POS: the till only records the amount, without connecting to the card device.
- If the customer pays with several methods, add one payment for each method.
- In the order panel, press Payment. The window shows the Order Total, in the example €38.00.
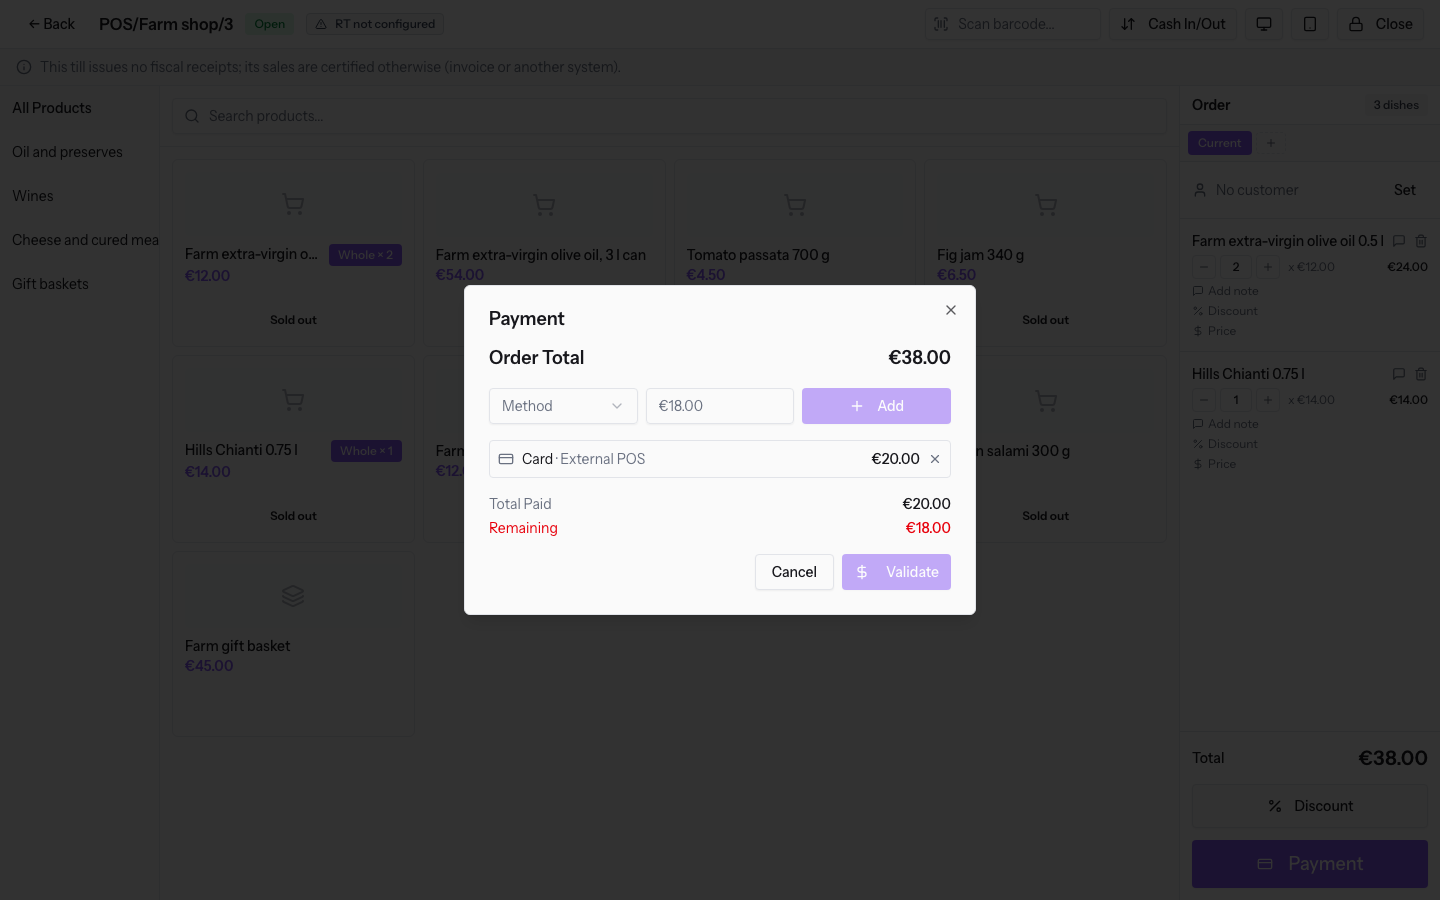
- Choose the method: Card.
- In Amount write the figure paid with that method:
20. - Press Add. The payment appears in the window's list.
- For the rest of the sum, choose Cash in Method, write the amount received,
20, and press Add.
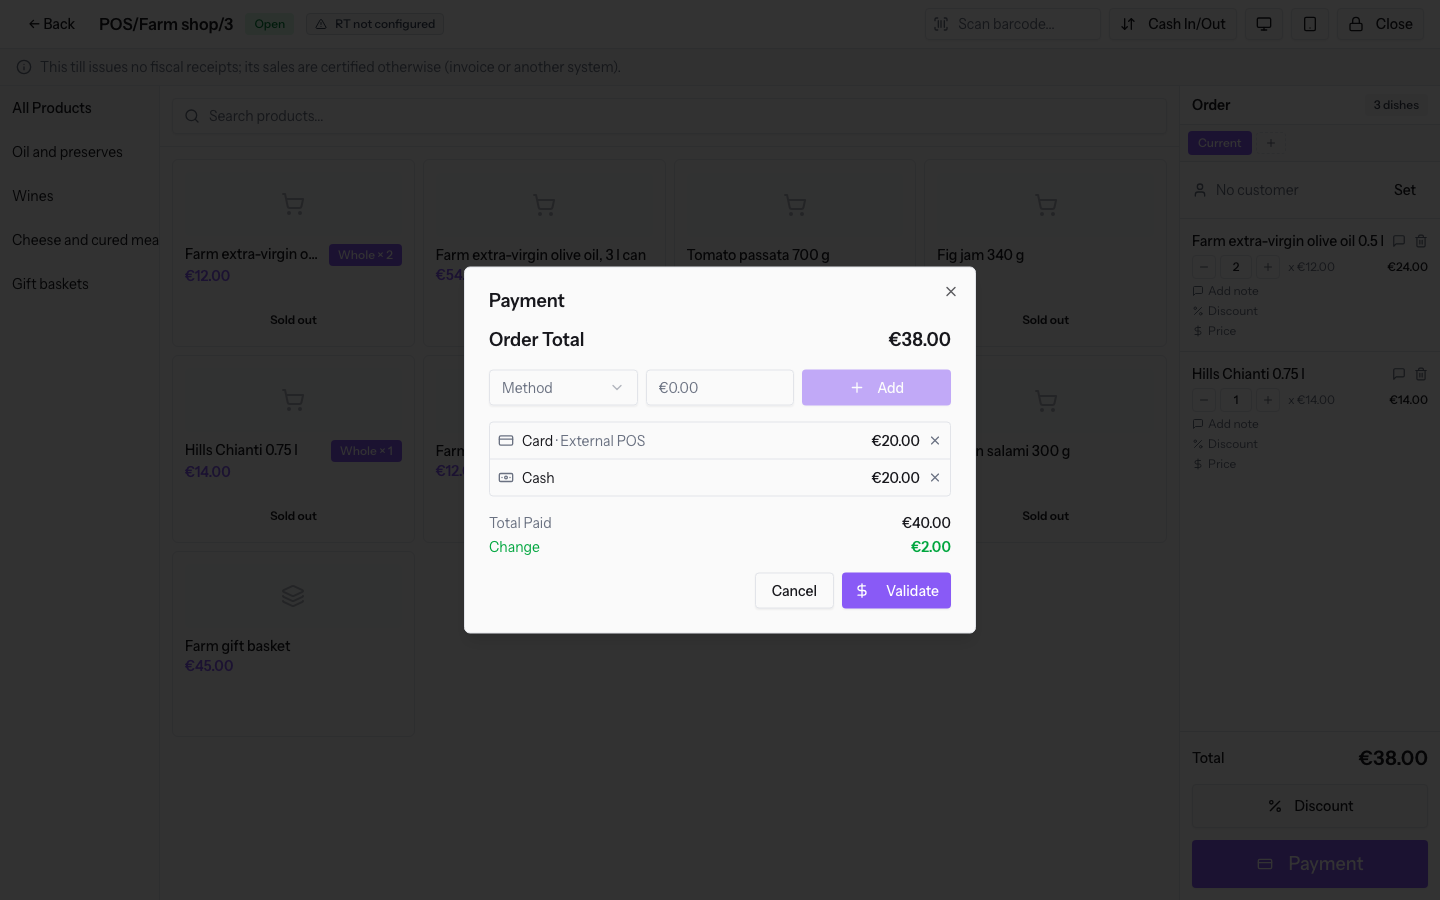
- Press Validate.
The fields of the Payment window:
- Order Total: the amount to collect. It comes from the order.
- Method: the payment method you are adding. The options are Cash and Card, which in the window appears as Card · External POS.
- Amount: the figure paid with the chosen method.
- Reference (optional): appears only with Card. You can write there, for example, the external POS receipt number. Under the field the window reminds: «Record the amount charged on your external card POS. No card reader is used.»
- Total Paid: the sum of the payments added. It updates automatically.
- Remaining: how much is left to collect: €18.00 after the €20.00 by Card.
Important: when the cash received exceeds the remainder, the till calculates the change to give the customer. In the example, €20.00 by Card and €20.00 in Cash on €38.00 give a change of €2.00.
After validation
After Validate the message Order validated and the panel Payment Successful appear.
The panel shows the order name (in the example POS/Farm shop/3/ORDER/4), the amount paid and the change to give («Change: €2.00»).
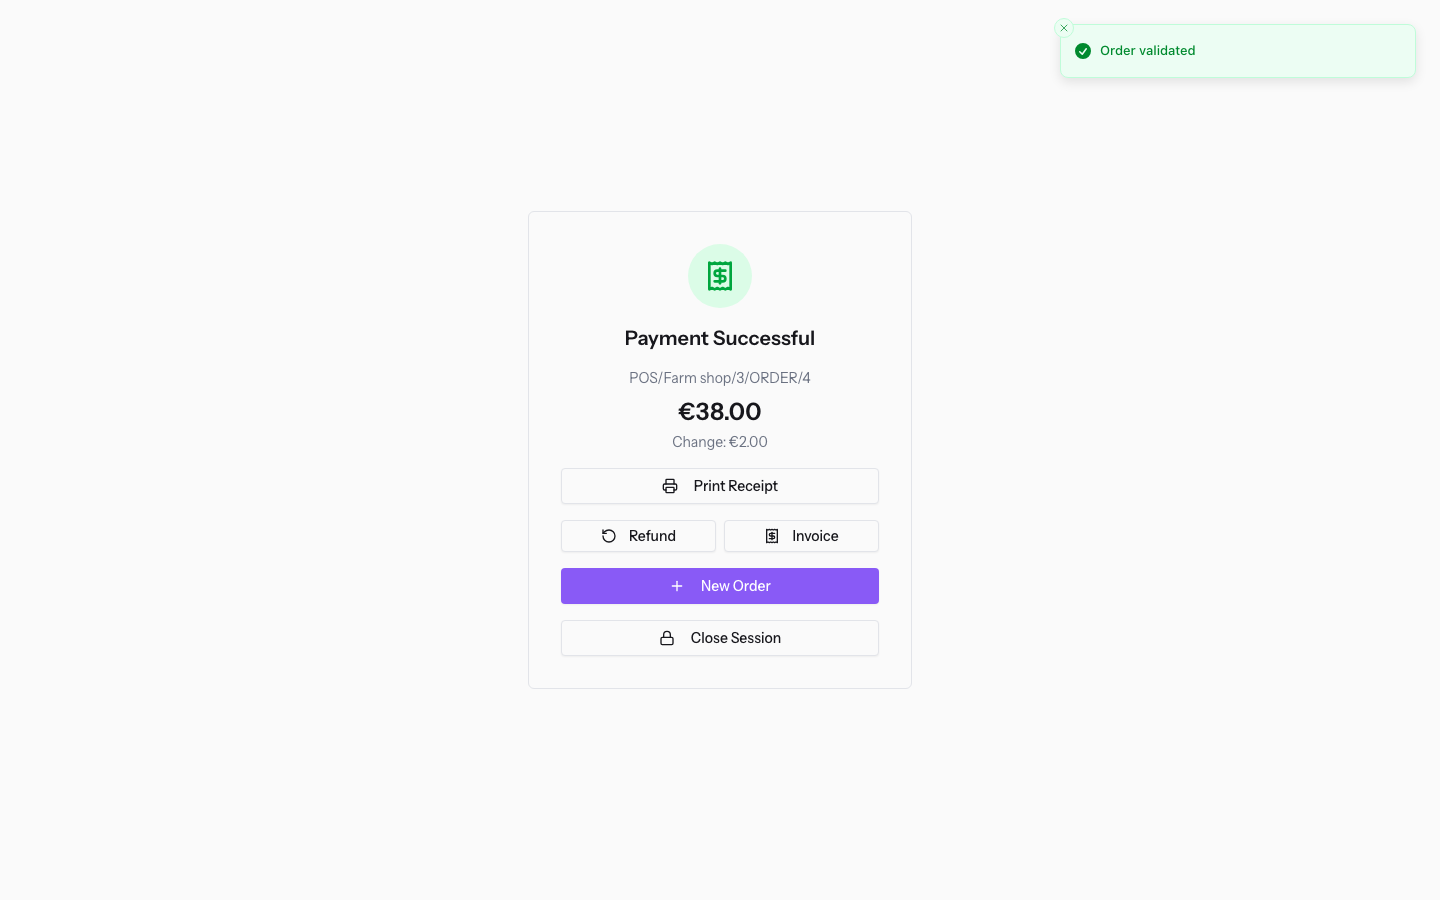
- Invoice: creates the invoice from the order.
- New Order: empties the panel for the next customer.
- Close Session: leads to closing the till.
Note: orders are named like the session plus /ORDER/ and a progressive number.
See it on your company, not on a slide deck.
In 30 minutes we map the software you use today.We show you how much work and how much margin Archimedes gives back.
Show me on my business →What industry are you in?
One tap — it lets us prepare the demo around your world.
What tools do you use today?
Pick the ones you recognise — or just type them. It helps us show you how they migrate.
Last step: your details.
We reply within one working day — and right after, if you like, you pick the demo slot yourself.
We couldn't send your request. Try again, or write to us at [email protected].
By sending, you agree to your data being processed so we can get back to you about the demo. Privacy notice.
Preview form — nothing is sent from this page.
Want to schedule the demo now?
Your call: book the slot you prefer yourself, or we'll call you to arrange it.
Live availability, 30 minutes, instant confirmation. The calendar opens in a new tab.
Lock in your slot ↗We'll get back to you within one working day — and we'll join the call already knowing your world.
The calendar is open in another tab: pick a slot and the demo is booked. Can't see it? Reopen it ↗
Preview page: nothing was sent.
Our calendar is live: take the slot that suits you and the demo is booked. 30 minutes, instant confirmation, no waiting.
Lock in your slot ↗