Point of Sale
All modules
Taking a restaurant order with dish options
Point of Sale · 7 of 16 · 6 min read
On the till screen of the Restaurant till you record the order of a table or a customer. You can choose dish options, such as extra pecorino on the pasta or the polenta style, and add notes for the kitchen. Then you collect the order, including charging it to a guest's room.
Opening the till screen
The till screen opens from the open session of the till. In the demo the session is POS/Restaurant till/2, opened today by Martin Ross.
On the Point of Sale page, press Resume Session in the box at the top of the open session. You can also use the Resume Session button on the Restaurant till card, in the POS Configurations section.
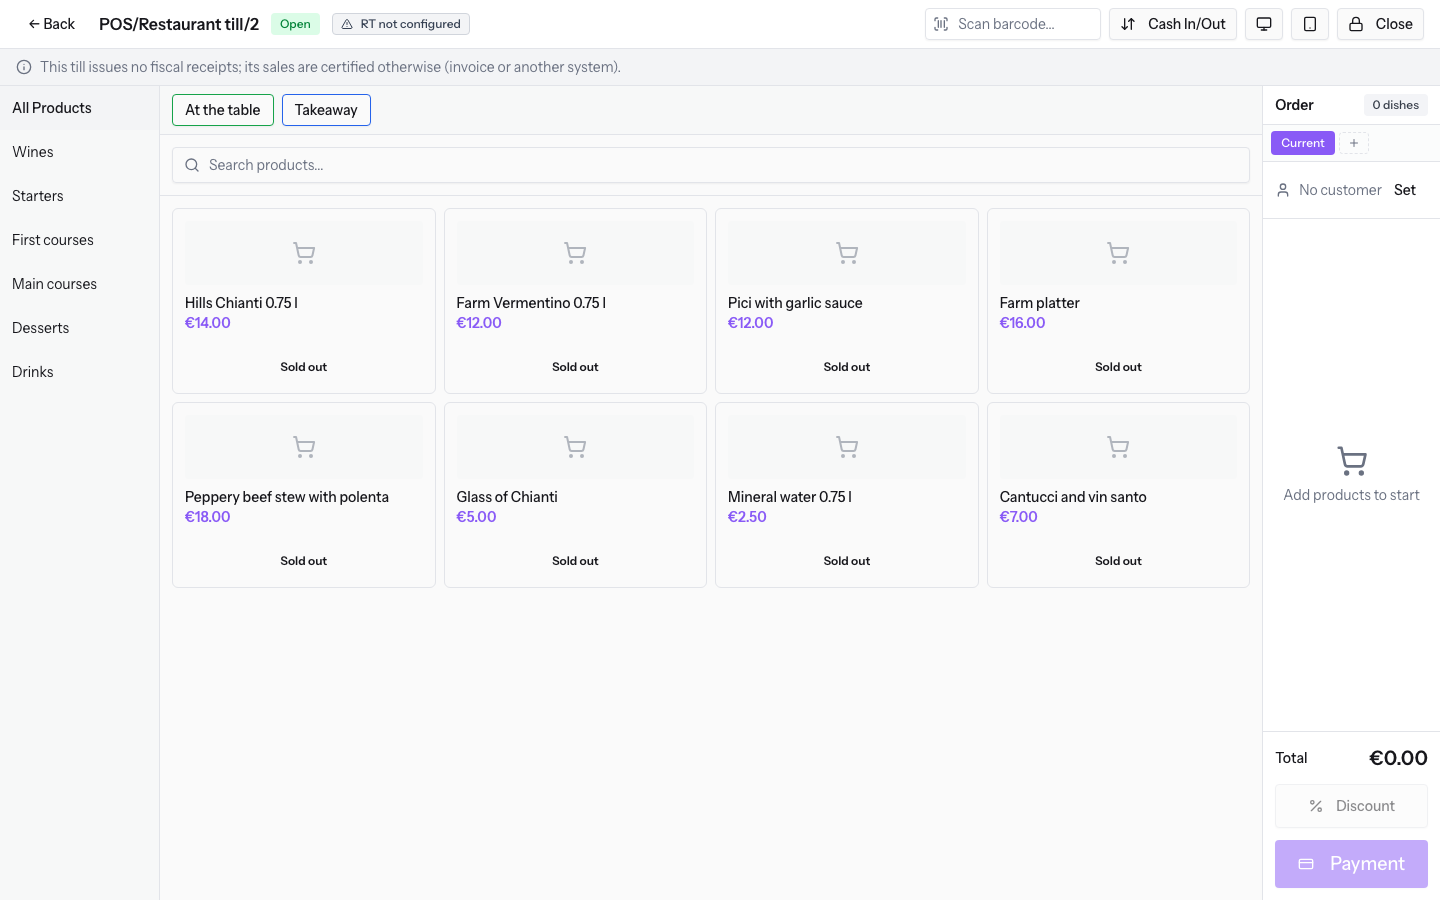
The parts of the screen:
- Session name and status:
POS/Restaurant till/2Open. - Search products...: search for a dish or a drink by name.
- Scan barcode...: the box where you type a product code.
- The category tabs: All Products, Wines, Starters, First courses, Main courses, Desserts, Drinks. With a tab selected, the grid shows only the products of that category: First courses shows Pici with garlic sauce.
- The product grid, with name and price. For example Farm platter €16.00, Pici with garlic sauce €12.00, Peppery beef stew with polenta €18.00, Glass of Chianti €5.00, Mineral water 0.75 l €2.50.
- The Current order panel, with New Order, the customer (Set), Discount and Payment.
Note: this till does not issue fiscal receipts. The screen says so with the text
This till issues no fiscal receipts; its sales are certified otherwise (invoice or another system).
Adding dishes and drinks
A product without options enters the order as soon as you press it. A dish with options opens the options window first (see the next section).
- Press a product in the grid. The line appears in the order panel with its quantity.
- To change the quantity of a line, use the plus and minus buttons on that line. For example, set Glass of Chianti to 4 and Mineral water 0.75 l to 2.
Each line also has the buttons Add note, Discount and Price.
Choosing the options of a dish
Some dishes have option groups, that is, variants the kitchen needs to know. In the demo, the Pici with garlic sauce have the group Fresh pasta and the Peppery beef stew with polenta has the group Polenta style. When you press one of these dishes, a window opens with the dish name and the text Pick the options, then add anything the kitchen needs to know.
- Press the dish in the grid.
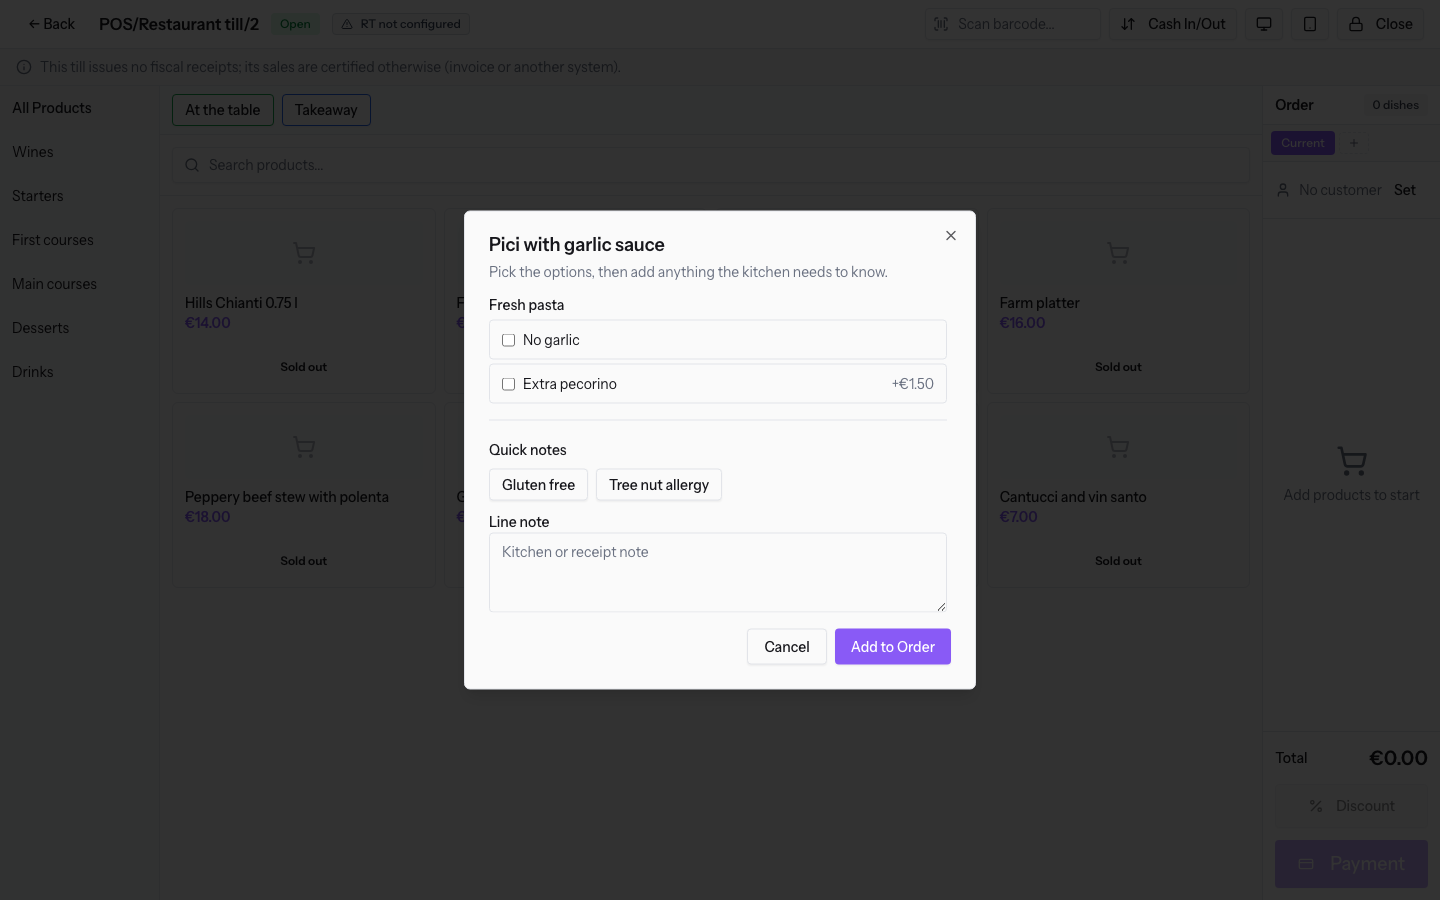
- Tick the options of the group, for example Extra pecorino +€1.50.
- If needed, press a quick note or type in the Line note field.
- Press Add to Order. The dish line appears in the order panel.
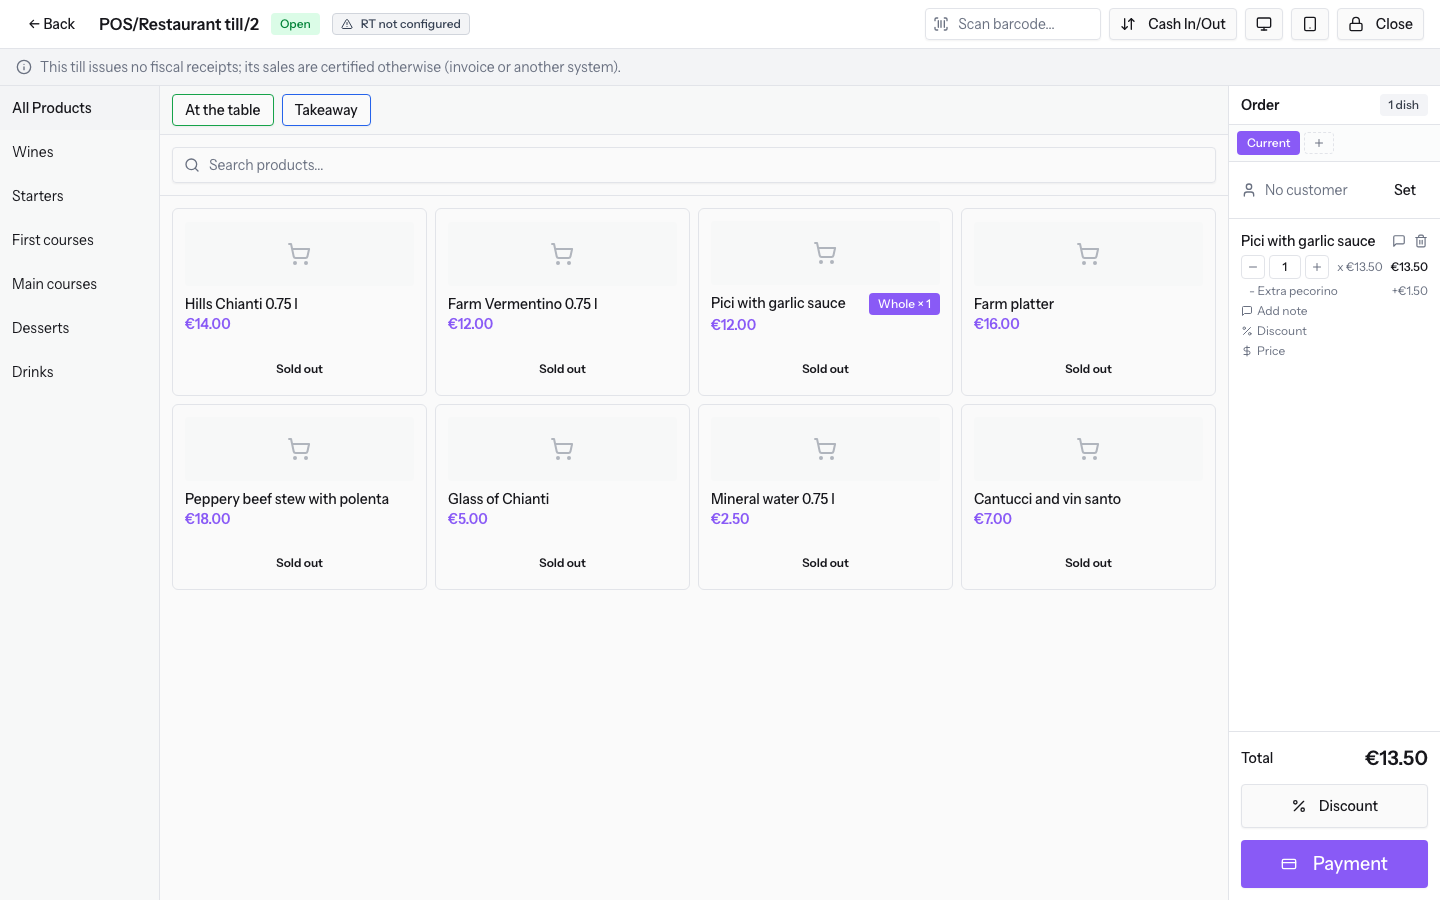
If two portions of the same dish have different options, such as two Pici with garlic sauce, one with Extra pecorino +€1.50 and one without, press the dish again and choose the options of the second portion in the window.
The fields of the window:
- Option group: the name of the group, with its choices below.
- Fresh pasta (Pici with garlic sauce): No garlic and Extra pecorino +€1.50. These are checkboxes: you can choose none, one or both. The surcharge is shown next to the option name.
- Polenta style (Peppery beef stew with polenta): Soft and Grilled. You can choose only one.
- Quick notes: ready-made notes, such as Gluten free and Tree nut allergy, that you add by pressing them.
- Line note: free text for the kitchen about the dish. The field is optional.
- Add to Order: adds the dish with the chosen options and notes.
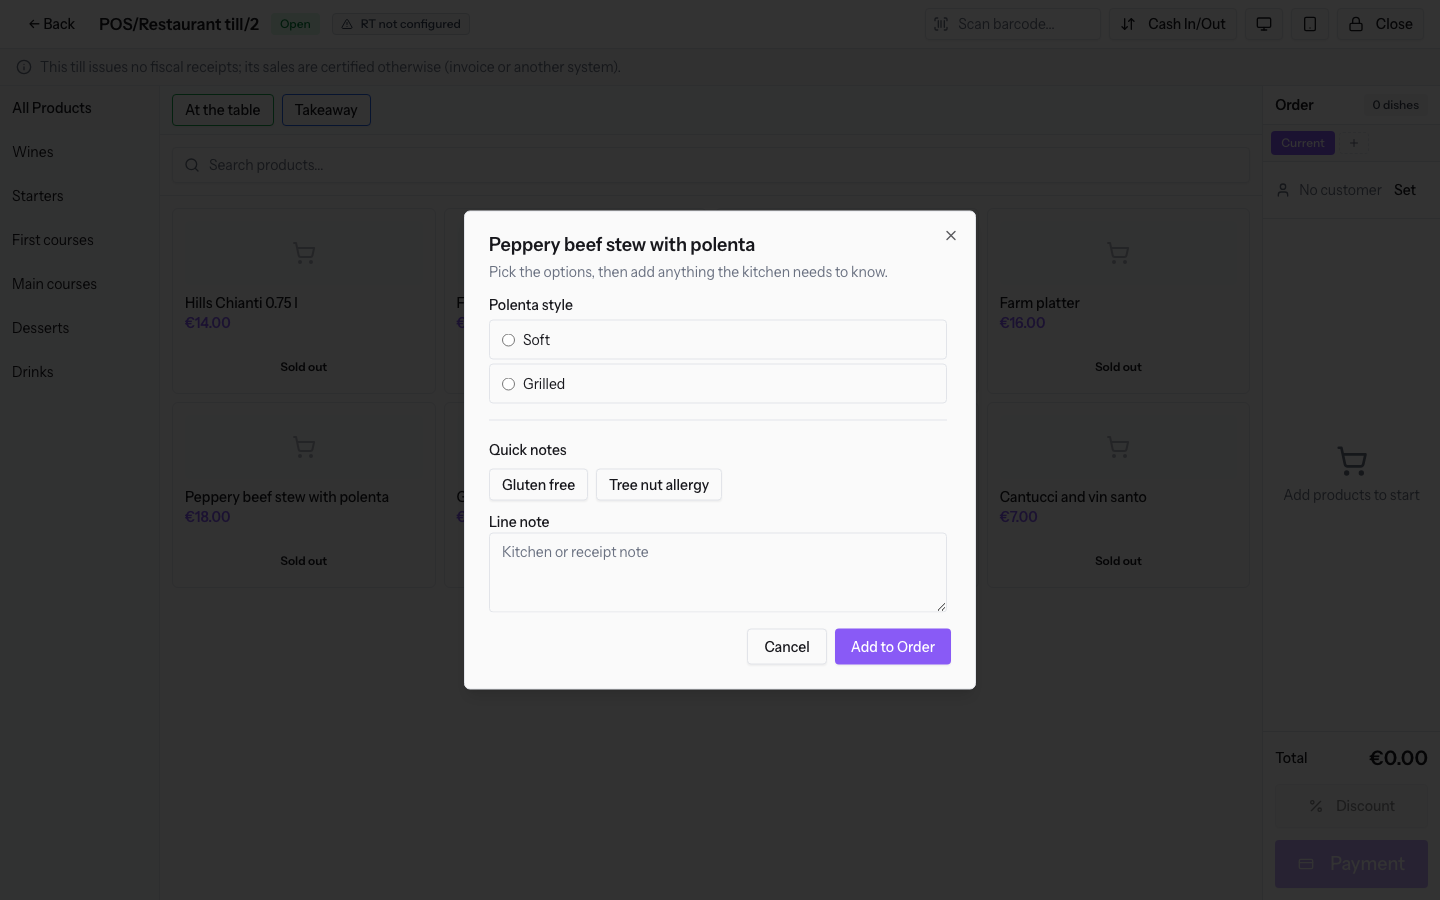
For the Peppery beef stew with polenta, choose Soft or Grilled, then press Add to Order.
Important: order notes, including allergies, are deleted after thirty days. The order stays.
Note: option groups and quick notes are set up in Point of Sale › POS options, reserved for the manager.
Example kitchen ticket for a table: 1 Farm platter, 2 Pici with garlic sauce (one with Extra pecorino), 2 Peppery beef stew with polenta, 4 Glass of Chianti, 2 Mineral water 0.75 l.
Setting the customer
The customer is also needed when you charge the order to a guest's room at the farm.
- In the order panel, press Set. The Set Customer window opens.
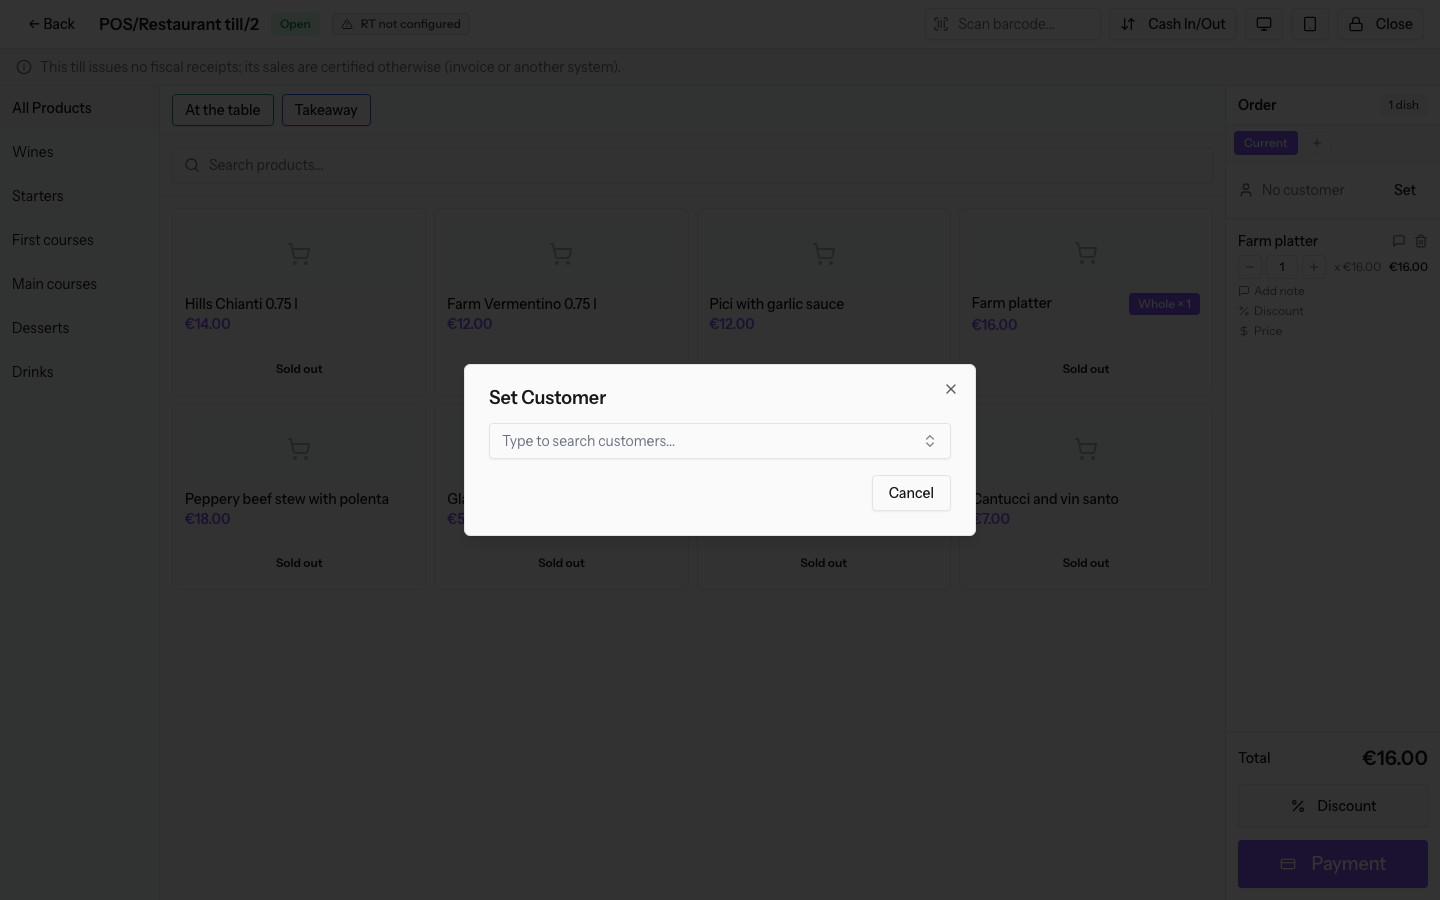
- Press Type to search customers... and type in the Search contacts... field. The list shows the name, email and phone for each contact.
- Choose the customer, for example
Luke Gallagher. The customer is set on the order and the Set button becomes Change.
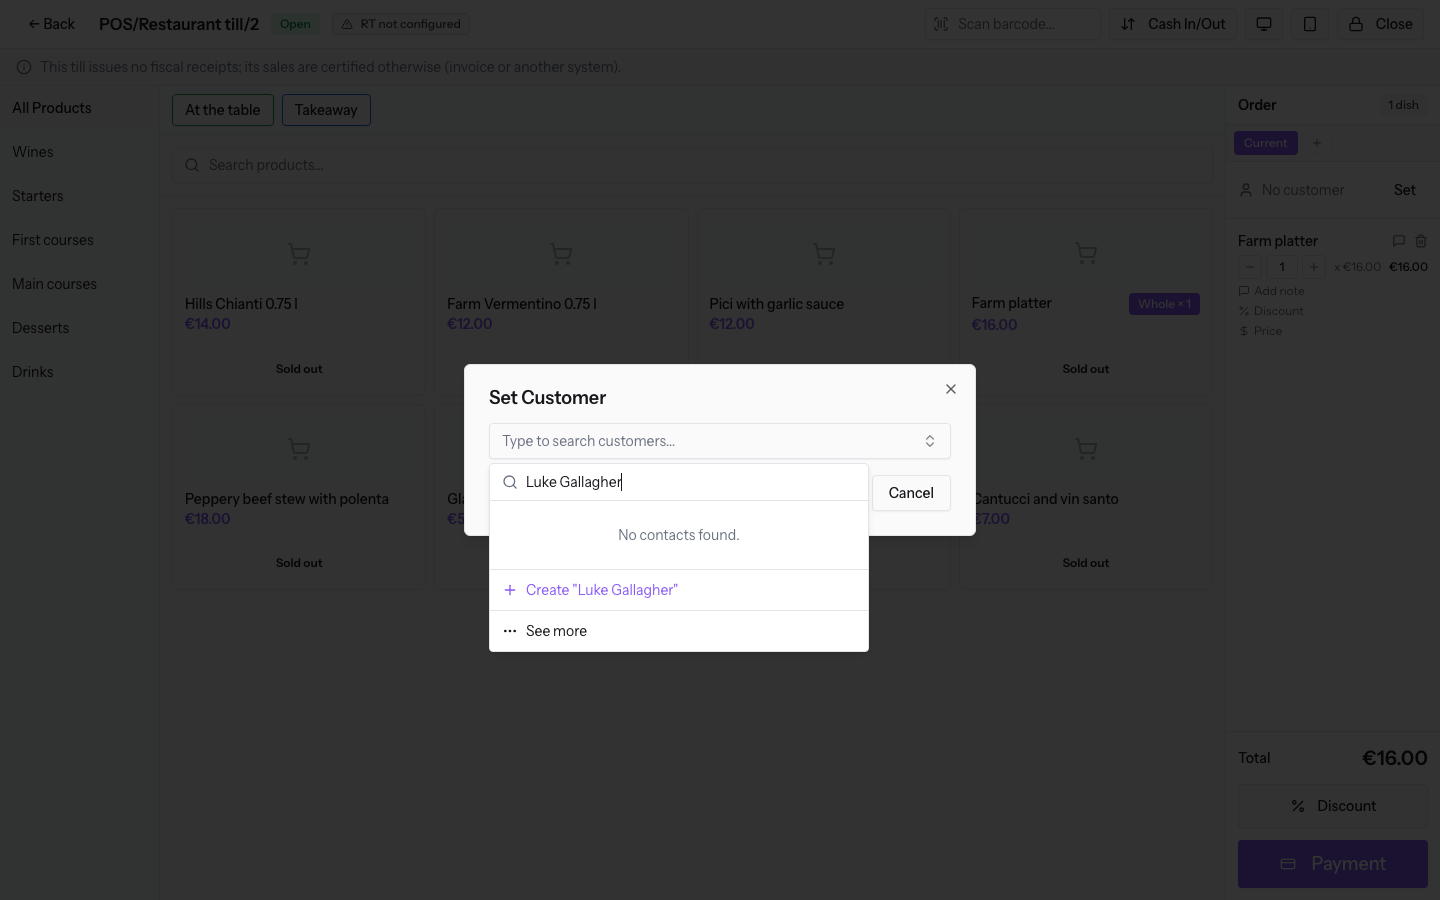
If the customer is not in the list, use Create new contact. See more loads more contacts.
Collecting the order
The Restaurant till accepts Cash, Card and Charge to room. Choose the method based on how the customer pays:
- If the customer pays at the till in cash, choose Cash.
- If they pay with the external card POS, choose the Card method and type the amount entered on the POS.
- If it is a guest of the farm and the order goes to the room, set the customer, such as Luke Gallagher, and choose Charge to room.
- Press Payment. The Payment window opens.
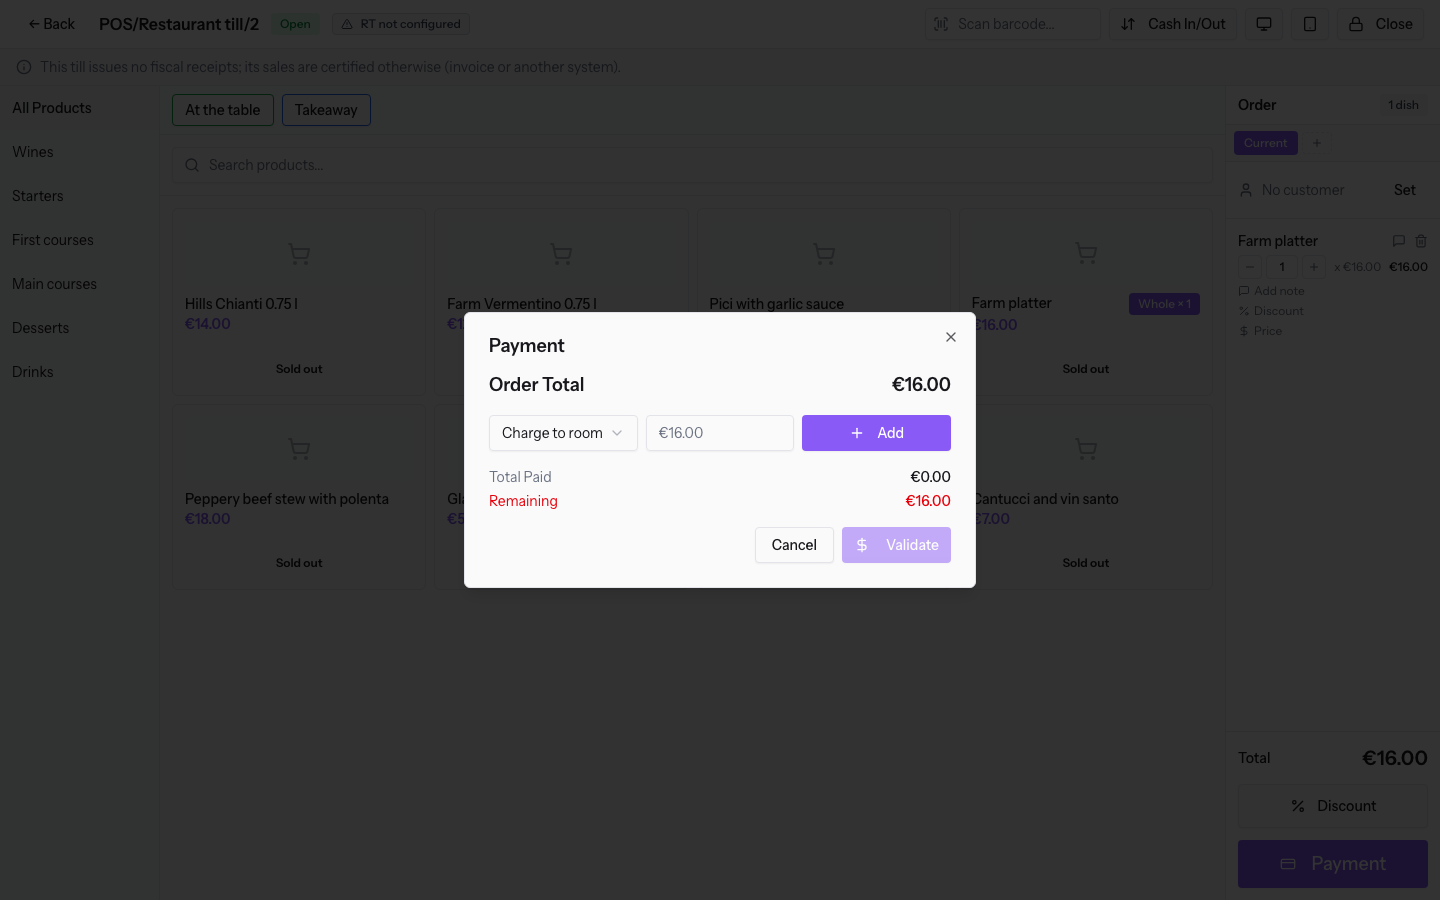
- Choose the method from the list, for example Charge to room.
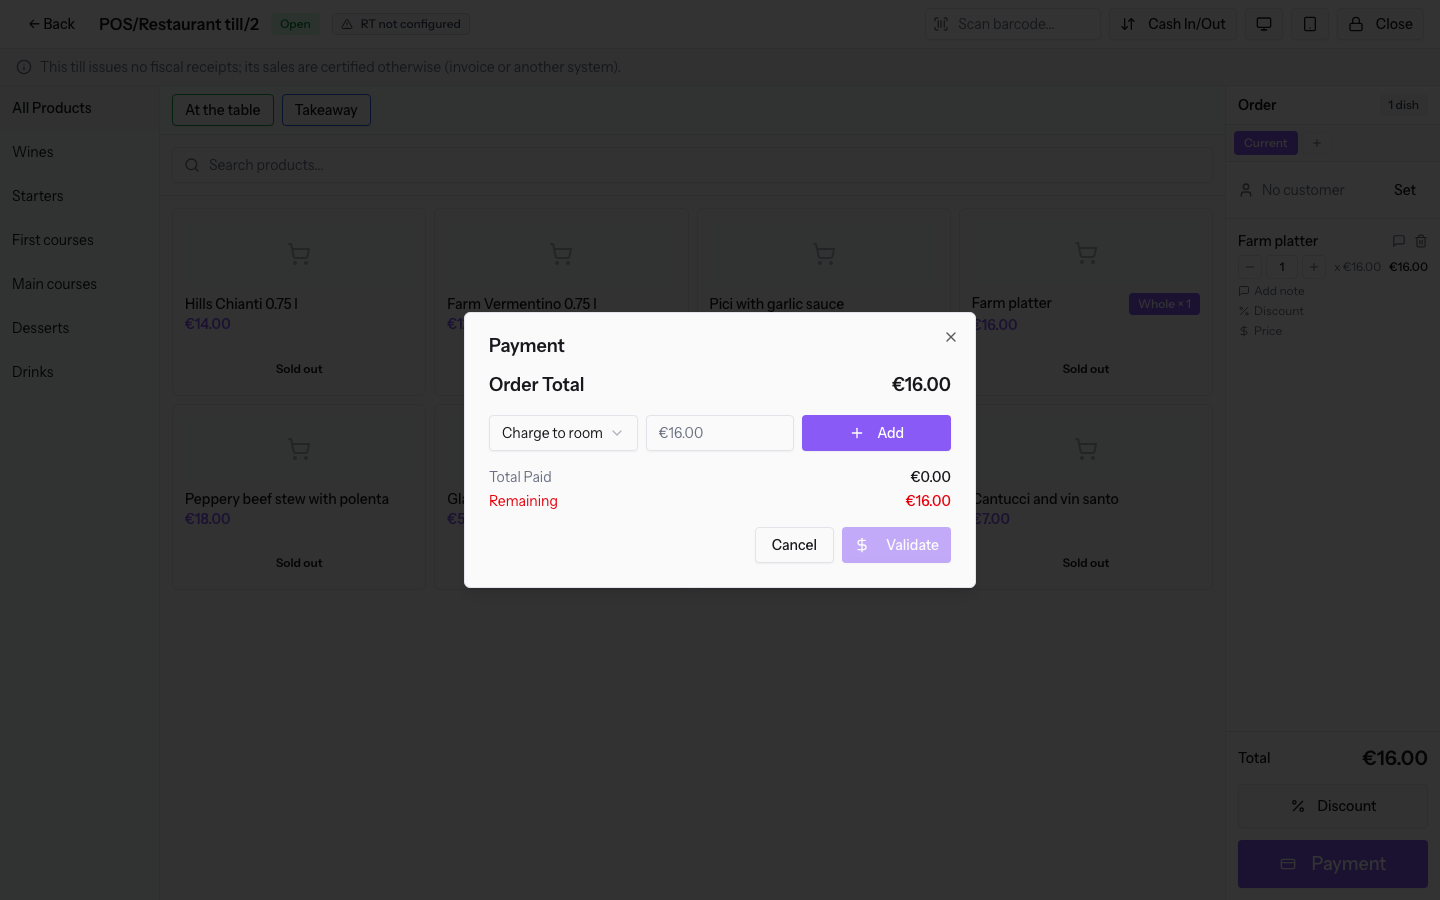
- Type the Amount and press Add. To split the payment across several methods, repeat this step with another method.
- When Remaining is at zero, press Validate.
The fields of the window:
- Order Total: the total to collect. The value is calculated automatically.
- Payment method: the list of the till's methods. The first one offered is Cash.
- Amount: the sum paid with the chosen method.
- Total Paid: the sum of the amounts already added.
- Remaining: how much is still to be collected.
After validation the screen shows Payment Successful, with the order name and amount (POS/Restaurant till/2/ORDER/2 €16.00), and the message Order validated. From here you can press Invoice, New Order or Close Session.
Important: closing the session cancels unpaid orders, which can then no longer be collected. Collect every order before closing the till.
See it on your company, not on a slide deck.
In 30 minutes we map the software you use today.We show you how much work and how much margin Archimedes gives back.
Show me on my business →What industry are you in?
One tap — it lets us prepare the demo around your world.
What tools do you use today?
Pick the ones you recognise — or just type them. It helps us show you how they migrate.
Last step: your details.
We reply within one working day — and right after, if you like, you pick the demo slot yourself.
We couldn't send your request. Try again, or write to us at [email protected].
By sending, you agree to your data being processed so we can get back to you about the demo. Privacy notice.
Preview form — nothing is sent from this page.
Want to schedule the demo now?
Your call: book the slot you prefer yourself, or we'll call you to arrange it.
Live availability, 30 minutes, instant confirmation. The calendar opens in a new tab.
Lock in your slot ↗We'll get back to you within one working day — and we'll join the call already knowing your world.
The calendar is open in another tab: pick a slot and the demo is booked. Can't see it? Reopen it ↗
Preview page: nothing was sent.
Our calendar is live: take the slot that suits you and the demo is booked. 30 minutes, instant confirmation, no waiting.
Lock in your slot ↗