Proxima
All modules
Adding a screen in a merchant's venue
Proxima · 4 of 15 · 4 min read
A screen is the physical device that airs the network's schedule. From Proxima › Screens, you add a screen, connect it to its host, and set its position, opening hours and editorial profile.
Choosing host, position and hours
The choices in this window decide whether the screen can receive campaigns and earn credits.
- If the screen is at a merchant's premises, choose the contact under Host venue and then its Address.
- If the screen is in a company room, leave Host venue empty. A screen with no host venue does not earn credits.
- If the contact has no usable address, choose No address — manual position and enter the coordinates.
- If the screen must earn credits, choose a calendar under Opening hours. Plays outside these hours do not earn credits.
- If the screen must accept every campaign, leave Editorial profile empty. If it must accept only some campaigns, add tags.
Important: a campaign only airs on a screen that is Active and has coordinates. A screen without coordinates receives no campaigns until you enter them.
Note: besides opening hours, earning credits requires a host and an active credit-based hosting agreement.
Creating a screen
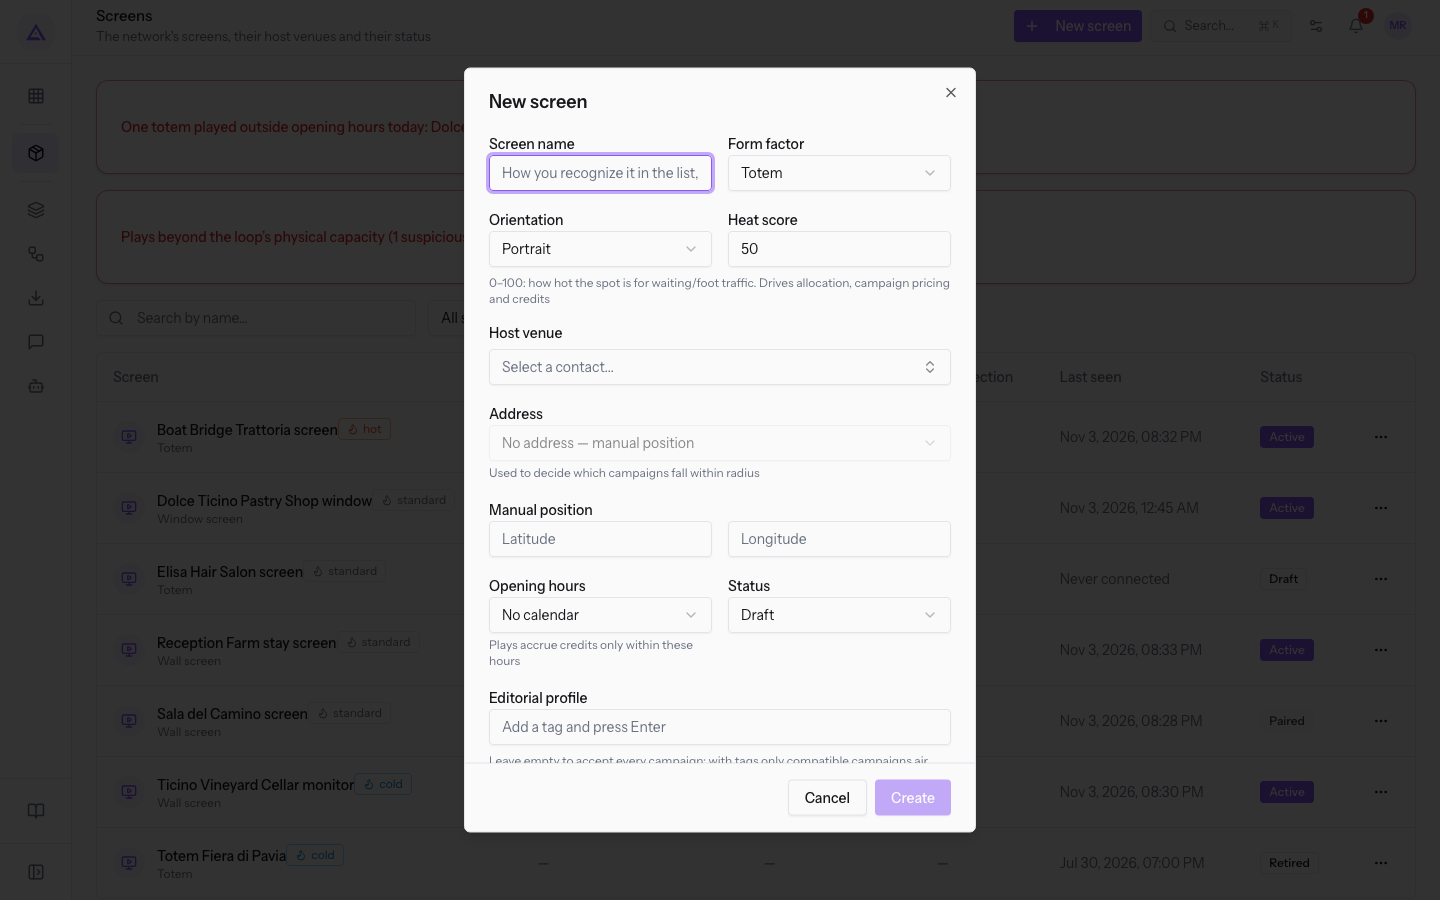
The New screen window registers the screen and its host. The created screen appears in the list on the Screens page.
Before you start: Opening hours are calendars. The host's calendar must already exist to appear in the list.
-
In Proxima › Screens, press New screen.
-
Choose the Host venue before the Address: the suggested addresses are those of the chosen contact.
-
Fill in the other fields and press Create. The screen starts in Draft.
-
Open the screen from the list and read the Pairing code on the Overview tab. This code must be entered on the screen, at the page
/totem-player. -
After pairing, open Edit screen and set Status to Active.
The fields in the window are:
- Screen name: the name you use to recognise the screen in the list.
- Form factor: the type of screen. The default value is Totem.
- Totem
- Wall screen
- Window screen
- Other
- Orientation: the position of the screen. The default value is Portrait.
- Portrait
- Landscape
- Heat score: from 0 to 100, indicates how busy the spot is for waiting and foot traffic. It affects allocation, campaign pricing and credits. The default value is 50.
- Host venue: the merchant that hosts the screen. The list offers Search contacts... and Create new contact.
- Address: the location of the screen. Without a Host venue the field is disabled.
- A contact's address: the coordinates are calculated from the address on save, and the Latitude and Longitude fields do not appear. If the calculation fails, the screen stays without coordinates.
- No address — manual position: the Manual position part appears, where you enter the coordinates.
- Latitude and Longitude: the screen's coordinates. The fields appear only with No address — manual position.
- Opening hours: the host's calendar. Plays earn credits only within these hours. With No calendar, the default, plays do not earn credits.
- Status: the phase the screen is in. The default value is Draft. The values are explained in the section «Screen statuses».
- Editorial profile: the screen's tags. Type in the field Add a tag and press Enter. With the field empty the screen accepts every campaign. With tags it accepts only the campaigns that share at least one tag, so a campaign with no tags stays out.
Screen statuses
The Status field shows where the screen is. When created, leave it at Draft: the move to Paired happens when the screen is paired.
- Draft: the screen is registered and has a Pairing code to enter.
- Paired: the screen has connected. It does not yet receive campaigns, because it is not Active. The move to Active is done from Edit screen.
- Active: the screen has joined the network and can receive campaigns.
- Retired: the screen is out of the network and its code no longer pairs anything.
Note: the code is valid for one pairing only. After use it changes, and the screen's page always shows the current one.
Editing a screen
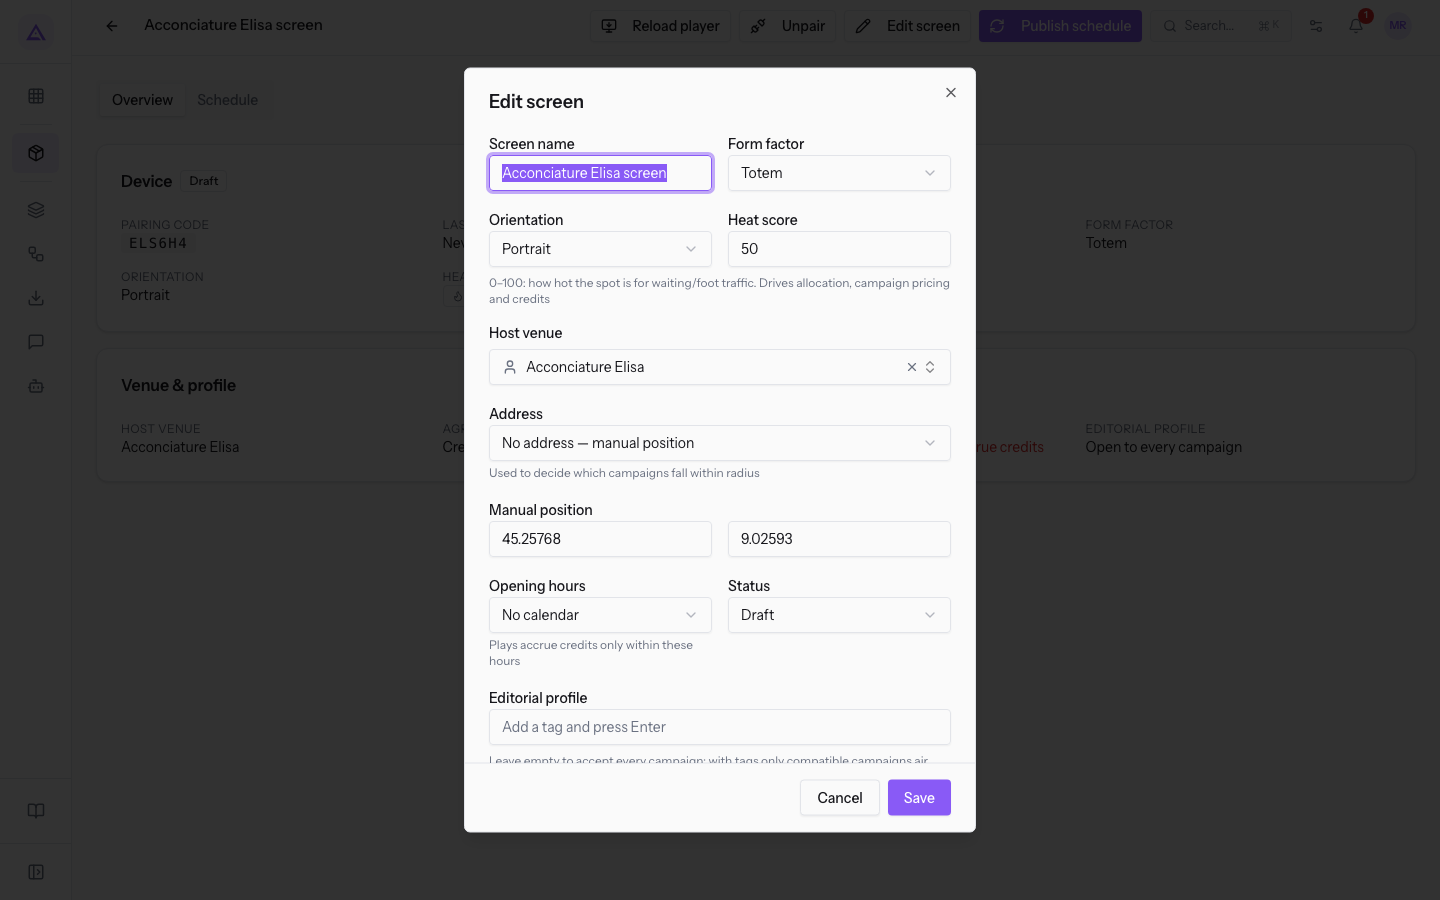
The Edit screen window has the same fields as New screen and shows the saved values. The confirm button is Save instead of Create.
-
In Proxima › Screens, press the screen's row.
-
Press Edit screen on the screen's page.
-
Change the fields and press Save. If you choose a different Address, the coordinates are recalculated on save.
Note: without a calendar the screen's page shows Not configured — plays never accrue credits.
See it on your company, not on a slide deck.
In 30 minutes we map the software you use today.We show you how much work and how much margin Archimedes gives back.
Show me on my business →What industry are you in?
One tap — it lets us prepare the demo around your world.
What tools do you use today?
Pick the ones you recognise — or just type them. It helps us show you how they migrate.
Last step: your details.
We reply within one working day — and right after, if you like, you pick the demo slot yourself.
We couldn't send your request. Try again, or write to us at [email protected].
By sending, you agree to your data being processed so we can get back to you about the demo. Privacy notice.
Preview form — nothing is sent from this page.
Want to schedule the demo now?
Your call: book the slot you prefer yourself, or we'll call you to arrange it.
Live availability, 30 minutes, instant confirmation. The calendar opens in a new tab.
Lock in your slot ↗We'll get back to you within one working day — and we'll join the call already knowing your world.
The calendar is open in another tab: pick a slot and the demo is booked. Can't see it? Reopen it ↗
Preview page: nothing was sent.
Our calendar is live: take the slot that suits you and the demo is booked. 30 minutes, instant confirmation, no waiting.
Lock in your slot ↗