Appointments
All modules
Customizing the appointment calendar
Appointments · 14 of 16 · 5 min read
The calendar settings decide how the appointment schedule appears to you: the hours and days shown, the view it opens with, the first day of the week, and the default values for new appointments. For example, you can have your day start at 9 instead of 8, or open the schedule in the Month view.
Each setting has two levels.
- The organization value applies to all people in the organization who have not chosen their own value. For example, the day runs from 8 to 20, with 15-minute slots.
- Your personal value overrides the organization value only for you. For example, Mario Rossi has chosen to have the day start at 9.
If you want to change the schedule only for yourself, use Appointment settings. If you want to change it for everyone who has not made a choice, change the organization value in Booking setup. The hours and days you set here are those shown in Viewing the appointment calendar.
Changing your settings
The Appointment settings page is available to every user of the module. Your choices apply only to you; where you have not made a choice, the organization value applies.
- Go to Appointments › Settings › Appointment settings.
- Change the value of the fields you want to customize. Every change is saved immediately: there is no Save button.
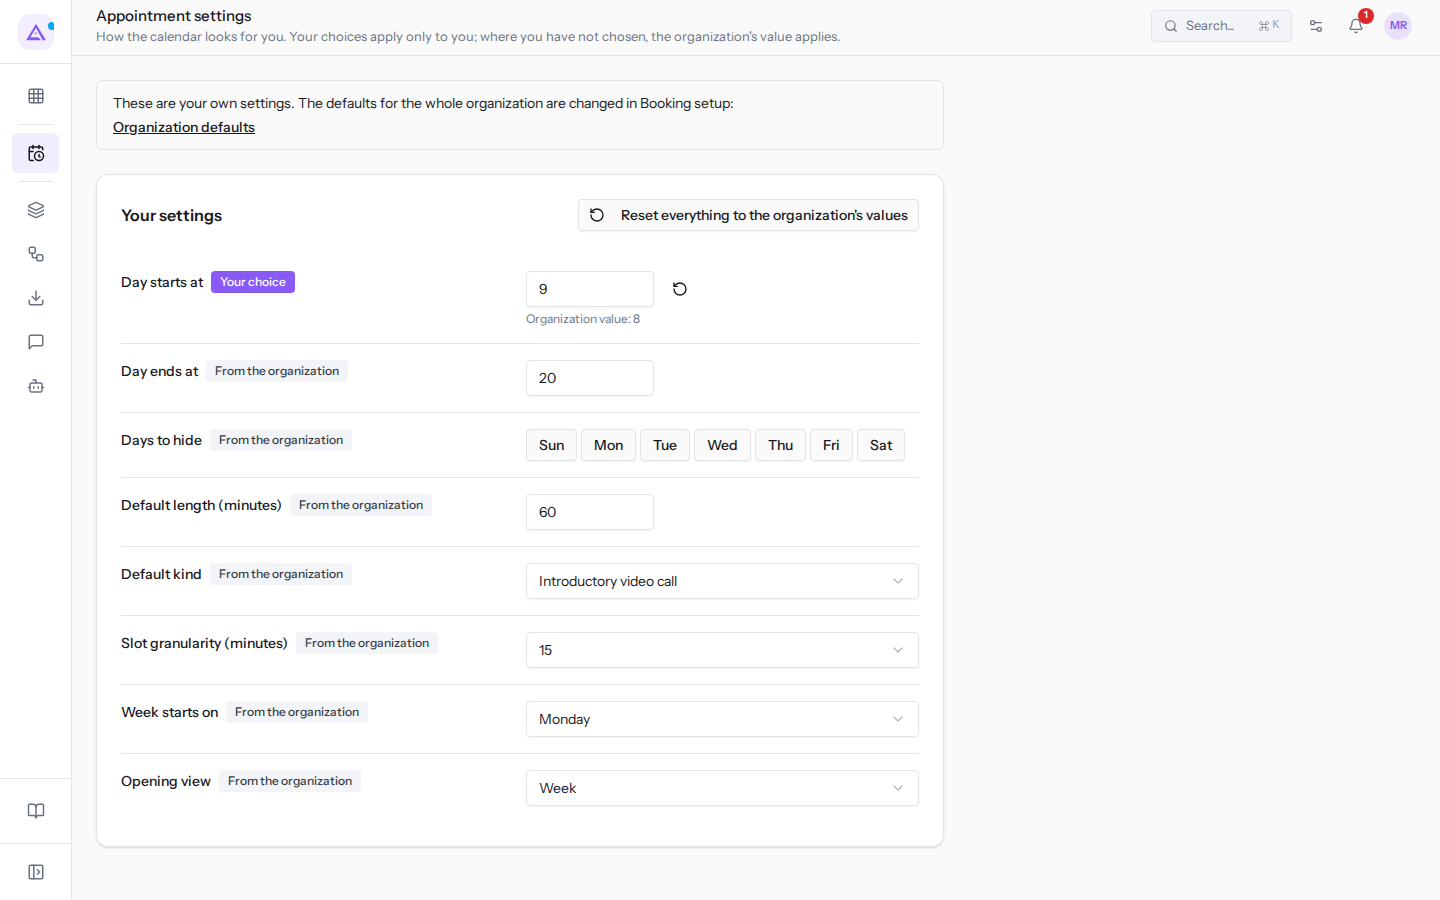
The fields in the Your settings tab:
- Day starts at: the hour from which the day starts in the schedule. For example
9for Mario Rossi. - Day ends at: the hour at which the day ends in the schedule, for example
20. - Days to hide: the days of the week you don't want to see in the schedule. Click the Sun, Mon, Tue, Wed, Thu, Fri and Sat buttons to hide or show a day. If no day is hidden, the value is shown as «No day hidden», for example in the «Organization value» line.
- Default length (minutes): the suggested duration for a new appointment, for example
60. - Default kind: the suggested appointment type. The options are the organization's active appointment types, for example Wedding site visit, Menu tasting or Introductory video call.
- Slot granularity (minutes): the width of the intervals into which the day is divided.
- 5, 10, 15, 20, 30, 60.
- Week starts on: the first day of the week in the schedule.
- Sunday, Monday, Tuesday, Wednesday, Thursday, Friday, Saturday.
- Opening view: the view with which the schedule opens.
- Day, Week, Month.
Next to each setting, a label indicates where the value comes from:
- From the organization: you have not made a choice, the organization value applies.
- Your choice: you have chosen your own value, which overrides the organization value. Below the field the organization value appears, for example «Organization value: 8».
Reverting to organization values
You can undo a single choice or all of them at once. The organization value applies to you again.
To undo a single choice:
- In Appointments › Settings › Appointment settings, find the setting with the Your choice label.
- Click the circular arrow icon next to the field (Use the organization's value). The field shows the organization value again: for example Day starts at goes from
9to8.
To undo all choices:
- Click Reset everything to the organization's values.
- In the Reset all your settings? dialog, click Reset everything. Every setting reverts to the organization value and your choices are removed. Click Cancel to leave everything as it is.
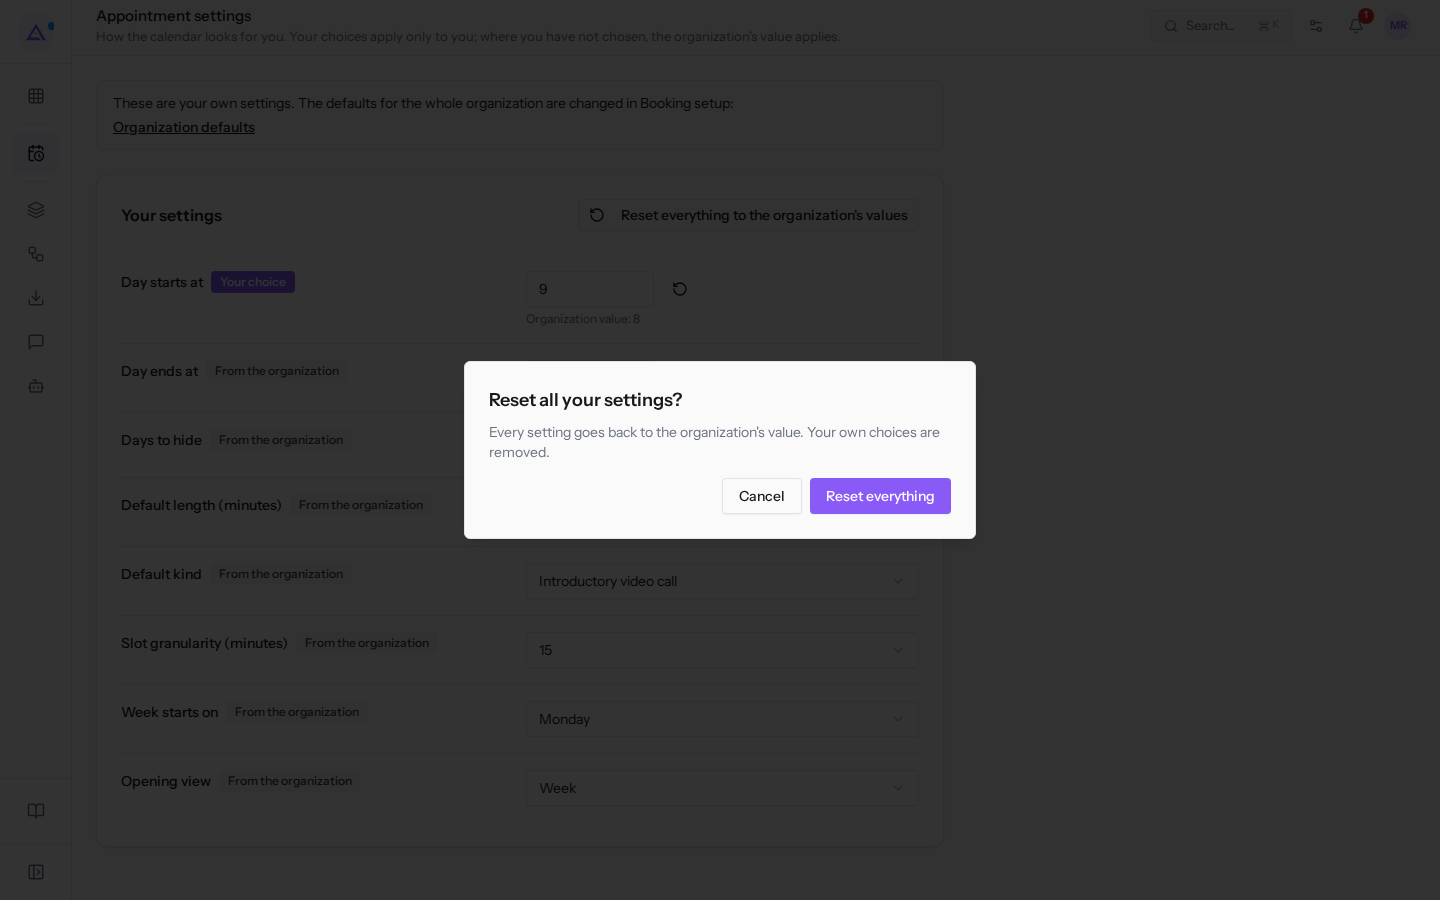
Note: the Use the organization's value icon appears only next to settings that have your own choice. The Reset everything to the organization's values button appears only when you have at least one choice of your own.
Setting organization values
The organization values apply to all people in the organization who have not chosen their own value. The same tab also contains settings that apply to everyone and that individual users cannot change.
The Booking setup item appears only to those who manage appointments, and only those with this permission can change the organization values. The Organization defaults link in Appointment settings appears only to these people.
- Go to Appointments › Settings › Booking setup and open the Organization defaults tab. You can also get there via the Organization defaults link in Appointment settings.
- Change the field values. Here too, every change is saved immediately.
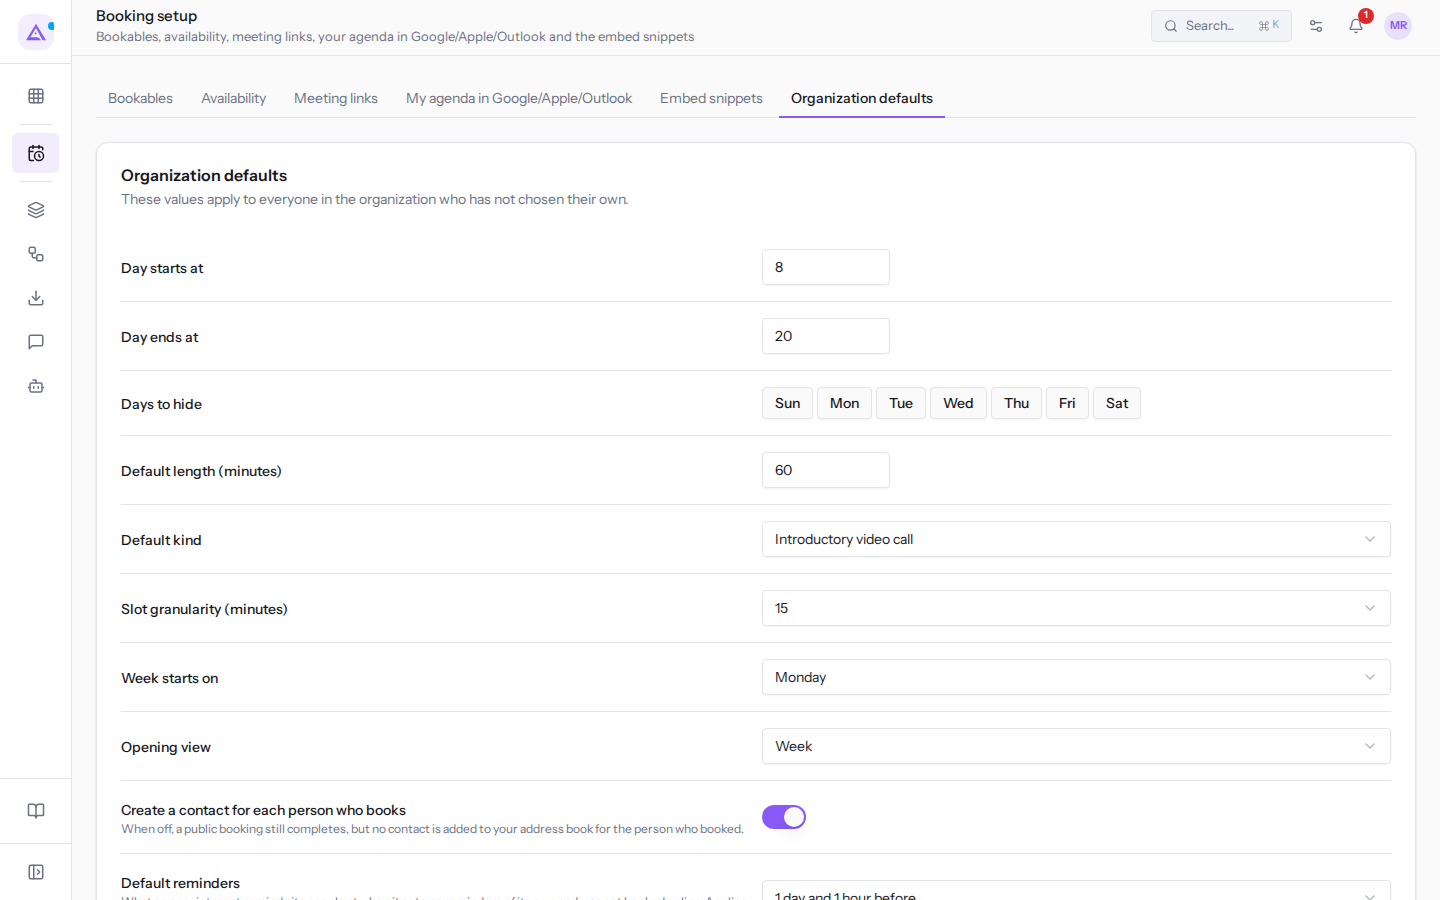
The tab has the same fields as Your settings: Day starts at, Day ends at, Days to hide, Default length (minutes), Default kind, Slot granularity (minutes), Week starts on and Opening view, with the same options.
Note: changing an organization value does not affect users who have their own choice for that setting. Mario Rossi continues to see the day from 9 even if the organization has it starting at 8.
The settings that apply to everyone:
- Default reminders: when an appointment sends reminders if it has no reminders of its own and was not booked online.
- 1 day and 1 hour before, 1 day before, 2 hours before, 1 hour before, No reminders.
- Remind the people an appointment is assigned to: if enabled, the colleagues the appointment is assigned to also receive a reminder, not just the invitees.
- Create a contact for each person who books: if enabled, every online booking adds a contact for the person who booked to the address book. If disabled, the booking is still completed, but no contact is added.
For reminders on individual appointments see Inviting other people and scheduling reminders; for the contact created by a booking see Recognizing and tracking an online booking.
See it on your company, not on a slide deck.
In 30 minutes we map the software you use today.We show you how much work and how much margin Archimedes gives back.
Show me on my business →What industry are you in?
One tap — it lets us prepare the demo around your world.
What tools do you use today?
Pick the ones you recognise — or just type them. It helps us show you how they migrate.
Last step: your details.
We reply within one working day — and right after, if you like, you pick the demo slot yourself.
We couldn't send your request. Try again, or write to us at [email protected].
By sending, you agree to your data being processed so we can get back to you about the demo. Privacy notice.
Preview form — nothing is sent from this page.
Want to schedule the demo now?
Your call: book the slot you prefer yourself, or we'll call you to arrange it.
Live availability, 30 minutes, instant confirmation. The calendar opens in a new tab.
Lock in your slot ↗We'll get back to you within one working day — and we'll join the call already knowing your world.
The calendar is open in another tab: pick a slot and the demo is booked. Can't see it? Reopen it ↗
Preview page: nothing was sent.
Our calendar is live: take the slot that suits you and the demo is booked. 30 minutes, instant confirmation, no waiting.
Lock in your slot ↗