Appointments
All modules
Setting the hours when bookings are possible
Appointments · 10 of 16 · 7 min read
An availability schedule sets the days and hours when an appointment type can be booked. For example a site inspection, a tasting, or a video call. For each schedule you set a standard week and the individual dates that are exceptions.
Before you begin: the Appointments › Settings › Booking setup item only appears to users who manage appointments.
How schedules work
Schedules are managed in the Availability tab of Appointments › Settings › Booking setup. A schedule can be used for multiple appointment types. For example, Booking hours for tours and site visits applies to Wedding site visit, Introductory video call, and Guided farm tour.
- If multiple types follow the same days and hours, assign them all the same schedule. A change to the schedule applies to all types that use it.
- If a type follows different days, create a separate schedule. For example
Tasting hours, Thursday through Sunday. - If only one day changes, leave the week alone: add a single date instead.
Slots are derived only from the schedule's time bands. A schedule with no bands offers no slots. For example Cooking class hours has no bands, so Cooking class cannot be booked.
Note: public holidays and company closures are not entered here. They come from the organization's working schedule and are removed from available slots automatically. To manage them, click Open the company profile.
Note: switching a type to a different schedule from a set date is configured on the appointment type. This is described in the article Creating and editing appointment types.
Choosing or creating a schedule
At the top of the tab, choose the schedule to edit or create a new one.
- Open Appointments › Settings › Booking setup.
- Click Availability.
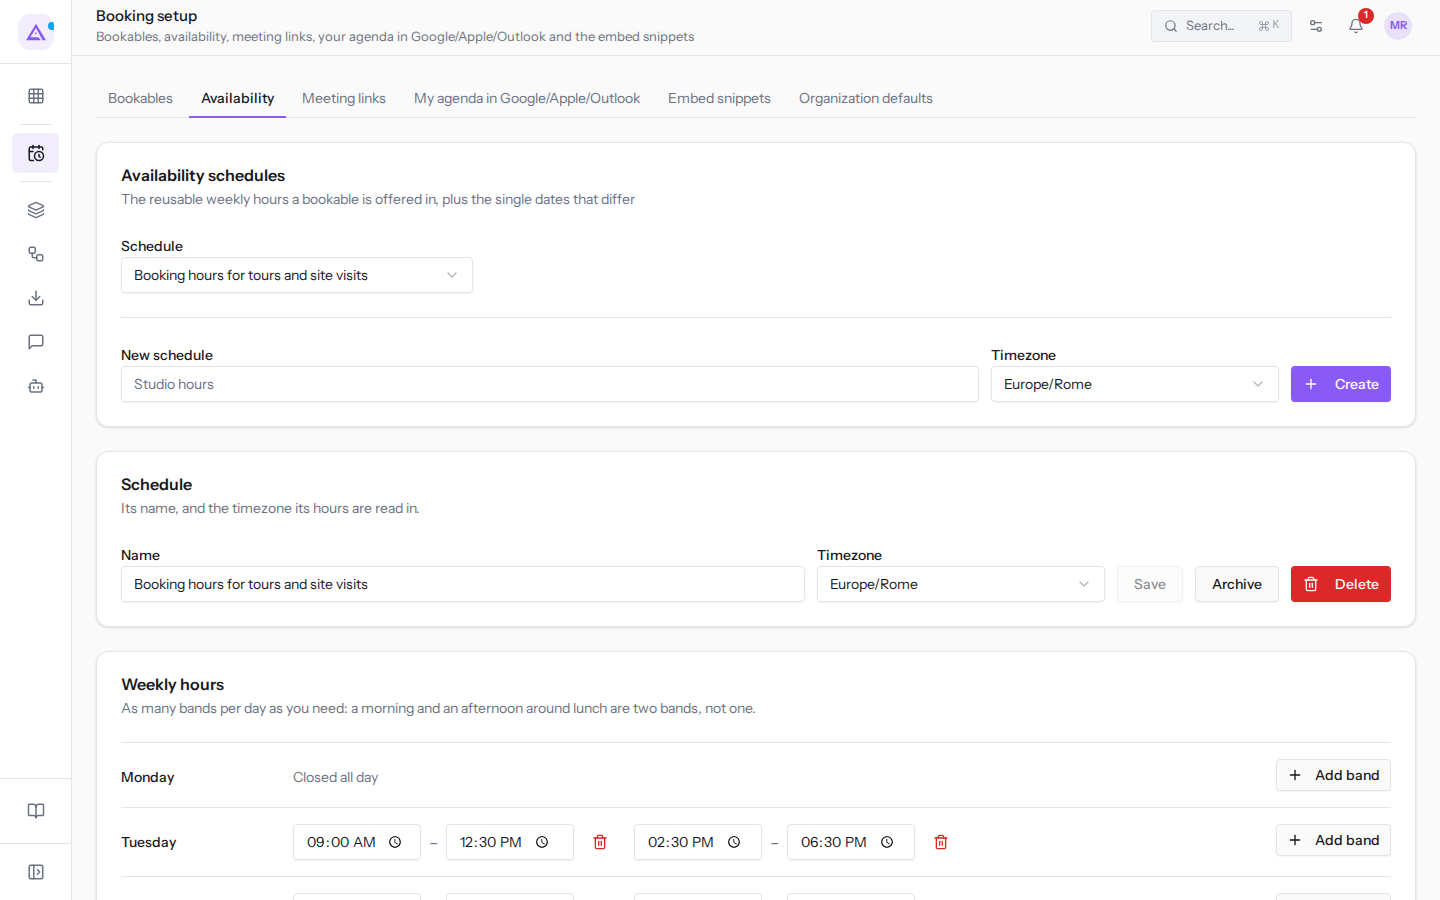
- In the Schedule field, choose the schedule to edit.
- To create a new one, fill in New schedule and Timezone, then click Create.
The fields:
- Schedule: the schedule the tab shows. The options are the organization's schedules, for example
Booking hours for tours and site visitsorTasting hours. An archived schedule has the label «archived» next to it, for exampleSummer hours 2025 — archived. - New schedule: the name of the schedule to create. Without a name the message «Give the schedule a name.» appears. After Create the message «Schedule created» appears.
- Timezone: the time zone in which the hours are read. For example
Europe/Rome.
Renaming, archiving, or deleting a schedule
The schedule panel shows the name and the time zone in which the hours are read. From here you can change both values and decide whether the schedule remains in use.
- Choose the schedule in the Schedule field.
- Edit Name or Timezone.
- Click Save. The message «Schedule saved» appears.
The fields:
- Name: the name of the schedule, which you see when assigning it to a type. For example
Booking hours for tours and site visits. - Timezone: the time zone in which the schedule's time bands are read.
You can choose between archiving and deleting a schedule:
- If a schedule is no longer needed but might be needed again, click Archive. An archived schedule remains in the list with the label «archived» and can be recovered with Restore.
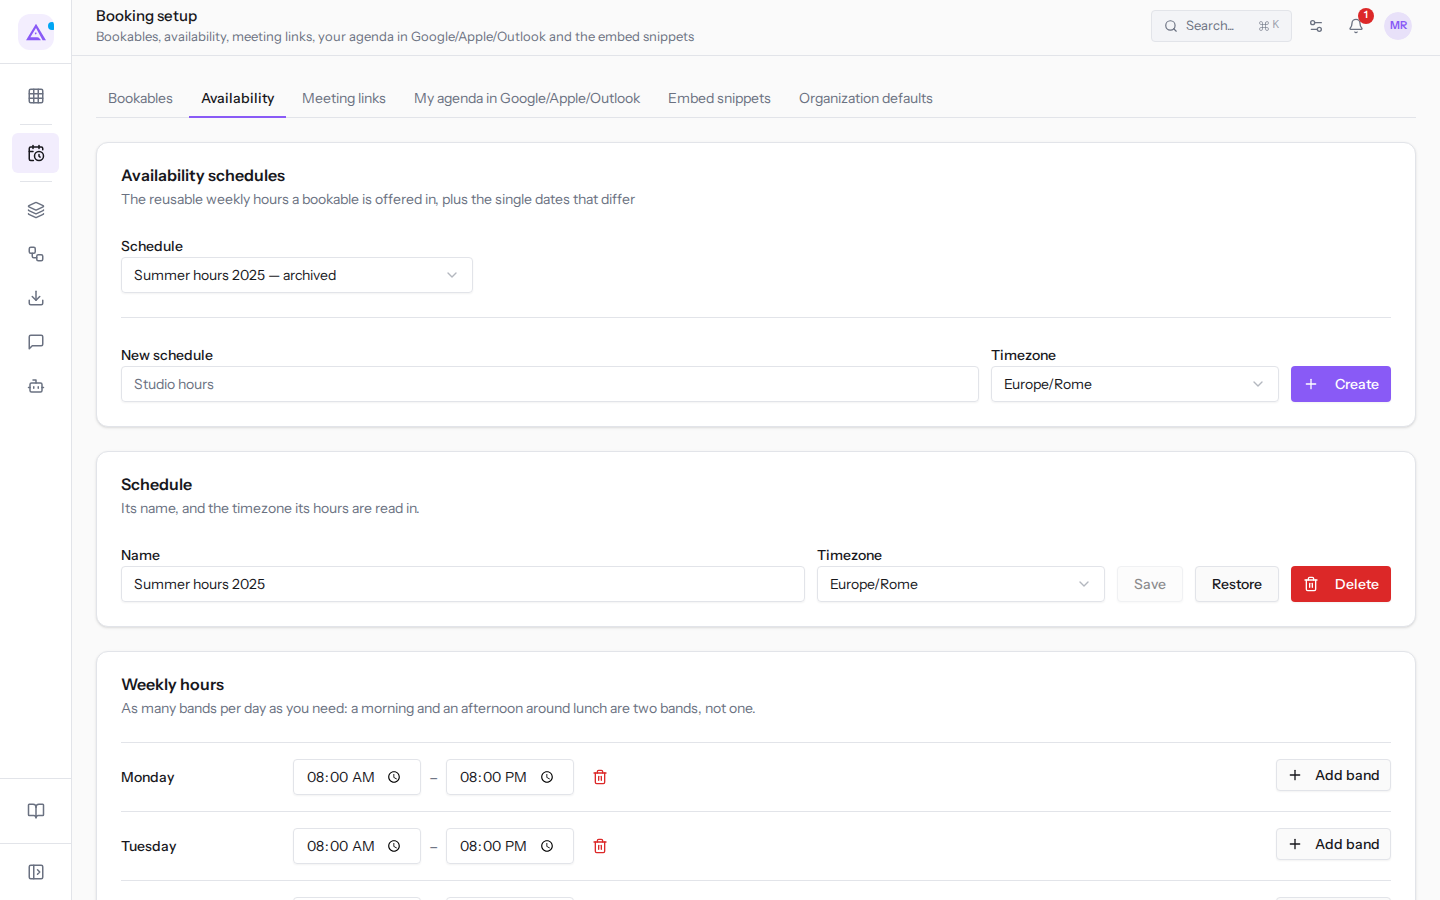
- If it is no longer needed, click Delete. Deletion is irreversible. If no type uses the schedule, it is deleted immediately with no confirmation prompt.
If no type uses the schedule, Archive archives it immediately. When types use it, Archive asks for confirmation: Archive this schedule?. The message states how many types depend on the schedule. Those that use it will no longer be offered until you assign them another schedule. Nothing is deleted or unlinked: if you restore the schedule, the types return to how they were.
- Leave it as it is: closes the confirmation without archiving.
- Archive it anyway: archives the schedule.
Delete also asks for confirmation when types depend on the schedule: Delete this schedule?. The types that use it will no longer be offered. To confirm click Delete it anyway, to go back click Leave it as it is.
Important: if you think you might reuse a schedule, archive it rather than deleting it.
Setting the weekly hours
The Weekly hours panel contains the time bands for each day, from Monday to Sunday. The hours apply every week.
- Choose the schedule in the Schedule field.
- To open a band on a day, click Add band next to the day. The first band of a day runs from 09:00 AM to 01:00 PM; subsequent ones from 02:00 PM to 06:00 PM.
- Enter the start and end time of each band.
- To remove a band, click the bin icon next to the band (Remove band … of …).
- Click Save week. The message «Weekly hours saved» appears.
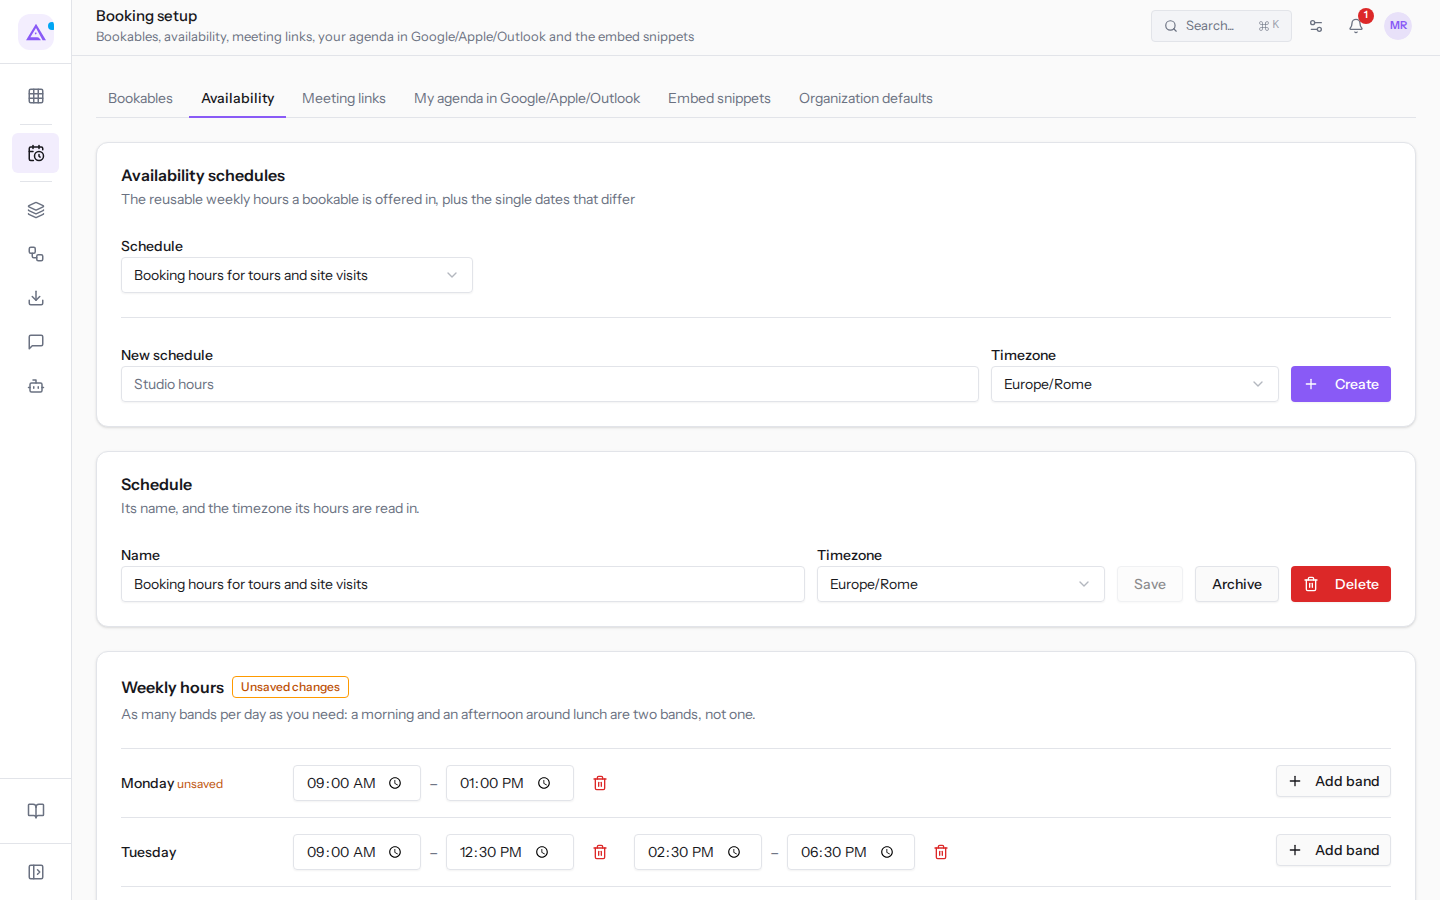
A day with a lunch break has two bands, one for the morning and one for the afternoon. For example Booking hours for tours and site visits has the bands 09:00 AM–12:30 PM and 02:30 PM–06:30 PM from Tuesday to Saturday. Monday and Sunday have no bands, so they are closed.
Until you save, the warning Unsaved changes appears, and the label «unsaved» appears next to the changed days. The changes have not yet been stored. Click Save week to store them, or Discard changes to return to the saved hours.
Note: leave at least one day with a band. An empty week is treated as not configured. The end time of each band must be later than its start time.
Adding a single date
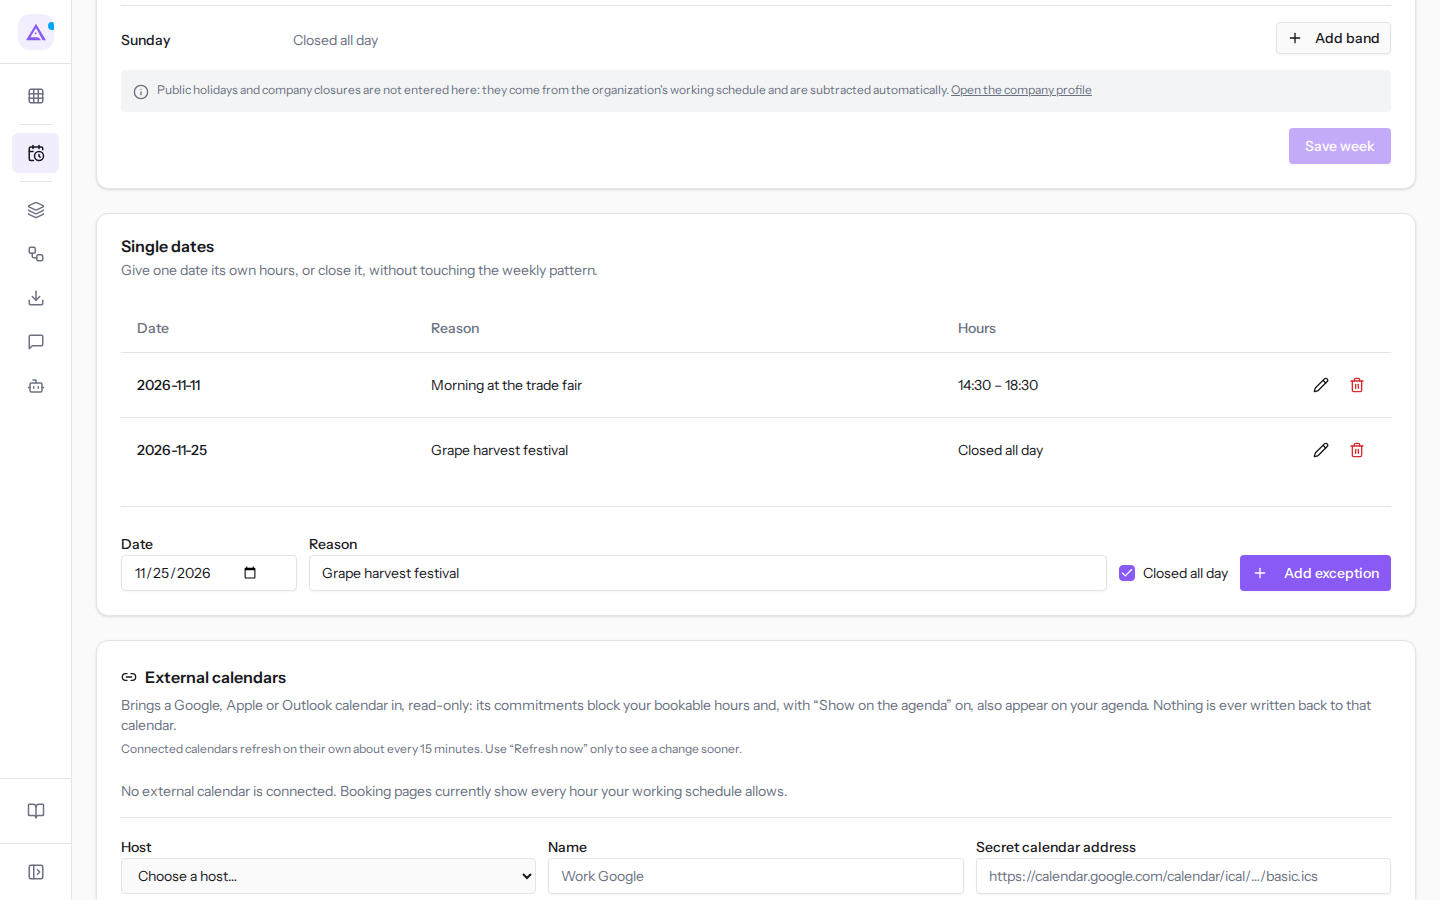
The Single dates panel assigns specific hours to a date, or closes it, without changing the week. If there are no dates, the weekly hours apply every week.
- Choose the schedule in the Schedule field.
- In Single dates, fill in Date and Reason.
- Choose whether the date stays closed with Closed all day. If you uncheck it, the date's time bands appear.
- Click Add exception. The message «Date saved» appears.
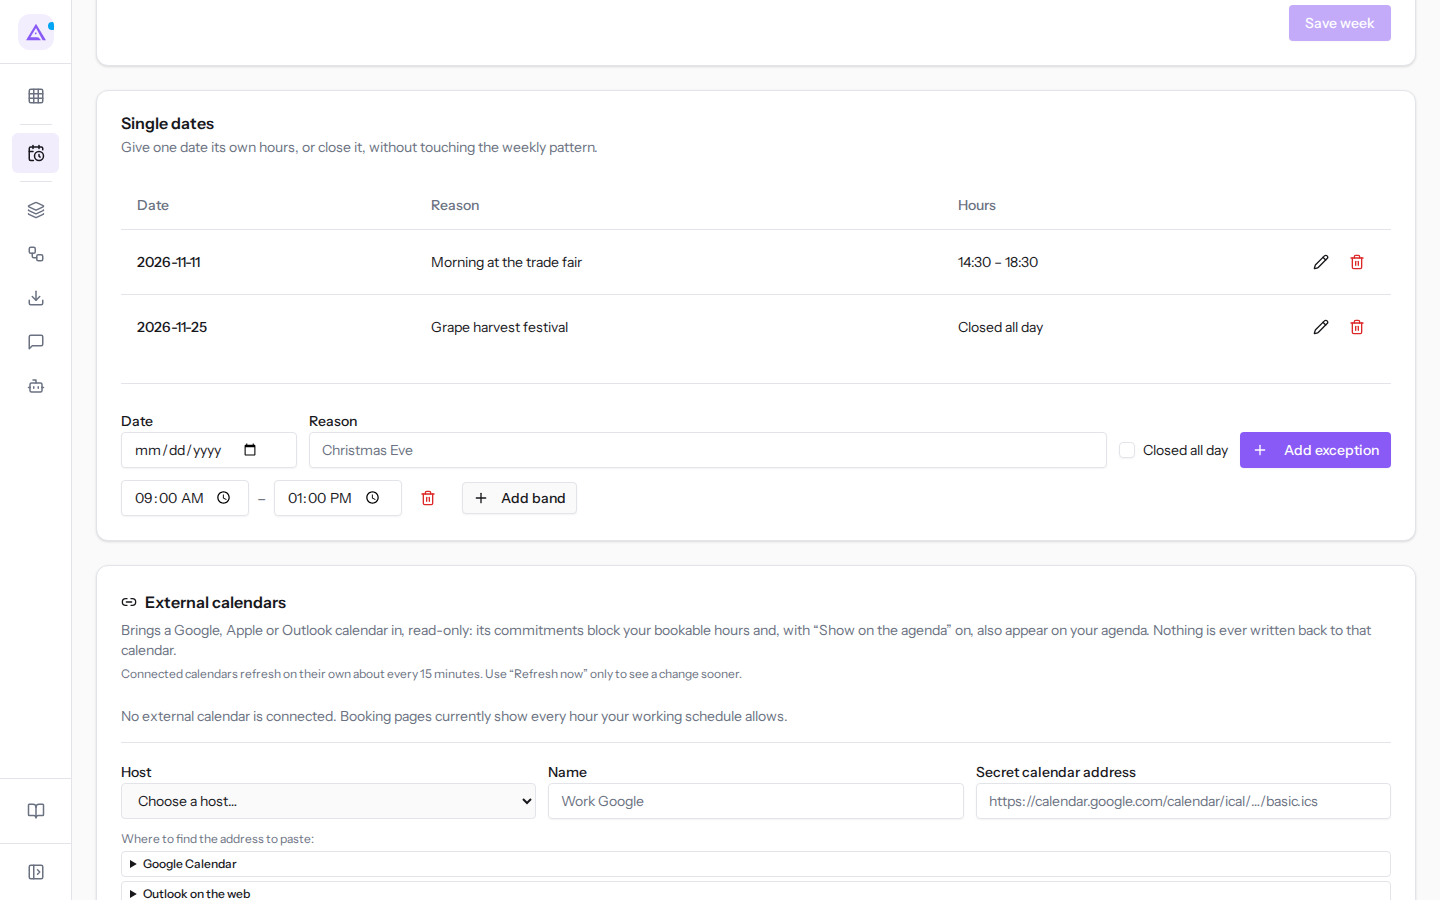
The fields:
- Date: the day that is an exception. The field is required: without a date the message «Pick a date.» appears.
- Reason: why the date is different. For example
Grape harvest festival. The field is optional. - Closed all day: the date offers no slots. The option is checked by default.
- Unchecked, you specify the date's time bands using the same Add band button as for the week. The first band runs from 09:00 AM to 01:00 PM.
Saved dates appear in the panel's list, with the columns Date, Reason, and Hours. To edit one, click the pencil icon (Edit the exception on …): the date returns to the panel's fields; change it and click Add exception again. To remove it, click the bin icon (Remove the exception on …). For example Booking hours for tours and site visits has two dates:
- 2026-11-25,
Grape harvest festival: closed all day. - 2026-11-11,
Morning at the trade fair: open only from 14:30 to 18:30.
Closing a date that already has bookings
If you close a date that already has bookings, the confirmation prompt Close this date? opens. The message states how many bookings there are on that day.
- Close it and cancel them: closes the date and cancels the bookings. Each invitee receives an email and their slot becomes available again.
- Leave the date open: does not close the date. The bookings remain as they are.
Appointments on that day that were not booked using this schedule are not affected.
Important: closing a date with bookings cancels them. Before confirming, check the appointments for that day.
See it on your company, not on a slide deck.
In 30 minutes we map the software you use today.We show you how much work and how much margin Archimedes gives back.
Show me on my business →What industry are you in?
One tap — it lets us prepare the demo around your world.
What tools do you use today?
Pick the ones you recognise — or just type them. It helps us show you how they migrate.
Last step: your details.
We reply within one working day — and right after, if you like, you pick the demo slot yourself.
We couldn't send your request. Try again, or write to us at [email protected].
By sending, you agree to your data being processed so we can get back to you about the demo. Privacy notice.
Preview form — nothing is sent from this page.
Want to schedule the demo now?
Your call: book the slot you prefer yourself, or we'll call you to arrange it.
Live availability, 30 minutes, instant confirmation. The calendar opens in a new tab.
Lock in your slot ↗We'll get back to you within one working day — and we'll join the call already knowing your world.
The calendar is open in another tab: pick a slot and the demo is booked. Can't see it? Reopen it ↗
Preview page: nothing was sent.
Our calendar is live: take the slot that suits you and the demo is booked. 30 minutes, instant confirmation, no waiting.
Lock in your slot ↗