Attendance
All modules
Configuring workplace locations and their attendance check
Attendance · 11 of 16 · 6 min read
The Workplace Locations screen lists the workplaces where people clock in. For each location you set the position, the attendance check type, and the people assigned.
Before you start: configuring locations requires the Administrator group of the Attendance module.
The Workplace Locations screen
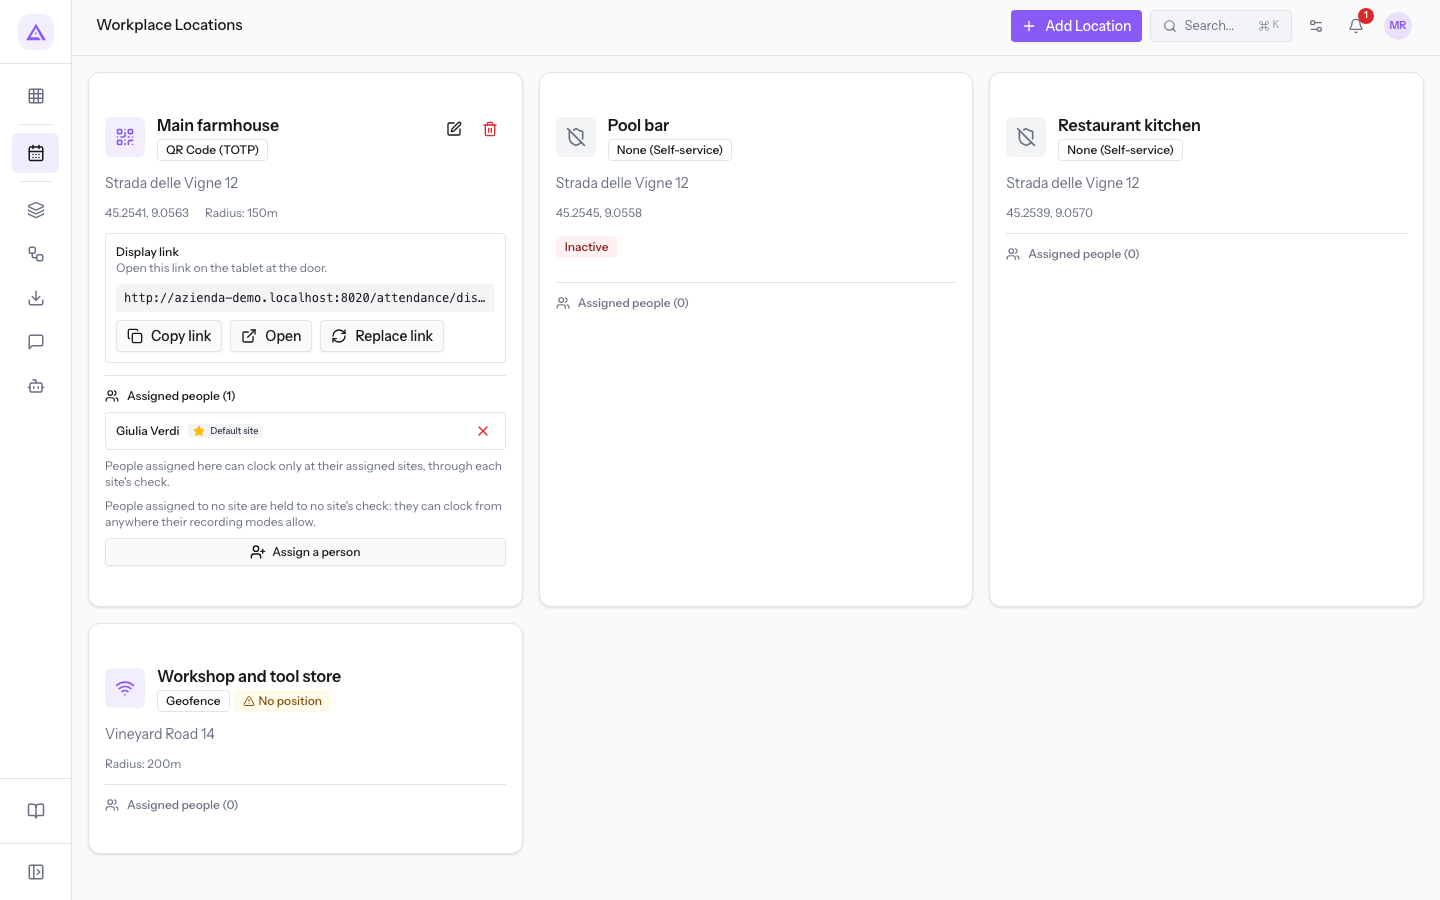
Attendance › Locations shows a card for each location. From the card you open editing, deletion, and the list of assigned people.
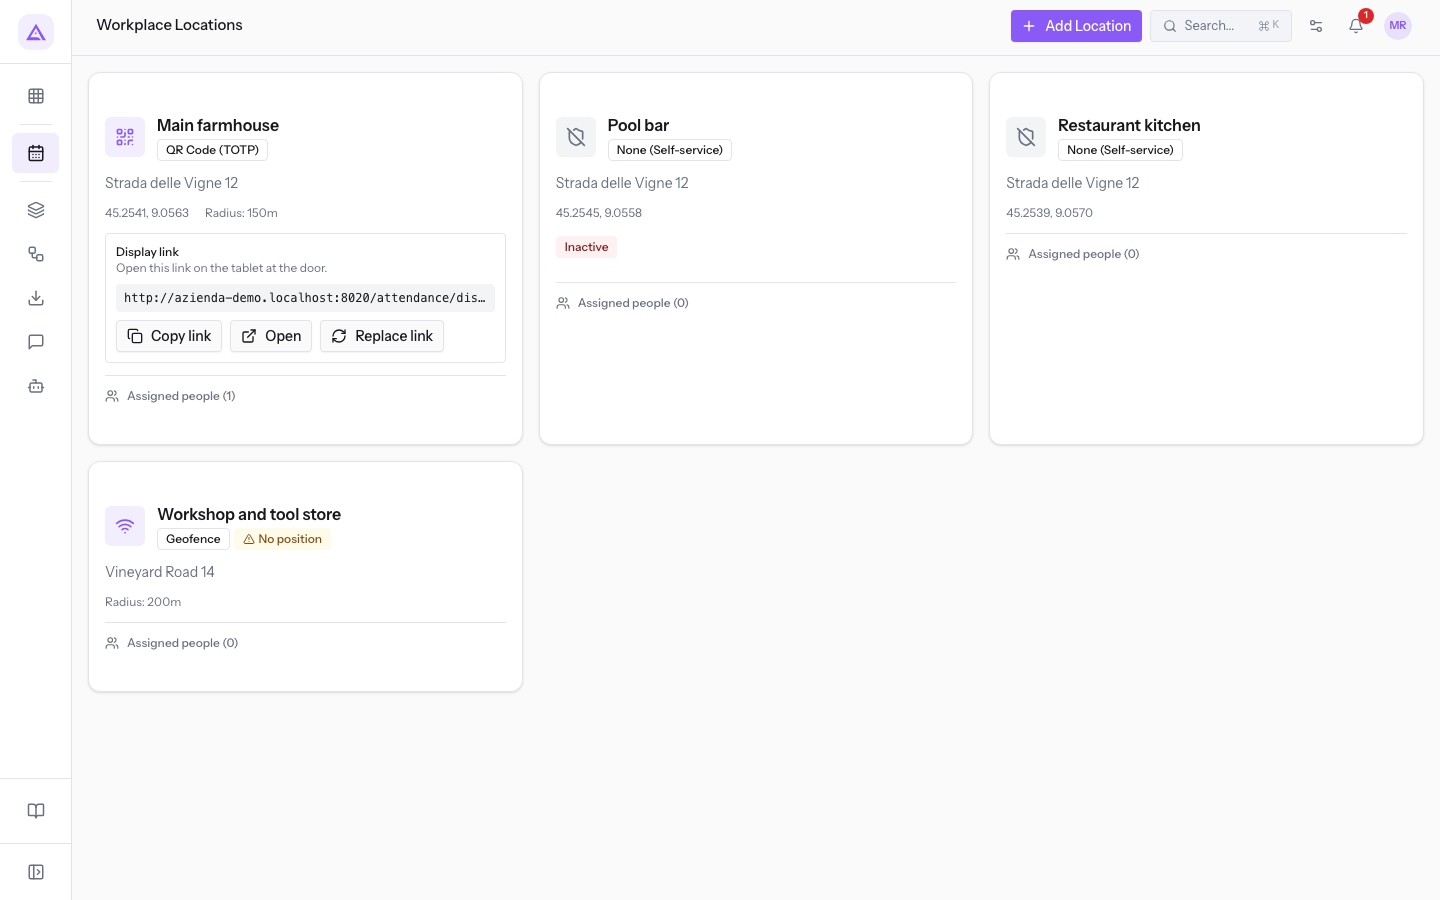
Each card contains these elements:
- Name and policy: the location name and the chosen check type.
- Address: appears if it was entered.
- Coordinates and radius: the coordinates appear if they were set. The radius in metres appears only on locations that check attendance, so not with None (Self-service).
- Inactive: flags a location that is not active. In this state, No position and the Display link do not appear. In the demo organisation,
Pool baris inactive. - No position: flags an active location that checks attendance but has no coordinates. The warning text is "Staff will be refused here until the position is set."
- Display link: appears on active locations with a QR code, with the buttons Copy link, Open and Replace link. Using the link is described in the article "Show the QR code at the site entrance".
- Assigned people: the button shows the number of assigned people and opens the panel with their list.
The Edit Location and Delete icons appear when you hover over the card. On touch devices they are always visible.
Choosing the attendance check
The Enforcement Policy field sets which check is asked of people who clock in at that location. Every option other than None (Self-service) requires the location's position.
- None (Self-service): no check. Choose this option if on-site presence does not need to be verified. Coordinates are not required.
- QR Code (TOTP): the person clocks in by scanning the code shown on the location's display. At entry, the device position is also checked. Choose this option if a tablet with the display can stay at the entrance.
- Geofence: the device position is checked against the location's area. Choose this option if you do not want a display at the entrance and people clock in from a device that shares its position.
- QR + Geofence: the check combines the QR code and the position check, both at entry and at exit. Choose this option if you want both checks on every clock-in.
With position checking, the clock-in is rejected if the person is outside the area, if the device does not share its position, or if the position is not precise enough. The position is read only at the moment of clock-in, never between clock-ins.
Adding a location
Create one entry for each location you want to manage separately.
- In Attendance › Locations press Add Location.
- Enter the Name and, if you wish, the Address.
- Choose the Enforcement Policy. If it is different from None (Self-service), the window shows "This check needs the site's position. Search the address or use your current position."
- Set the position: choose an address from the suggestions, press Use my current position, or enter Latitude and Longitude. When the coordinates are complete the message disappears.
- Press Create Location. The button stays disabled while the Name or the required position is missing.
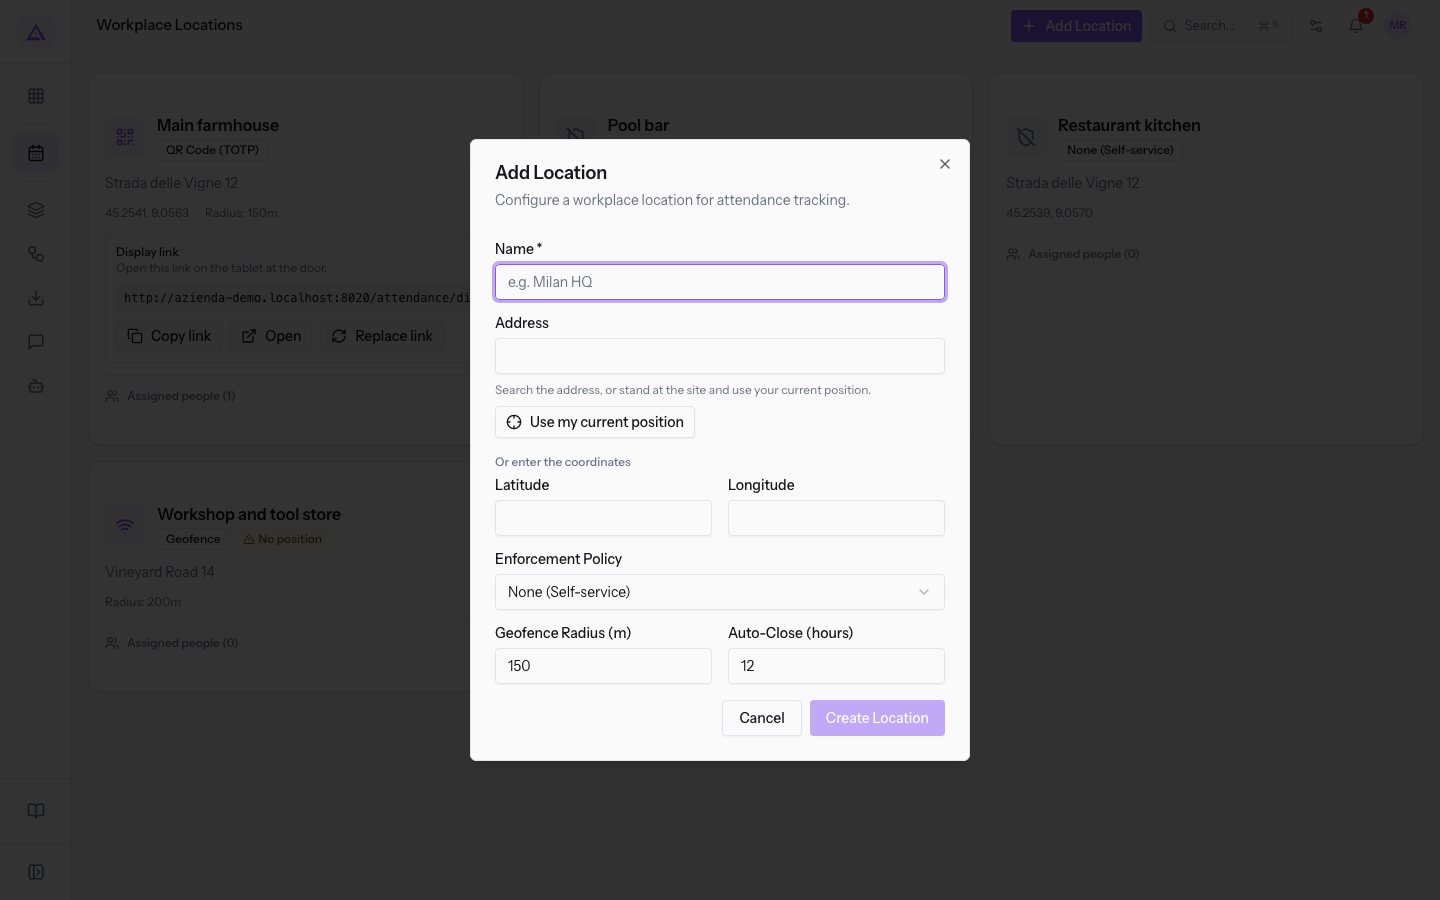
The window fields are the same for all Enforcement Policy options:
- Name: the location name. The field is required.
- Address: the location address. Choosing a suggestion that has a position fills Latitude and Longitude automatically.
- Use my current position: sets the coordinates to your device's position. Use it only while you are at the location.
- Or enter the coordinates: the fields to type the position by hand.
- Latitude: the location latitude, with a point or a comma as decimal separator. Required if the policy is different from None (Self-service).
- Longitude: the location longitude, with the same rules as the latitude.
- Enforcement Policy: the location check. The options are None (Self-service), QR Code (TOTP), Geofence and QR + Geofence. The initial value is None (Self-service).
- Geofence Radius (m): the radius of the location area, in metres. The field is required and accepts a whole number from 1 to 10000. The initial value is
150. - Auto-Close (hours): a value saved with the location. The field accepts decimals and the initial value is
12. Session closing, however, follows Auto-close after (hours): for a location it is set in Attendance › Attendance rules, like all calculation rules.
Editing a location
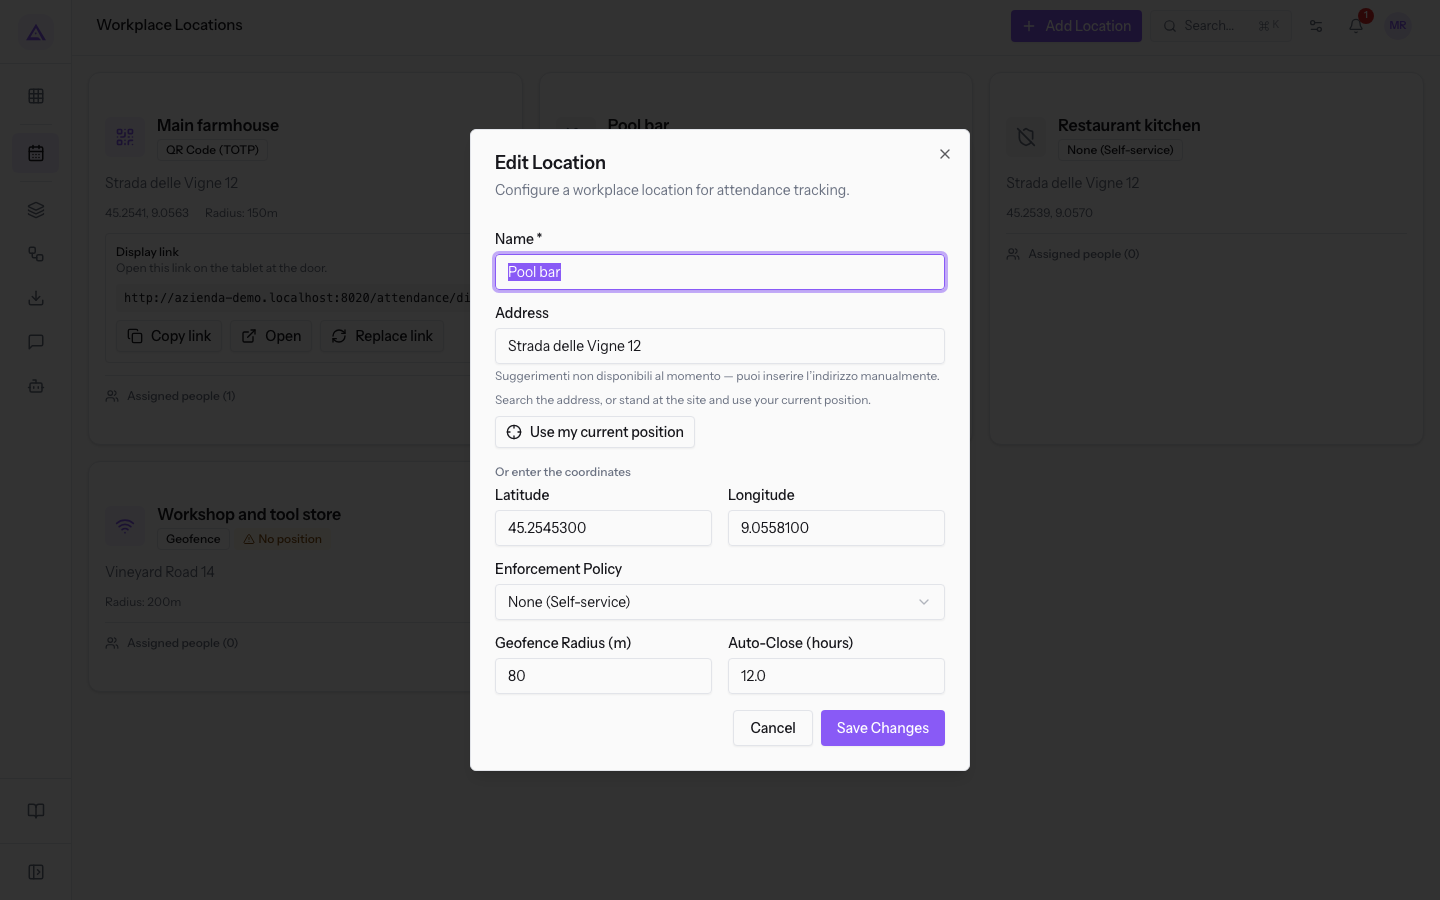
The Edit Location window has the same fields as Add Location, already filled with the location's values.
- Hover over the location card and press the Edit Location icon.
- Change the fields and press Save Changes. The button stays disabled while the Name or the position required by the Enforcement Policy is missing.
Fixing a missing position
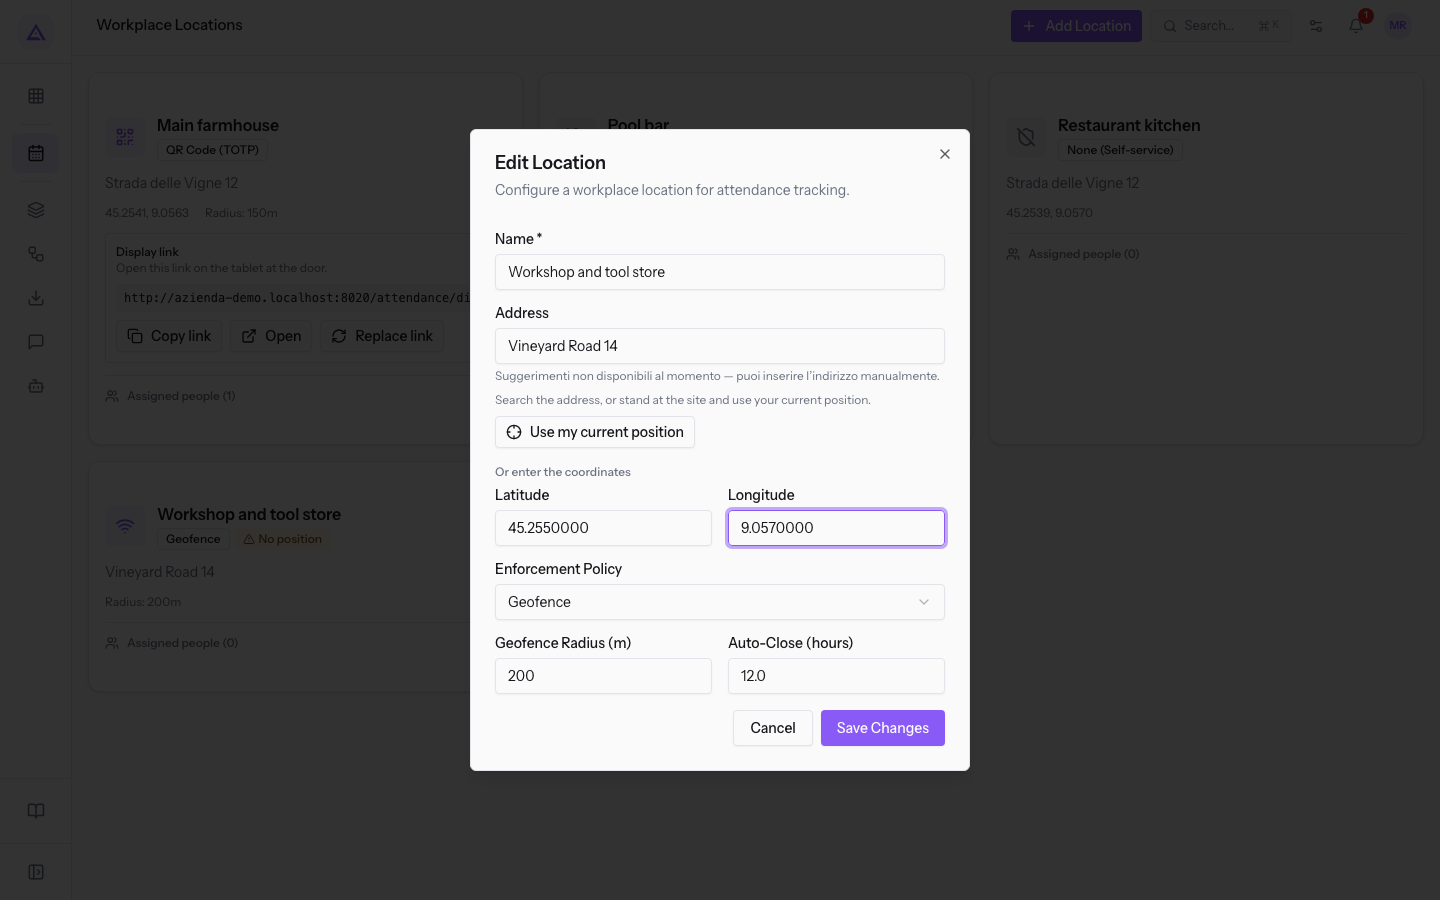
A location with No position rejects staff until it has coordinates. A person trying to clock in reads "This site has no position set, so your presence cannot be checked. Ask your administrator to add the site coordinates."
- Open Edit Location on the location with the warning. In the demo organisation it is
Workshop and tool store, with the Geofence policy. - Enter Latitude and Longitude. The position message disappears.
- Press Save Changes to unlock clock-ins at the location.
Assigning people to a location
Assignment sets where a person can clock in. Before assigning, consider what changes:
- If you assign a person to a location, they can clock in only at the assigned locations and pass the check of each one.
- If you do not assign them to any location, they have no checks and can clock in anywhere the Recording Modes allow. Mario Rossi, in the demo organisation, is not assigned to any location.
Important: a person with no assignments who uses in-app clock-in has nothing that checks where they clock. The Attendance › Recording Modes screen lists these people and points to the locations screen.
- On the location card press Assigned people to open the panel. If it is empty, it shows "Nobody is assigned to this site."
- Press Assign a person.
- In Search by name or email… type the name and choose the person from the results. The search finds only people with a login.
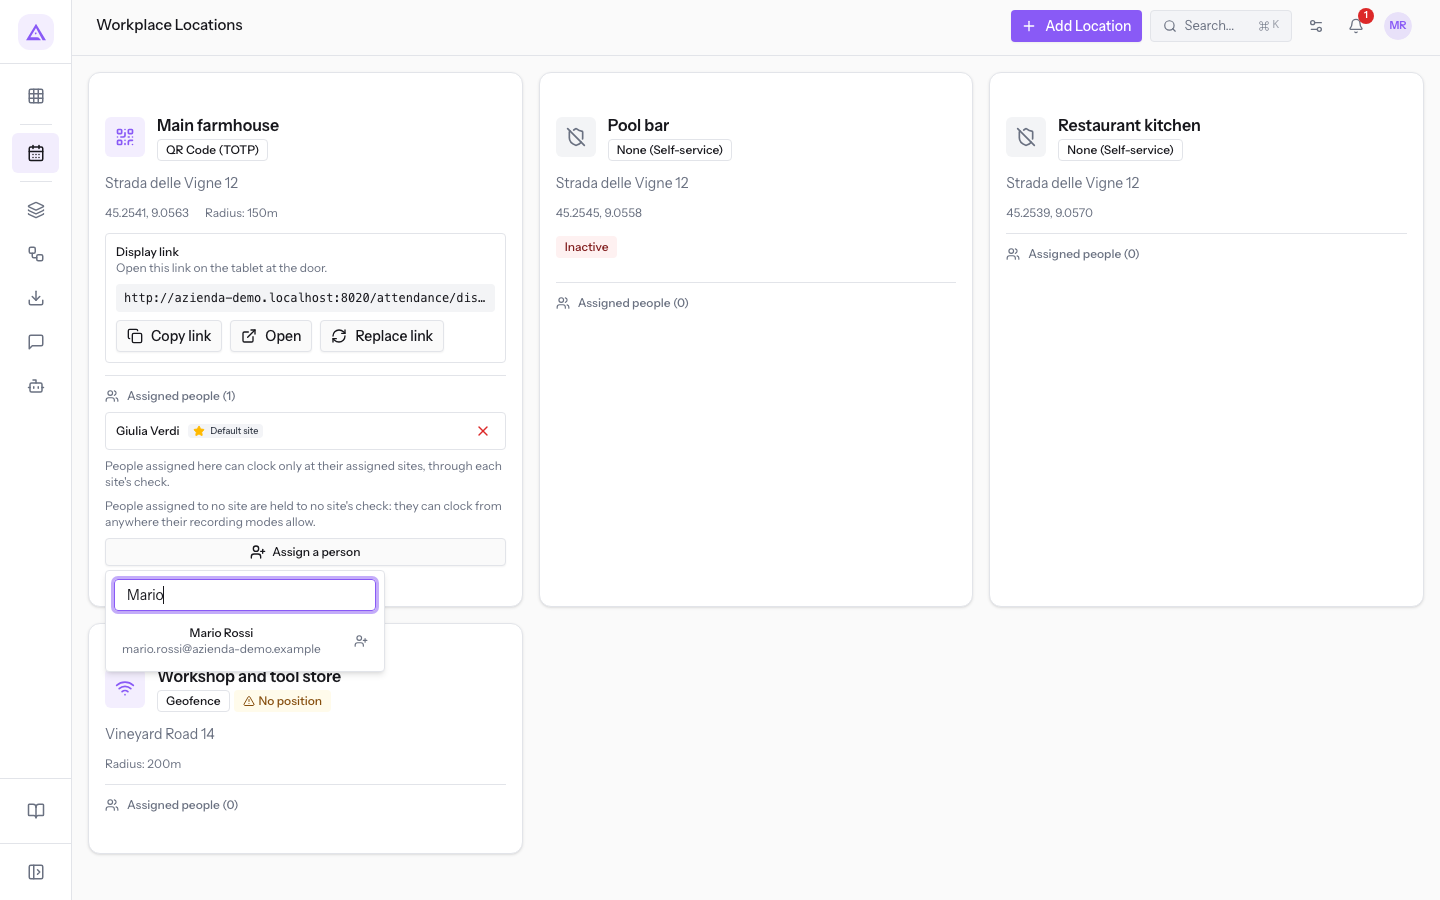
The panel shows the assigned people, each with these elements:
- Default site: indicates this is the person's default location. Giulia Verdi shows it on
Main farmhouse. - Make this their default site: sets this location as the person's default. It does not appear on Giulia Verdi, who already has her default location here.
- Remove from this site: removes the assignment to the location.
Deleting a location
Deletion removes the location from the list together with what depends on it.
- Hover over the location card and press the Delete icon.
- In the Delete this location? window press Delete to confirm or Cancel to return to the list.
Important: the confirmation message is "The site and its assignments are removed. Its display link stops working." If the location has a tablet with the display, it stops showing the QR code.
See it on your company, not on a slide deck.
In 30 minutes we map the software you use today.We show you how much work and how much margin Archimedes gives back.
Show me on my business →What industry are you in?
One tap — it lets us prepare the demo around your world.
What tools do you use today?
Pick the ones you recognise — or just type them. It helps us show you how they migrate.
Last step: your details.
We reply within one working day — and right after, if you like, you pick the demo slot yourself.
We couldn't send your request. Try again, or write to us at [email protected].
By sending, you agree to your data being processed so we can get back to you about the demo. Privacy notice.
Preview form — nothing is sent from this page.
Want to schedule the demo now?
Your call: book the slot you prefer yourself, or we'll call you to arrange it.
Live availability, 30 minutes, instant confirmation. The calendar opens in a new tab.
Lock in your slot ↗We'll get back to you within one working day — and we'll join the call already knowing your world.
The calendar is open in another tab: pick a slot and the demo is booked. Can't see it? Reopen it ↗
Preview page: nothing was sent.
Our calendar is live: take the slot that suits you and the demo is booked. 30 minutes, instant confirmation, no waiting.
Lock in your slot ↗