CMS
All modules
Plan the blog with the editorial plan
CMS · 10 of 17 · 4 min read
The editorial plan collects the topics to write for a site blog, for example the blog of the page Farm diary. From here you propose new topics with their brief, approve them, decide their order, and ask the writer for a draft of the article.
Turning a page into a blog
The plan and the articles belong to a page. For this reason the blog must first be enabled on the page with the Blog page switch in the editor.
- Open CMS › Pages and, in the row of the page, for example
Farm diary, press Edit. - In the editor, find the Blog page switch at the top.
- Turn on the Blog page switch. The Blog button appears in the editor; it opens the plan, the articles and the writer of the page.
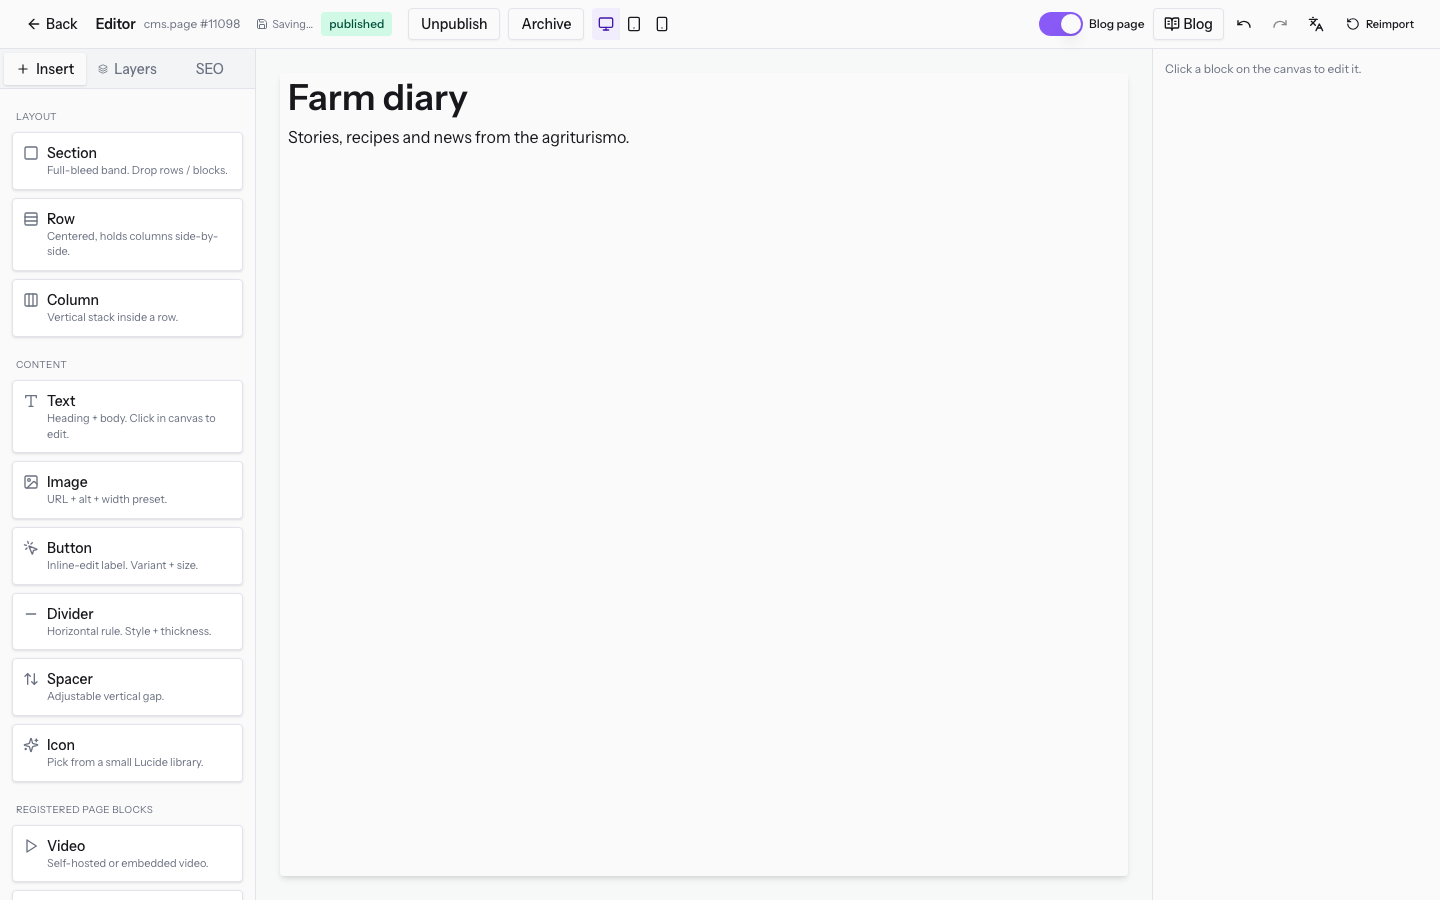
If you turn the switch off, the page is no longer a blog, but articles and plan remain saved: turning it back on brings them back.
Note: the page composition in the editor is described in Editing a page with the visual editor.
Opening the plan of a blog
Each blog page has its own editorial plan.
- Open CMS › Pages.
- In the row of the blog page, for example
Farm diary, press Blog. Alternatively, press Blog in the page editor. - Open the Plan tab. The other tabs are Articles, Writer rules and Learning.
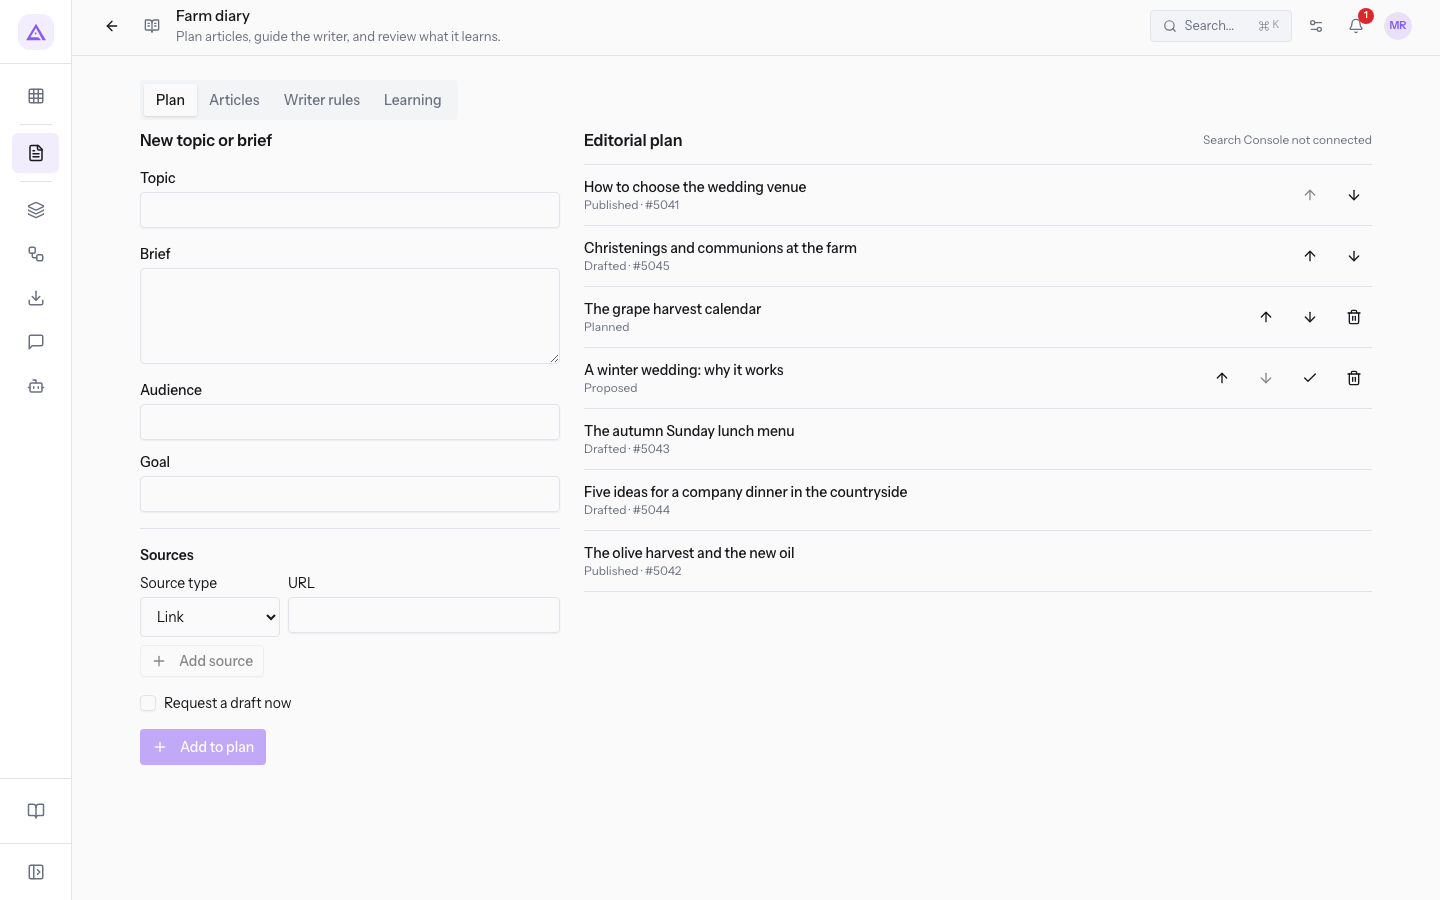
The Plan tab contains the New topic or brief panel and, next to it, the Editorial plan.
Adding a topic to the plan
A topic can enter the plan by itself, to be approved and written later, or with the immediate request of a draft to the writer.
- If you only want to note an idea to evaluate, leave Request a draft now off and use Add to plan.
- If the topic is already decided and the blog writer is active, turn on Request a draft now and use Request draft.
- In the Plan tab, fill in the New topic or brief panel.
- If you want to tell the writer where to start, choose the Source type, fill in the field that appears and press Add source.
- If you want the draft right away, select Request a draft now.
- Press Add to plan, or Request draft if you selected the previous option.
The fields of the panel are:
- Topic: the title of the topic, for example
The grape harvest calendar. - Brief: the instructions for the person who writes the article.
- Audience: who the article is addressed to.
- Goal: the purpose of the article.
- Source type: the type of material to start from. The initial value is Link. The options are:
- Link: shows the URL field, where you write the address of the reference page.
- Document: shows the Record ID in this organization field.
- Helpdesk ticket: shows the Record ID in this organization field and the Propose from question button.
- Form submission: shows the Record ID in this organization field and the Propose from question button.
- Request a draft now: when selected, the Add to plan button becomes Request draft.
Important: to request a draft you need Brief, Audience and Goal, and the blog writer must be active. Otherwise the messages A draft needs a brief, audience, and goal. and Enable this blog's writer before requesting a draft. appear. The writer is enabled in the Writer rules tab, described in Managing blog articles and writer rules.
Managing the editorial plan
The Editorial plan lists the blog topics in the set order. Each topic has a status:
- Proposed: the topic has been added but not yet approved.
- Planned: the topic has been approved.
- Drafted: the writer has written the draft of the article.
- Published: the article of the topic is online.
Approving a topic
A proposed topic enters the planning only after approval.
- In the row of the topic, for example
A winter wedding: why it works, press Approve topic (the check mark). - The message Plan updated. appears and the Approve topic button disappears from the row.
Changing the order of topics
The order of the plan indicates which topics to tackle first.
- In the row of the topic, press Move up to bring it forward or Move down to postpone it. In the demo the last three topics do not have these buttons.
Deleting a topic
The Drop topic button appears only on topics that do not yet have a draft or an article, as The grape harvest calendar and A winter wedding: why it works.
- In the row of the topic, press Drop topic.
Note: drafts and articles born from the plan are managed in the Articles tab, described in Managing blog articles and writer rules.
See it on your company, not on a slide deck.
In 30 minutes we map the software you use today.We show you how much work and how much margin Archimedes gives back.
Show me on my business →What industry are you in?
One tap — it lets us prepare the demo around your world.
What tools do you use today?
Pick the ones you recognise — or just type them. It helps us show you how they migrate.
Last step: your details.
We reply within one working day — and right after, if you like, you pick the demo slot yourself.
We couldn't send your request. Try again, or write to us at [email protected].
By sending, you agree to your data being processed so we can get back to you about the demo. Privacy notice.
Preview form — nothing is sent from this page.
Want to schedule the demo now?
Your call: book the slot you prefer yourself, or we'll call you to arrange it.
Live availability, 30 minutes, instant confirmation. The calendar opens in a new tab.
Lock in your slot ↗We'll get back to you within one working day — and we'll join the call already knowing your world.
The calendar is open in another tab: pick a slot and the demo is booked. Can't see it? Reopen it ↗
Preview page: nothing was sent.
Our calendar is live: take the slot that suits you and the demo is booked. 30 minutes, instant confirmation, no waiting.
Lock in your slot ↗