CMS
All modules
Organizing the site pages
CMS · 3 of 17 · 6 min read
The Pages tab gathers all the site's pages in a tree, showing the path and status of each. From here you create pages, place them under one another, change their order, and decide which appear in the menu: for example a page for weddings, one for the restaurant, and a privacy notice.
The page tree
The tree shows each page with its title, path, and status. Subpages sit under their parent page.
- In the CMS module, open Pages.
- Stay on the Pages tab. The Shared blocks tab contains the blocks common to all pages instead.
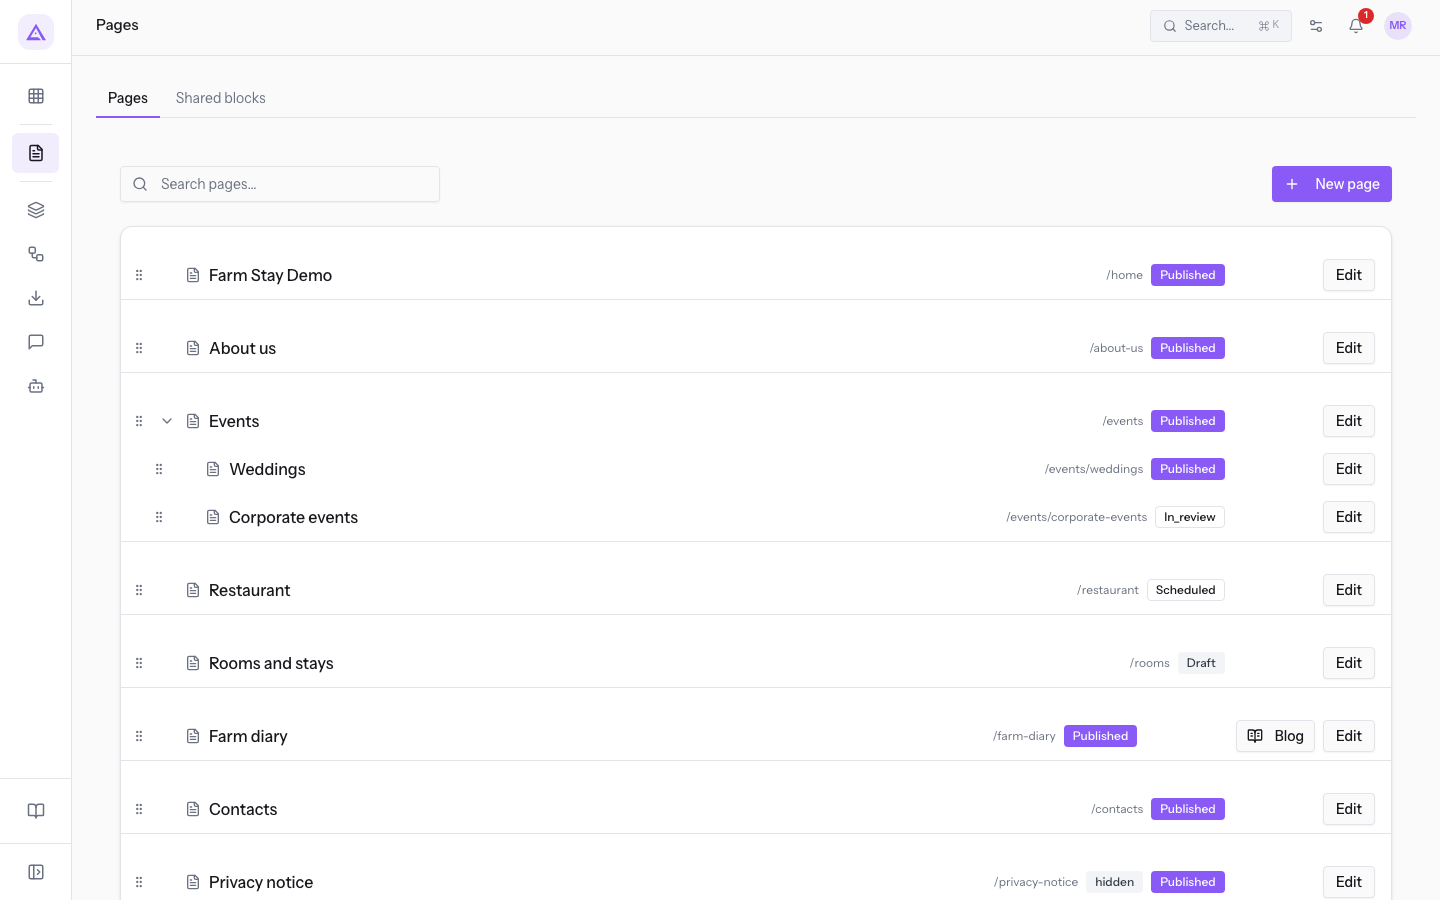
Each row contains:
- the page title, for example
Farm Stay Demo; - the path, such as
/homeor/events; the path of a subpage continues that of the parent page, as in/events/weddings; - the hidden indicator, if the page is not in the menu, as on
Privacy notice(/privacy); - the page status;
- the Child button, which appears when you hover over the row, and the Edit button.
Statuses appear in the tree with these labels:
- Published: the page is online (
About us). - In_review: the page is waiting for review (
Corporate events). - Draft: the page is a draft (
Rooms and stays). - Scheduled: publication is scheduled (
Restaurant). - Archived: the page is archived (
2025 Easter menu).
A page with subpages has the Collapse button to close its branch, as on Events. The blog page has the extra Blog button that opens the blog, as on Farm diary.
Searching for a page
Search filters the tree by title and also shows the parent page of the page found.
- Type part of the title in the Search pages… field, for example
Weddings. - The tree shows the page found,
Weddings(/events/weddings), under its parent page,Events.
Reordering pages
The order of the rows is the order of the pages at the same level of the tree.
- Grab the drag handle on the left of the row.
- Drag the row to the new position and release it.
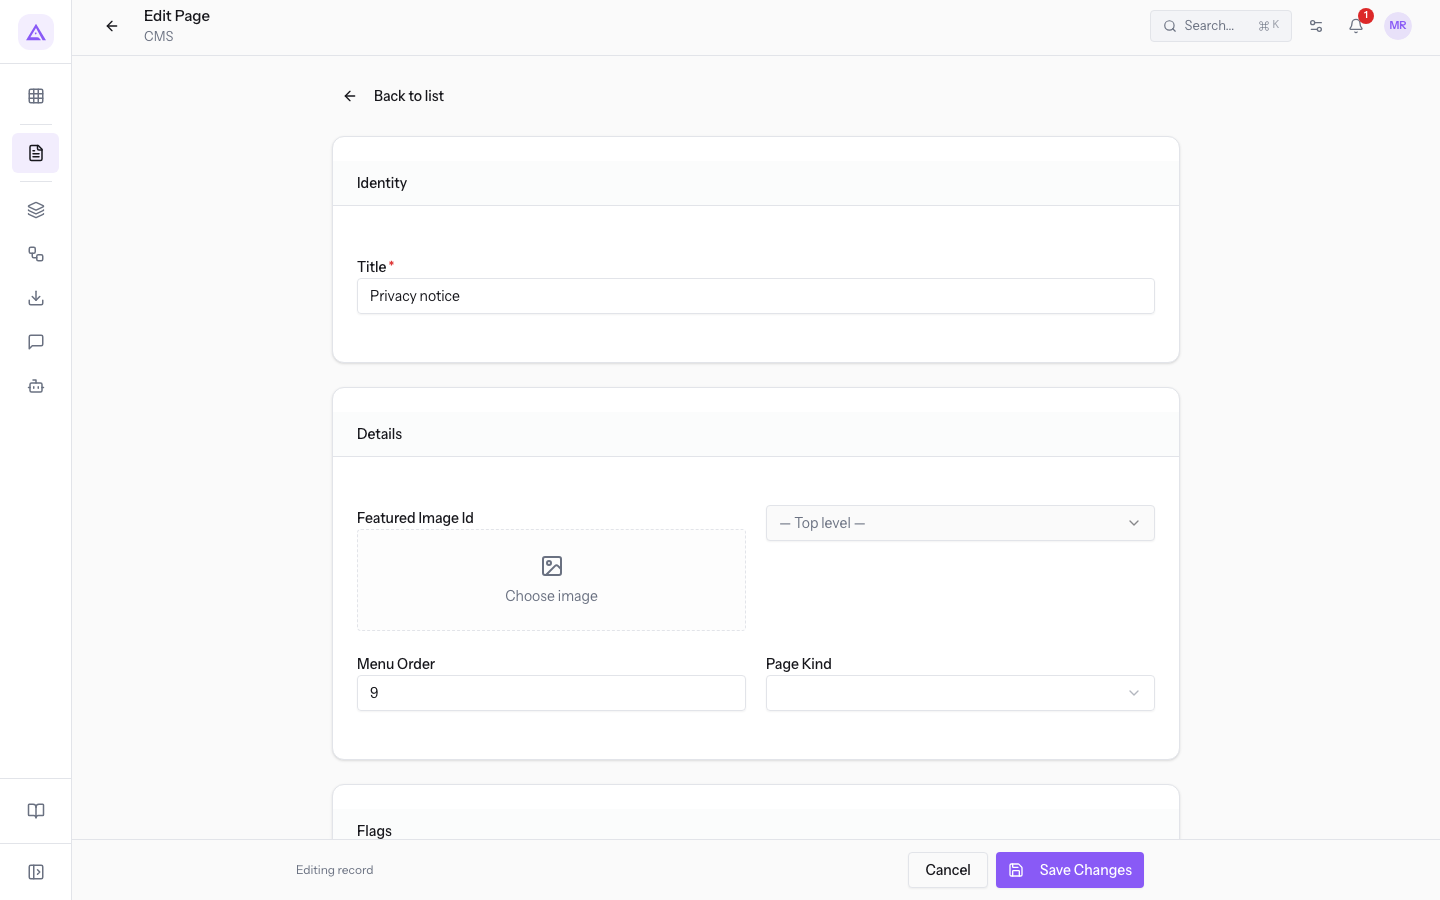
On the page's edit screen, the order is also shown in the Menu Order field: 9 for Privacy notice.
Creating a page
A new page starts without a parent page, at the top level of the tree.
- In the Pages tab, press New page.
- Fill in the fields of the New Page screen.
- Press Create. With Cancel you close the screen without creating the page.
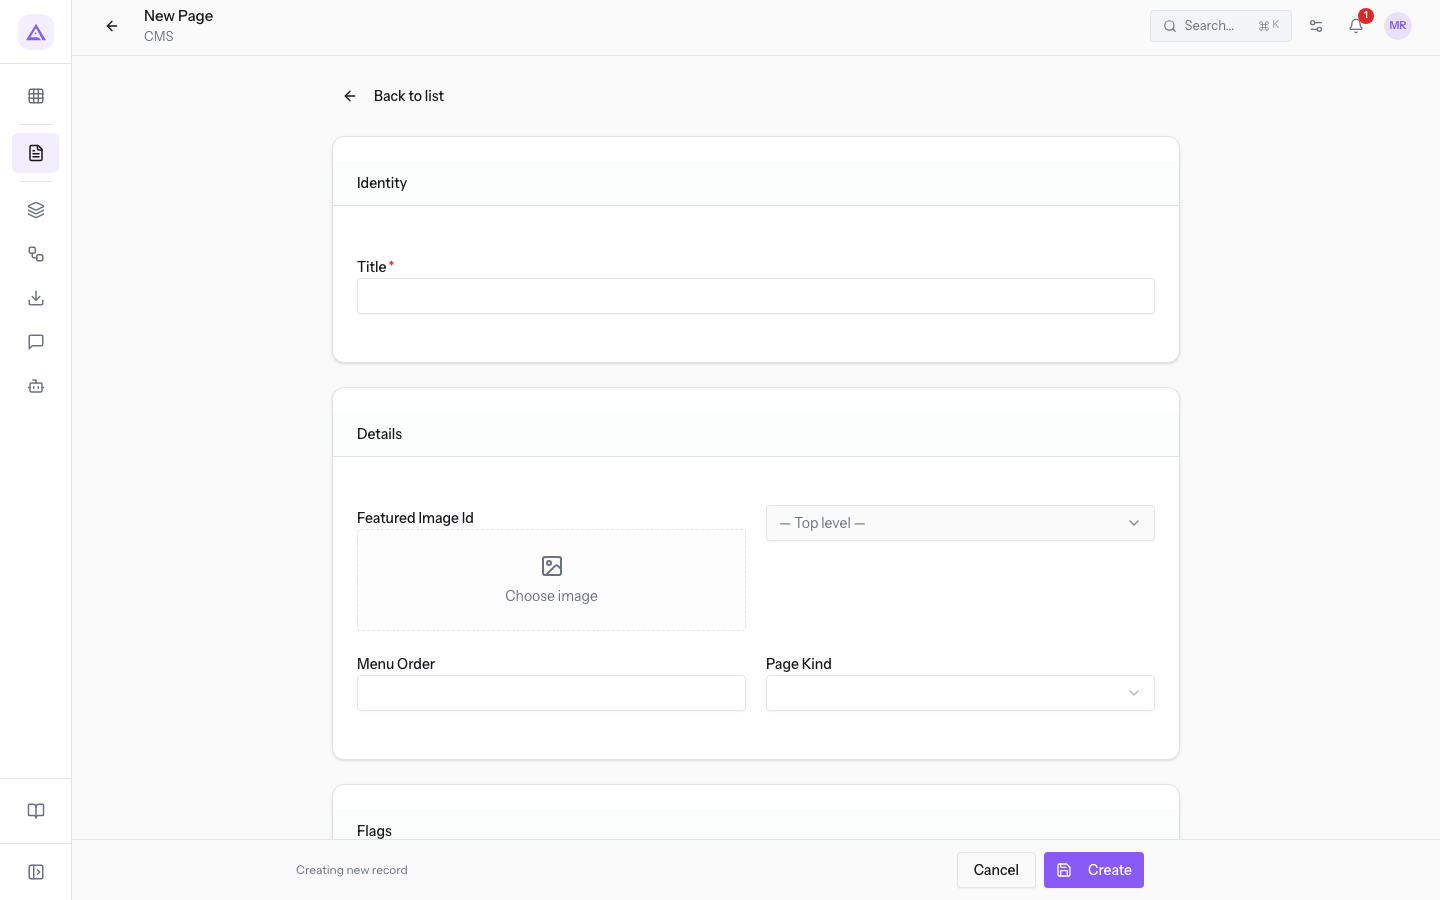
The screen is divided into the sections Identity, Details, Flags, Content and Body. The fields are:
- Title: the page title, for example
Rooms and stays. The field is required. - Featured Image Id: the featured image. Choose it with Choose image from the Media library, described in Upload and organize images and files in the Media library.
- Parent page: the field shows — Top level — when the page is at the top level. Open the list to choose the page to put it under; each page appears with its path, such as
Events /events. The list has a Search pages… search field. - Menu Order: the position of the page among those at the same level.
- Page Kind: the type of page.
- Show In Menu: if on, the page appears in the site menu. It is off by default.
- Excerpt: a short summary of the page.
- Body: the content blocks. Add a block with Add block.
Note: to compose the page with visual blocks, use the visual editor, which you open with Edit in the page's row of the tree.
Creating a subpage
A subpage sits under another page in the tree, and its path continues that of the parent page. For example, Weddings under Events has the path /events/weddings.
- In the row of the parent page, press Child, as in the
Eventsrow. - The New Page screen opens with the parent page already filled in.
- Fill in Title and the other fields, then press Create.
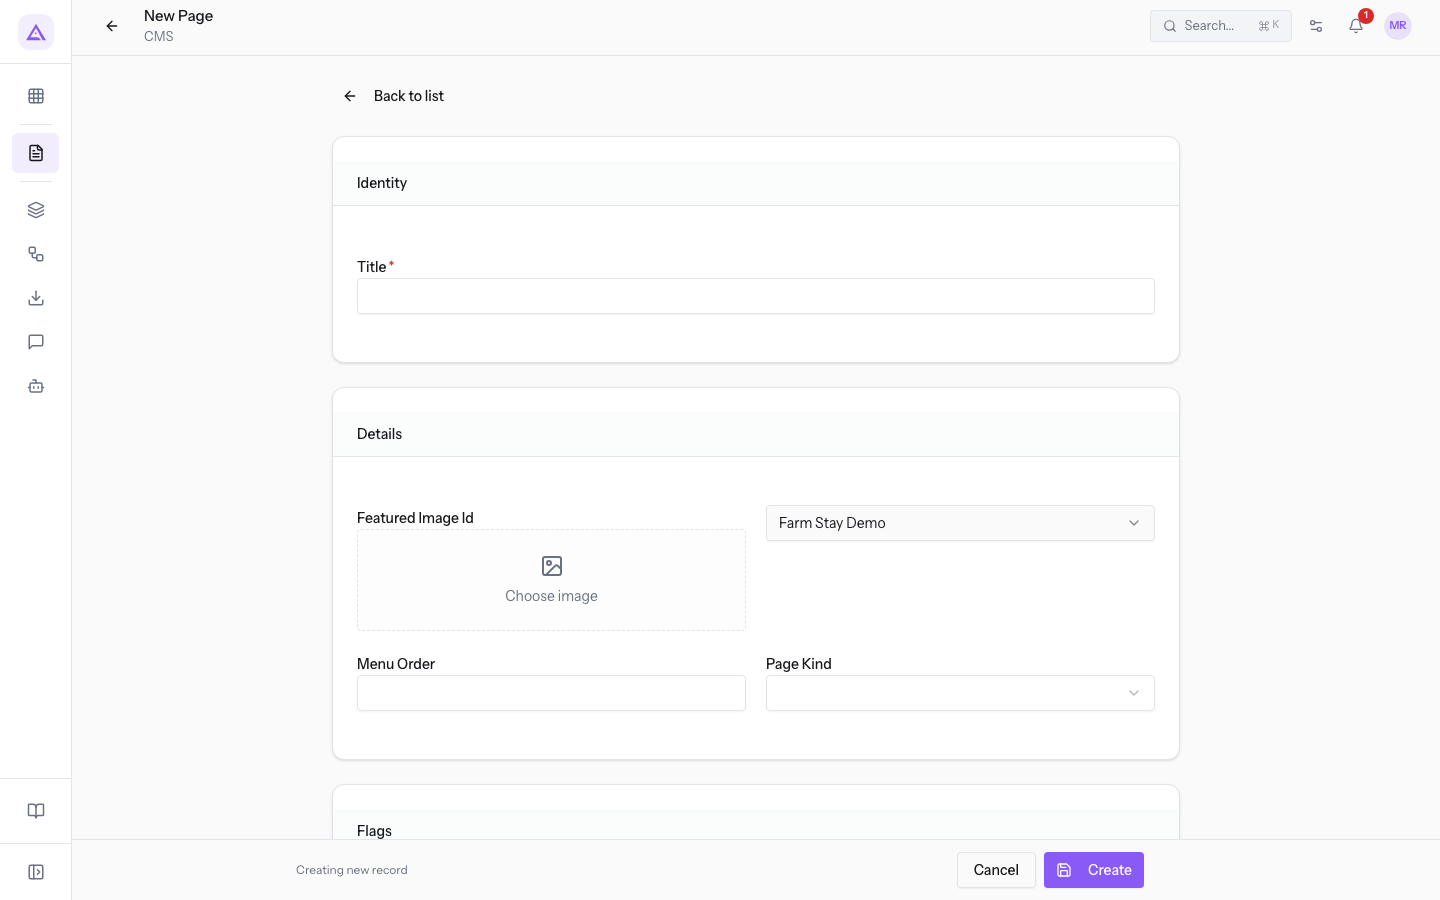
To move an existing page under another, change the parent page on its edit screen, as described in the section Editing a page's details.
Showing or hiding a page in the menu
The Show In Menu field decides whether the page enters the site menu.
- If the page must be reachable from the menu, as
Contactsis, turn on Show In Menu. - If the page must be online but outside the menu, as
Privacy noticeis, leave Show In Menu off. In the tree, the page shows the hidden indicator.
Subpages with Show In Menu on appear in the menu by themselves, after the manually added items, when the menu item has automatic expansion of child pages. So a new page under Events enters the menu without any change to the menu. Menu items are managed in Manage site menus.
Opening a page's details
The detail screen shows the page with its status and publication date, for example Published and published 7/7/2026.
- In the tree, press the page title, such as
Privacy notice. - Use the tabs Overview, Content, SEO, Taxonomy, Translations, Versions and Activity.
The buttons are:
- View live: opens the page on the site.
- Edit: opens the edit screen.
- Open visual editor, in the Content tab: opens the visual editor.
- More actions (the ⋯ button): contains Unpublish, Archive and Delete.
Important: only the website manager can delete a page. The website editor cannot, because a deletion removes public content.
Editing a page's details
The edit screen has the same fields as when creating a page.
- Open the page's detail screen and press Edit.
- Change the fields, such as the parent page or Show In Menu.
- Press Save Changes.
Filling in a page's SEO fields
The SEO fields decide how the page appears in search engine results.
- Open the page's detail screen and press SEO.
- Fill in the fields in the SEO metadata section.
- Press Save SEO.
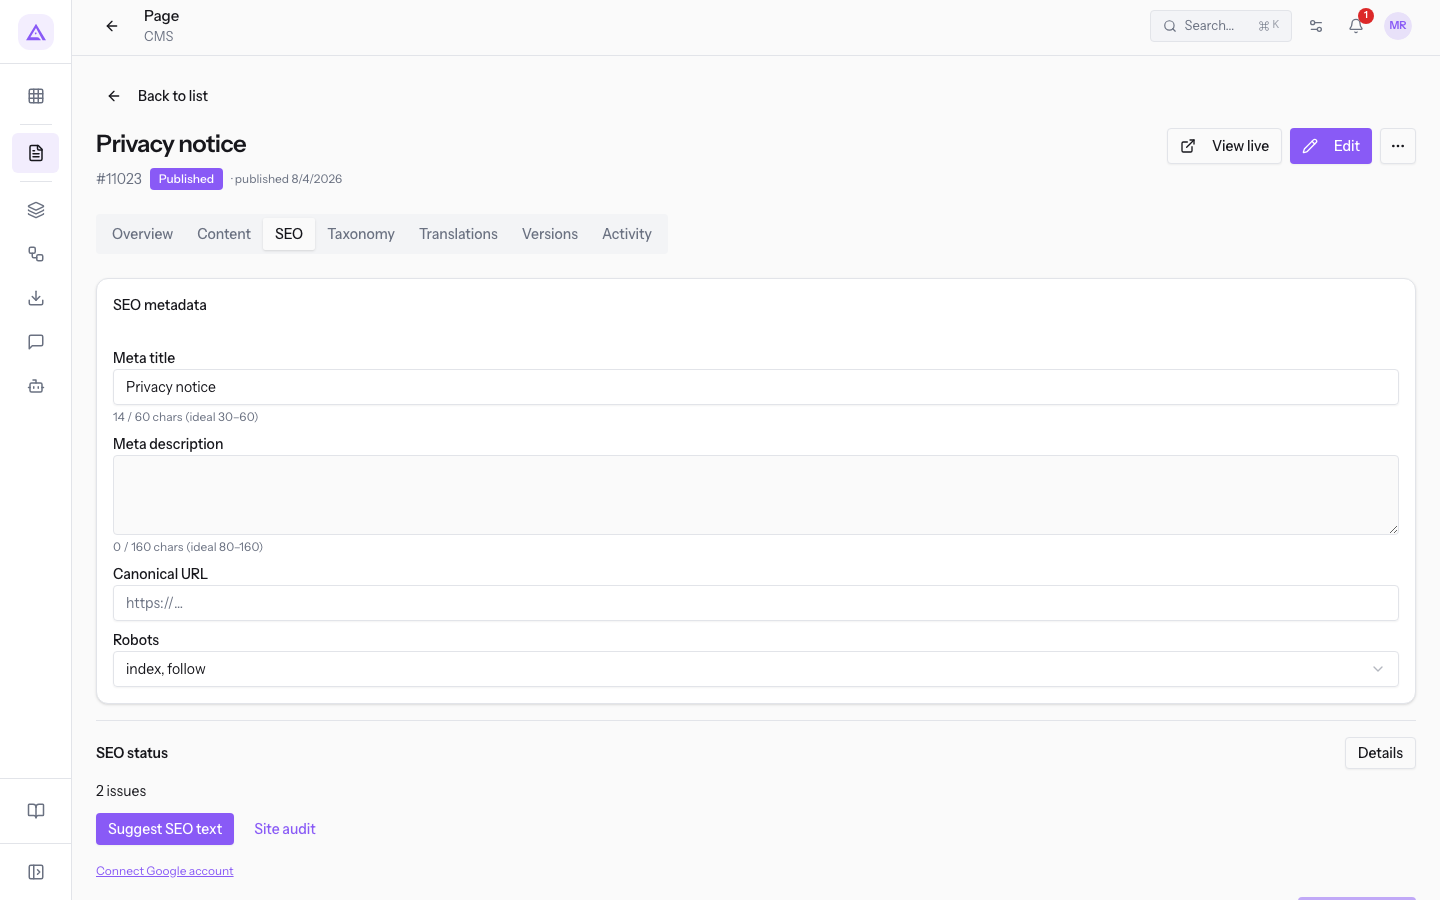
The fields are:
- Meta title: the title shown in search results,
Privacy noticein the demo. - Meta description: the description shown in search results.
- Canonical URL: the main address of the page, if the same content can be reached from several addresses.
- Robots: what search engines may do with the page. The default value is
index, follow.index, follow: the page appears in results and its links are followed.noindex, follow: the page does not appear in results, but its links are followed.index, nofollow: the page appears in results, but its links are not followed.noindex, nofollow: the page does not appear in results and its links are not followed.
With Suggest SEO text you get a proposal for the title and description. The SEO status section reports the status of the page, 2 issues in the demo. From Site audit you go to the check of all pages, described in Check page SEO and set the rules.
See it on your company, not on a slide deck.
In 30 minutes we map the software you use today.We show you how much work and how much margin Archimedes gives back.
Show me on my business →What industry are you in?
One tap — it lets us prepare the demo around your world.
What tools do you use today?
Pick the ones you recognise — or just type them. It helps us show you how they migrate.
Last step: your details.
We reply within one working day — and right after, if you like, you pick the demo slot yourself.
We couldn't send your request. Try again, or write to us at [email protected].
By sending, you agree to your data being processed so we can get back to you about the demo. Privacy notice.
Preview form — nothing is sent from this page.
Want to schedule the demo now?
Your call: book the slot you prefer yourself, or we'll call you to arrange it.
Live availability, 30 minutes, instant confirmation. The calendar opens in a new tab.
Lock in your slot ↗We'll get back to you within one working day — and we'll join the call already knowing your world.
The calendar is open in another tab: pick a slot and the demo is booked. Can't see it? Reopen it ↗
Preview page: nothing was sent.
Our calendar is live: take the slot that suits you and the demo is booked. 30 minutes, instant confirmation, no waiting.
Lock in your slot ↗