CMS
All modules
Create content categories
CMS · 8 of 17 · 3 min read
Categories group the site's content, such as Weddings, Corporate events, Farm life and Recipes. From this screen you create a category, place it under another category, edit it, or delete it.
The Categories screen
The screen shows categories divided by taxonomy, one tab for each.
- Open CMS › Categories.
- Choose the taxonomy tab. In the demo there is the default tab.
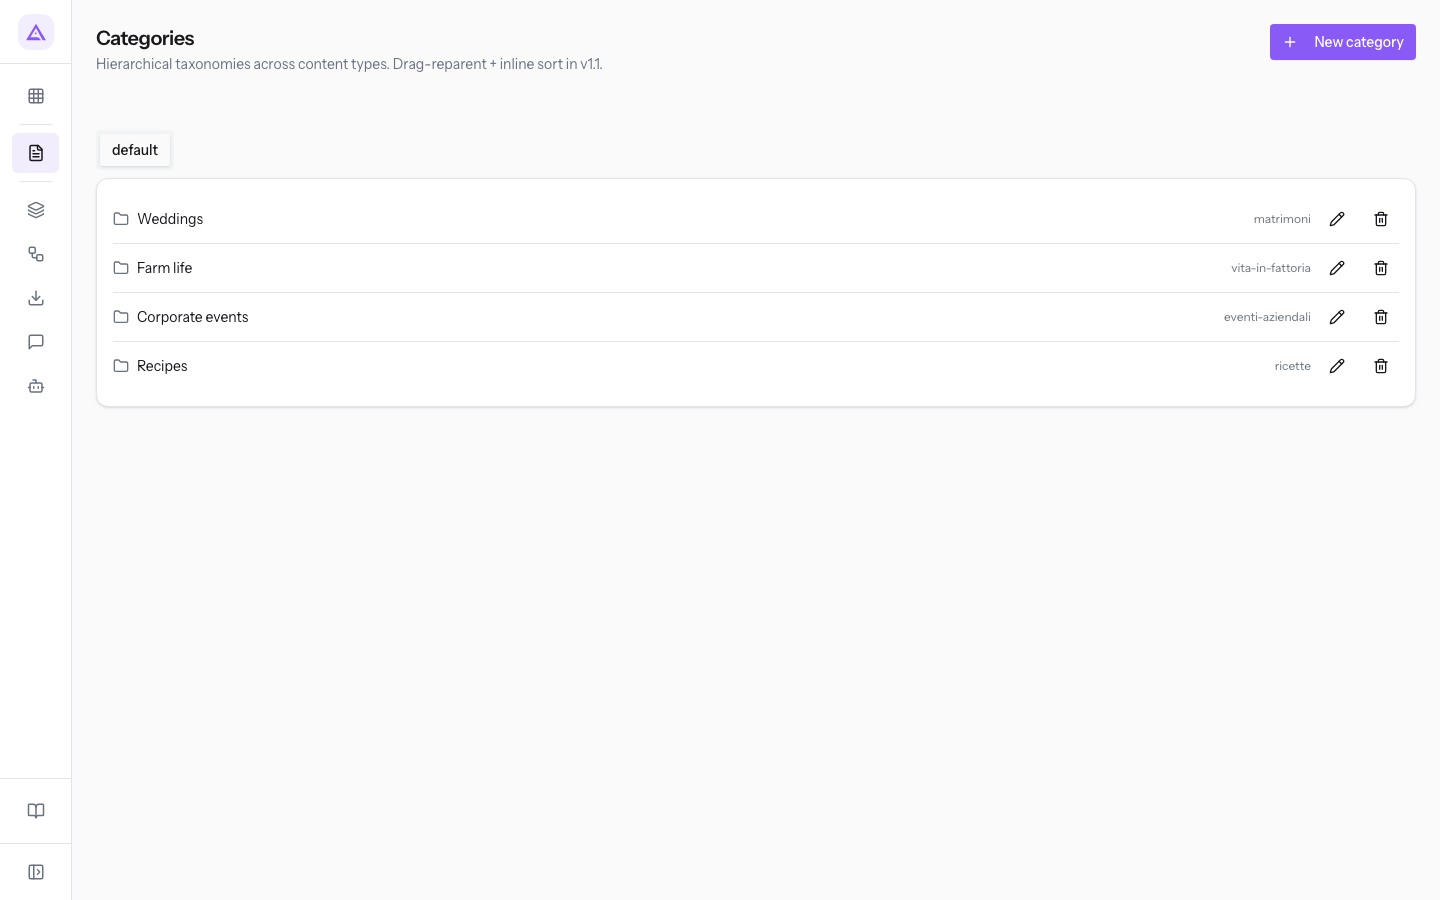
Each row in the list shows:
- the category name, for example
Weddings; - the slug, that is the part of the address, such as
weddingsorcorporate-events; - the pencil icon, to edit the category;
- the trash icon, to delete it.
Child categories appear under the parent category, indented to the right.
Note: in this version the list cannot be reordered by dragging rows. To move a category under another one, edit the parent category.
Create a category
A new category is created in the taxonomy of the open tab.
- In CMS › Categories open the taxonomy tab (default in the demo).
- Press New category. The New Category screen opens.
- Fill in the fields.
- Press Create. To leave without saving, press Cancel or Back to list.
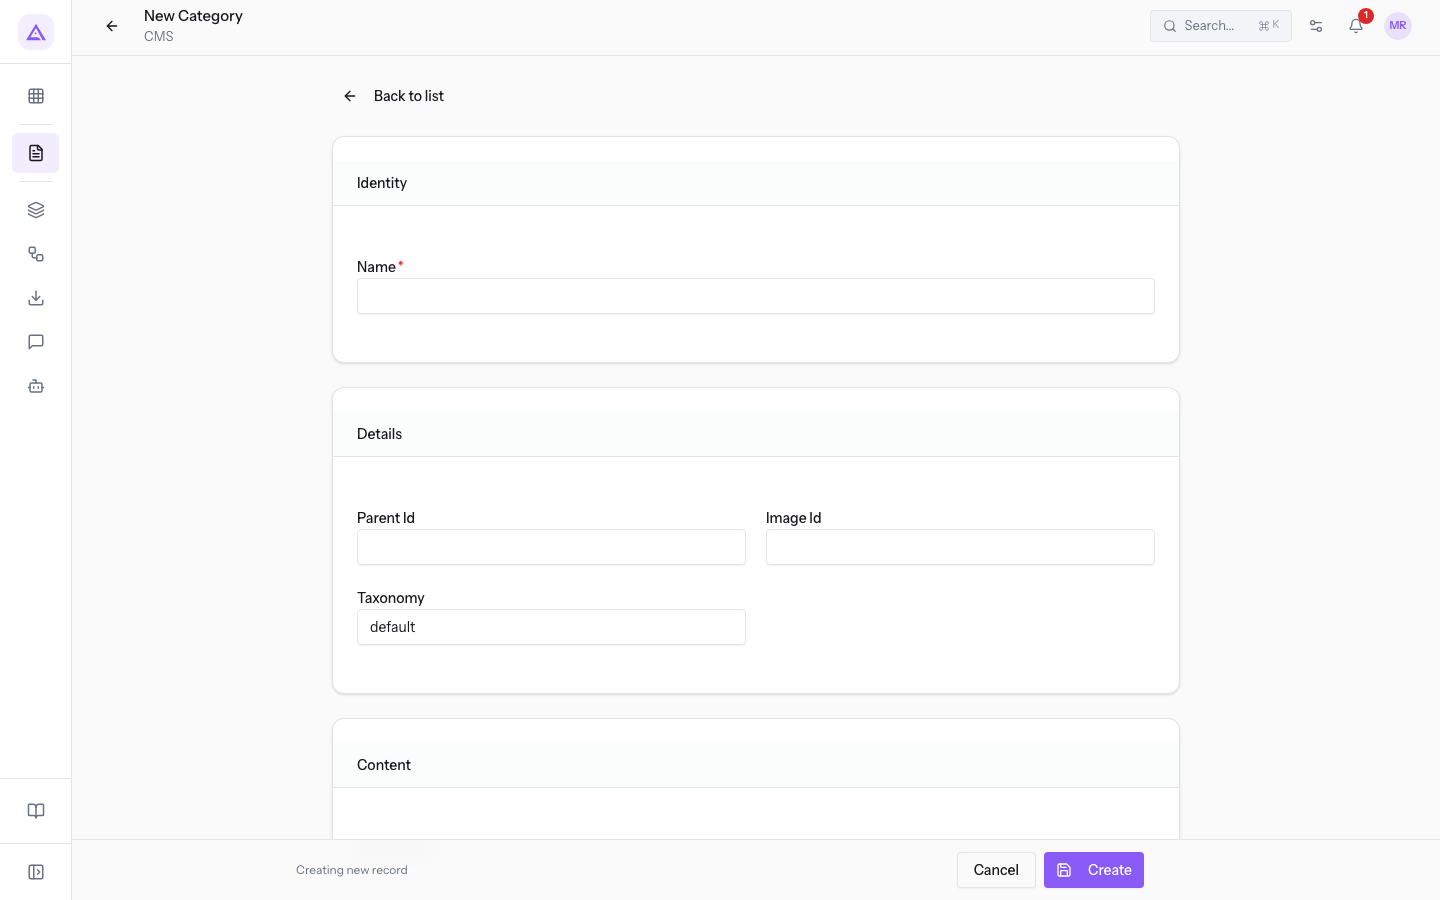
The screen is divided into the sections Identity, Details and Content.
- Name: the category name, for example
Farm life. The field is required. - Parent Id: the parent category. Leave it empty for a top-level category.
- Image Id: the category image. The field is not required.
- Taxonomy: the taxonomy of the category. It fills in automatically with the tab from which you pressed New category,
defaultin the demo. - Description: the category description. The field is not required.
Tip: if you need to create several categories in the same taxonomy, open the taxonomy tab before pressing New category: the Taxonomy field will already be filled in.
Edit a category
Editing opens the category screen with the same fields as creation.
- In CMS › Categories find the category row, for example
Weddings. - Press the pencil icon on the row.
- Edit the fields and save.
To move a category under another one, change the Parent Id field. In the list the category then appears under the new parent category.
Delete a category
Deleting asks for confirmation before removing the category.
- In CMS › Categories find the category row.
- Press the trash icon on the row.
- Confirm the deletion in the window that opens.
Important: if the deletion fails, check that the category has no child categories. Move or delete the child categories first.
To use categories in the site navigation, see Manage site menus.
See it on your company, not on a slide deck.
In 30 minutes we map the software you use today.We show you how much work and how much margin Archimedes gives back.
Show me on my business →What industry are you in?
One tap — it lets us prepare the demo around your world.
What tools do you use today?
Pick the ones you recognise — or just type them. It helps us show you how they migrate.
Last step: your details.
We reply within one working day — and right after, if you like, you pick the demo slot yourself.
We couldn't send your request. Try again, or write to us at [email protected].
By sending, you agree to your data being processed so we can get back to you about the demo. Privacy notice.
Preview form — nothing is sent from this page.
Want to schedule the demo now?
Your call: book the slot you prefer yourself, or we'll call you to arrange it.
Live availability, 30 minutes, instant confirmation. The calendar opens in a new tab.
Lock in your slot ↗We'll get back to you within one working day — and we'll join the call already knowing your world.
The calendar is open in another tab: pick a slot and the demo is booked. Can't see it? Reopen it ↗
Preview page: nothing was sent.
Our calendar is live: take the slot that suits you and the demo is booked. 30 minutes, instant confirmation, no waiting.
Lock in your slot ↗