CMS
All modules
Editing a page with the visual editor
CMS · 4 of 17 · 6 min read
The visual editor lets you compose a site page's content from blocks, seeing the page as it will appear. You can add, move, duplicate and delete blocks, change their look, check the page on desktop, tablet and mobile, and write its translations. For example, you edit the Farm Stay Demo page, with the sections Welcome to the countryside and Your event with us.
Opening a page's editor
The editor opens from the site's page tree.
- Open CMS › Pages.
- In the page's row, for example
Farm Stay Demo, press Edit. The Editor screen opens. To find the row, type the title in the Search pages… field.
Alternatively, press the page title and, in the Content tab of the detail screen, press Open visual editor.
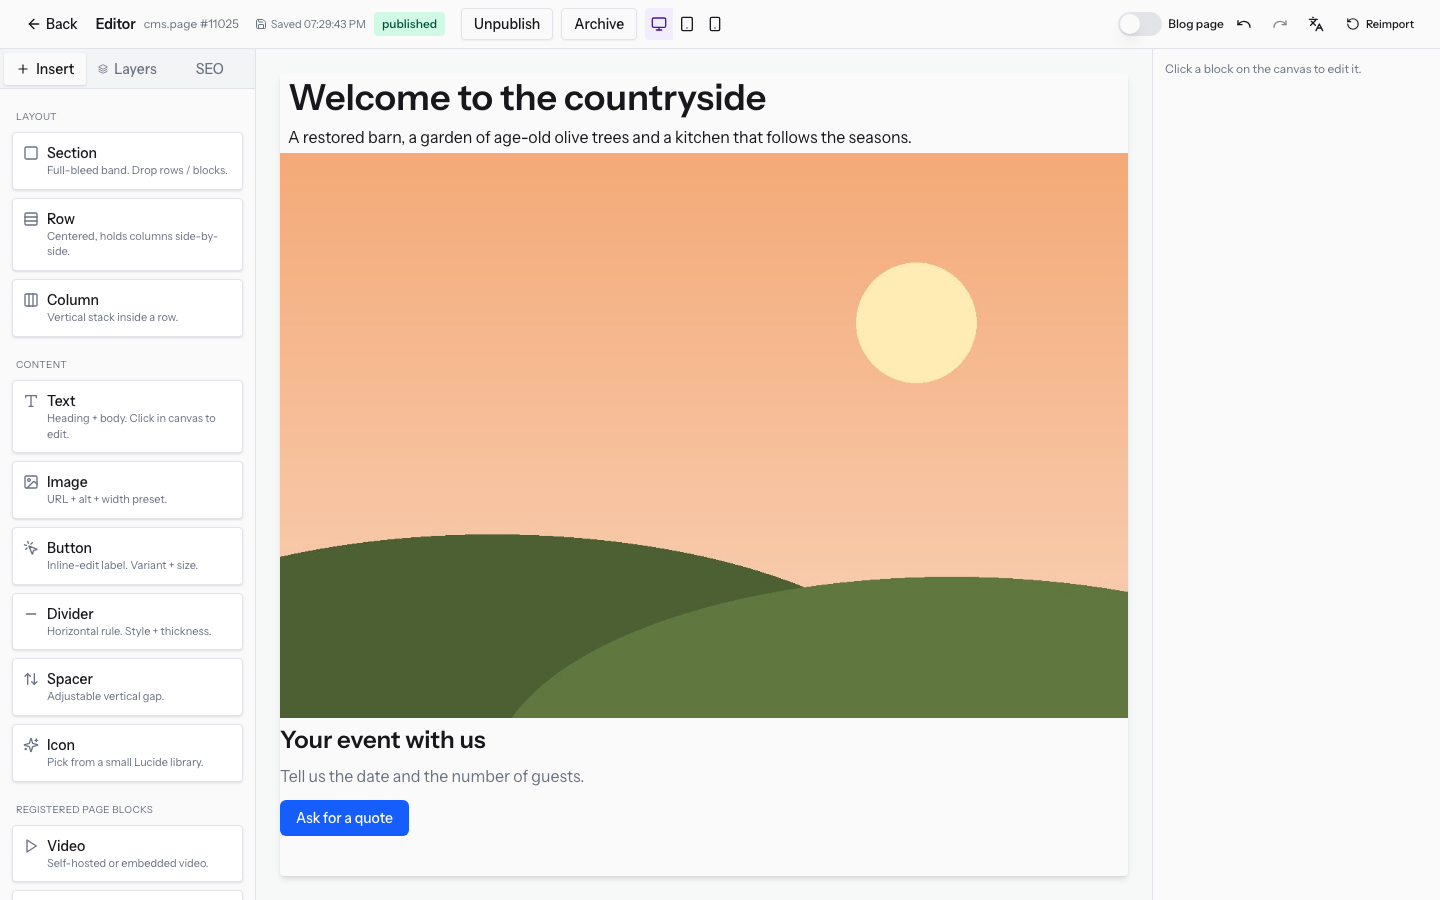
The screen has three parts:
- on the left, the sidebar with the Insert, Layers and SEO tabs;
- in the center, the work area with the page;
- on the right, the settings panel for the selected block.
At the top is the editor bar with Back, the publishing buttons, the Desktop, Tablet and Mobile buttons, the Blog page switch, the undo and redo buttons, Translations and Reimport. Back returns to the page's detail screen.
Note: the publishing buttons are described in Publish, schedule and get a page reviewed.
Adding blocks from the Insert tab
The Insert tab contains the blocks you can add to the page. It is the tab open when you enter the editor.
- In the sidebar, open the Insert tab.
- Drag the block into the work area, to the point where you want to insert it.
Structure blocks contain other blocks: the section is a band of the page, the row places columns side by side, the column holds the content blocks. Content blocks are text, image, button, divider and spacer.
- If you want two or three contents side by side, insert a row inside a section and a column for each content.
- If you only need more space between two blocks, use the spacer instead of an empty section.
- If you want a separating line, use the divider.
Note: if the page is linked to a template, the Insert tab does not appear. In that case you can only edit the texts and images provided by the template: you cannot add, move or delete blocks.
Selecting a block with the Layers tab
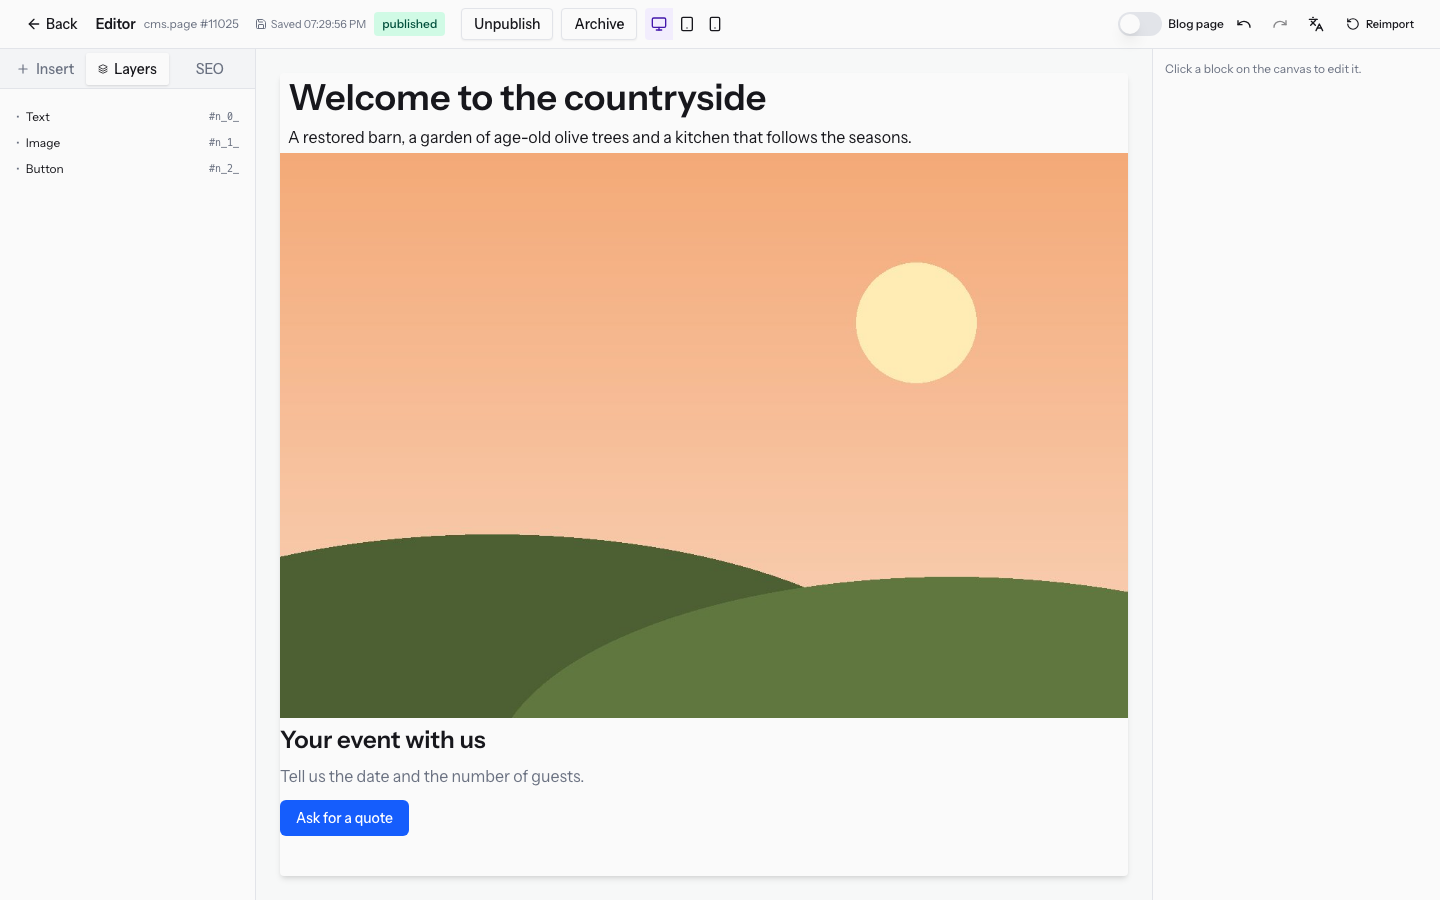
The Layers tab shows the page structure as a list of blocks. It is used to select a block that is hard to press in the work area, such as a column inside a row.
- In the sidebar, open the Layers tab.
- Press the block in the list. The block is selected in the work area and its settings open in the right panel.
Editing a block
When you select a block, the right panel shows its settings. The settings change depending on the block type.
- Select the block in the work area or in the Layers tab.
- To change a text, type directly in the selected block, for example in the title
Welcome to the countrysideor in the buttonAsk for a quote. - Change the settings in the right panel. The work area shows the result immediately.
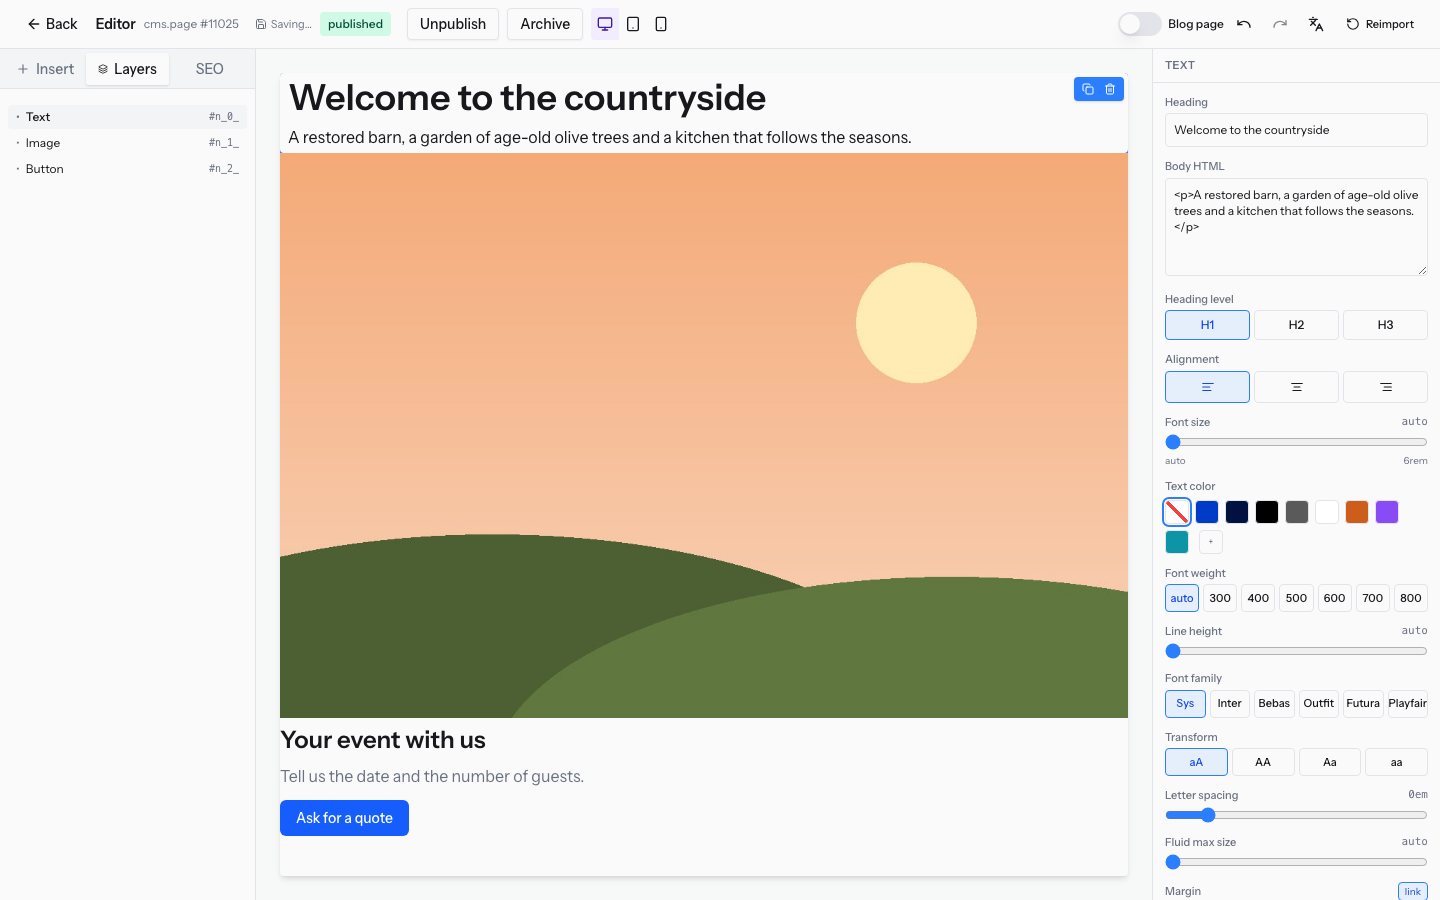
The main settings for each block type:
- Text: heading level (H1, H2, H3), alignment, font size, color, weight, line spacing, font type (such as Inter, Bebas, Outfit, Futura, Playfair), upper and lower case, letter spacing, margins and gradient text.
- Image: image address, alternative text, caption, width, aspect ratio, fit, rounded corners, margins, hover effect and filters (brightness, saturation, contrast, grayscale).
- Button: title and text above the button, link, variant, size, rounded corners and margins.
- Divider: line style, thickness (1, 2 or 4 px) and color.
- Spacer: height, from 0.5 to 12 rem.
- Section: background color and image, gradient, inner width, aspect ratio, spacing, corners, shadow, minimum height, border and hover effect.
- Row: width, vertical alignment of the columns, distance between the columns and spacing.
- Column: width (half or a third of the row, for instance), background, spacing, corners, shadow, aspect ratio, border and position.
Tip: fill in the alternative text of every image. Library images are described in Upload and organize images and files in the Media library.
When a block is selected, a small bar with two commands appears on the block: duplicate the block and delete it. You can also delete the selected block with the Delete or Backspace key, if you are not typing in a field.
The Site header and Site footer blocks appear in the editor as a bar with their name and a link to edit them: they are edited once for all pages. See Using shared blocks, the header, and the footer.
Viewing the page on desktop, tablet and mobile
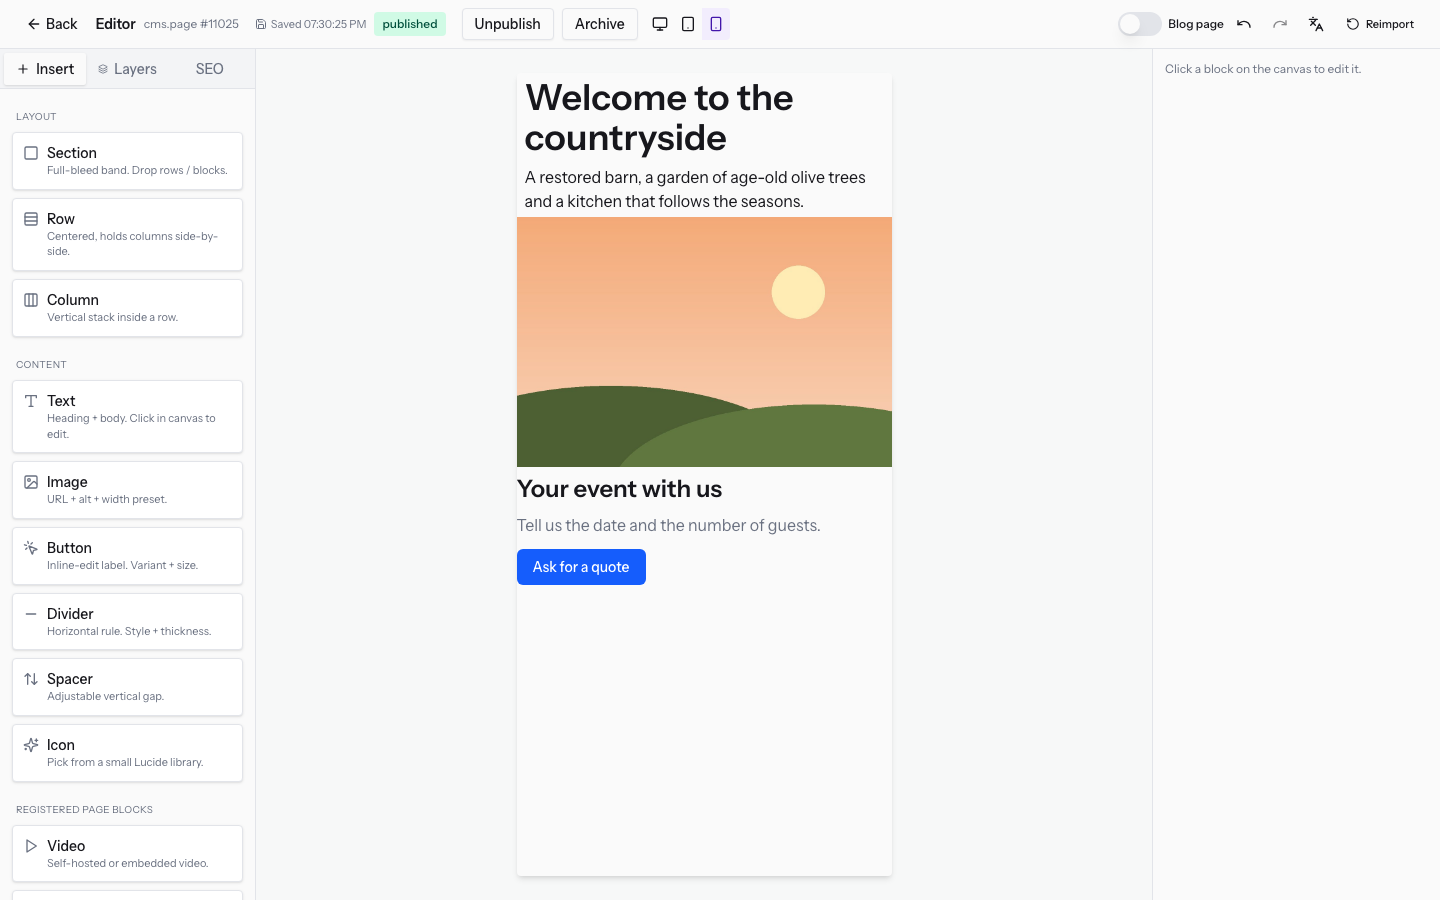
The Desktop, Tablet and Mobile buttons change the width of the work area, to check how the page looks on different screens. They do not change the page content.
- In the editor bar, press Tablet or Mobile. The mobile preview is 375 px wide.
- Press Desktop to return to full width.
Undoing and redoing changes
In the editor bar there are two arrow buttons: the first undoes the last change, the second redoes it. A button is disabled when there is nothing to undo or redo.
You can also use the keyboard: Ctrl+Z (Cmd+Z on Mac) undoes, Shift+Ctrl+Z (Shift+Cmd+Z) redoes. The shortcuts do not act while you are typing in a field or a text, where the text's own shortcuts apply.
Automatic saving
The editor saves on its own: there is no save button. Each change is saved shortly after you stop changing the page, so even dragging a slider produces a single save.
- Saving…: the change is being saved.
- Saved: the change is saved. The time of the last save appears next to it.
If the save fails, an error message appears and the indicator does not show Saved.
Important: automatic saving records the page, but does not publish it. Changes reach the site according to the page's status: see Publish, schedule and get a page reviewed.
Reloading the page with Reimport
Reimport deletes the structure built in the editor and reloads the page. It asks for confirmation before proceeding.
- In the editor bar, press Reimport.
- Confirm in the window that opens. The page reloads.
Important: changes made in the editor are lost and cannot be undone with the undo button.
Translating the page
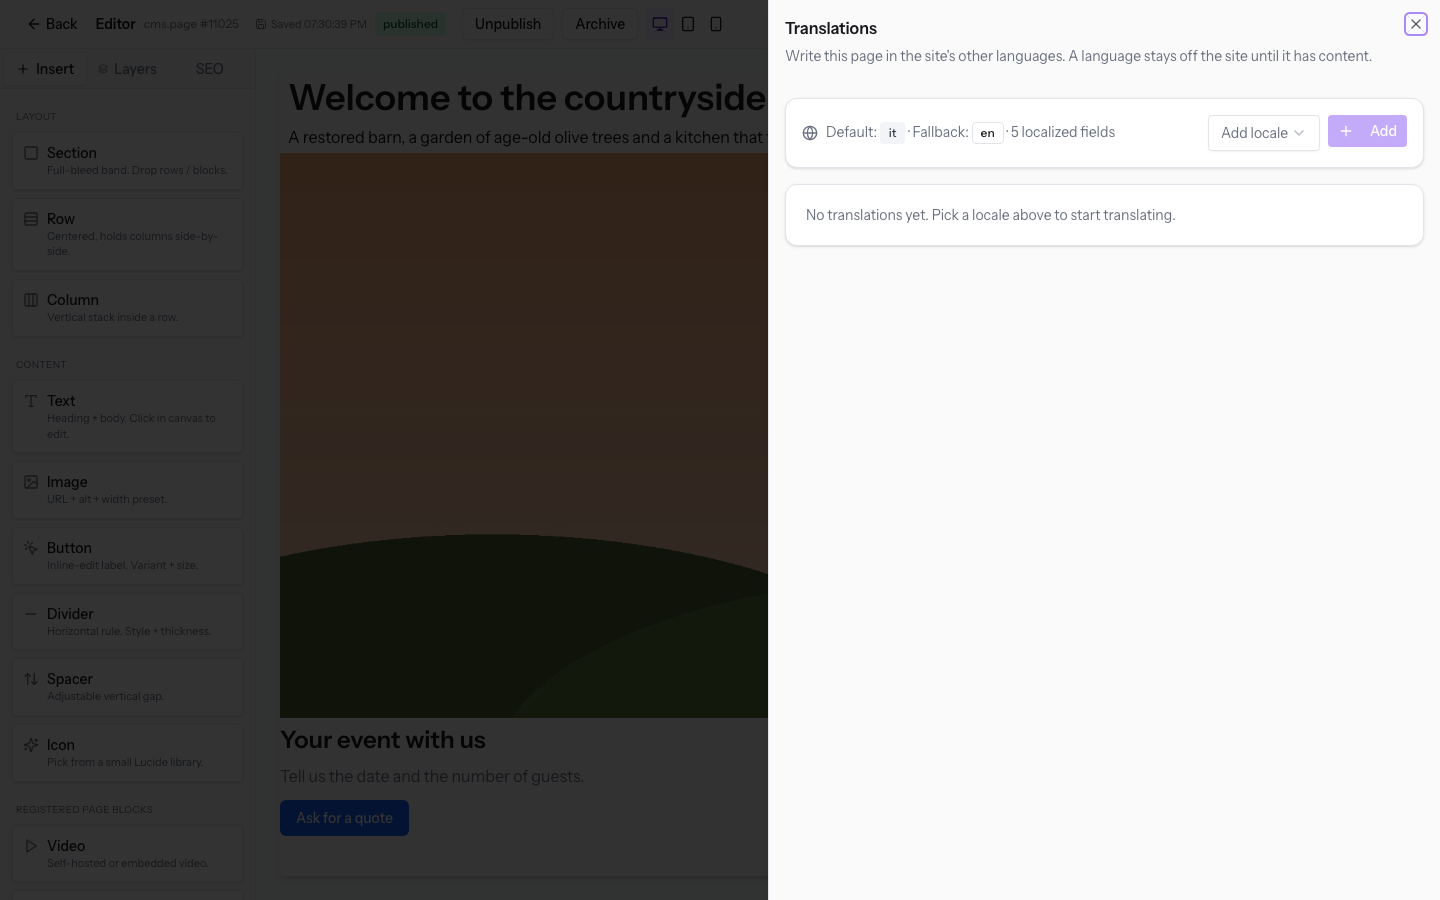
The Translations button opens the window where you write the page in the site's other languages. A language stays off the site until it has content.
- In the editor bar, press Translations.
- Choose the language in the Add locale list, for example
en. - Press Add and write the translated texts of the page.
- Press Close.
The window shows the site's default language (it in the demo), the fallback language (en) and the number of localized fields of the page (5 localized fields).
Other editor tabs and options
- SEO: the sidebar tab with the page's SEO status.
- Blog page: the switch that turns the page into a blog, with editorial plan and articles. On the
Farm Stay Demopage it is off.
See it on your company, not on a slide deck.
In 30 minutes we map the software you use today.We show you how much work and how much margin Archimedes gives back.
Show me on my business →What industry are you in?
One tap — it lets us prepare the demo around your world.
What tools do you use today?
Pick the ones you recognise — or just type them. It helps us show you how they migrate.
Last step: your details.
We reply within one working day — and right after, if you like, you pick the demo slot yourself.
We couldn't send your request. Try again, or write to us at [email protected].
By sending, you agree to your data being processed so we can get back to you about the demo. Privacy notice.
Preview form — nothing is sent from this page.
Want to schedule the demo now?
Your call: book the slot you prefer yourself, or we'll call you to arrange it.
Live availability, 30 minutes, instant confirmation. The calendar opens in a new tab.
Lock in your slot ↗We'll get back to you within one working day — and we'll join the call already knowing your world.
The calendar is open in another tab: pick a slot and the demo is booked. Can't see it? Reopen it ↗
Preview page: nothing was sent.
Our calendar is live: take the slot that suits you and the demo is booked. 30 minutes, instant confirmation, no waiting.
Lock in your slot ↗