CMS
All modules
Create a web form for the site
CMS · 12 of 17 · 6 min read
A web form collects requests from site visitors and delivers each submission to a destination, such as the CRM. You can use it, for example, for a quote request, a contact, or a sign-up. Each form has its own public address.
Before you start: the Forms item is visible only to organization administrators. Only the website manager can delete a form.
The forms list
The list shows all forms in the organization. The demo has Wedding quote request, published at /f/wedding-quote-request, and Corporate event request, in draft.
- Open CMS › Forms.
- Stay on the Forms tab. The Submissions tab contains the requests received: you'll find them described in Reading form submissions and publishing them on the site.
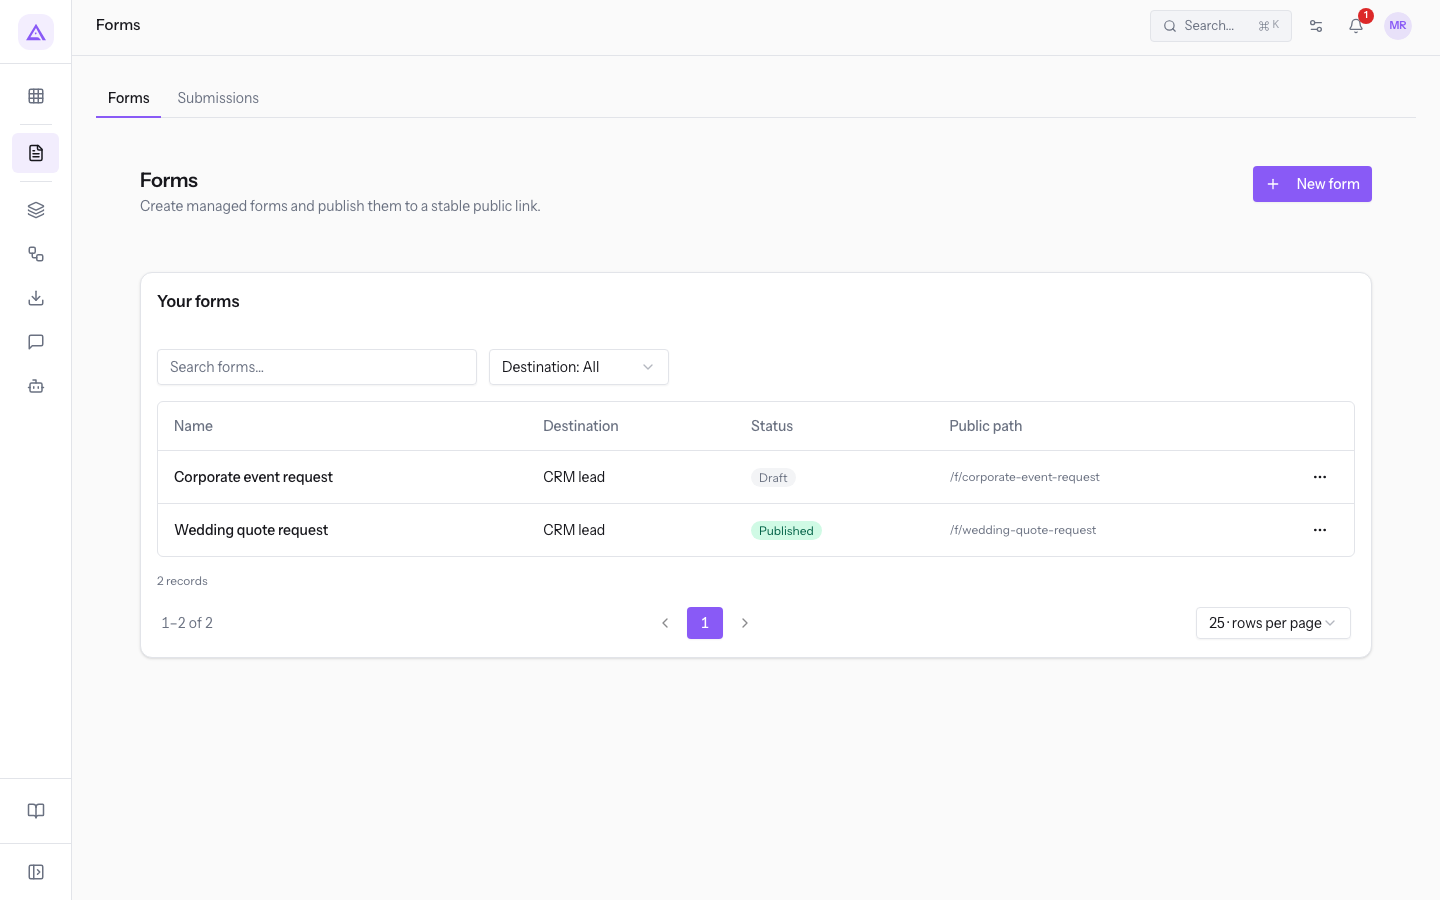
The Your forms table has the columns Name, Destination, Status and Public path, plus a ⋯ button at the end of each row. Above the table you'll find the Search forms… search and the Destination filter.
The ⋯ menu of each row contains:
- Open in the editor: opens the form builder.
- Copy link: copies the form's public address.
- Publish: makes the form available at its public address.
- Delete form: deletes the form.
Choosing the destination
The destination decides where each submission goes and which system fields the form can fill. For this reason it should be chosen first: the list of system fields you can connect depends on it.
- Press New form. The Create form screen opens.
- Under Where does this form deliver? choose the destination in the Submission target field.
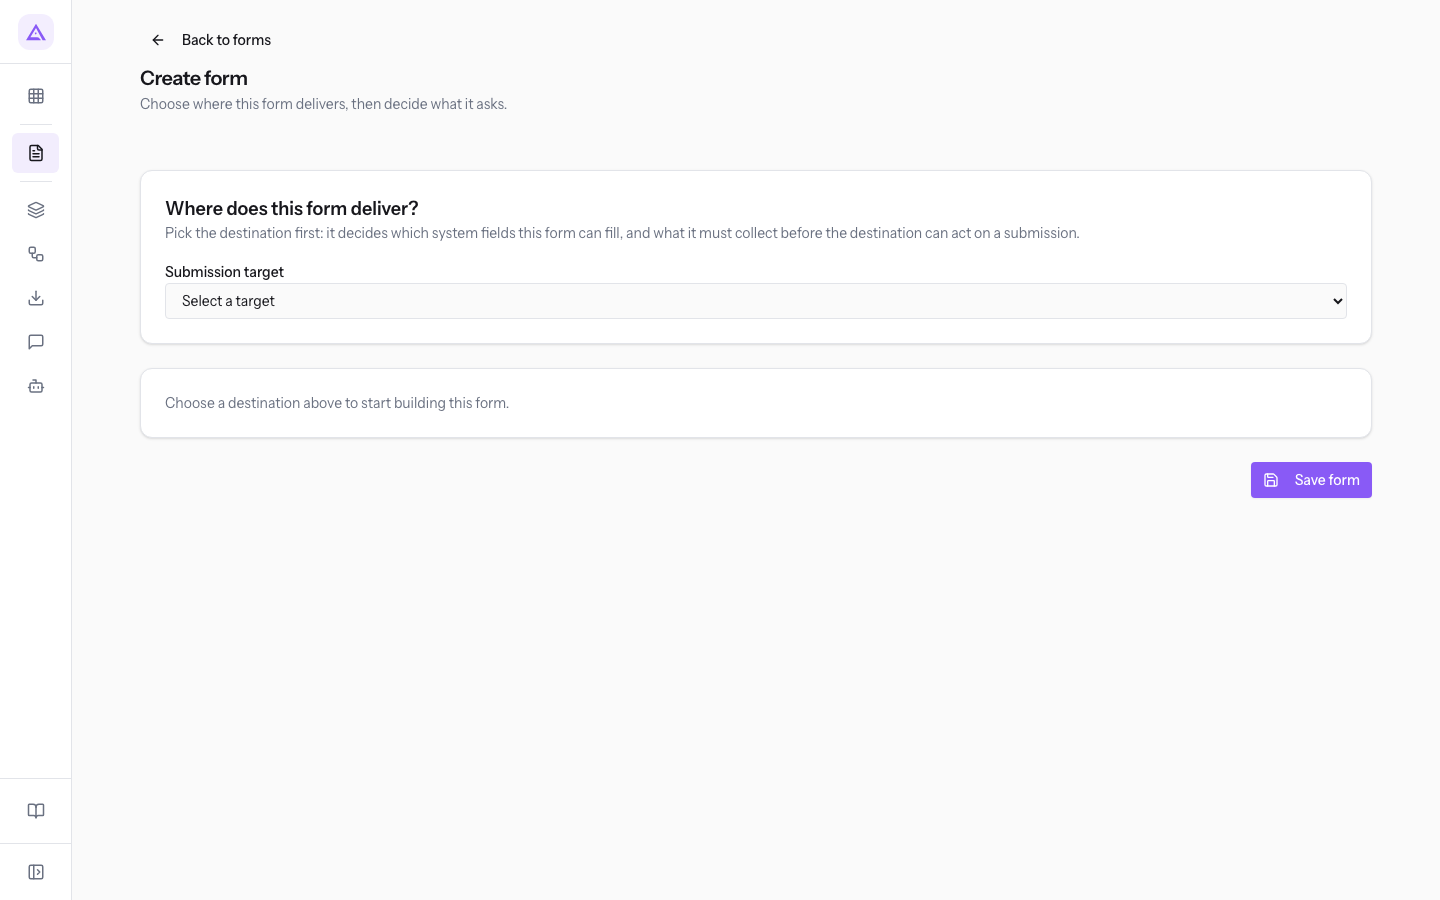
The available destinations are: a subscriber list, starting a workflow, a sales contact in the CRM (CRM lead), the newsletter sign-up, a support ticket and a project task. In the demo, Wedding quote request delivers its submissions to CRM lead.
- If you want to follow a sales request, choose the CRM destination.
- If the form is a support request, choose the ticket.
Once you've chosen the destination, the other sections of the builder appear.
Starting from a template
A template fills the form with fields already prepared.
- In the Start from a template section, press the template you need. The Contact template adds name, email, phone, subject and message.
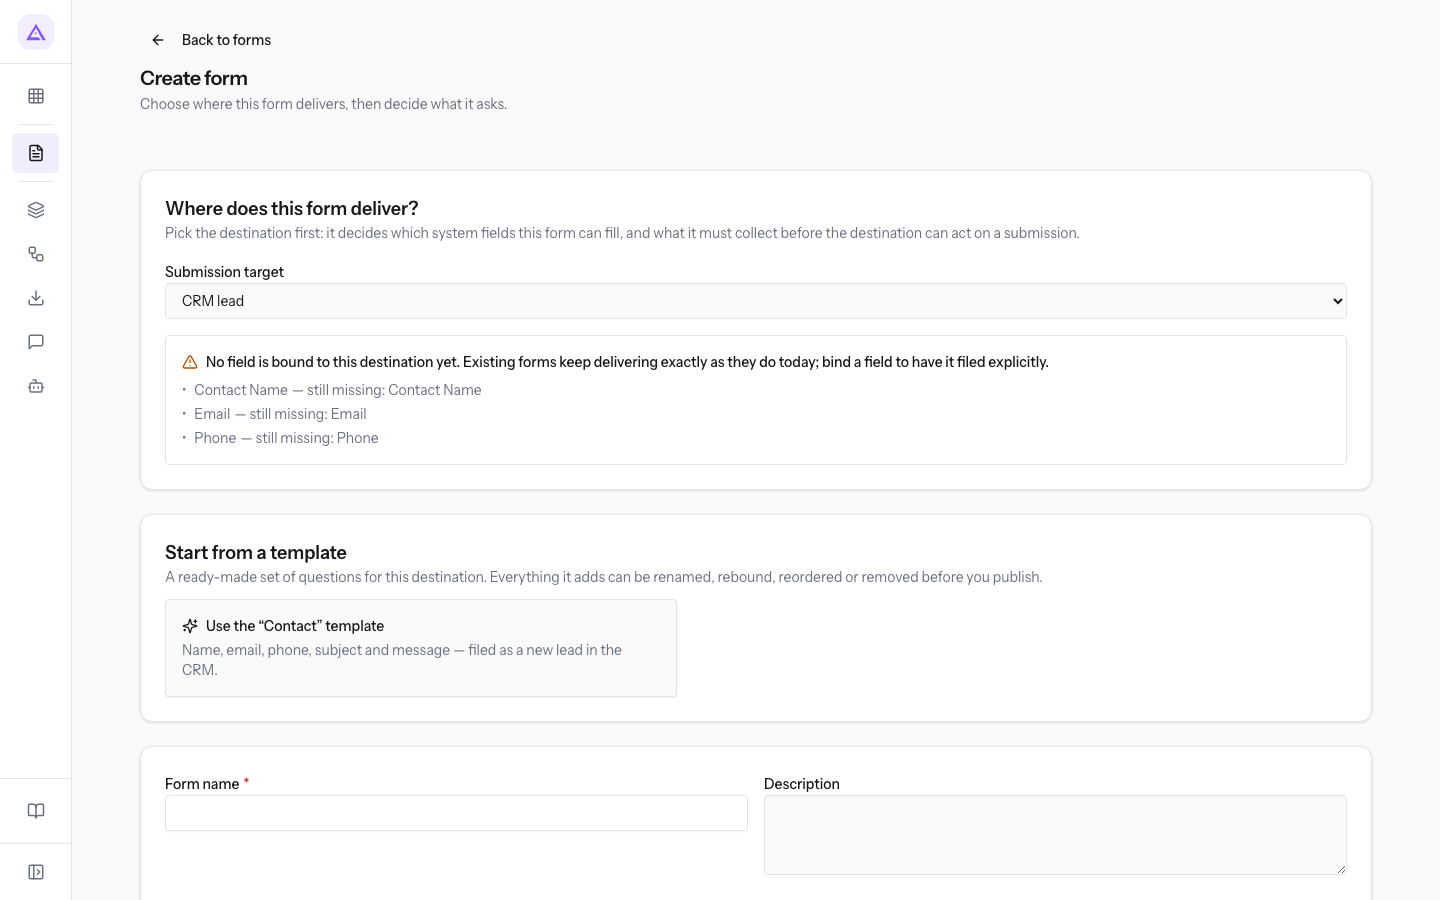
Note: the section appears on a new form. It does not appear on a form that has already been saved.
Naming the form
The name and description identify the form in the list.
- Form name: the form's name, for example
Wedding quote request. The field is required. While it is empty, the preview showsUntitled form. - Description: a note about the form, such as
The form on the Weddings page: it creates an opportunity in the CRM.
Adding and configuring fields
In Form fields you build the questions the visitor fills in.
- Press Add field to add a question.
- To insert a layout element, press Heading, Text or Divider.
- To split the form into multiple steps, press Step. The Step title field appears.
- Fill in the field settings.
- Change the order with the up and down move arrows, or remove the field with Remove field.
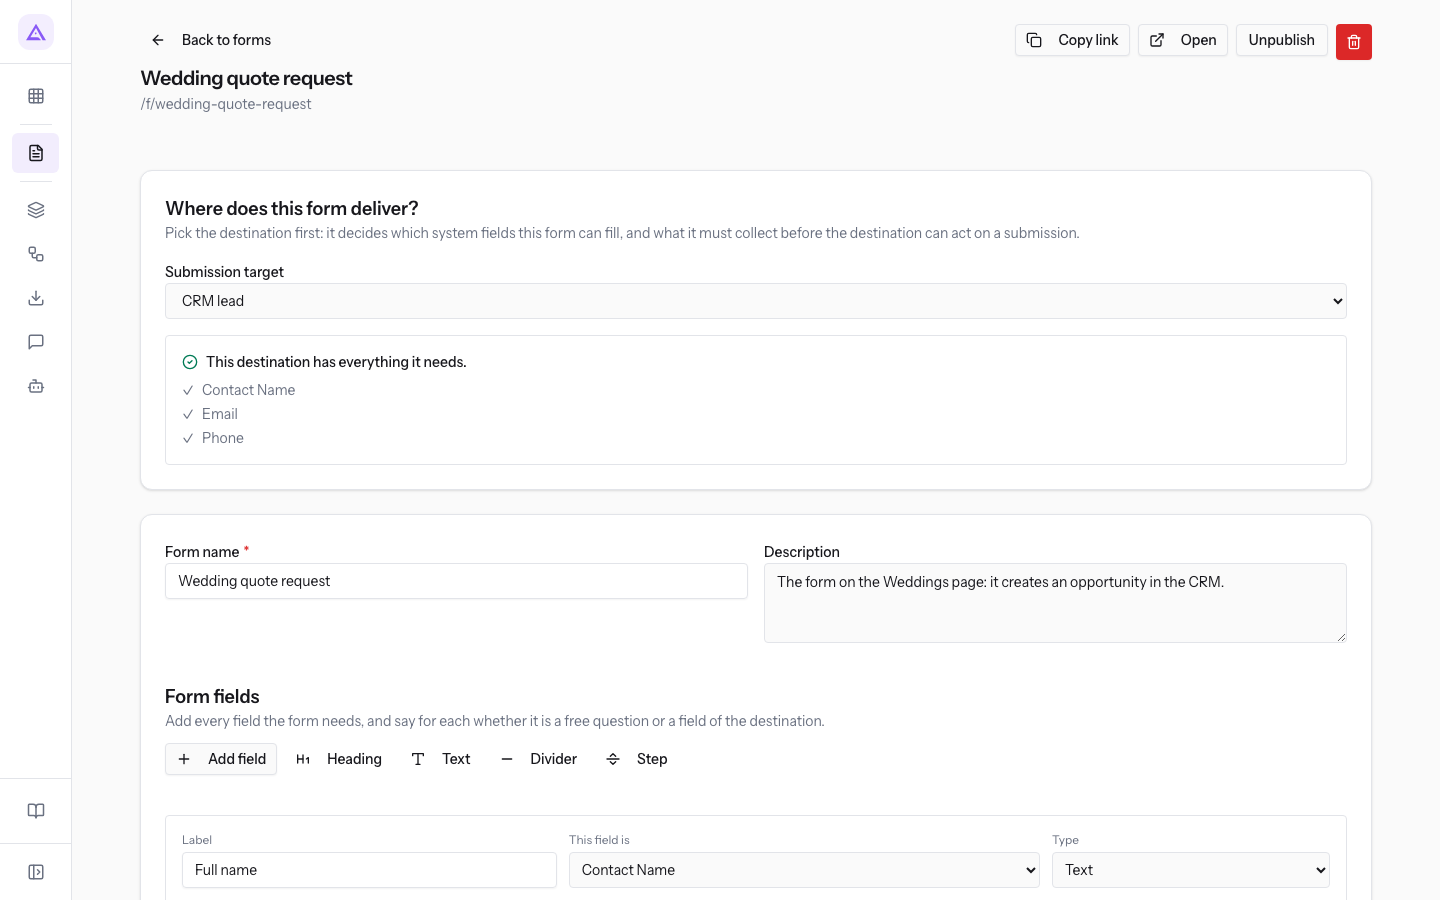
Each field has these settings:
- Label: the question the visitor reads, for example
Number of guests. - This field is: connects the answer to a system field of the destination, such as
Contact Name. With A free question the answer is not connected to any field. This is the default option. - Type: the answer type.
- Text, Long text: a written answer, on one line or on several lines.
- Email, Phone, Number, Date: an email address, a phone number, a number or a date.
- Select: a choice among the lines of the Options field, as
Spring Summer Autumn WinterforPreferred period. - Checkbox, Consent: a box to tick.
- Hidden: a field the visitor does not see.
- File upload: an attachment.
- Field name: the name of the field in the system:
guestsforNumber of guests. - Placeholder: the text shown in the empty field.
- Width: the space the field takes up, with the options Full width, Half width and One third. Two fields with Half width sit on the same row.
- Default value: the value already written in the field.
- Help text: an explanation shown with the field.
- Required: the visitor must fill in the field to submit the form.
- Shown when: shows the field based on an earlier field. With Always shown the field is always visible. The setting appears from the second field onward.
- Min length, Max length, Pattern (regular expression): the limits of the written answer. On Number fields, Minimum and Maximum appear in their place.
- Message shown when the value is refused: the text shown when the answer does not respect the limits.
The Preview section shows the form as the visitor will see it. To check it on several screens, use Desktop, Tablet and Mobile.
Setting the appearance
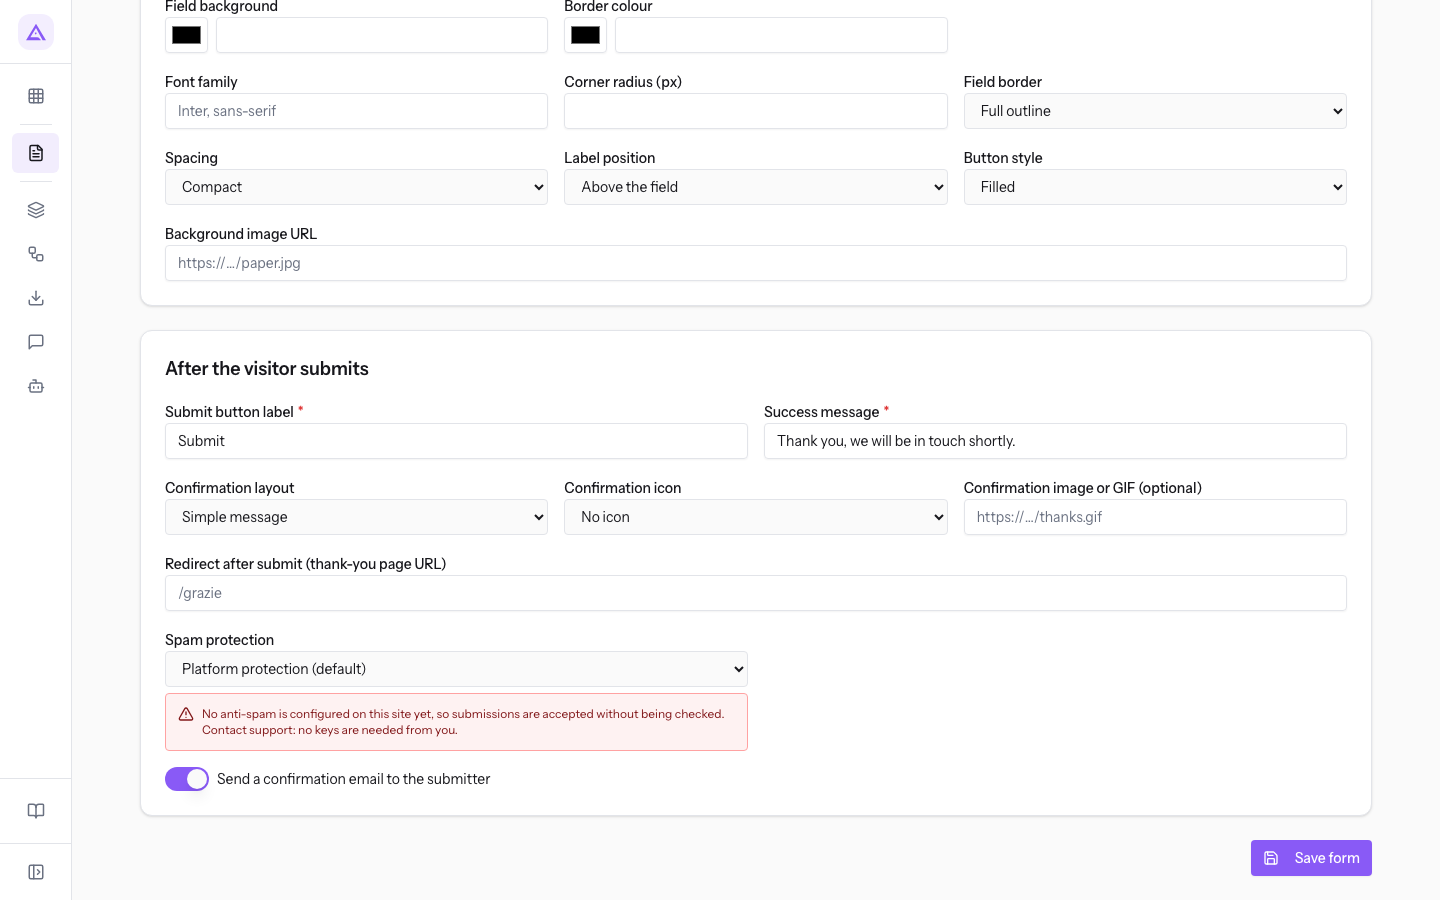
In Appearance choose whether the form uses the site's colors or its own colors.
- Follow the brand: the form uses the colors and fonts set in Customizing the site's look: brand, top bar and badge.
- Use a custom appearance: these form settings appear:
- Accent colour, Background colour, Text colour, Field background, Border colour: the colors, chosen from the picker or written as a hex code.
- Font family and Corner radius (px).
- Field border: Full outline, Underline only or No border.
- Spacing: Compact, Normal or Relaxed.
- Label position: Above the field, Beside the field or Hidden (screen readers only).
- Button style: Filled or Outlined.
- Background image URL.
What happens after submission
In After the visitor submits you set the button, the response to the visitor, and spam protection.
- Submit button label: the button text. The default value is
Submit. The field is required. - Success message: the message shown after submission, for example
Thank you! We will call you back within two working days.The field is required. - Confirmation layout: Simple message, Centered with icon or Card with icon.
- Confirmation icon: No icon, Checkmark or Heart.
- Confirmation image or GIF (optional): an image to show with the message.
- Redirect after submit (thank-you page URL): instead of the message, sends the visitor to a page of the site.
- Spam protection: Platform protection (default), None, Cloudflare Turnstile or reCAPTCHA v3. Blocked submissions appear as Held back in the Submissions tab.
- Send a confirmation email to the submitter: sends an email to the person who filled in the form.
Saving and publishing the form
A draft form receives no submissions from the site until you publish it.
- Press Save form.
- Press Publish in the form header. The form becomes reachable at its public path, for example
/f/corporate-event-request. - Press Copy link to copy the address, or Open to see the public page.
To remove a published form from the site, press Unpublish. To go back to the list, press Back to forms.
To place the form on a page, read Reading form submissions and publishing them on the site.
Important: submissions are kept for two years from the date of submission.
See it on your company, not on a slide deck.
In 30 minutes we map the software you use today.We show you how much work and how much margin Archimedes gives back.
Show me on my business →What industry are you in?
One tap — it lets us prepare the demo around your world.
What tools do you use today?
Pick the ones you recognise — or just type them. It helps us show you how they migrate.
Last step: your details.
We reply within one working day — and right after, if you like, you pick the demo slot yourself.
We couldn't send your request. Try again, or write to us at [email protected].
By sending, you agree to your data being processed so we can get back to you about the demo. Privacy notice.
Preview form — nothing is sent from this page.
Want to schedule the demo now?
Your call: book the slot you prefer yourself, or we'll call you to arrange it.
Live availability, 30 minutes, instant confirmation. The calendar opens in a new tab.
Lock in your slot ↗We'll get back to you within one working day — and we'll join the call already knowing your world.
The calendar is open in another tab: pick a slot and the demo is booked. Can't see it? Reopen it ↗
Preview page: nothing was sent.
Our calendar is live: take the slot that suits you and the demo is booked. 30 minutes, instant confirmation, no waiting.
Lock in your slot ↗