CMS
All modules
Upload and organize images and files in the Media library
CMS · 9 of 17 · 4 min read
The Media library collects the site's images, videos, audio and documents, for example photos of the rooms or dishes to use in pages and articles. It lets you upload files, split them into folders, search them and assign tags to them.
Before you start: to upload and delete media you only need the website editor role.
The library screen
The library shows folders on the left and, on the right, the upload area, search, filters and the file grid.
- Open CMS › Media.
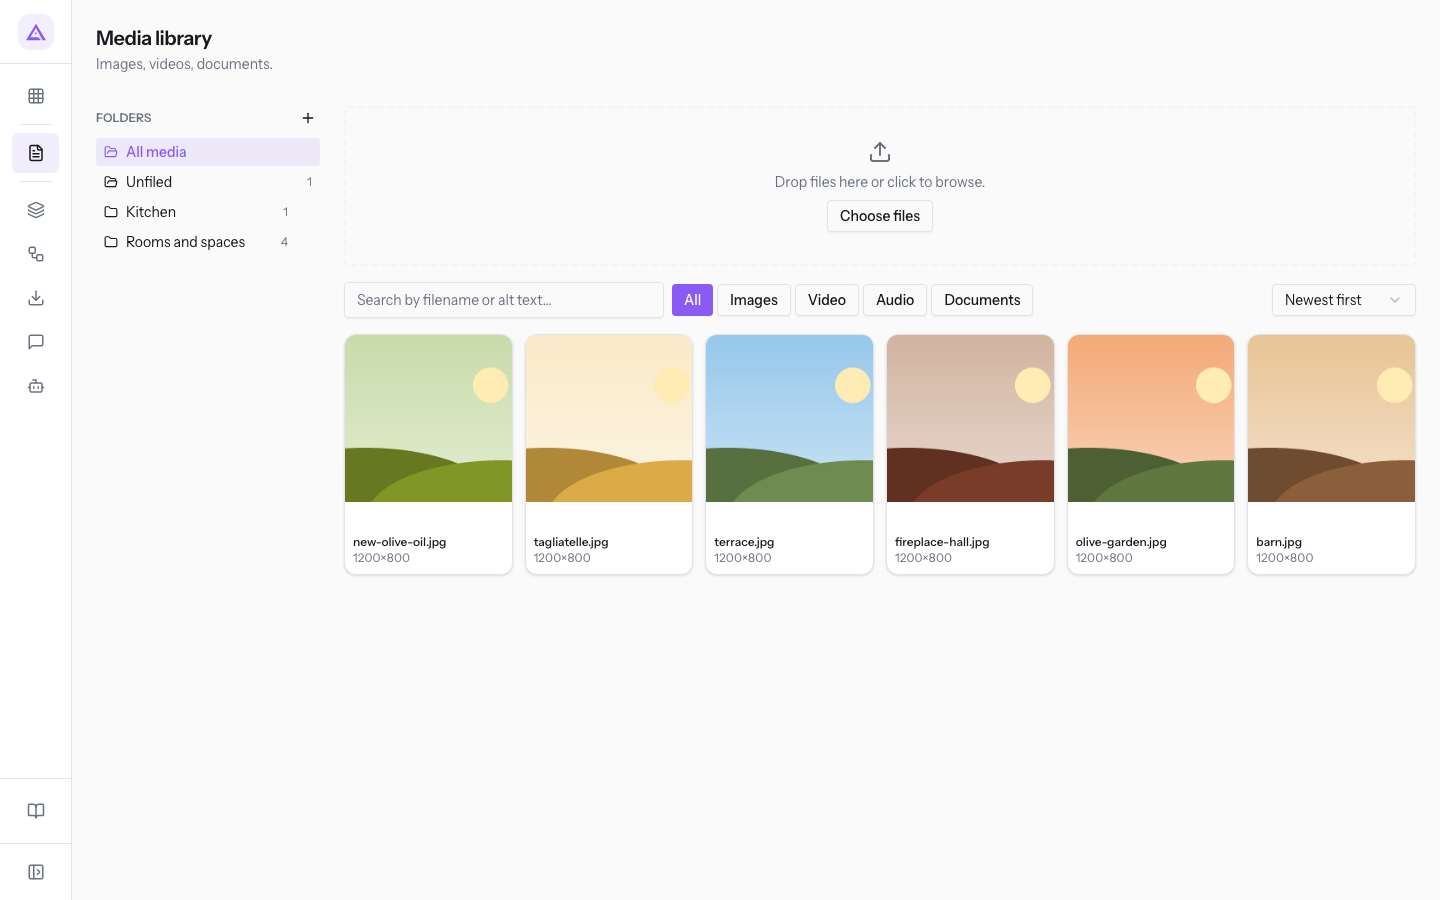
The folder column contains:
- All media: all the files in the library, in any folder.
Unfiled: the files that are not in any folder.- The organization's folders,
KitchenandRooms and spacesin the demo. Next to each folder is the number of files it contains.
Each file in the grid shows its name, for example barn.jpg, and below it the size in pixels for images or the file type for the others.
Upload a file
Uploaded files go into the folder that is open at that moment. If All media is open, the file does not go into any folder.
- In the left column, press the destination folder, for example
Rooms and spaces. - Drag the files into the area
Drop files here or click to browse., or press Choose files and pick the files from your computer.
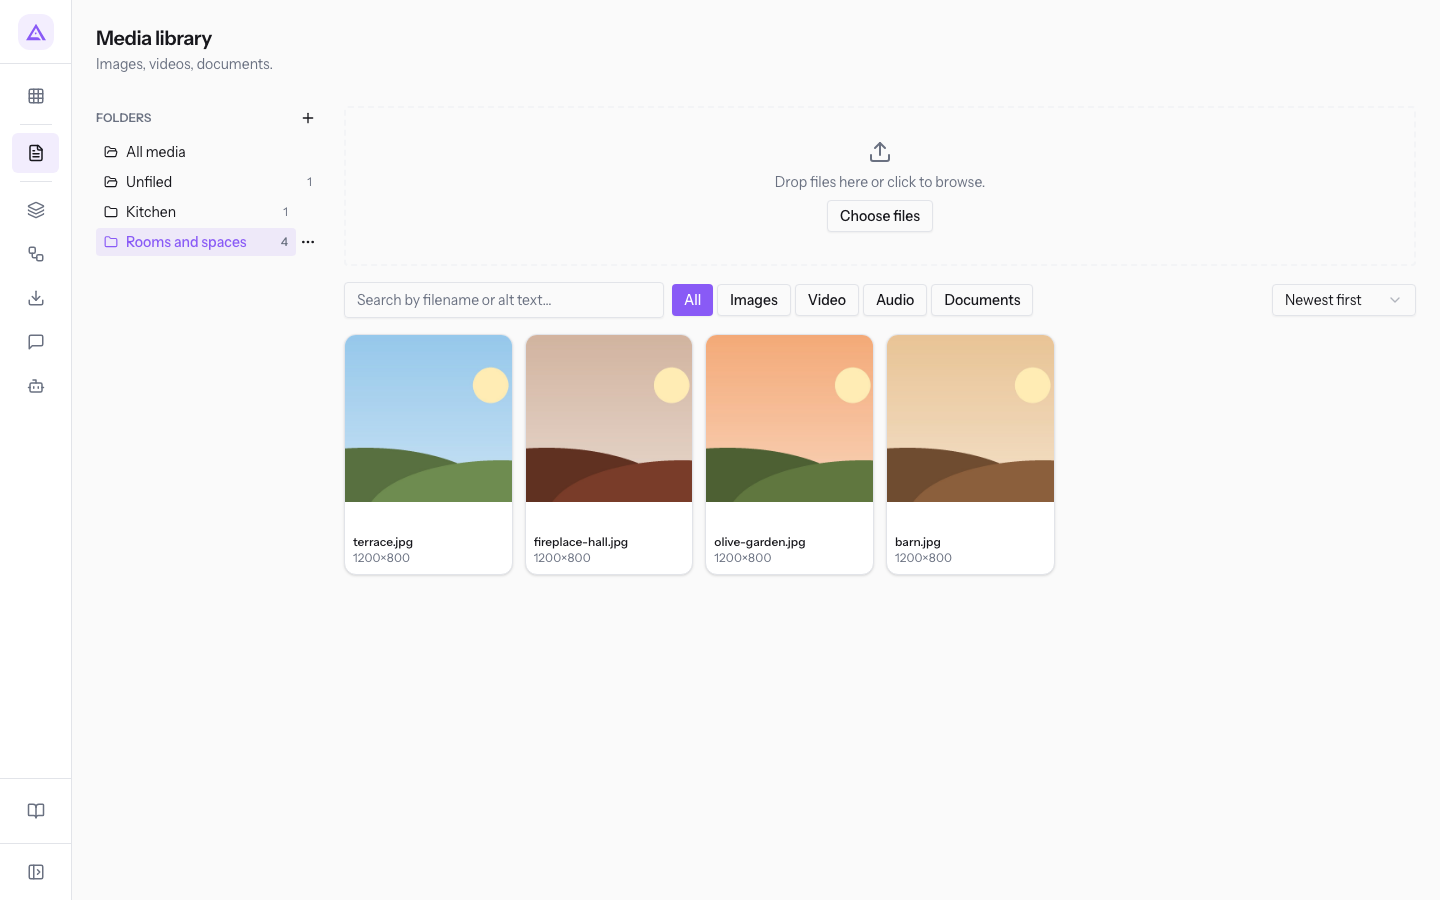
Tip: open the folder before uploading. This way you avoid having to move the files afterwards.
Search, filter and sort files
Search, filters and sorting work together with the open folder.
- Search by filename or alt text…: search files by name or by alt text. For example
barnfindsbarn.jpg. - Filters by type:
- All: all files.
- Images: images only.
- Video: videos only.
- Audio: audio files only.
- Documents: documents only.
- Sorting, with Newest first as the starting value:
- Newest first: from the most recent.
- Oldest first: from the least recent.
- Name A→Z: by name in alphabetical order.
- Largest first: from the largest file.
Select several files, move them to a folder and assign tags
With multiple selection you can move, label or delete several files at once.
- Hover over a file and press the Select checkbox in the top-left corner of the thumbnail.
- Select the other files in the same way. While a selection is active, pressing a file adds it to or removes it from the selection instead of opening it.
- Above the grid, the selection bar appears with the number of selected files.
The selection bar contains:
- Move to folder…: moves the selected files into the chosen folder, for example
Kitchen. When it finishes, the message Moved. appears and the folder counters update. - Add tags, comma-separated: the tags to assign to the selected files, separated by commas.
- Delete: deletes the selected files.
- Deselect: cancels the selection.
Delete a file
Deleting removes the file from the library.
Note: if the storage system refuses the deletion, the file still disappears from the library and the message "The file was removed. Library cleanup is pending and will retry automatically." appears. The cleanup is retried automatically, without you having to do anything.
The alt text of images
Alt text describes the content of an image.
- The library search also finds files by alt text. A description of the content makes the image findable even if the file name does not say what it shows.
- If an image has no alt text, the library uses the file name instead.
Tip: fill in the alt text for every image you use on the site's pages.
Images uploaded here are used in pages, for example in categories: see Create content categories.
See it on your company, not on a slide deck.
In 30 minutes we map the software you use today.We show you how much work and how much margin Archimedes gives back.
Show me on my business →What industry are you in?
One tap — it lets us prepare the demo around your world.
What tools do you use today?
Pick the ones you recognise — or just type them. It helps us show you how they migrate.
Last step: your details.
We reply within one working day — and right after, if you like, you pick the demo slot yourself.
We couldn't send your request. Try again, or write to us at [email protected].
By sending, you agree to your data being processed so we can get back to you about the demo. Privacy notice.
Preview form — nothing is sent from this page.
Want to schedule the demo now?
Your call: book the slot you prefer yourself, or we'll call you to arrange it.
Live availability, 30 minutes, instant confirmation. The calendar opens in a new tab.
Lock in your slot ↗We'll get back to you within one working day — and we'll join the call already knowing your world.
The calendar is open in another tab: pick a slot and the demo is booked. Can't see it? Reopen it ↗
Preview page: nothing was sent.
Our calendar is live: take the slot that suits you and the demo is booked. 30 minutes, instant confirmation, no waiting.
Lock in your slot ↗