Projects
All modules
Add custom fields and set default values
Projects · 17 of 17 · 5 min read
The Custom Fields, Task Tags, and Defaults tabs in Project Settings are used to adapt projects to your organization. You can add your own data to projects and tasks — for example, a client contact, a job code, or a site visit date. You can manage task tags and set how new projects behave.
Note: Projects › Settings only appears in the menu for project managers (the "Project Manager" group). Other module users see the custom field definitions as read-only.
Custom Fields
The Custom Fields tab has two lists. Project fields contains the fields added to each project. Task fields contains the fields added to tasks.
Choose which list to add the field to based on the data you want to record:
- If the data relates to the job as a whole — for example, a client contact — use Project fields.
- If the data varies from one task to another, use Task fields.
Fields are defined once for the entire organization and form a catalog shared across all projects.
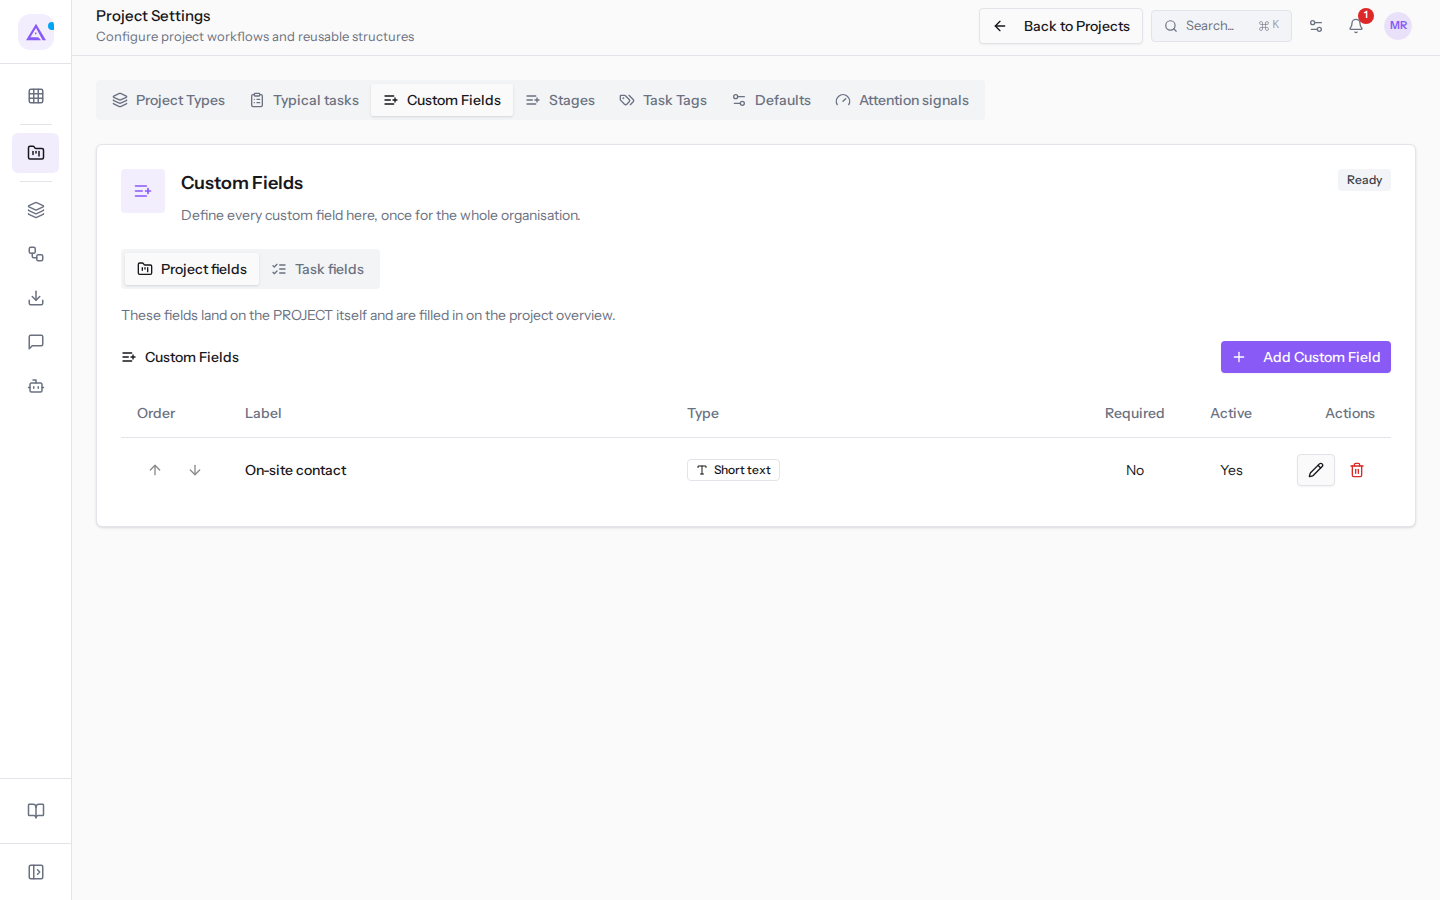
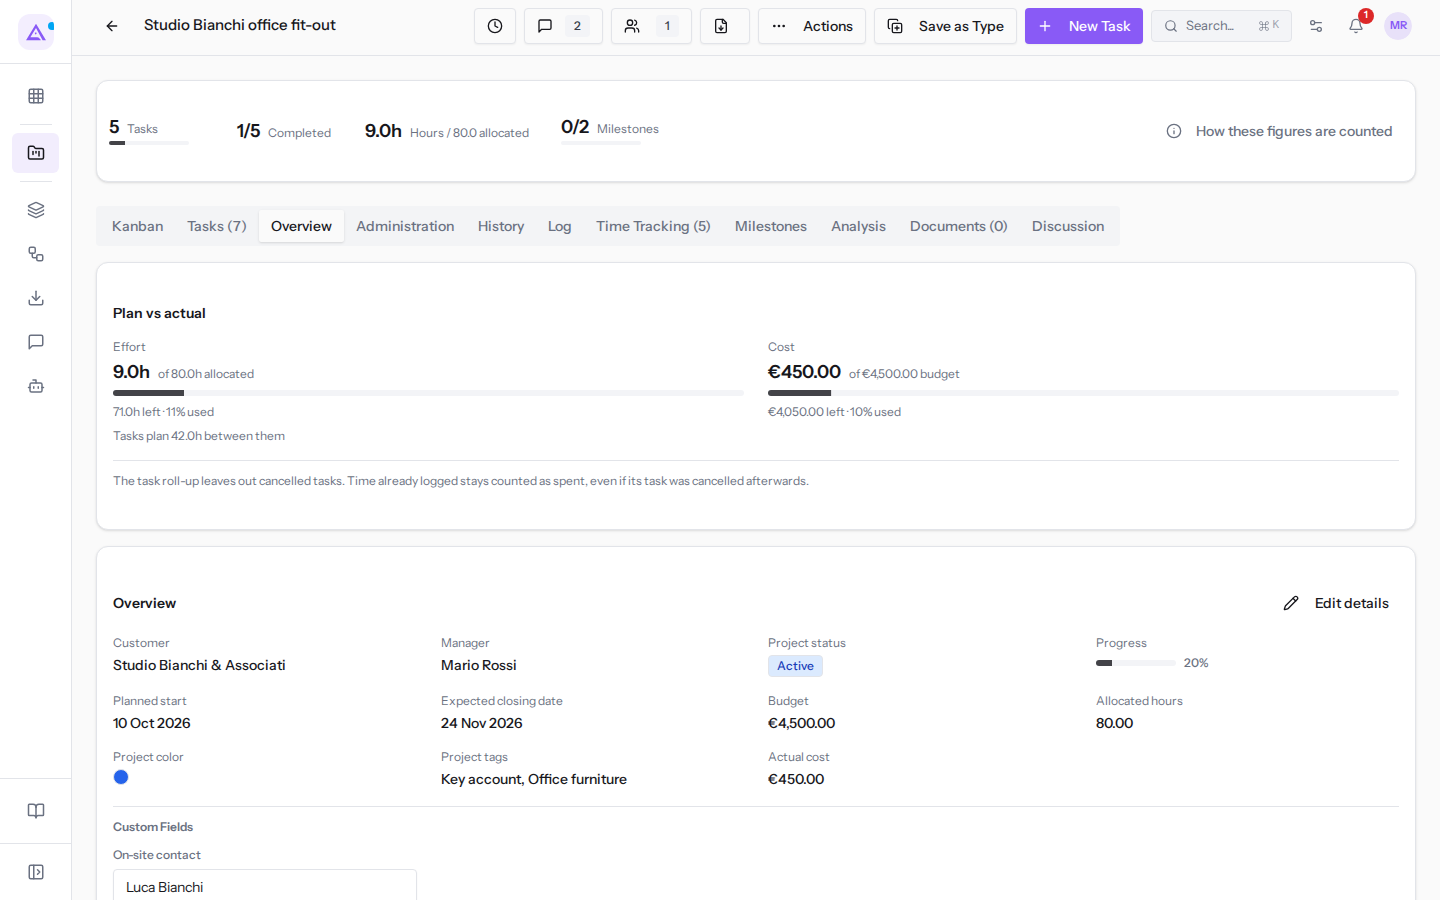
The Project fields list contains, for example, the field On-site contact. The arrows in Order change the field's position, and the icons in Actions edit or delete it. The On-site contact field is of type Short text, is not required, and is active.
Add a project field
A project field appears in every project in the organization.
- Go to Projects › Settings and open the Custom Fields tab.
- In the Project fields list, click Add Custom Field. The Add Custom Field dialog opens.
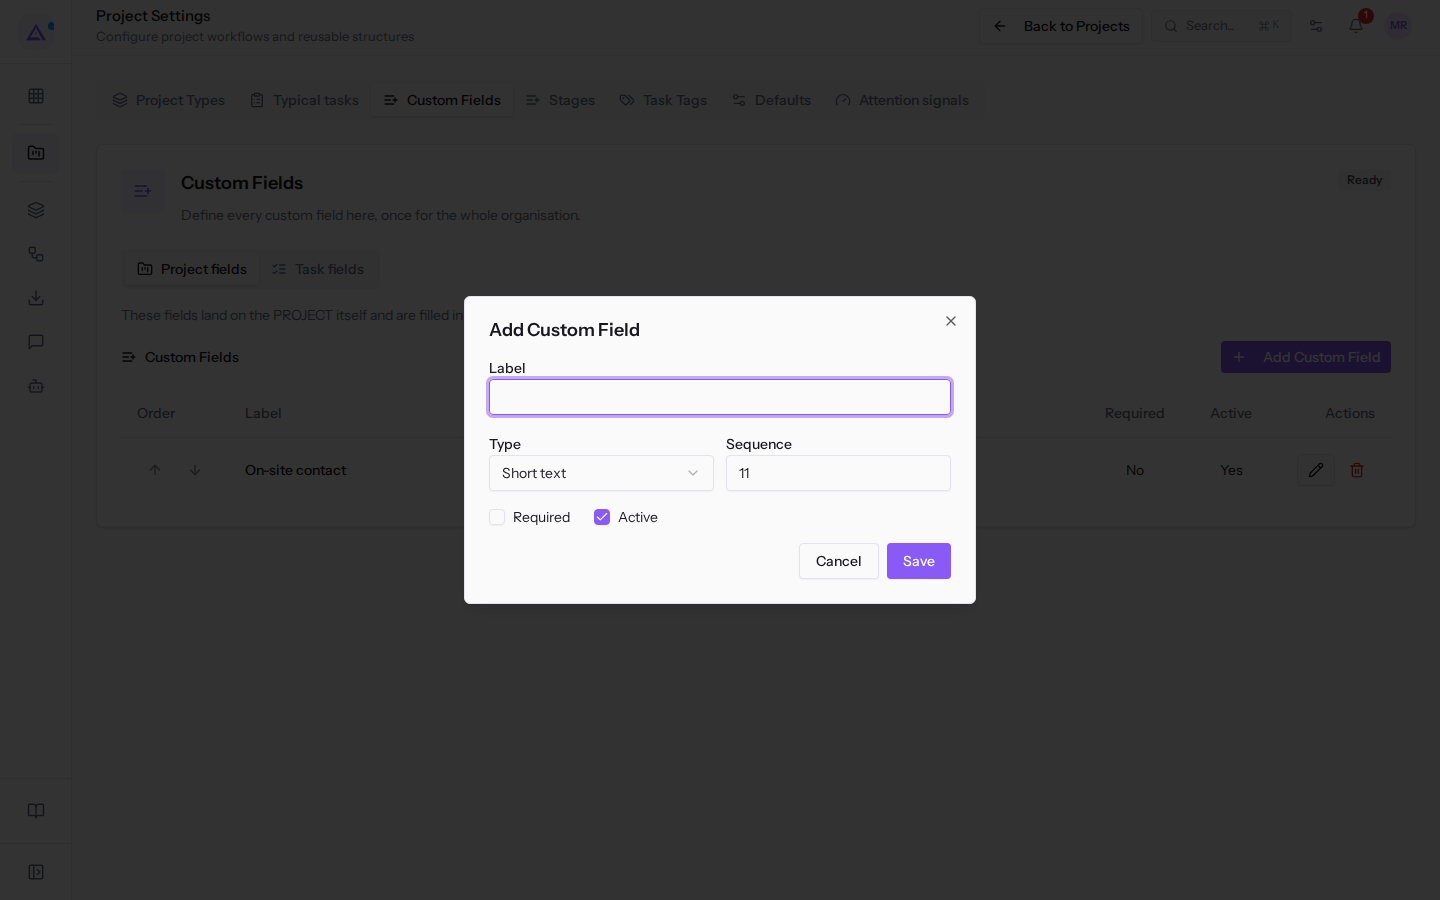
- Fill in the fields and click Save.
The dialog contains these fields:
- Label: the field name, as it appears in projects. For example,
On-site contact. - Type: the data type of the field. The default value is Short text. The options are:
- Short text
- Paragraph
- Number
- Currency
- Date
- Date and time
- Checkbox
- Dropdown
- Labels
- URL
- Sequence: the field's position in the list.
- Options: appears only with the Dropdown or Labels type. Write one option per line.
- Required: the checkbox is off by default.
- Active: the checkbox is on by default.
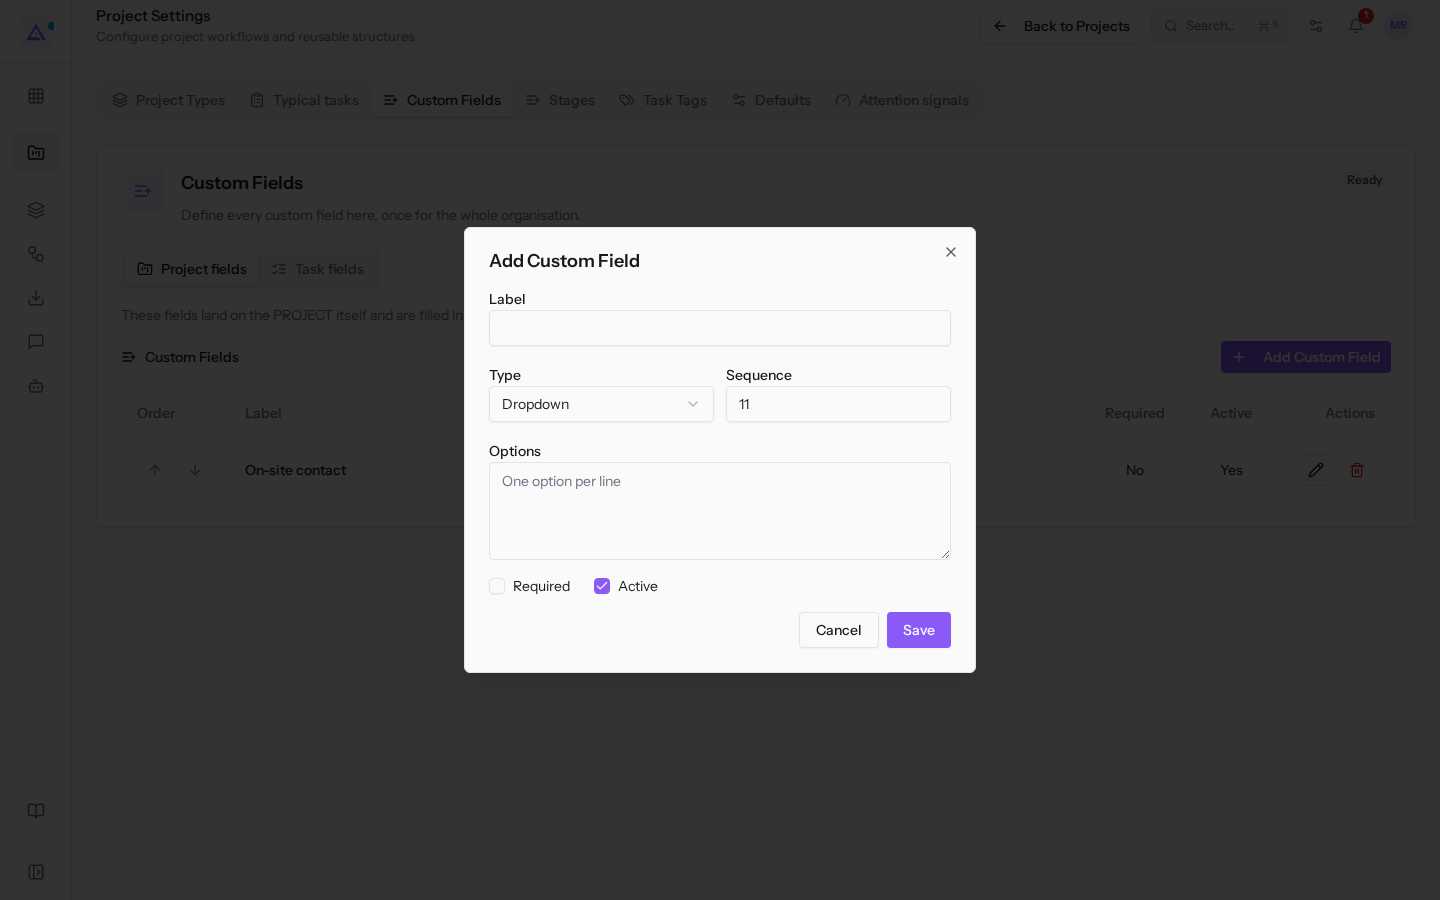
To edit an existing field, click the pencil icon next to the field. The Edit Custom Field dialog opens, with the same fields.
Add a task field
A task field is added to the field catalog that every project can draw from.
- Go to Projects › Settings and open the Custom Fields tab.
- Click Task fields.
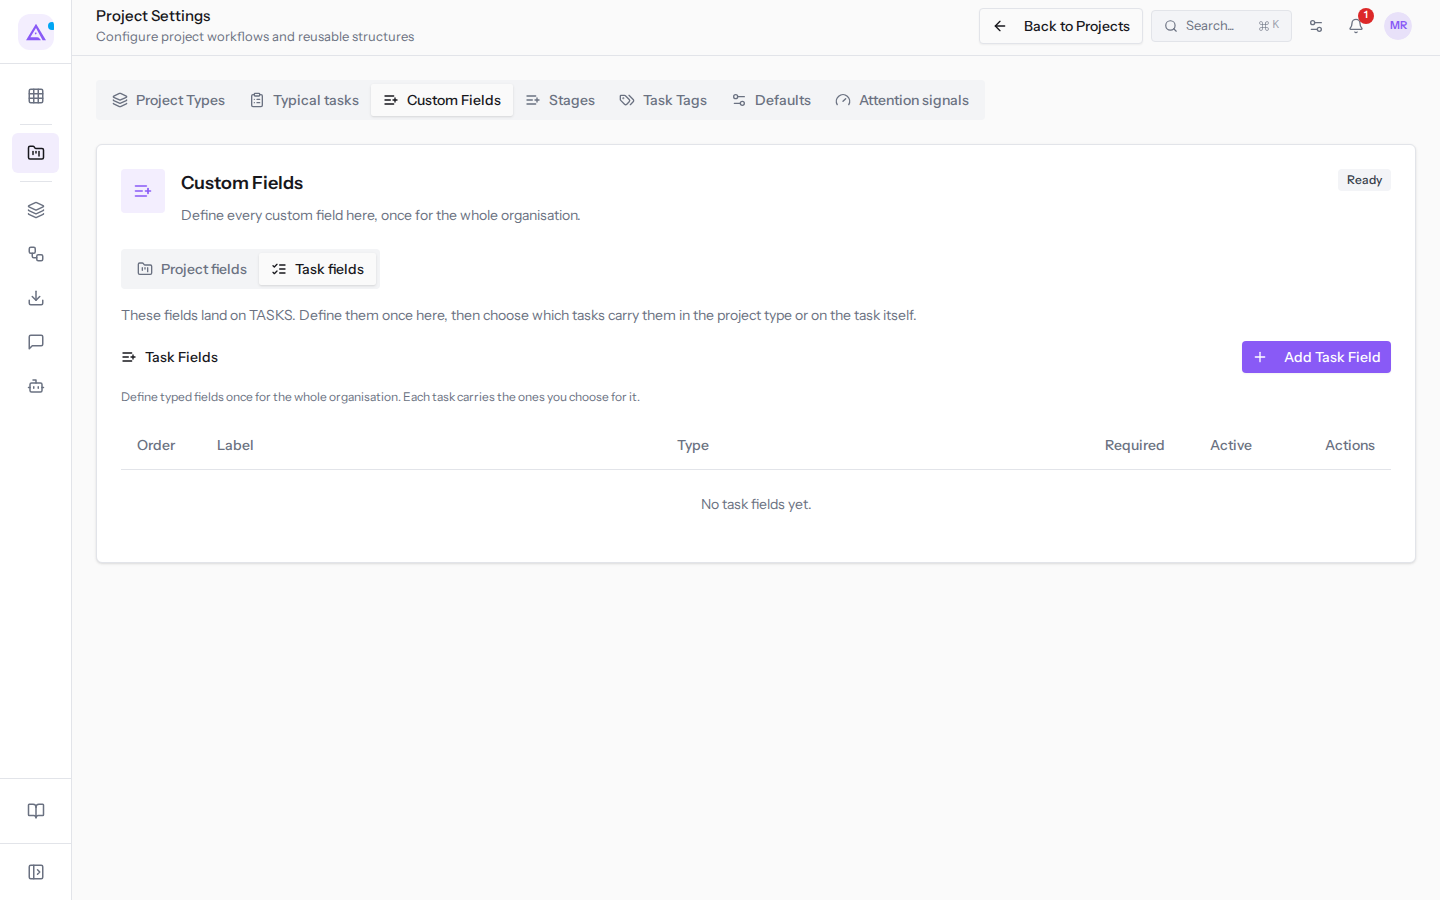
- Click Add Task Field. The Add Task Field dialog opens.
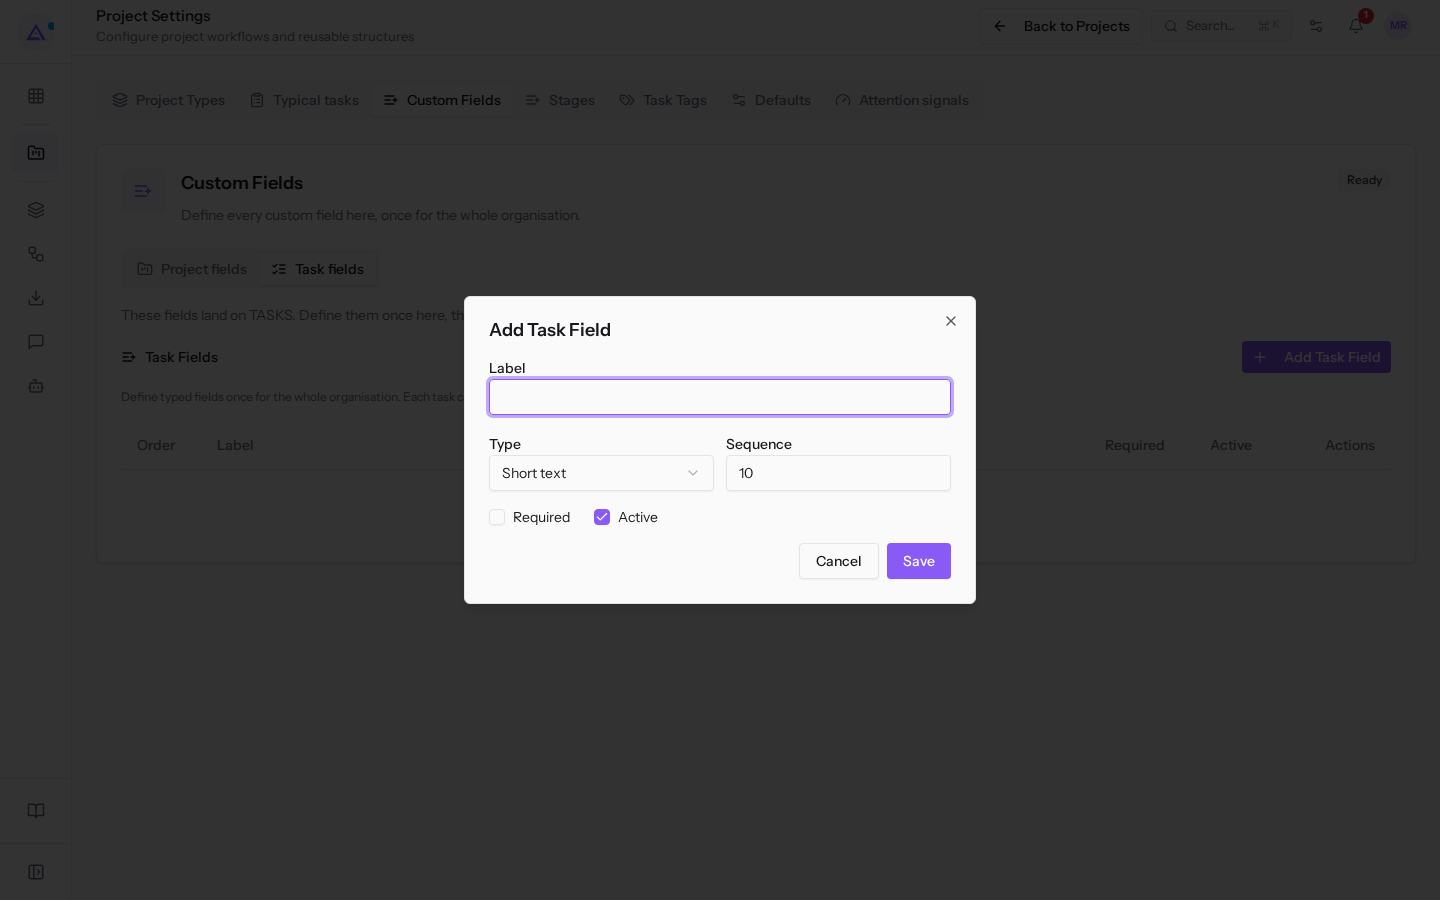
- Fill in Label, Type, Sequence, Required, and Active as you would for a project field, then click Save.
Where fields appear
Project fields appear in the Overview tab of each project, in the Custom Fields section.
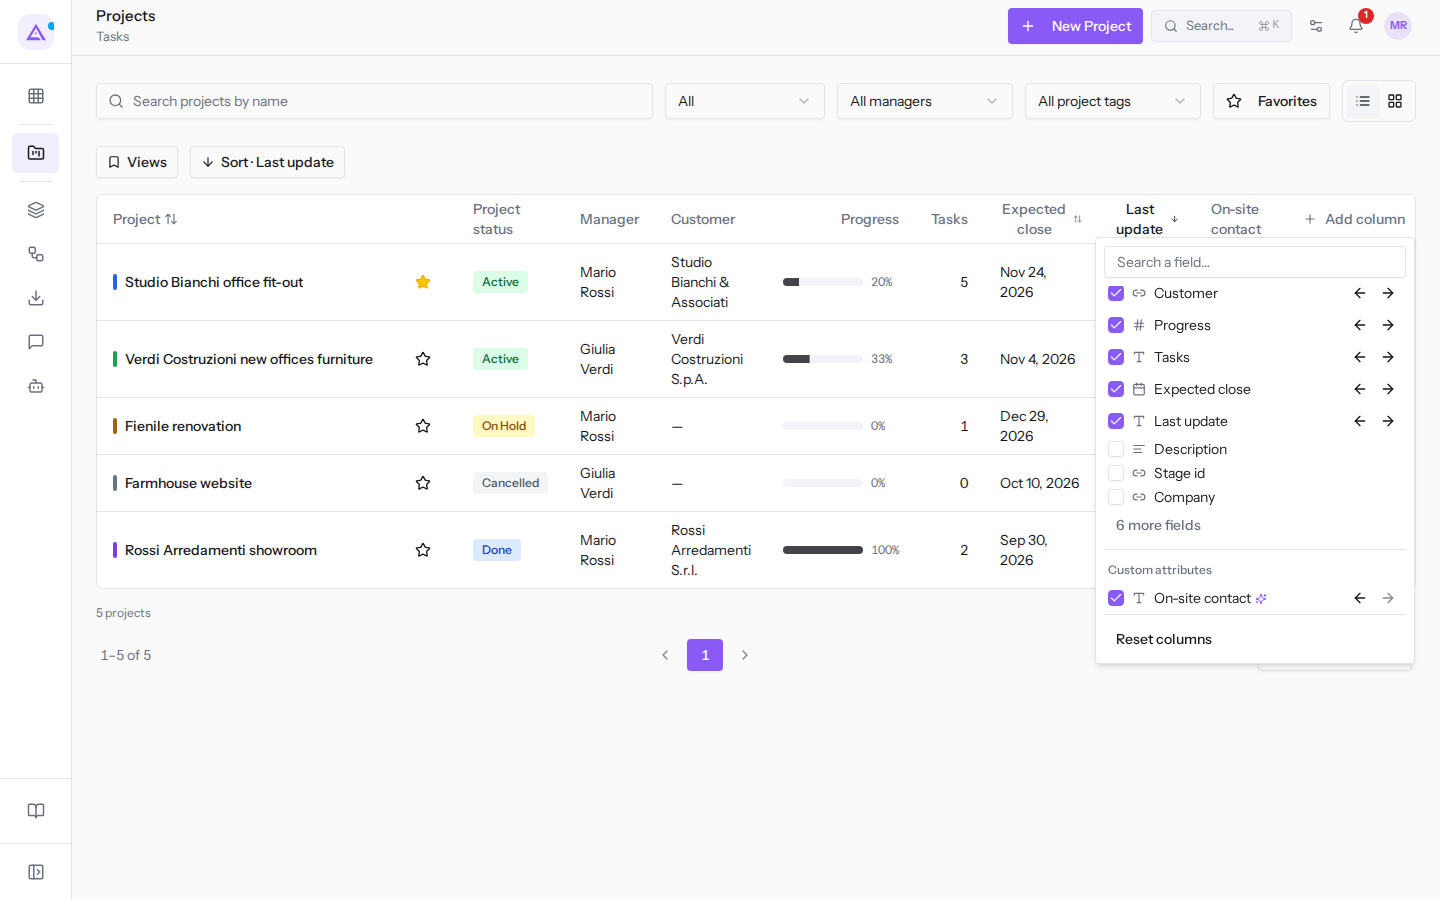
In the project list, a project field becomes a column. Click Add column and enable the checkbox for the field — for example, On-site contact. To return to the default columns, click Reset columns.
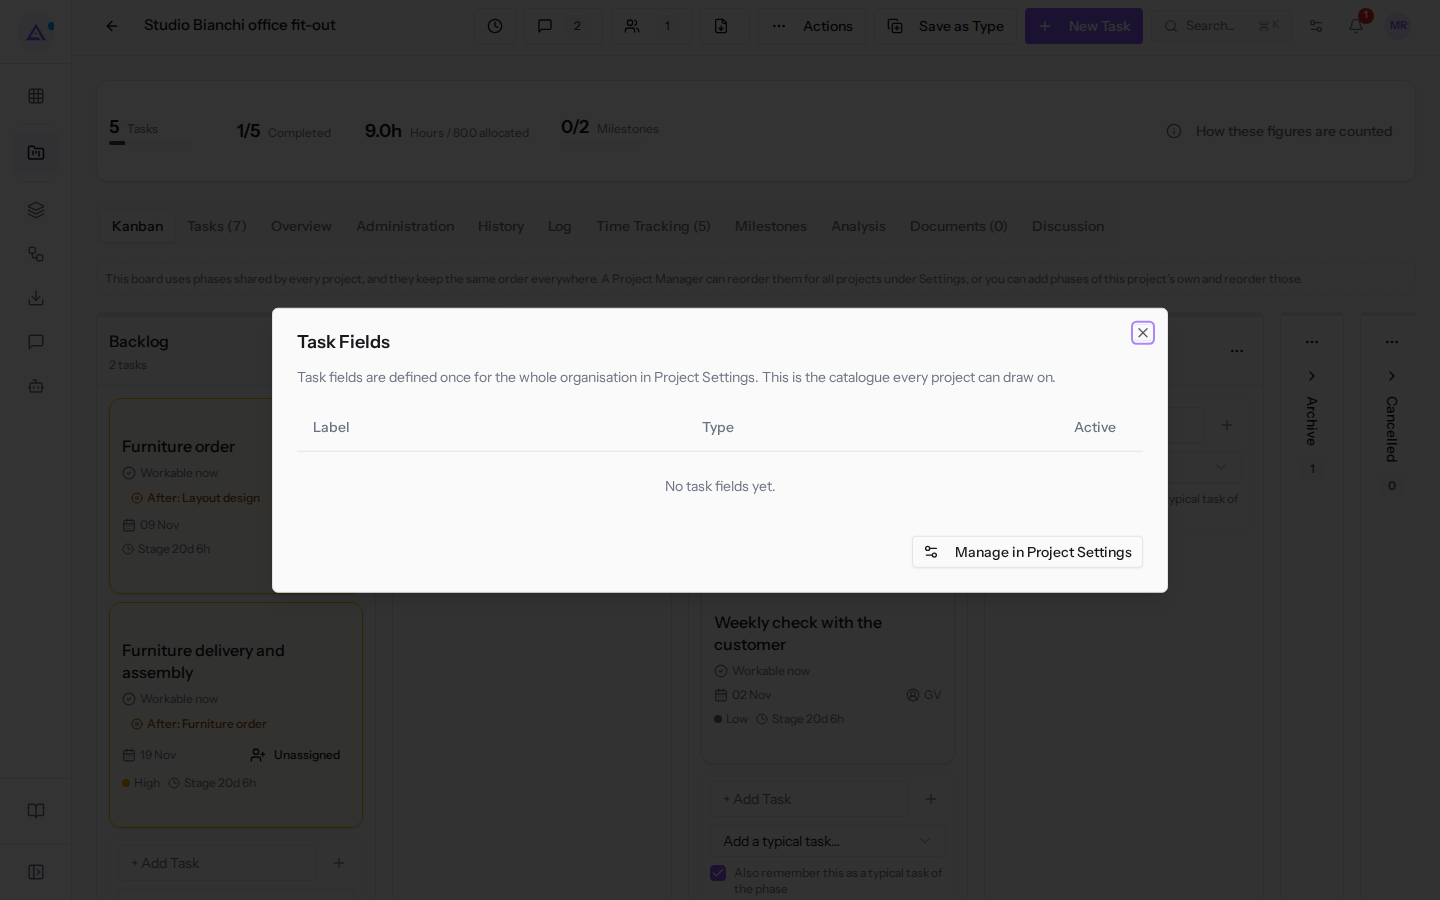
To view task fields from a project, open the project, click Actions, then Task fields. The Task Fields dialog lists the catalog with the Label, Type, and Active columns. To edit it, click Manage in Project Settings.
Task Tags
Tags do not belong to the Projects module alone. They are grouped into filter categories used throughout the platform.
- Go to Projects › Settings and open the Task Tags tab.
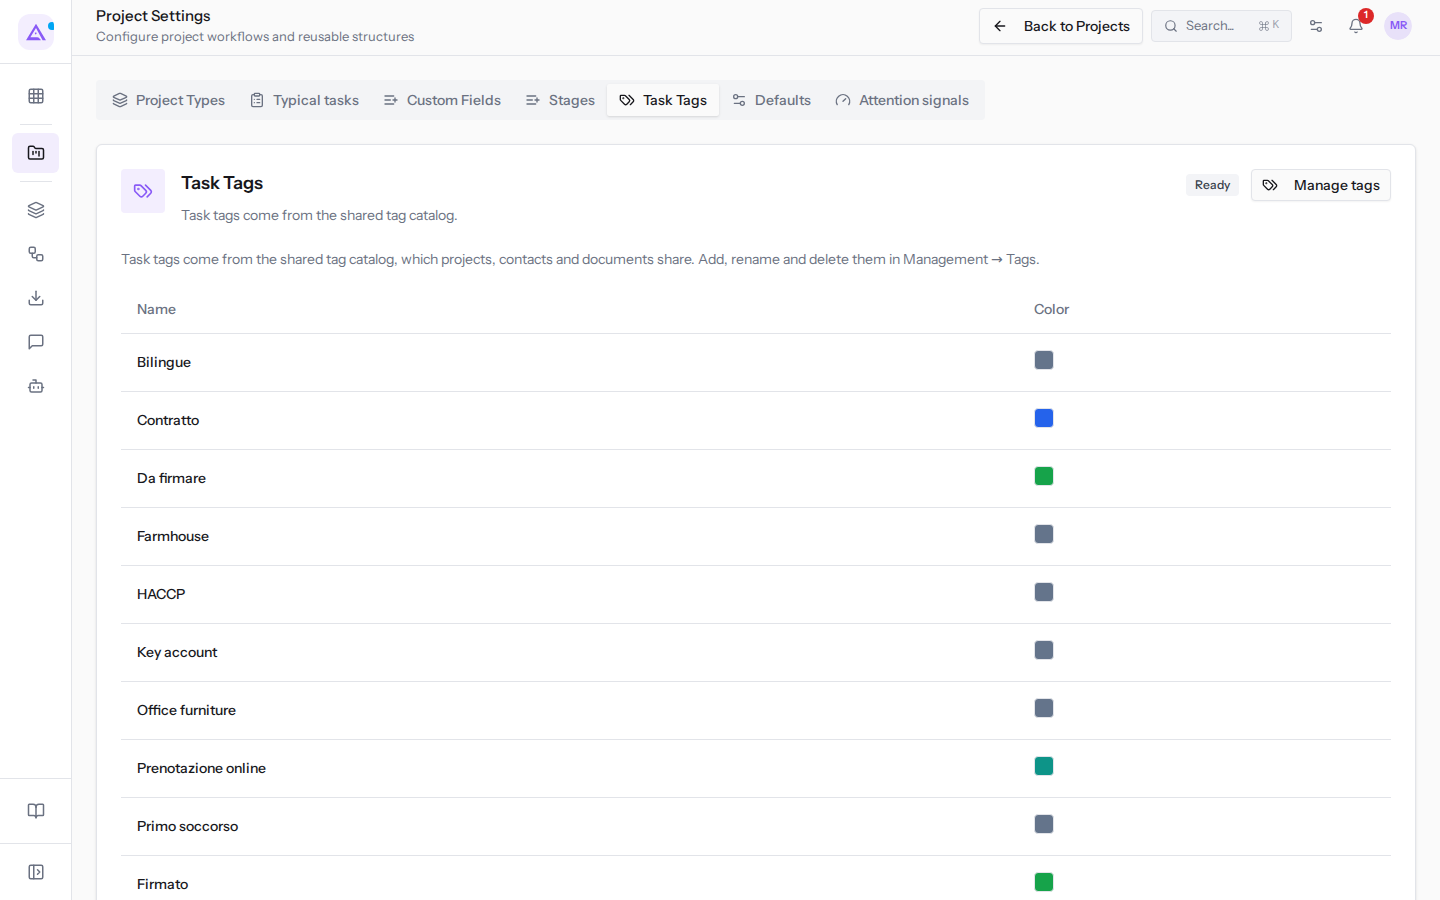
- Click Manage tags. The Tags & Categories page opens.
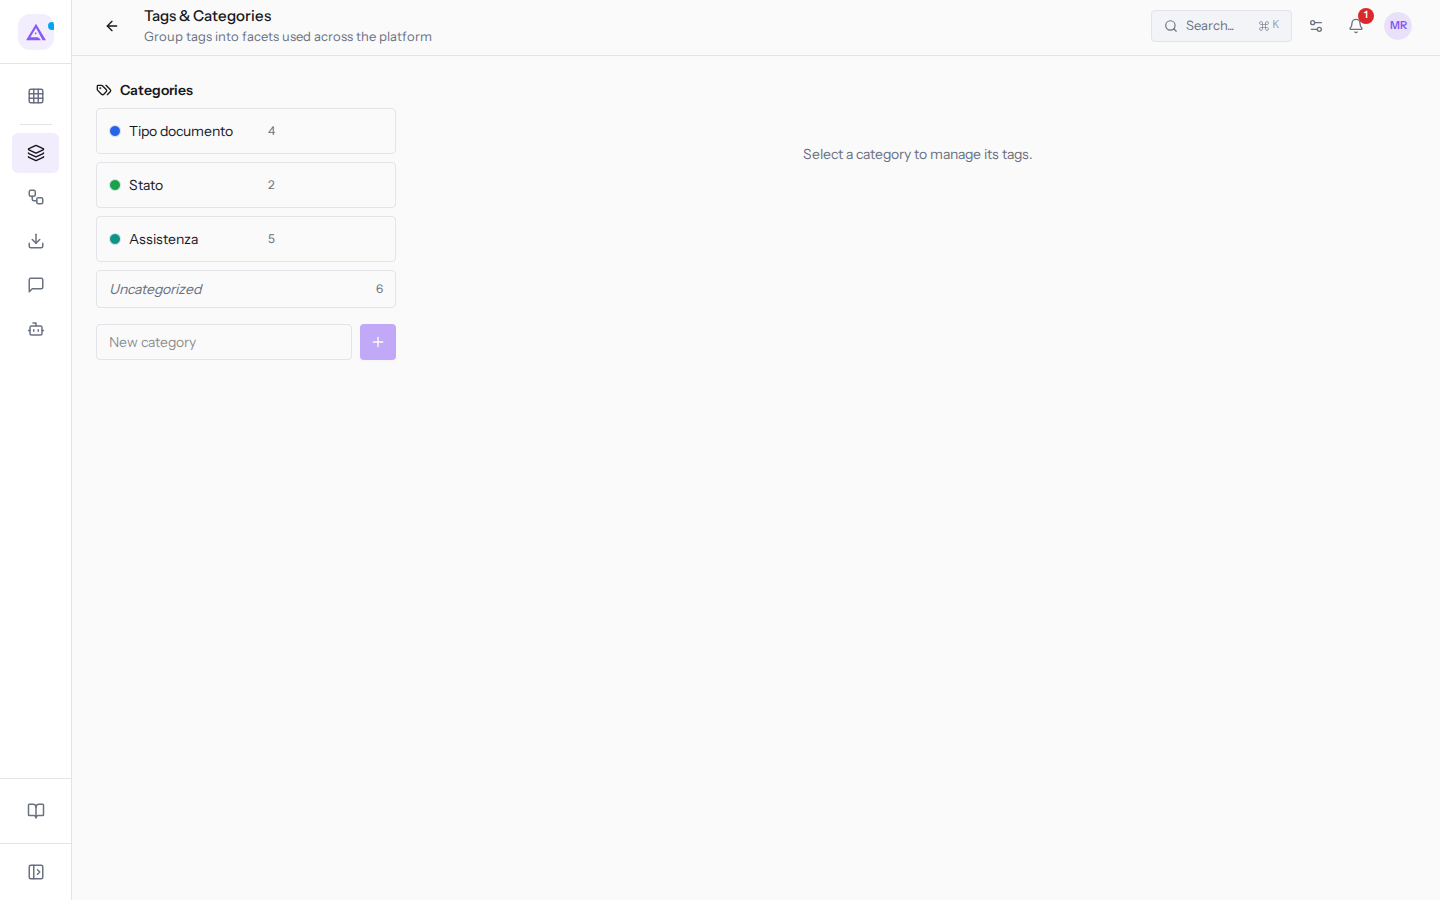
- Select a category to manage its tags. Tags not yet assigned to a category are in Uncategorized.
- To create a category, type the name in New category and press the + button next to it.
Note: changes made in Tags & Categories apply throughout the platform, not just in projects.
Defaults
The Defaults tab contains the rules common to all projects.
- Go to Projects › Settings and open the Defaults tab.
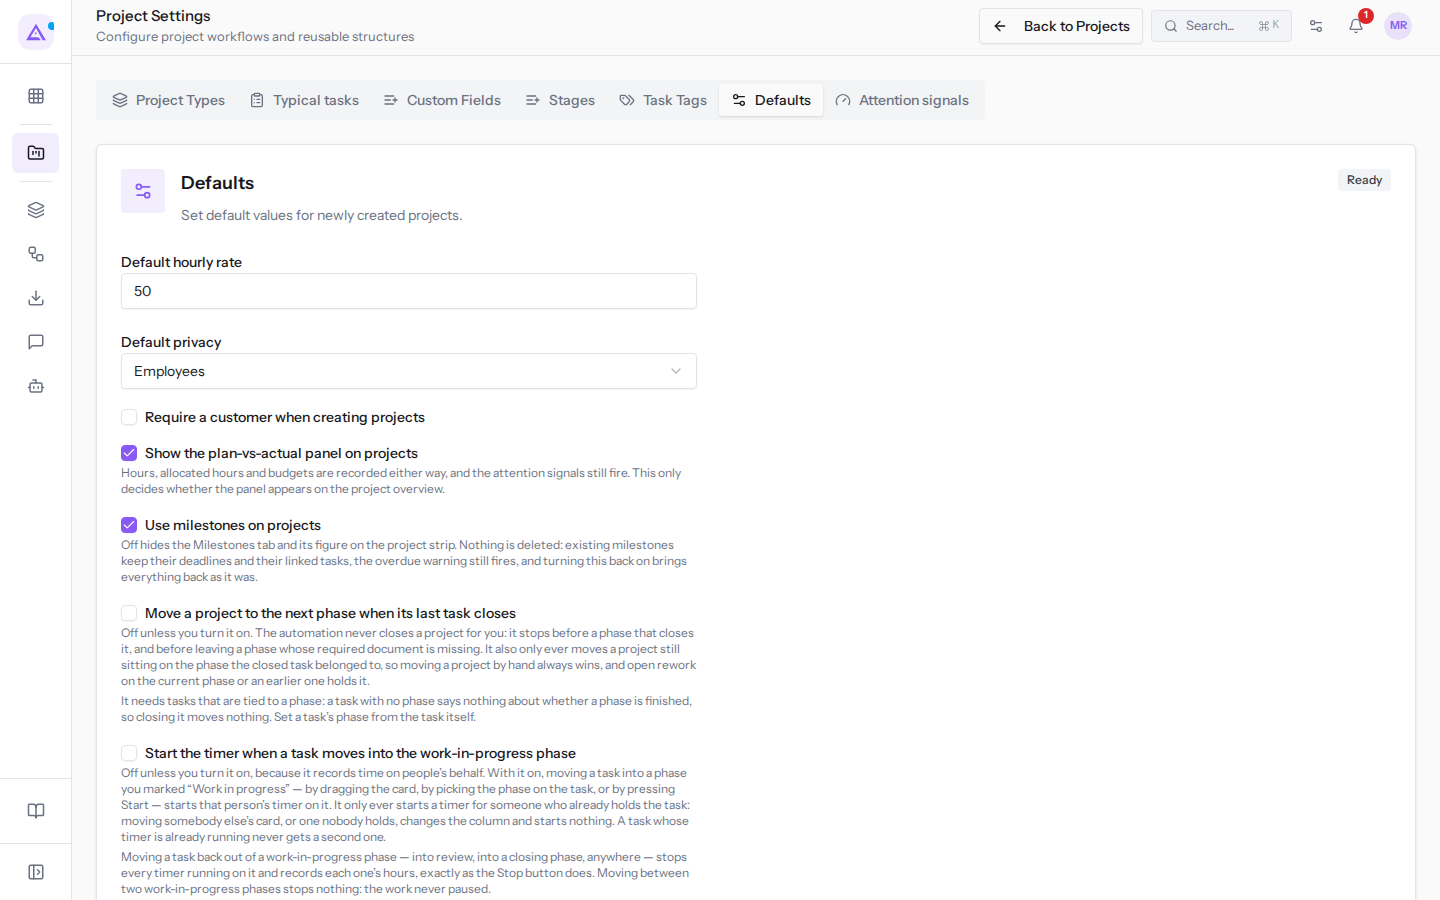
- Set the fields and click Save defaults.
The tab's fields are:
- Default hourly rate: the rate used for the cost of hours logged without their own rate, for example
50. - Default privacy: the default visibility for projects. The options are Employees, Followers, and Portal.
- Require a customer when creating projects: enable this if every project must have a customer from the moment it is created.
- Show the plan-vs-actual panel on projects: shows the Plan vs actual panel in the Overview tab of projects. Hours and budget are recorded regardless.
- Use milestones on projects: if you turn it off, the Milestones tab and the related data in the project strip no longer appear. Nothing is deleted: existing milestones keep their deadlines and linked tasks, and the overdue alert continues to trigger. If you turn the option back on, everything returns as it was.
- Move a project to the next phase when its last task closes: off until you enable it. The automation never closes a project on your behalf. It stops before a phase that closes the project and before exiting a phase that requires a missing document. It only moves a project that is still in the phase the closed task belonged to: if you move a project manually, your choice prevails. Open rework items in the current or a previous phase hold the project in place.
- Start the timer when a task moves into the work-in-progress phase: off until you enable it, because it records hours on behalf of people. When enabled, the timer of the person moving a task starts when they bring it into a phase marked as "In progress". This applies whether you drag the card, select the phase on the task, or press Start. The timer starts only if the person moving the task is already assigned to it. If you move someone else's task, or a task that no one has taken on, the column changes but no timer starts. A task with a timer already running does not receive a second one.
Tip: phases marked as "In progress" are set in the Stages tab of the same settings.
To prepare reusable project tasks, see Prepare project types and standard tasks.
See it on your company, not on a slide deck.
In 30 minutes we map the software you use today.We show you how much work and how much margin Archimedes gives back.
Show me on my business →What industry are you in?
One tap — it lets us prepare the demo around your world.
What tools do you use today?
Pick the ones you recognise — or just type them. It helps us show you how they migrate.
Last step: your details.
We reply within one working day — and right after, if you like, you pick the demo slot yourself.
We couldn't send your request. Try again, or write to us at [email protected].
By sending, you agree to your data being processed so we can get back to you about the demo. Privacy notice.
Preview form — nothing is sent from this page.
Want to schedule the demo now?
Your call: book the slot you prefer yourself, or we'll call you to arrange it.
Live availability, 30 minutes, instant confirmation. The calendar opens in a new tab.
Lock in your slot ↗We'll get back to you within one working day — and we'll join the call already knowing your world.
The calendar is open in another tab: pick a slot and the demo is booked. Can't see it? Reopen it ↗
Preview page: nothing was sent.
Our calendar is live: take the slot that suits you and the demo is booked. 30 minutes, instant confirmation, no waiting.
Lock in your slot ↗