All modules
Changing the text of an automated email
Mail · 9 of 18 · 7 min read
Every email that the platform sends on behalf of the organization has a record, where you can change the subject, the text, and the address it is sent from. For example, you can rewrite the invoice email with your company's tone, change the subject of an order confirmation, or the portal invitation.
The record opens from the Email automations page, reserved for the Email Manager group.
When to change the text and when to leave the module's
Every email comes with a text written by the module that sends it, in the organization's language. What you write in the record replaces it for all subsequent sends; emails already sent remain as they are. The module's text is not lost: you can recover it at any time.
- If you only want a different subject, write the subject and leave the body as is: the body continues to use the module's text.
- If you want your own text, edit the body and save.
- If you want to return to the original text, use Restore module default.
Changing the text does not change when the email is sent or who receives it: for that you need Change when it is sent, available only in automations.
Opening an email's record
- Open Mail › Communications › Email automations.
- Click the email's name, for example Email fattura.
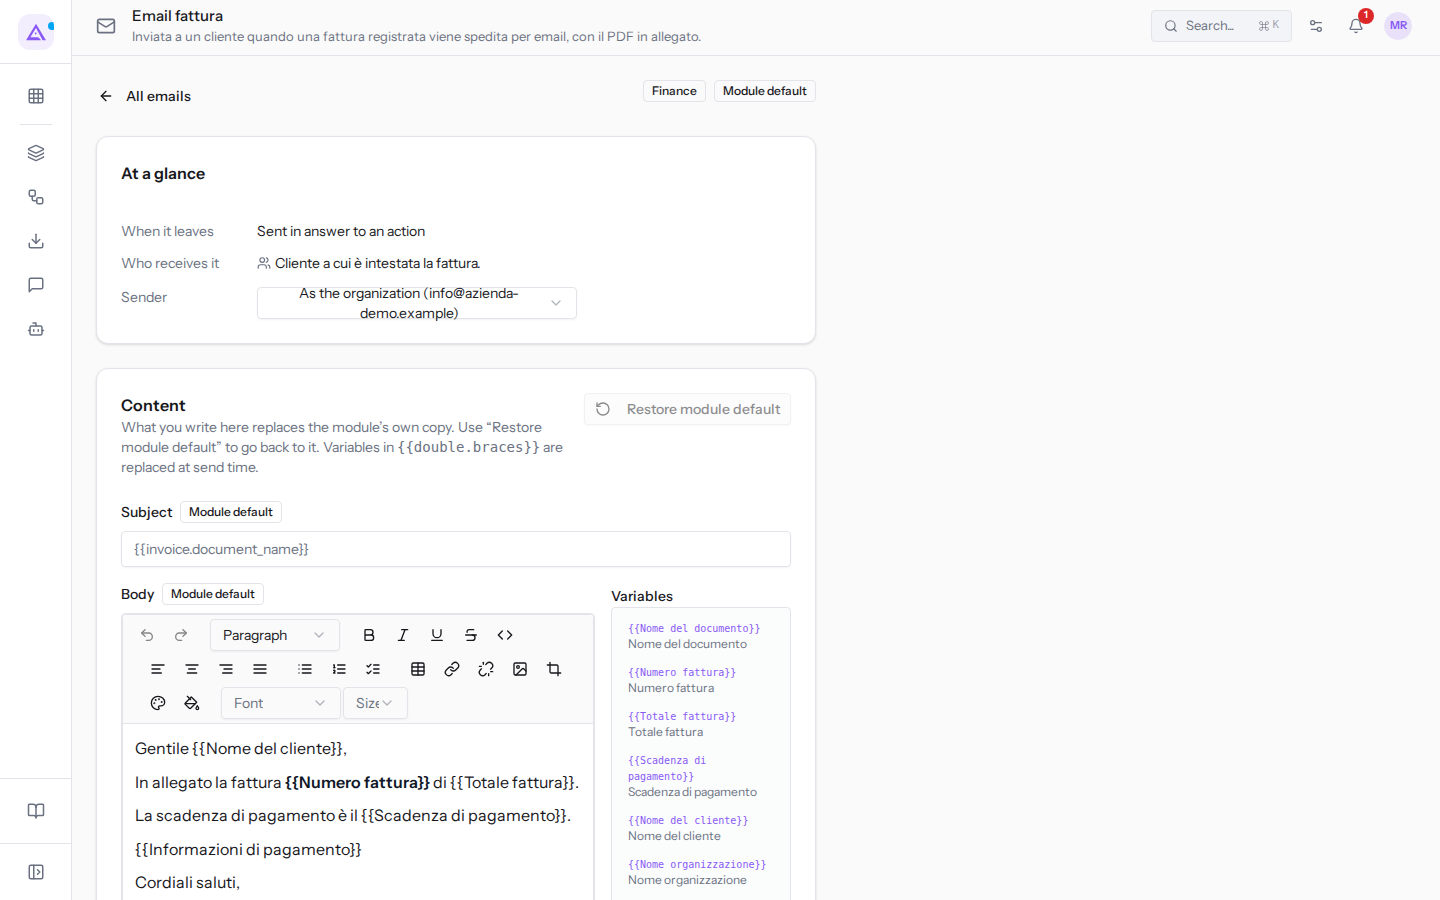
At the top of the record you find:
- the email's name and a sentence describing what it does, for example, for Email fattura, that it is sent to a customer when a registered invoice is emailed, with the PDF attached;
- All emails: takes you back to the Email automations page;
- the label of the area the email belongs to, for example Finance;
- the label showing whose text it is: Module default if the email still uses the original, Your wording if you have changed it, Your own template for a template created by the organization.
The At a glance panel
The At a glance panel summarizes when the email is sent, who receives it, and from which address.
- When it leaves: what triggers the email. For Email fattura it is «Sent in answer to an action»: it is sent when someone sends an invoice by email.
- Who receives it: the recipients, for example «Cliente a cui è intestata la fattura.».
- Sender: the address the email is sent from. The options are:
- As the organization ([email protected]): the email uses the sender chosen for the entire organization in Every email leaves from, and follows it if it changes. It is the default choice;
- a verified address, for example Agriturismo Azienda Demo ([email protected]): only this email is sent from that address, even if the organization chooses another. Next to it the label Its own sender appears. Only verified addresses appear in the list.
The sender choice is saved as soon as you change it, without pressing Save, and takes effect from the next send.
If the email cannot be sent, the reason appears in the panel in orange, for example «Not sending — sender not verified». For an automation, the panel also has the Change when it is sent button, which opens the Edit automation page.
Changing the subject and text
The content section contains the subject, the email body, and the variables to insert.
- In the Subject field, write the new subject, for example
Invoice {{Numero fattura}} from Azienda Demo S.r.l.. - In the body, edit the text using the editor.
- To insert a document field, click on a variable in the list on the right, for example {{Numero fattura}} Numero fattura.
- Click Save. The message Template saved appears.
The section's fields:
- Subject: the email subject. If empty, the field shows the module's subject in grey, which is what gets sent.
- Body: the email text, already filled with the text that is sent. The editor allows you to format the text, insert lists, links, and images. If you empty the body, the email reverts to using the module's text.
- Variables: the data that are substituted on send, written between double braces. Clicking a variable adds it at the end of the body. For Email fattura they are:
- {{Nome del documento}} Nome del documento;
- {{Numero fattura}} Numero fattura;
- {{Totale fattura}} Totale fattura;
- {{Scadenza di pagamento}} Scadenza di pagamento;
- {{Nome del cliente}} Nome del cliente;
- {{Nome organizzazione}} Nome organizzazione;
- {{Informazioni di pagamento}} Informazioni di pagamento.
Every email has its own variables, based on the document it sends. On send, each variable is replaced by the document's data: for example in an invoice {{Numero fattura}} becomes the invoice number, such as FATT/2026/00004.
The Save button activates only when you have changed something from the saved text. After saving, the label at the top of the record becomes Your wording.
Saving a shared text
An email's text can be used by multiple automations. In this case the record signals this above the content, with the names of the other emails.
When you press Save on a shared text, the This text is shared dialog opens. The dialog lists by name the other emails that will change along with this one.
- Read the list of emails that will change.
- Click Save for all of them to save the new text, or Cancel to return to the record without saving.
With Save for all of them the new text applies to all emails listed in the dialog, not just the one open. If one of those emails needs to say something different, give it its own template with Create a new template in its automation.
Checking the email in the preview
The Preview panel shows the email as the recipient receives it, with the header, footer, and signature set in Email design, and updates as you write. It is used to see the result before saving; it does not send anything.
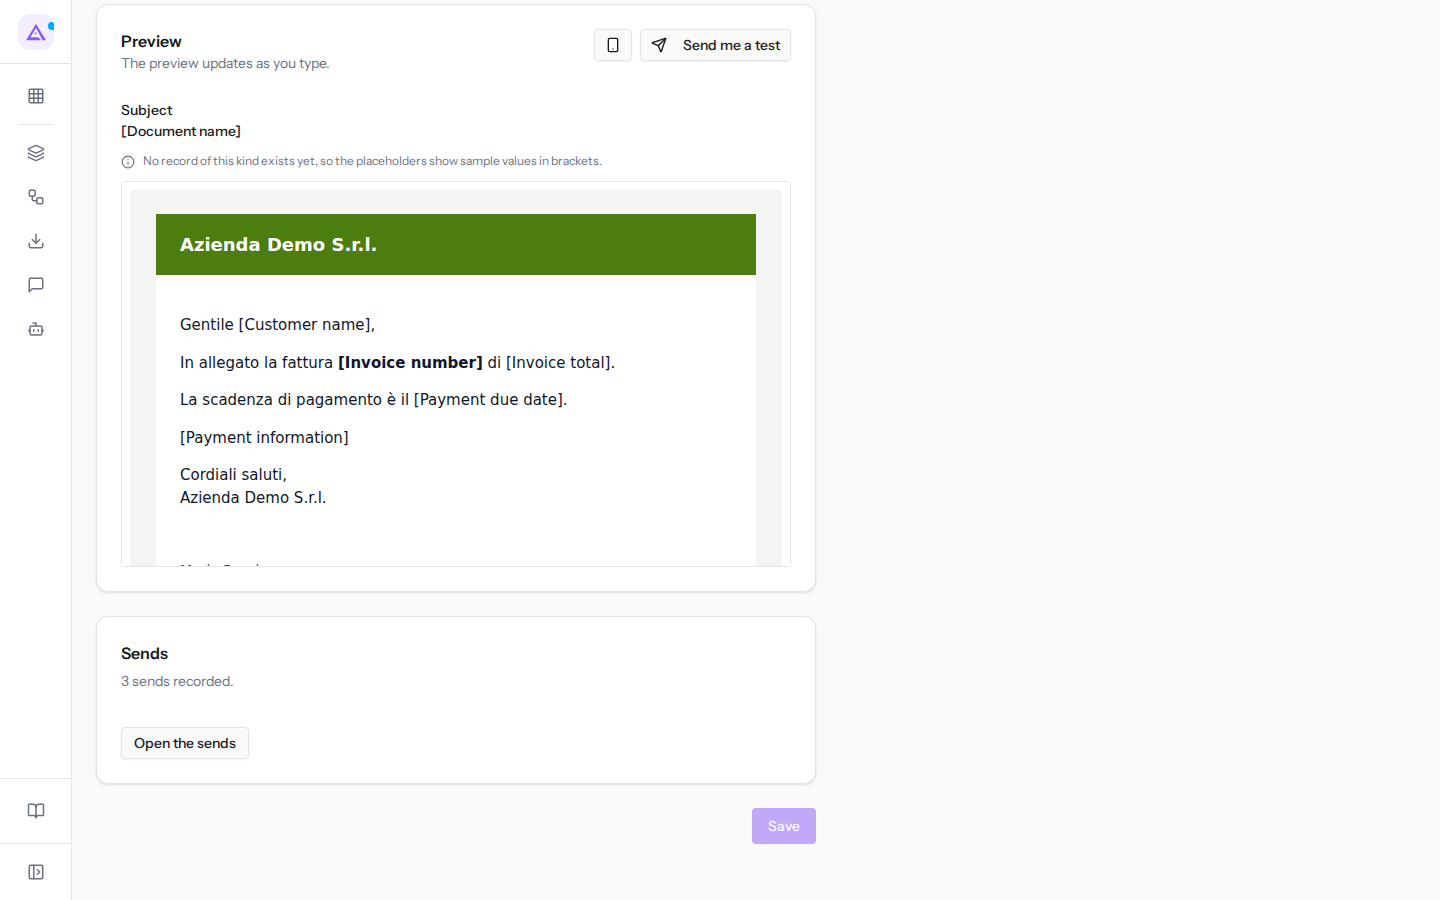
- Choose a record for the preview: the document from which to take the variable values. The selector appears only when there are documents to choose from. Below the subject, a note says where the data comes from; without a record, variables show an example value in square brackets, for example «[Customer name]».
- the phone icon: switches from desktop width to phone width, to check how the email reads on a smartphone;
- Send me a test: sends a real test email to your address, with the text you are writing even if you have not yet saved it.
Send me a test sends a real email. If the test does not go out, a message gives the reason: a real send would be held back for the same reason.
The Sends panel
The Sends panel shows how many times the email has been sent, for example «3 sends recorded.» for Email fattura. It is used to check whether a customer received the email and with what outcome.
- Click Open the sends.
- The send log opens, filtered on this email.
Restoring the module's text
Restoring removes the subject and body you wrote and returns the email to the text provided by the module.
- In the content section, click Restore module default. The button is active only if you have saved custom text.
- The Restore the module's default copy? dialog opens.
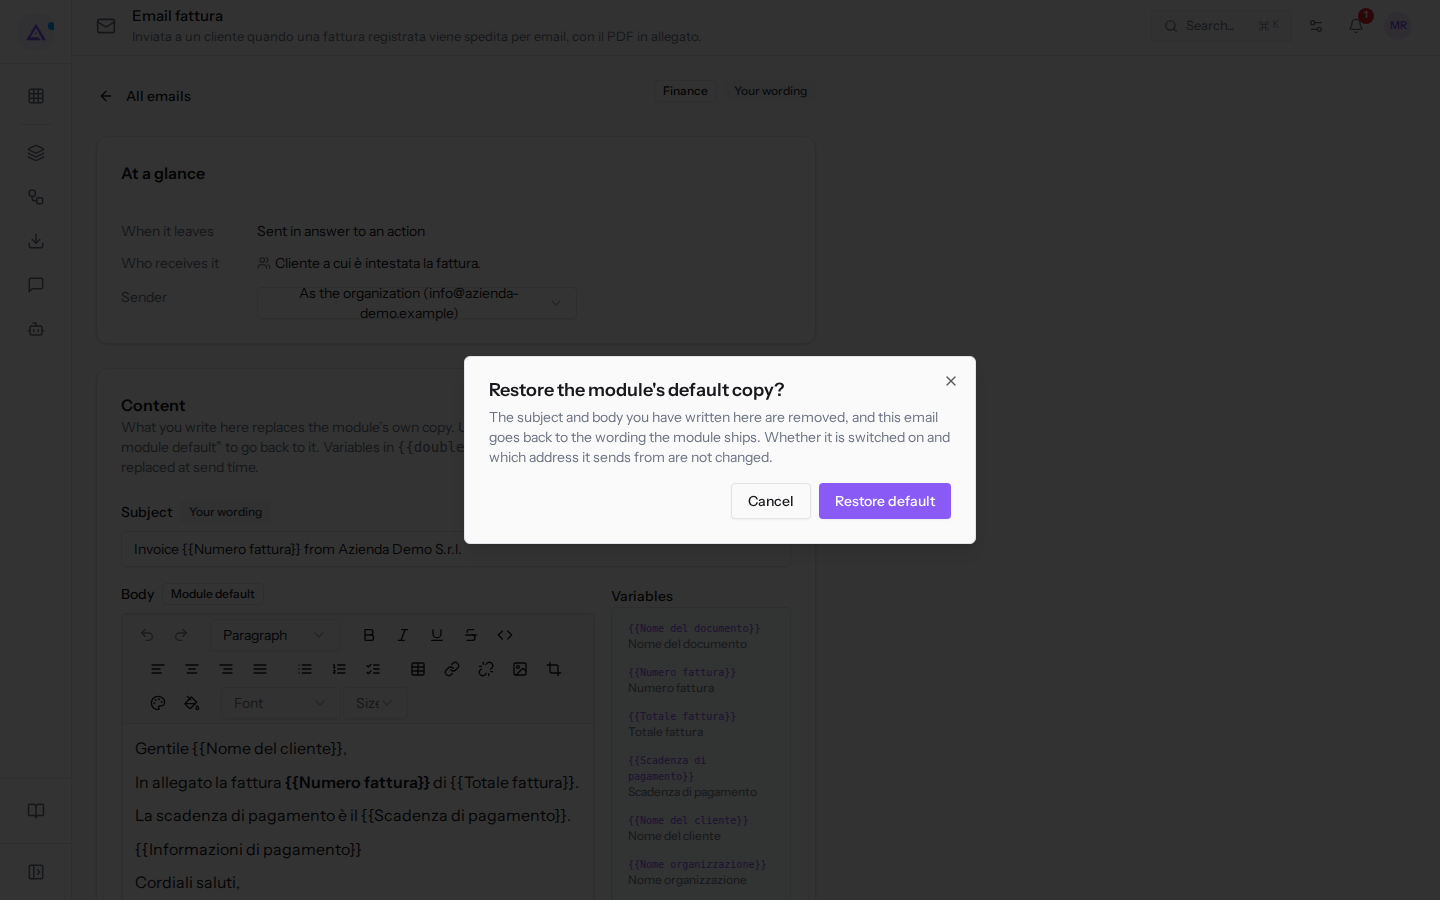
- Click Restore default. The message Module default restored appears. With Cancel you close the dialog without changing anything.
After restoring, the record shows the Module default label again. The activation and sender address remain as they were.
See it on your company, not on a slide deck.
In 30 minutes we map the software you use today.We show you how much work and how much margin Archimedes gives back.
Show me on my business →What industry are you in?
One tap — it lets us prepare the demo around your world.
What tools do you use today?
Pick the ones you recognise — or just type them. It helps us show you how they migrate.
Last step: your details.
We reply within one working day — and right after, if you like, you pick the demo slot yourself.
We couldn't send your request. Try again, or write to us at [email protected].
By sending, you agree to your data being processed so we can get back to you about the demo. Privacy notice.
Preview form — nothing is sent from this page.
Want to schedule the demo now?
Your call: book the slot you prefer yourself, or we'll call you to arrange it.
Live availability, 30 minutes, instant confirmation. The calendar opens in a new tab.
Lock in your slot ↗We'll get back to you within one working day — and we'll join the call already knowing your world.
The calendar is open in another tab: pick a slot and the demo is booked. Can't see it? Reopen it ↗
Preview page: nothing was sent.
Our calendar is live: take the slot that suits you and the demo is booked. 30 minutes, instant confirmation, no waiting.
Lock in your slot ↗