Employees
All modules
Configure HR options
Employees · 10 of 20 · 7 min read
The Configuration page collects the items used by the Employees module in other screens: contract types and templates, working schedules, work locations, tags, departure reasons, and receipt reading in expense reports. Use it to prepare the module before adding employees and contracts, for example to add a part-time schedule or a new location.
Before you start: open the page from Employees › HR options. The menu item only appears to members of the HR Manager group.
The page has seven tabs: Contract Types, Contract Templates, Working Schedules, Work Locations, Tags, Departure Reasons and Expenses.
Contract types
Contract types classify employee contracts. Each type specifies whether the contract must have an end date and which category it belongs to.
- Open Employees › HR options.
- Stay on the Contract Types tab. The list shows existing types, for example
Freelance (VAT number). - To add a type, fill in the fields of the empty row at the bottom of the list and click the + button.
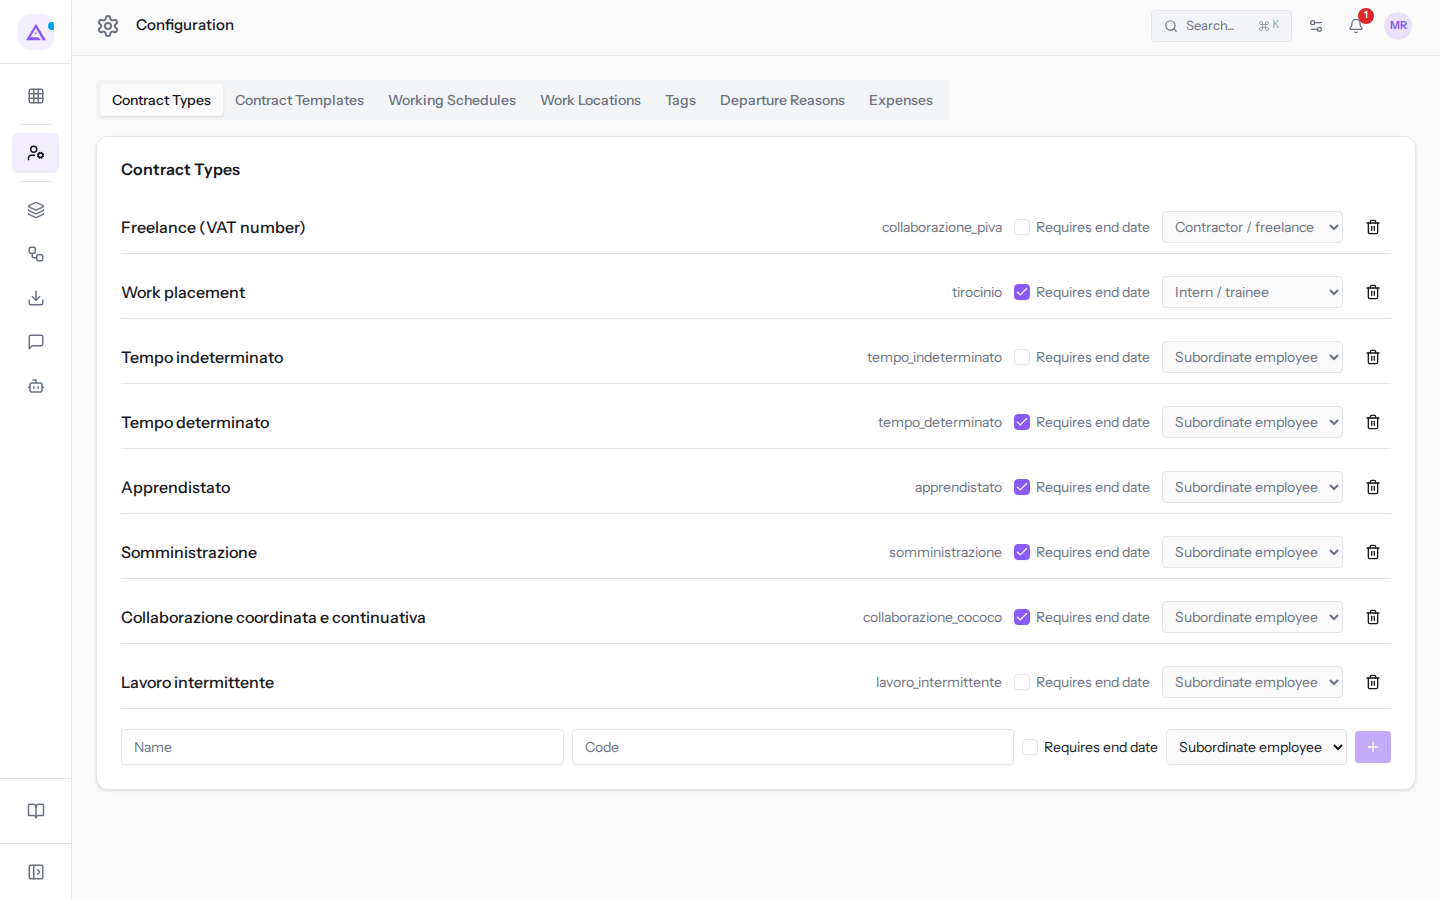
The fields of a contract type:
- Name: the name of the type, as it appears in contracts.
- Code: a short code for the type.
- Requires end date: when enabled, contracts of this type must have an end date. In the example it is enabled for the type with category Intern / trainee and for some Subordinate employee types.
- Kind: the nature of the relationship.
- Subordinate employee: for employees.
- Contractor / freelance: for contractors, for example with a VAT number.
- Intern / trainee: for internships and traineeships.
If the relationship always has an expiry, for example a fixed-term contract, enable Requires end date. If the relationship is open-ended, leave it off.
Contract templates
A contract template contains the text of a contract, written in HTML.
- Open the Contract Templates tab. The list shows existing templates, each with a pencil icon to edit it and a bin icon to delete it.
- Click New Template.
- Fill in the fields and click Save.
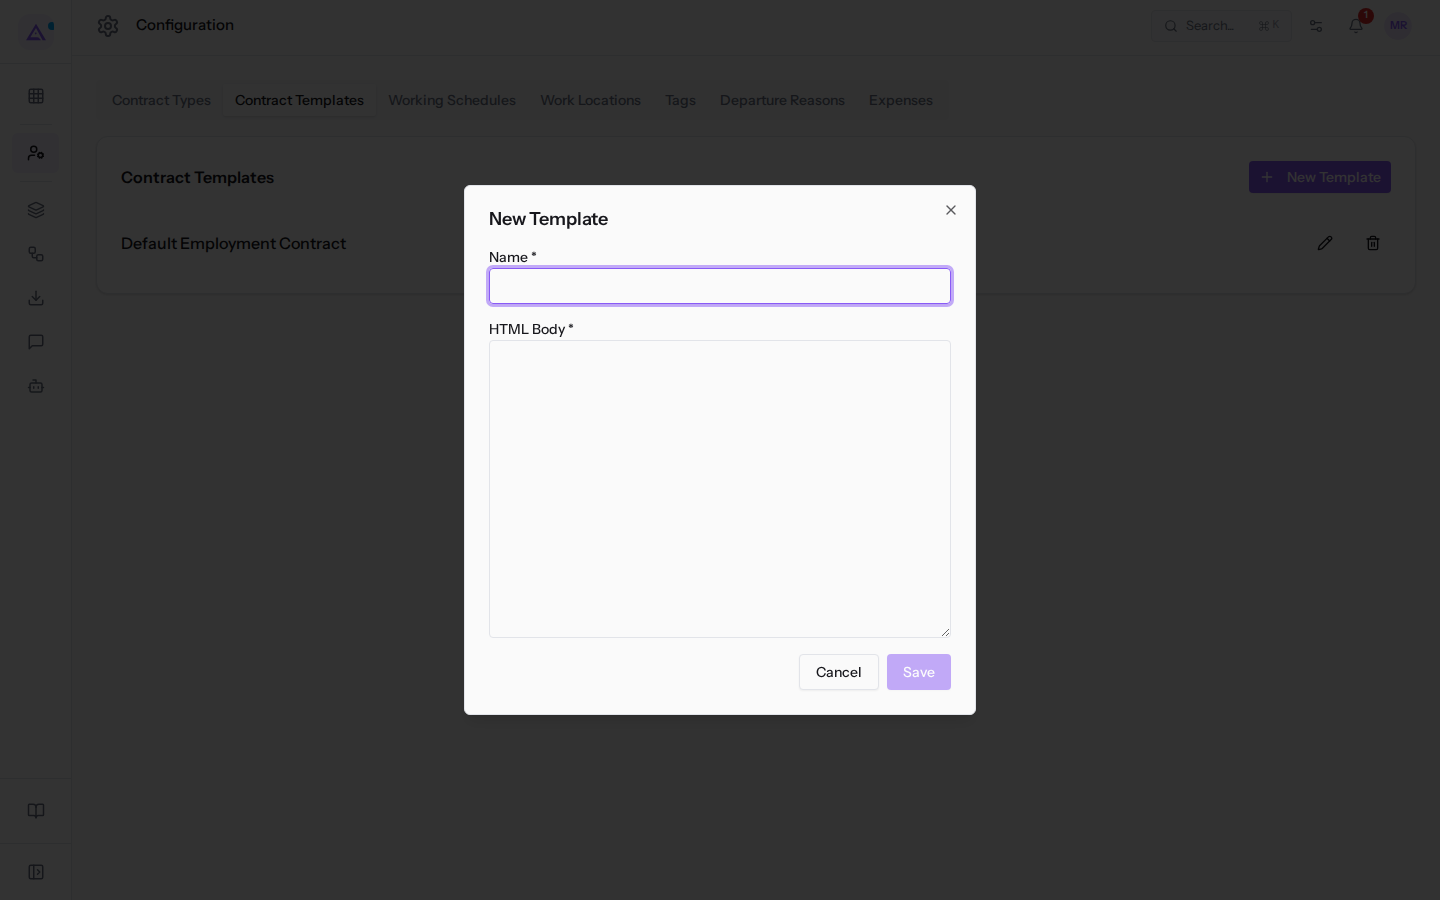
The fields of the New Template dialog:
- Name: the name of the template. This field is required.
- HTML Body: the contract text in HTML format. This field is required.
Working schedules
A working schedule defines the expected working hours and days. Each employee follows a schedule. In the example there are Full time 40 hours, which is the default, and Morning part-time 20 hours, followed by Sara Colombo.
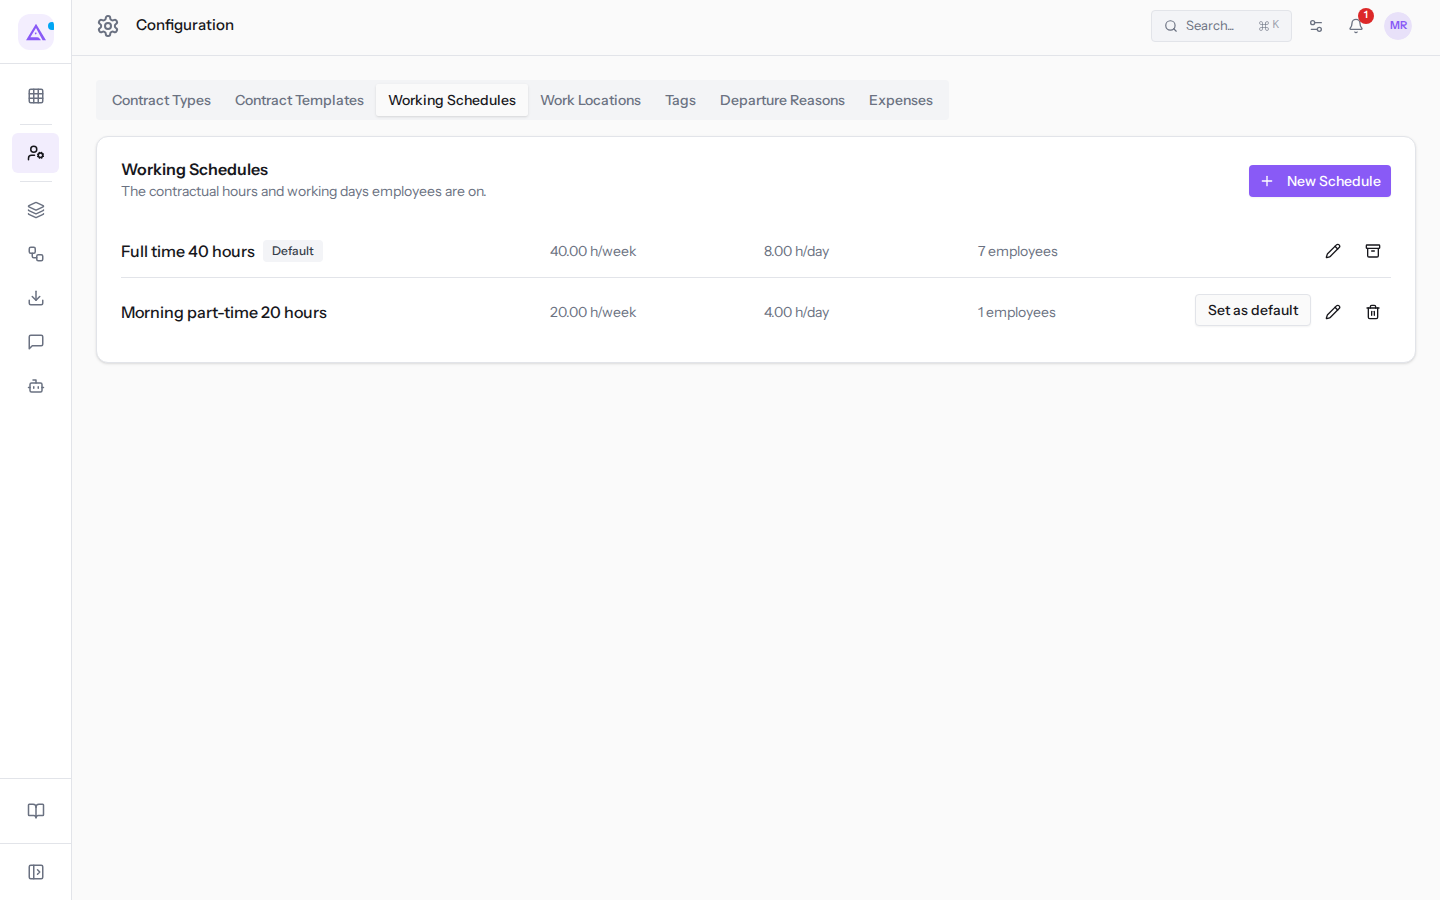
The default schedule applies to employees who do not have their own schedule. If a schedule applies only to certain people, for example a part-time schedule, create it and assign it from the employee's record. If almost everyone's schedule changes, set it as the default.
Create a schedule
- Open the Working Schedules tab and click New Schedule.
- Fill in Name and Hours per day.
- Under Working hours by weekday click Add line for each working time slot.
- Click Save.
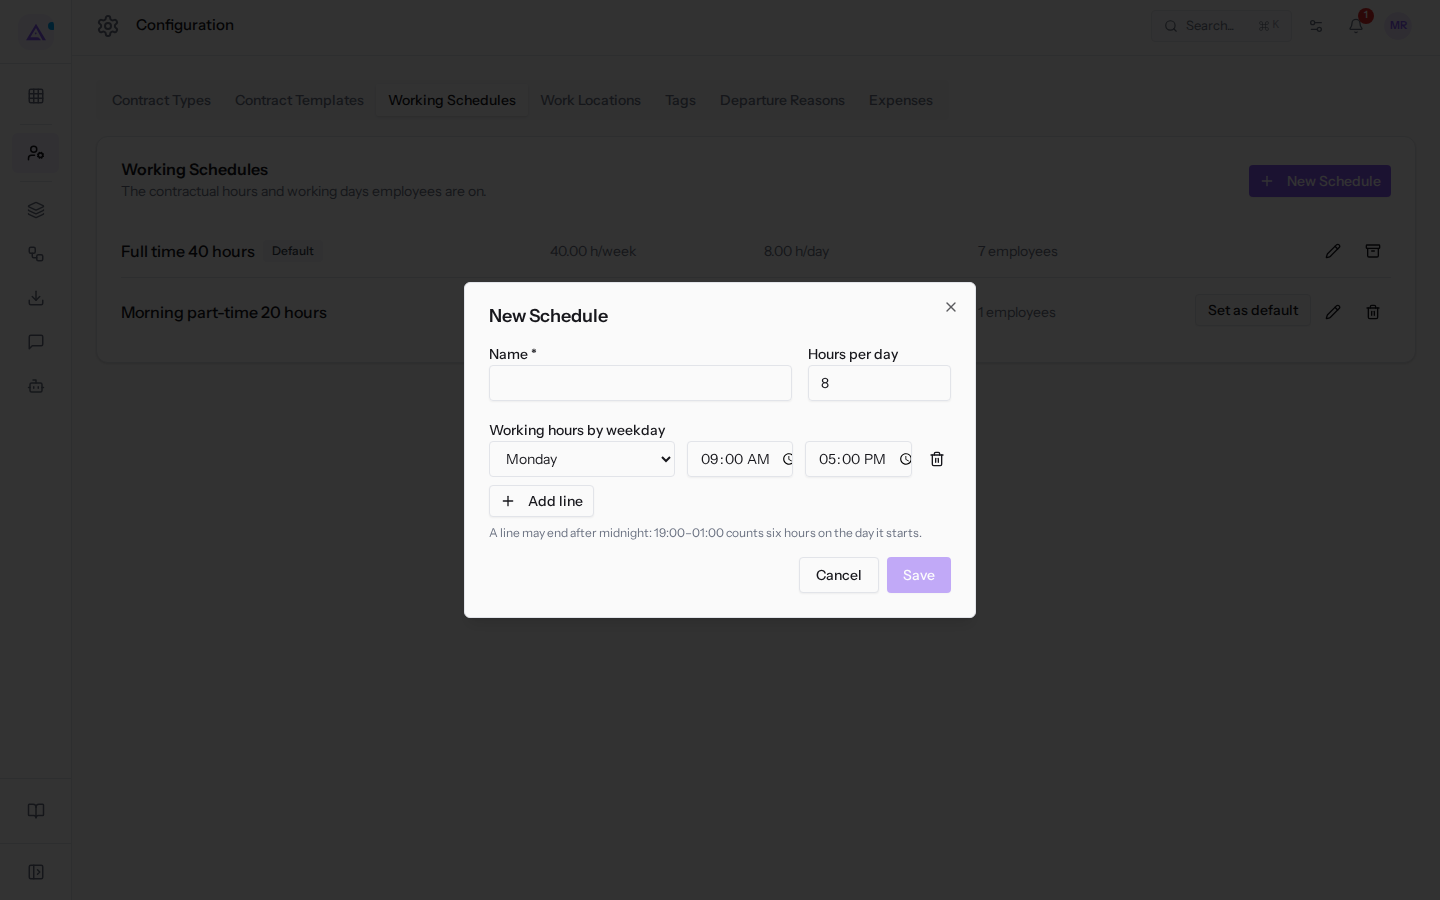
The fields of the New Schedule dialog:
- Name: the name of the schedule, for example
Morning part-time 20 hours. This field is required. - Hours per day: the expected hours in a working day.
- Working hours by weekday: the working time slots. Without any rows the message No weekday lines yet — this schedule expects no working days. is shown. Each row has these fields:
- Weekday: the day of the week, from Monday to Sunday.
- From: the start of the slot. For a new row it is
09:00. - To: the end of the slot. For a new row it is
17:00.
To remove a row, click the bin icon (Delete) next to it. For two slots on the same day, for example morning and afternoon, add two rows with the same day.
Note: a row can end after midnight. The slot 19:00–01:00 counts as six hours on the day it starts. A row cannot start and end at the same time.
Set the default schedule
The change of default schedule takes effect from a date. Previous days keep the old schedule.
- In the Working Schedules tab click Set as default next to the schedule.
- A dialog opens with the schedule name, for example Make "Morning part-time 20 hours" the default.
- In Valid from choose the date from which the new default applies. The field suggests today's date.
- Click Set as default.
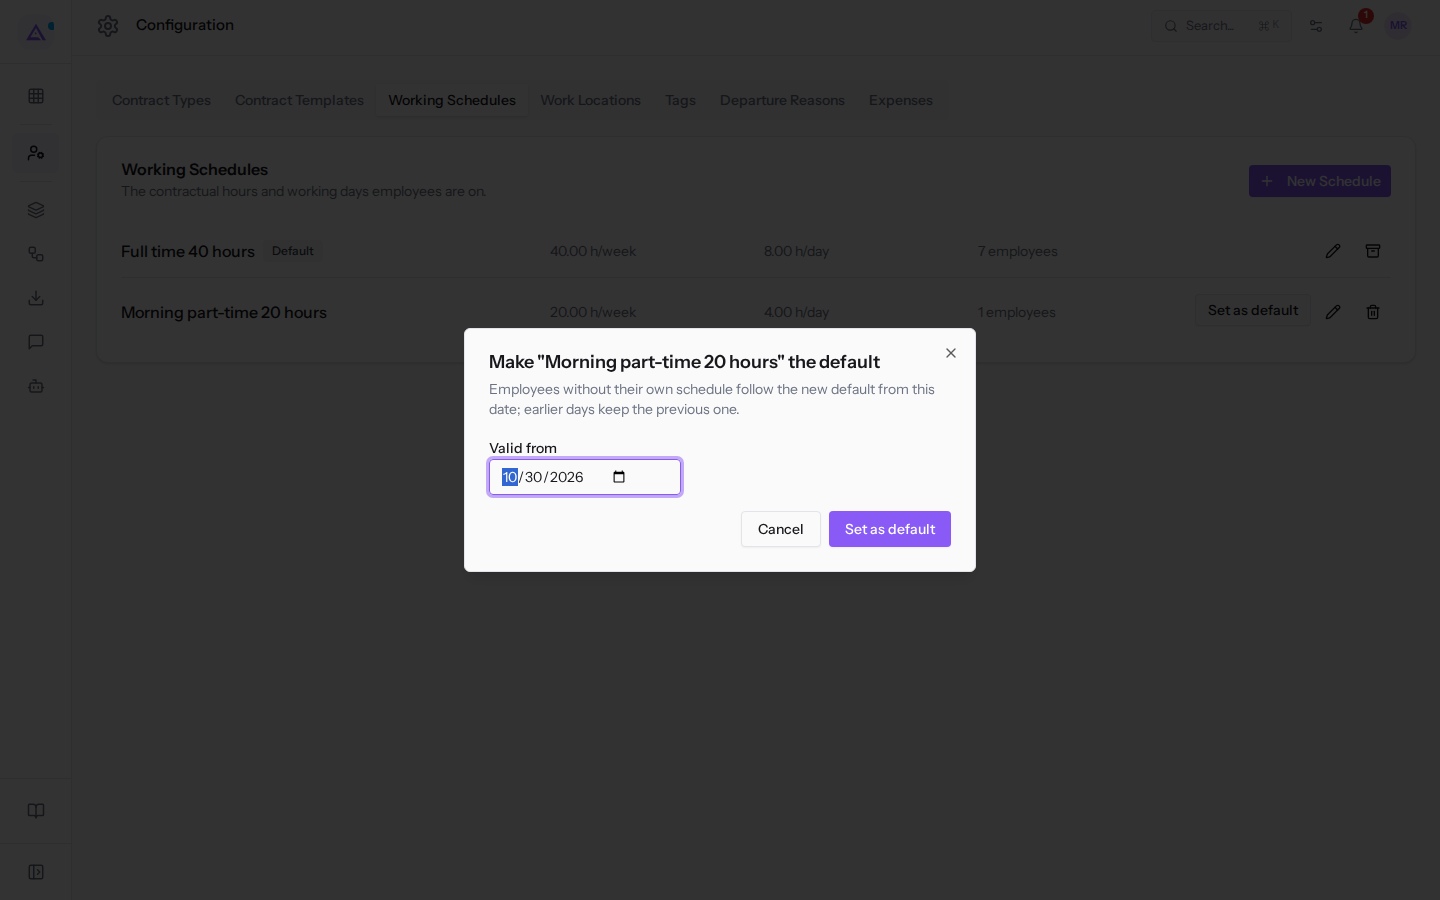
From the chosen date, employees without their own schedule follow the new default. Employees who have their own schedule are not affected.
Replace and archive a schedule
A schedule followed by someone, and the default schedule, cannot be deleted. They are replaced by another schedule and archived.
- In the Working Schedules tab, for the default schedule click the Replace and archive icon. For another schedule click the bin icon and confirm: if someone follows it, the Replace and archive dialog opens.
- The dialog that opens shows whether the schedule is the default, how many people follow it and their names, and how many changes are already planned.
- Choose the replacement schedule. If you are replacing the default, the replacement must be another schedule: the organisation always has a default schedule.
- Choose the date from which the replacement applies. The field suggests today's date.
- Click Replace and archive.
Those who follow the schedule switch to the replacement from the chosen date. Previous days keep their hours. If the date is today or already past, the schedule is archived, not deleted. If the date is in the future, the schedule remains active until that date and is archived afterwards. When the operation is complete, a message appears with the name of the archived schedule and the date from which its employees follow the replacement.
Important: a month already closed in payroll data cannot be modified. A schedule change does not alter the hours of a closed month.
Each schedule has a pencil icon to edit it. A schedule that nobody follows and that is not the default can be deleted with the bin icon.
Work locations
Work locations are the places where employees work. In the example one of the locations is Casale principale.
- Open the Work Locations tab. The list shows each location with its address.
- To add a location, fill in the fields at the bottom of the list and click the + button.
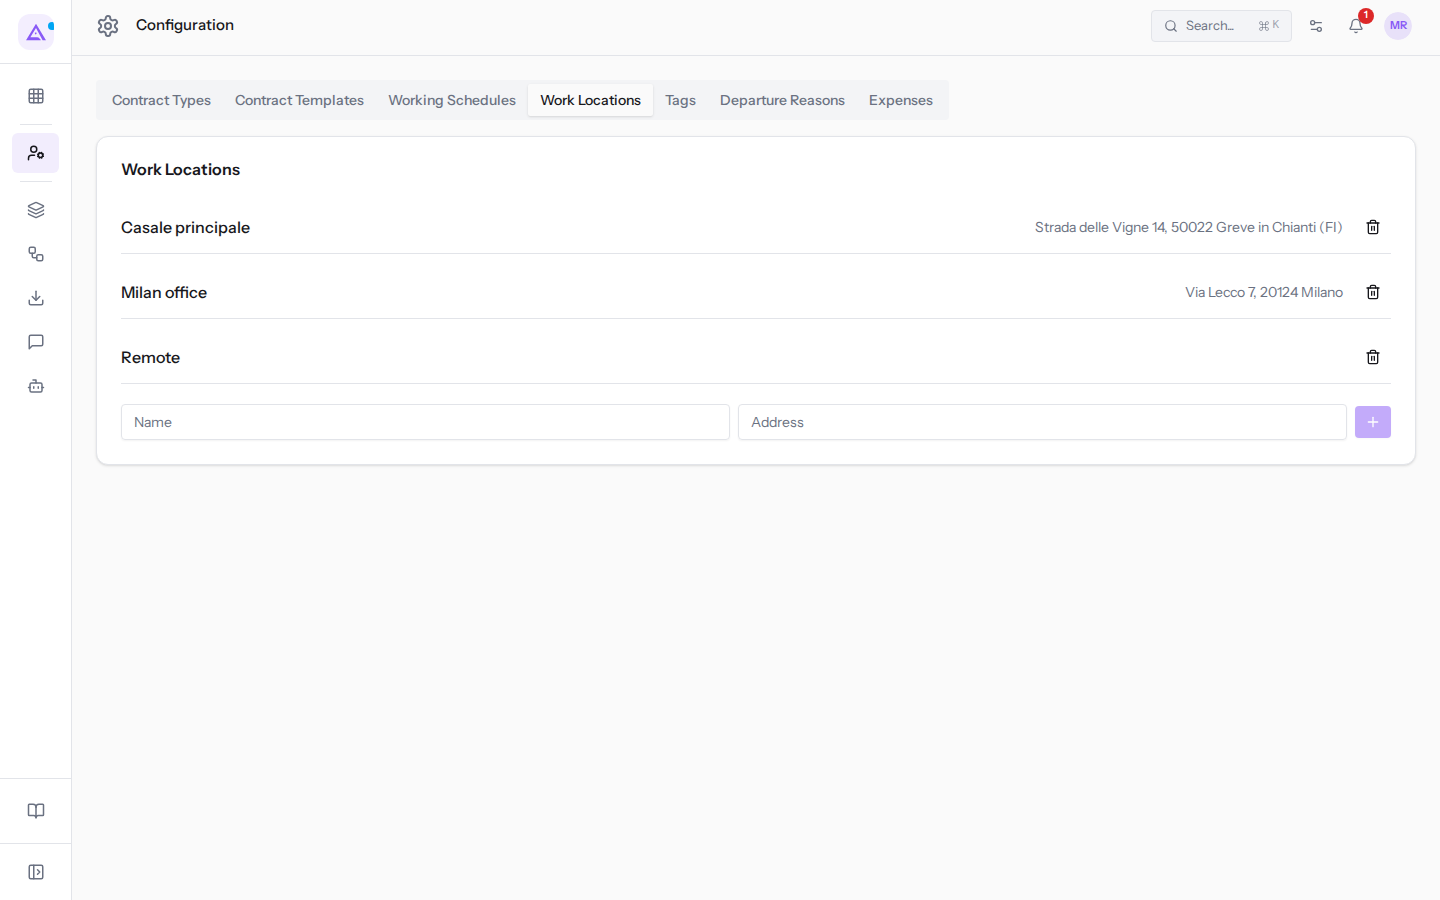
The fields of a location:
- Name: the name of the location, for example
Casale principale. - Address: the address of the location.
Tags
The Tags tab shows Employee Tags. Here you can only view them.
Employee tags come from the shared catalogue of the entire workspace. The same tag can also be applied to contacts, opportunities, and projects. To create or change them click Manage tags, which opens the shared catalogue.
Departure reasons
Departure reasons list the causes of an employee's exit. In the example the list includes Resignation and Dismissal.
- Open the Departure Reasons tab.
- Enter the reason in the Name field at the bottom of the list and click the + button.
Expenses
The Expenses tab contains the Read receipts to fill in expenses toggle. When enabled, the expense is filled in from the receipt photo or PDF, and the employee checks the data before submitting it.
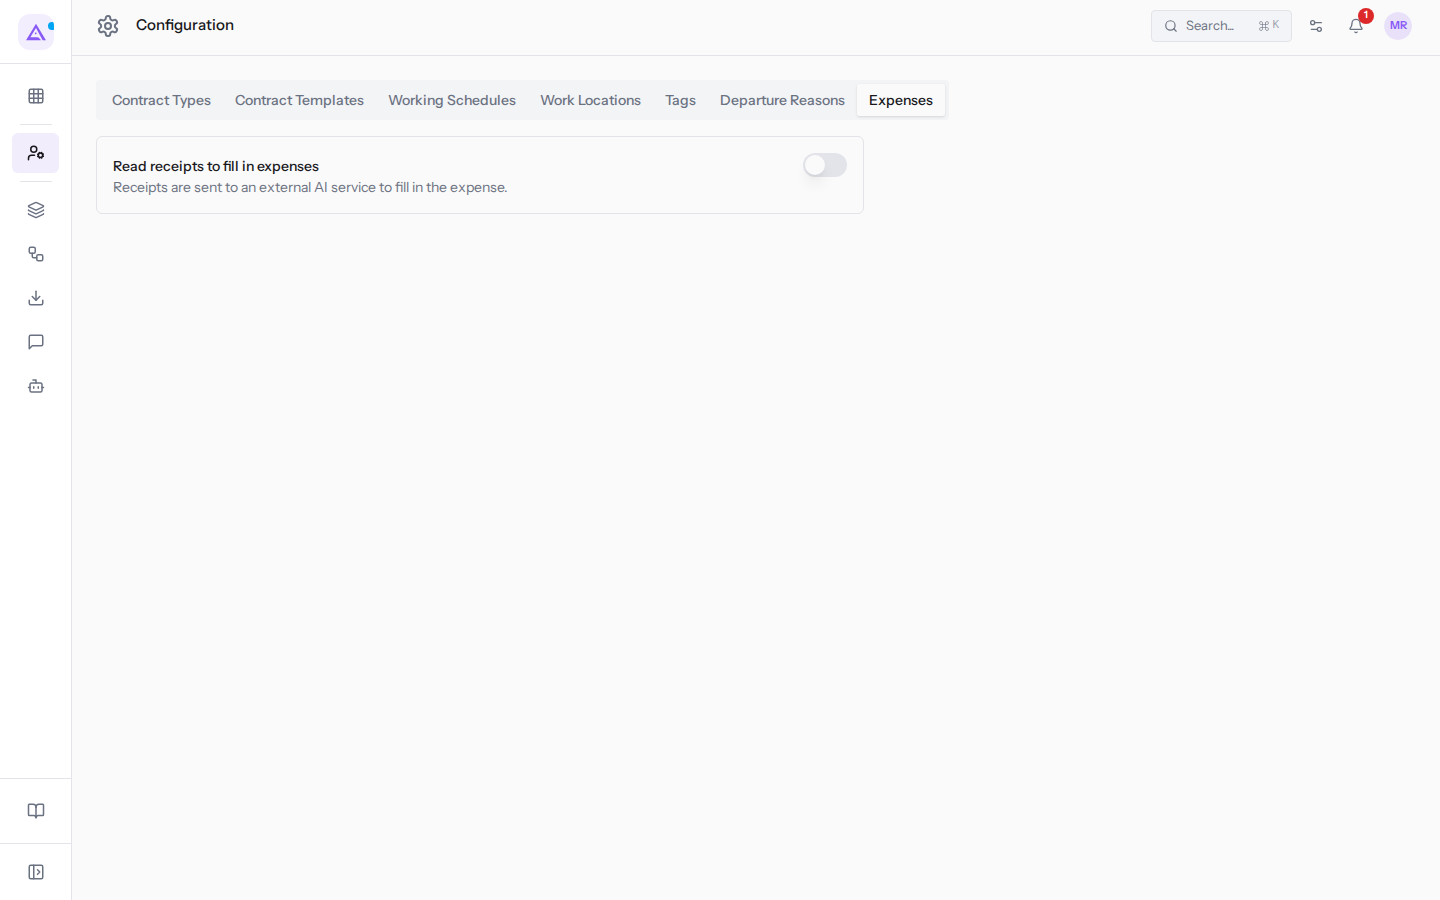
- Open the Expenses tab.
- Enable or disable Read receipts to fill in expenses. The choice is saved immediately.
Important: when the toggle is enabled, receipts are sent to an external AI service to fill in the expense. If the organisation does not want receipts to leave the platform, leave it off.
The toggle is off until someone enables it. Even with the toggle off the receipt remains attached to the expense, but the fields are filled in manually.
See it on your company, not on a slide deck.
In 30 minutes we map the software you use today.We show you how much work and how much margin Archimedes gives back.
Show me on my business →What industry are you in?
One tap — it lets us prepare the demo around your world.
What tools do you use today?
Pick the ones you recognise — or just type them. It helps us show you how they migrate.
Last step: your details.
We reply within one working day — and right after, if you like, you pick the demo slot yourself.
We couldn't send your request. Try again, or write to us at [email protected].
By sending, you agree to your data being processed so we can get back to you about the demo. Privacy notice.
Preview form — nothing is sent from this page.
Want to schedule the demo now?
Your call: book the slot you prefer yourself, or we'll call you to arrange it.
Live availability, 30 minutes, instant confirmation. The calendar opens in a new tab.
Lock in your slot ↗We'll get back to you within one working day — and we'll join the call already knowing your world.
The calendar is open in another tab: pick a slot and the demo is booked. Can't see it? Reopen it ↗
Preview page: nothing was sent.
Our calendar is live: take the slot that suits you and the demo is booked. 30 minutes, instant confirmation, no waiting.
Lock in your slot ↗