Employees
All modules
Managing leave, time off and allocations
Employees · 11 of 20 · 6 min read
The Leave Management page collects employee absence requests, the days allocated to each person, absence types, and mandatory days. From here you create a request on behalf of an employee, for example Andrea Neri's annual leave. You can also allocate the year's holiday days and define who must approve each absence type.
The Leave Management page
- Open Employees › Leaves.
- At the top you will find four summary tiles: Pending Requests, On Leave Today, Approved Today and Upcoming Holidays. In the example On Leave Today shows 1.
- Below the tiles are the Leave Requests, Allocations, Leave Types and Mandatory Days tabs.
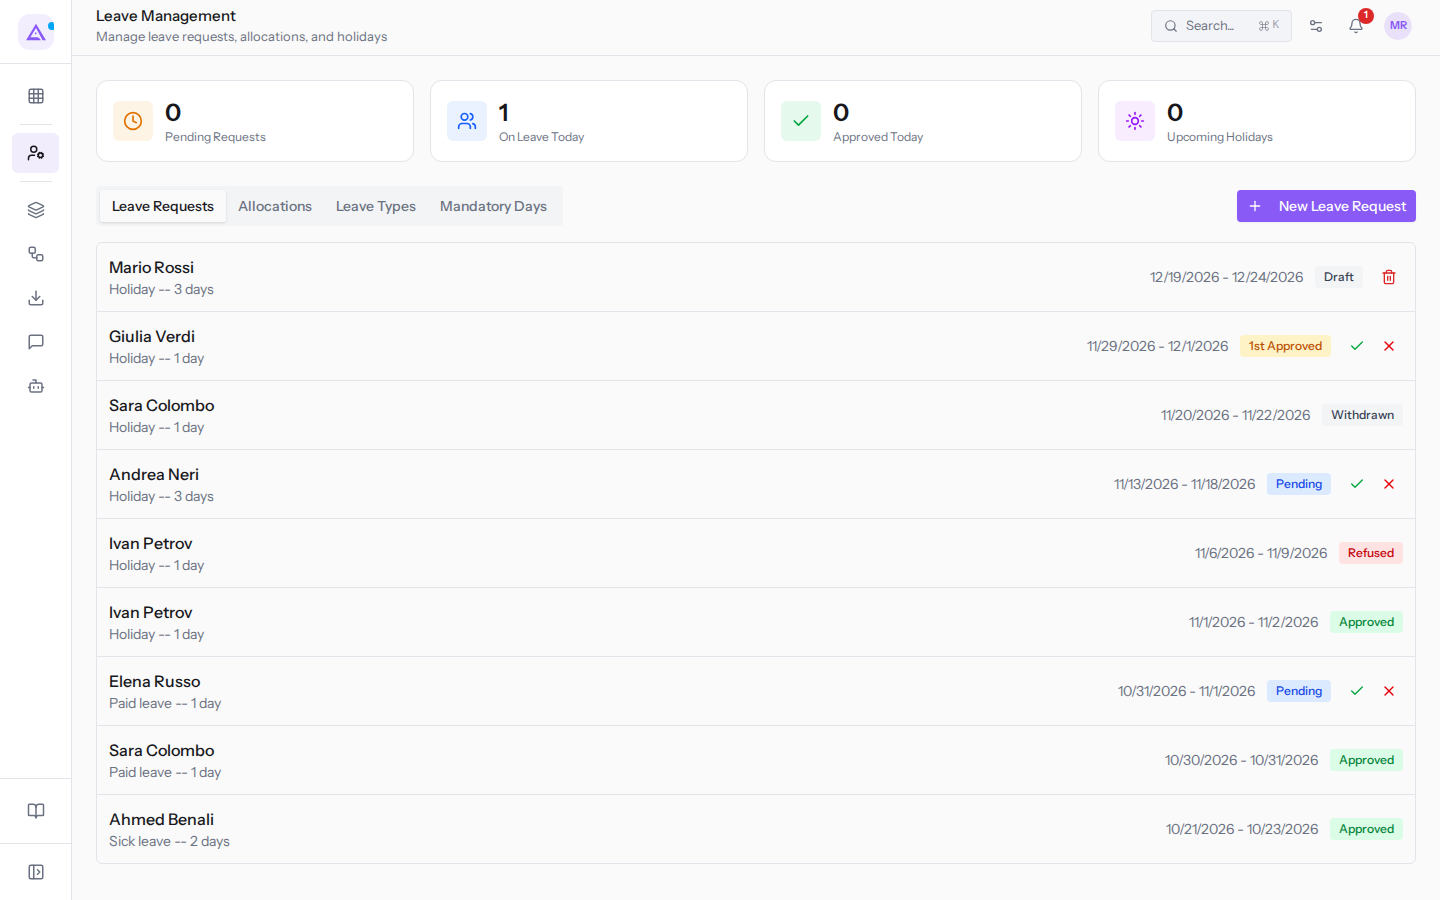
The New Leave Request button is always visible. In the other tabs, the button that creates an item for that tab also appears.
Who approves a request
Each absence type indicates in the Validation field who must approve requests of that type. Choose the option based on the check you need:
- If the absence requires no review, choose No Validation. The request is granted as soon as it is submitted.
- If only the HR department should decide, choose HR.
- If only the employee's direct manager should decide, choose Manager.
- If two signatures are needed, choose Both. The manager approves first, then HR. After the first signature the request is in 1st Approved and awaits HR.
How approval works:
- The manager sees requests from people who report to them according to the org chart and approves them from the My team area. Anyone higher up in the same line, for example the manager's manager, can also act.
- HR cannot approve before the manager when the type requires the manager's signature.
- With Both, the two signatures must come from two different people. Whoever has already signed the first approval cannot sign the second, even if they are part of HR.
- If the employee has no active manager, the request passes to HR. With Both, two different HR staff members are still required.
Important: if a single person manages HR in the organisation, a Both request for an employee without a manager will remain in 1st Approved.
In the Leave Requests tab you approve or refuse a Pending or 1st Approved request using the tick icon or the X on its row. The message Leave approved or Leave refused appears. From the My team area the manager instead sees Request approved. or Request refused. A refused request shows as Refused. A request that the employee withdraws shows as Withdrawn.
Creating a leave or time-off request
Create a request on behalf of an employee, for example Andrea Neri's annual leave. The employee can submit the same request from their own personal area.
- Click New Leave Request.
- In the Employee field choose the person, for example
Andrea Neri. - In Leaves choose the type, for example Holiday.
- Enter the period in From and To. For a half day, enable Half day and use the same date in From and To.
- Click Create. The message Leave request created appears.
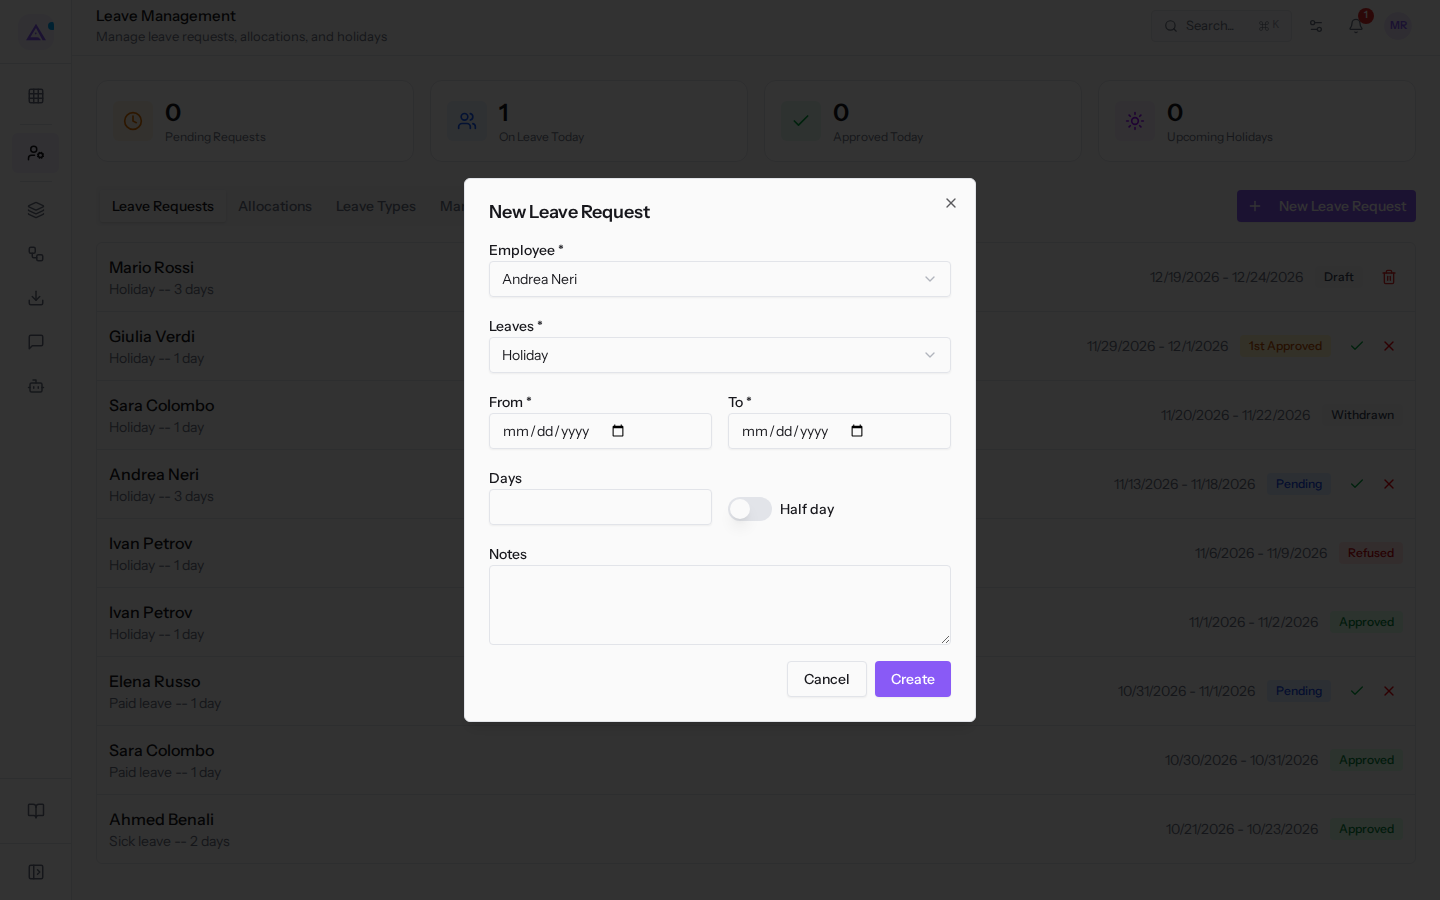
Dialog fields:
- Employee: the person who will be absent. This field is required. The list shows active employees.
- Leaves: the absence type. This field is required. In the example the options are:
- Holiday
- Paid leave
- Sick leave
- Smart working
- From and To: the first and last day of the absence. These fields are required.
- Days, Half day, Notes: optional.
The request follows the approval rule of the chosen type. With a No Validation type it is granted immediately. With other types it waits for whoever must approve it.
Allocating days to employees
An allocation is the number of days of a given absence type that an employee is entitled to. An example is the year's holiday days.
- Open the Allocations tab.
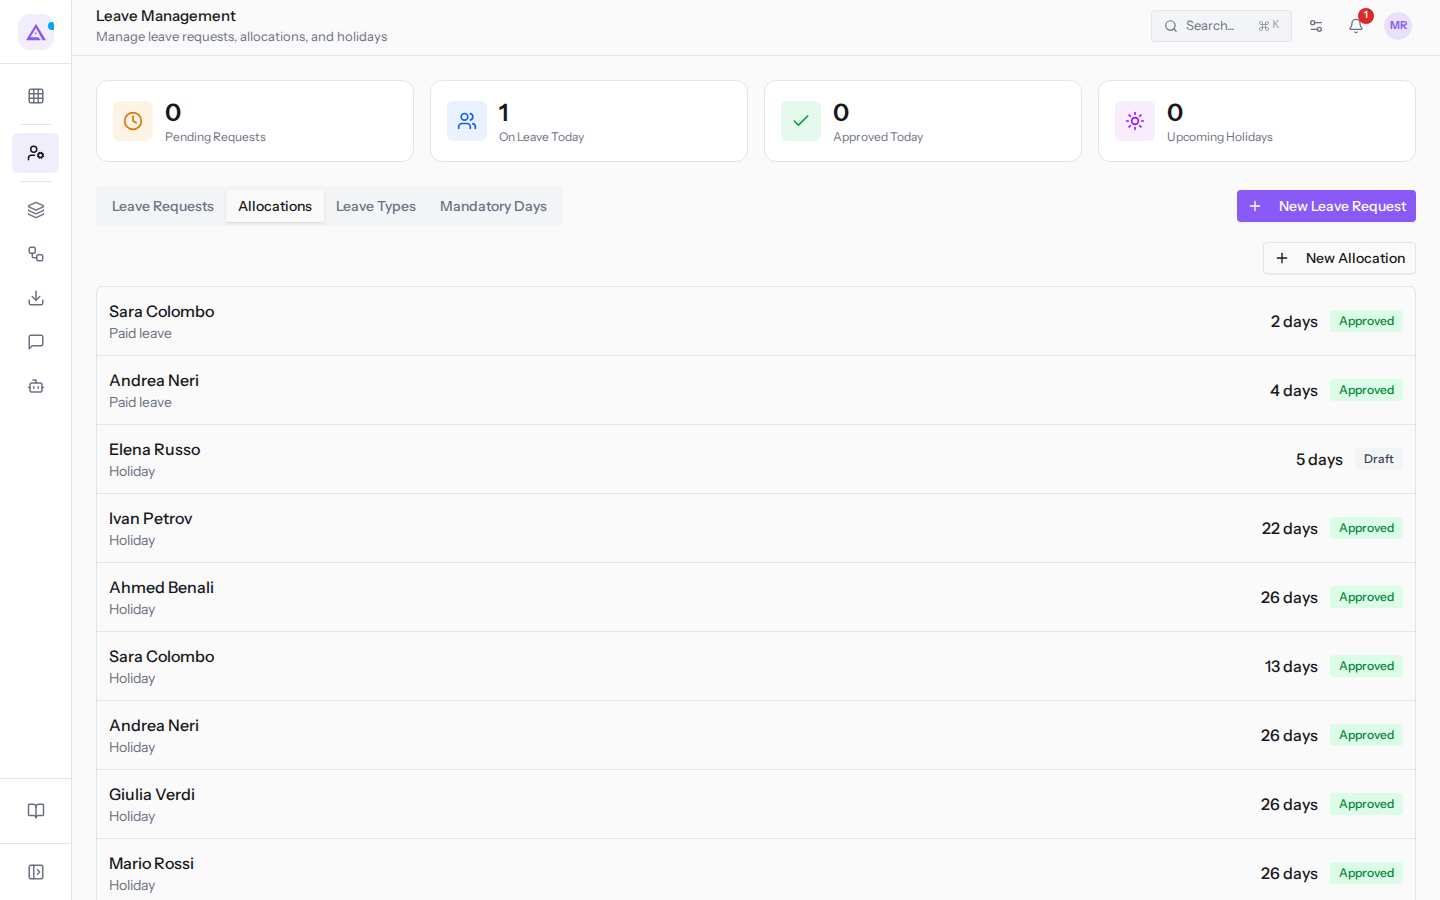
- Click New Allocation.
- In the Employee field choose the person, for example
Sara Colombo. - Choose the absence type, for example Holiday.
- Enter the number of days.
- Click Create. The message Allocation created appears and the allocation shows in the list in Draft status. A Draft allocation does not count in the balance yet: the days become available only once the allocation is approved, and today no screen lets you approve it.
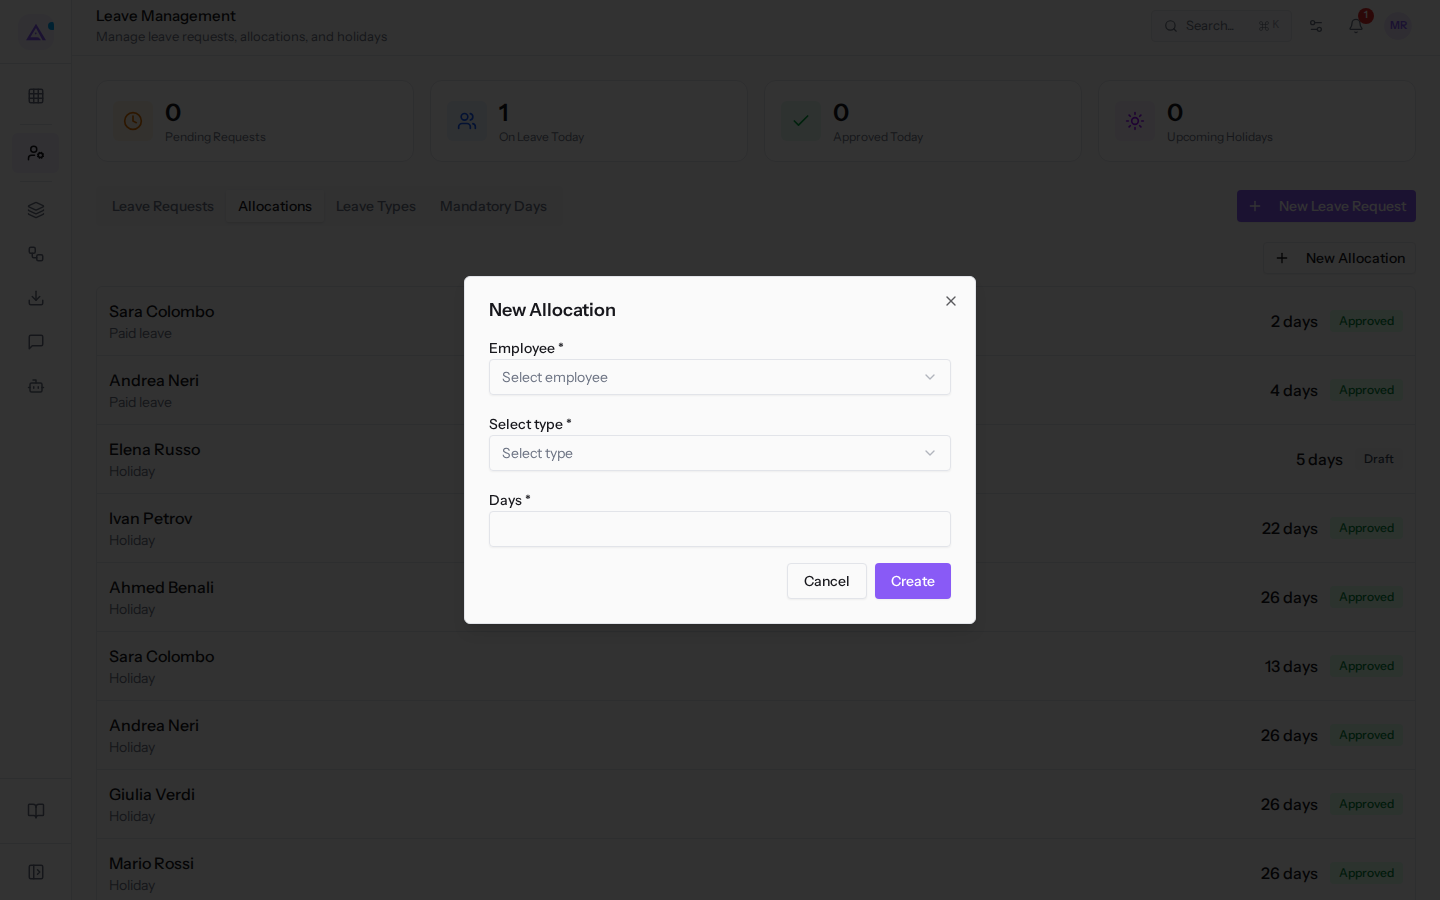
Dialog fields:
- Employee: the person to whom you are allocating days. This field is required.
- Select type: one of the configured types (Holiday, Paid leave, Sick leave, Smart working). This field is required.
- Days: the number of days allocated. This field is required.
A tab with no allocations shows No allocations yet.
Configuring leave types
Leave types are the absence categories that employees can request. For each type you set who approves it, the unit in which it is requested, and whether allocated days are required.
- Open the Leave Types tab.
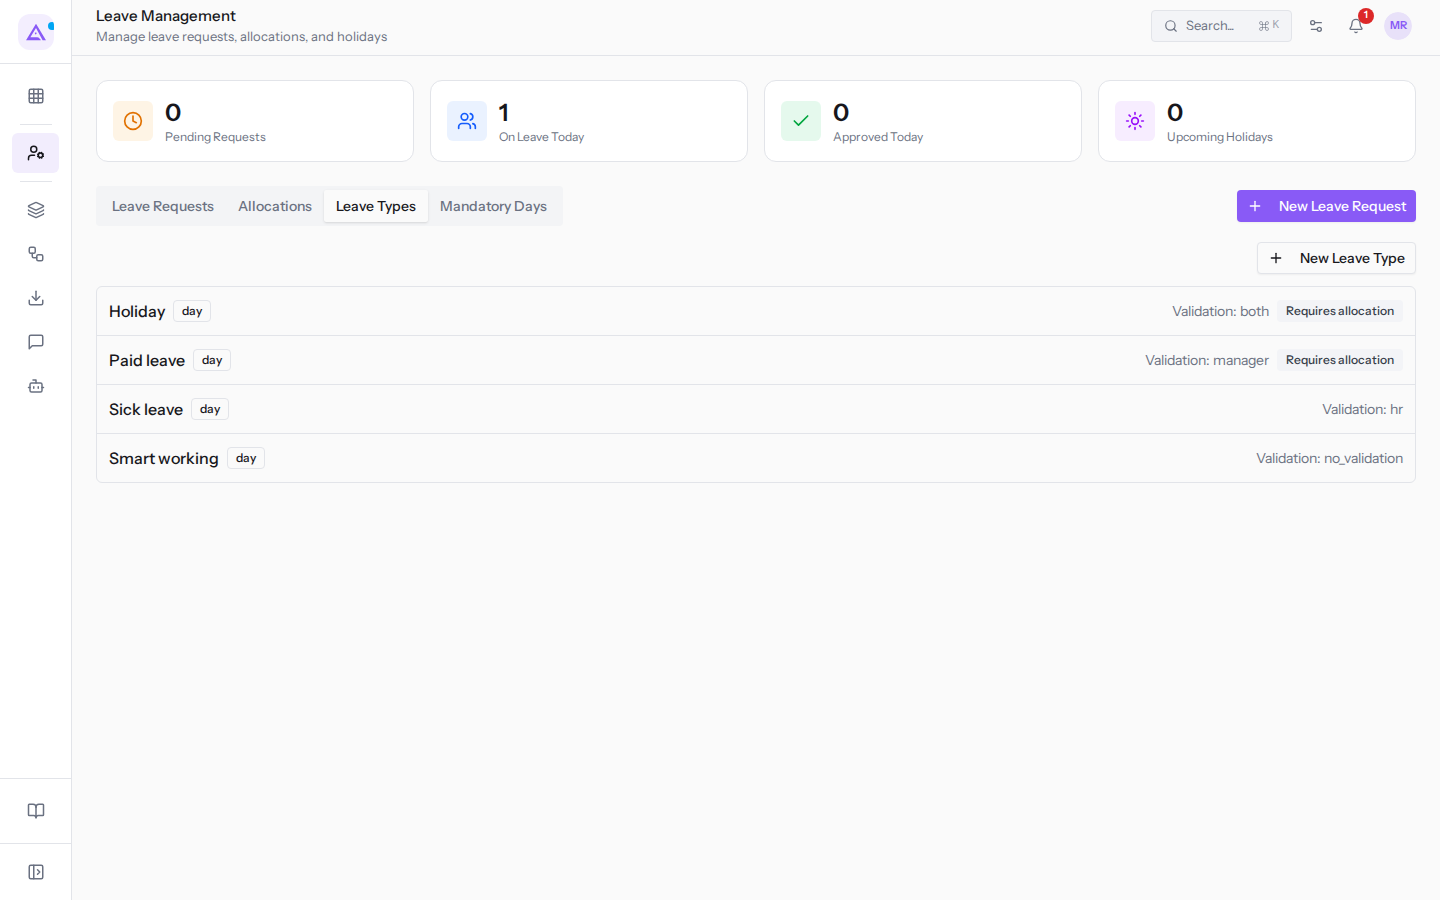
- Click New Leave Type.
- Fill in the fields and click Create. The message Leave type created appears.
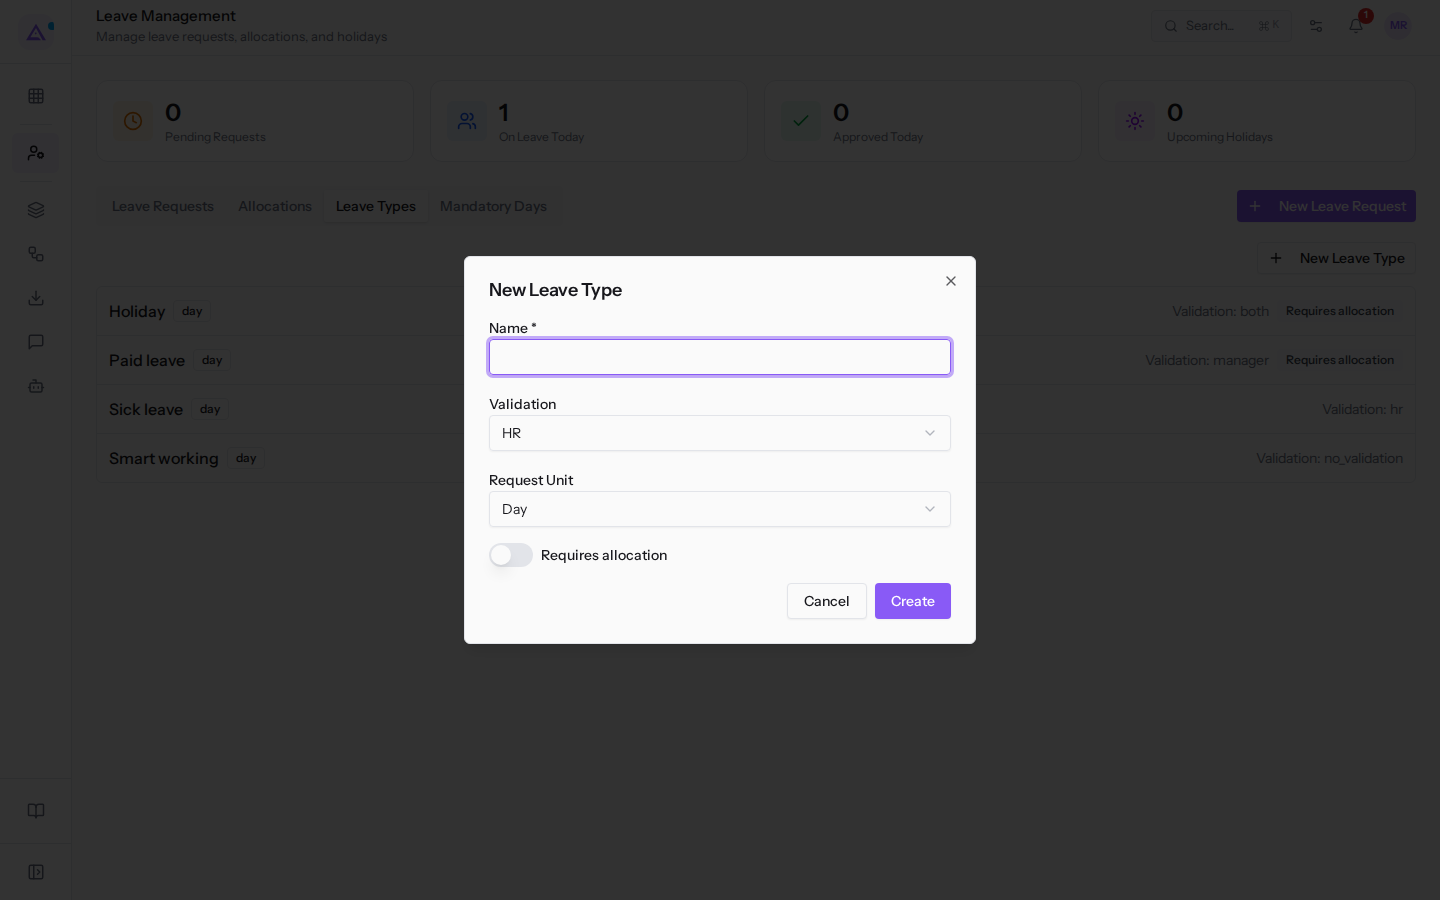
Dialog fields:
- Name: the name of the type, for example
Smart working. This field is required. - Validation: who approves requests of this type. The default value is HR. The options are:
- No Validation: the request is granted as soon as it is submitted.
- HR: HR approves.
- Manager: the direct manager approves.
- Both: the manager approves first, then HR, with two different people.
- Request Unit: the unit in which the absence is requested. The default value is Day. The options are Day, Half Day and Hour.
- Requires allocation: the type is used with days allocated to the employee in the Allocations tab. Only approved allocations count: a request that exceeds the available days will not be accepted, and with an allocation still in Draft the available days are zero.
When no type is configured, the tab shows No leave types configured.
Adding a mandatory day
A mandatory day is a period that applies to the entire organisation, for example Year-end stock count.
- Open the Mandatory Days tab.
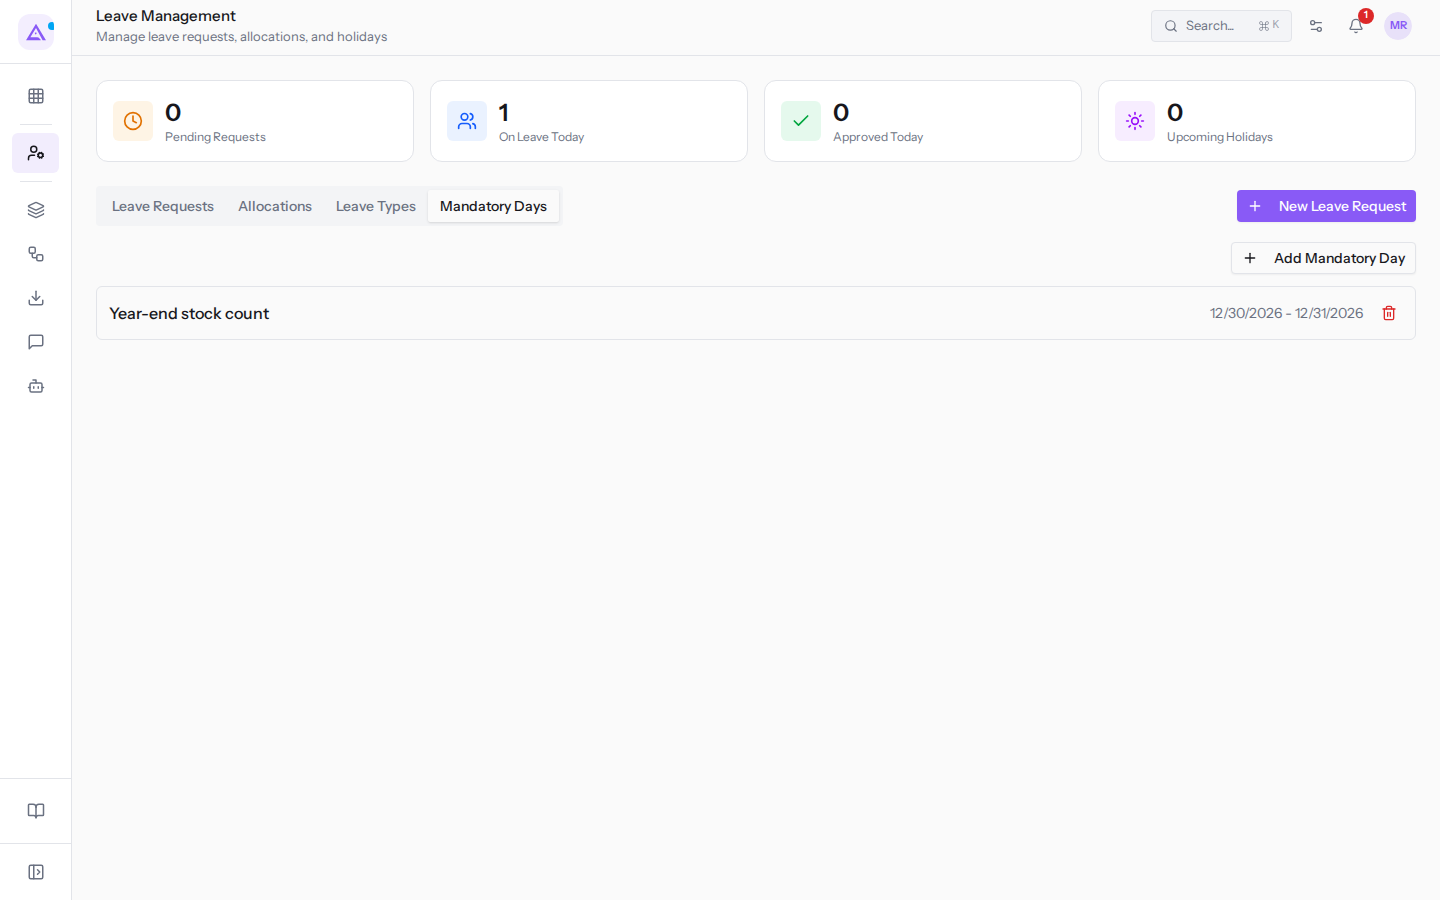
- Click Add Mandatory Day.
- Fill in the fields and click Create. The message Mandatory day created appears.
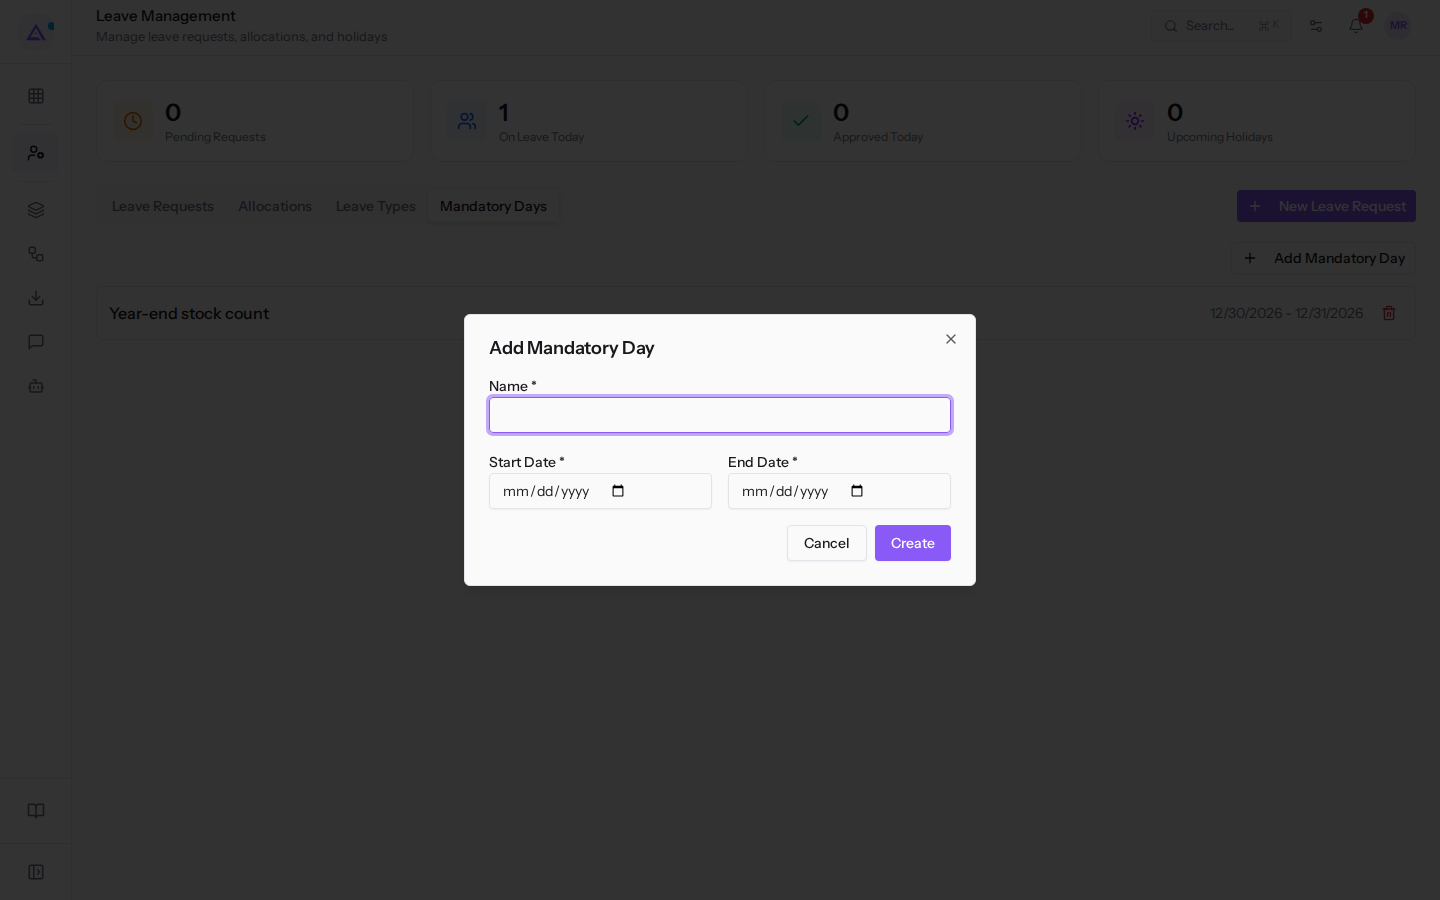
Dialog fields:
- Name: the name of the mandatory day, for example
Year-end stock count. This field is required. - Start Date: the first day of the period. This field is required.
- End Date: the last day of the period. This field is required. For a single day, enter the same date as Start Date.
When no day is configured, the tab shows No mandatory days configured.
See it on your company, not on a slide deck.
In 30 minutes we map the software you use today.We show you how much work and how much margin Archimedes gives back.
Show me on my business →What industry are you in?
One tap — it lets us prepare the demo around your world.
What tools do you use today?
Pick the ones you recognise — or just type them. It helps us show you how they migrate.
Last step: your details.
We reply within one working day — and right after, if you like, you pick the demo slot yourself.
We couldn't send your request. Try again, or write to us at [email protected].
By sending, you agree to your data being processed so we can get back to you about the demo. Privacy notice.
Preview form — nothing is sent from this page.
Want to schedule the demo now?
Your call: book the slot you prefer yourself, or we'll call you to arrange it.
Live availability, 30 minutes, instant confirmation. The calendar opens in a new tab.
Lock in your slot ↗We'll get back to you within one working day — and we'll join the call already knowing your world.
The calendar is open in another tab: pick a slot and the demo is booked. Can't see it? Reopen it ↗
Preview page: nothing was sent.
Our calendar is live: take the slot that suits you and the demo is booked. 30 minutes, instant confirmation, no waiting.
Lock in your slot ↗